The Complete Cabinet Painting Kit
Eleven cabinet painting supplies tested on two real kitchens and a rack of test doors. Top pick: INSL-X Cabinet Coat, plus the prep, primer, and applicators that make it hold.

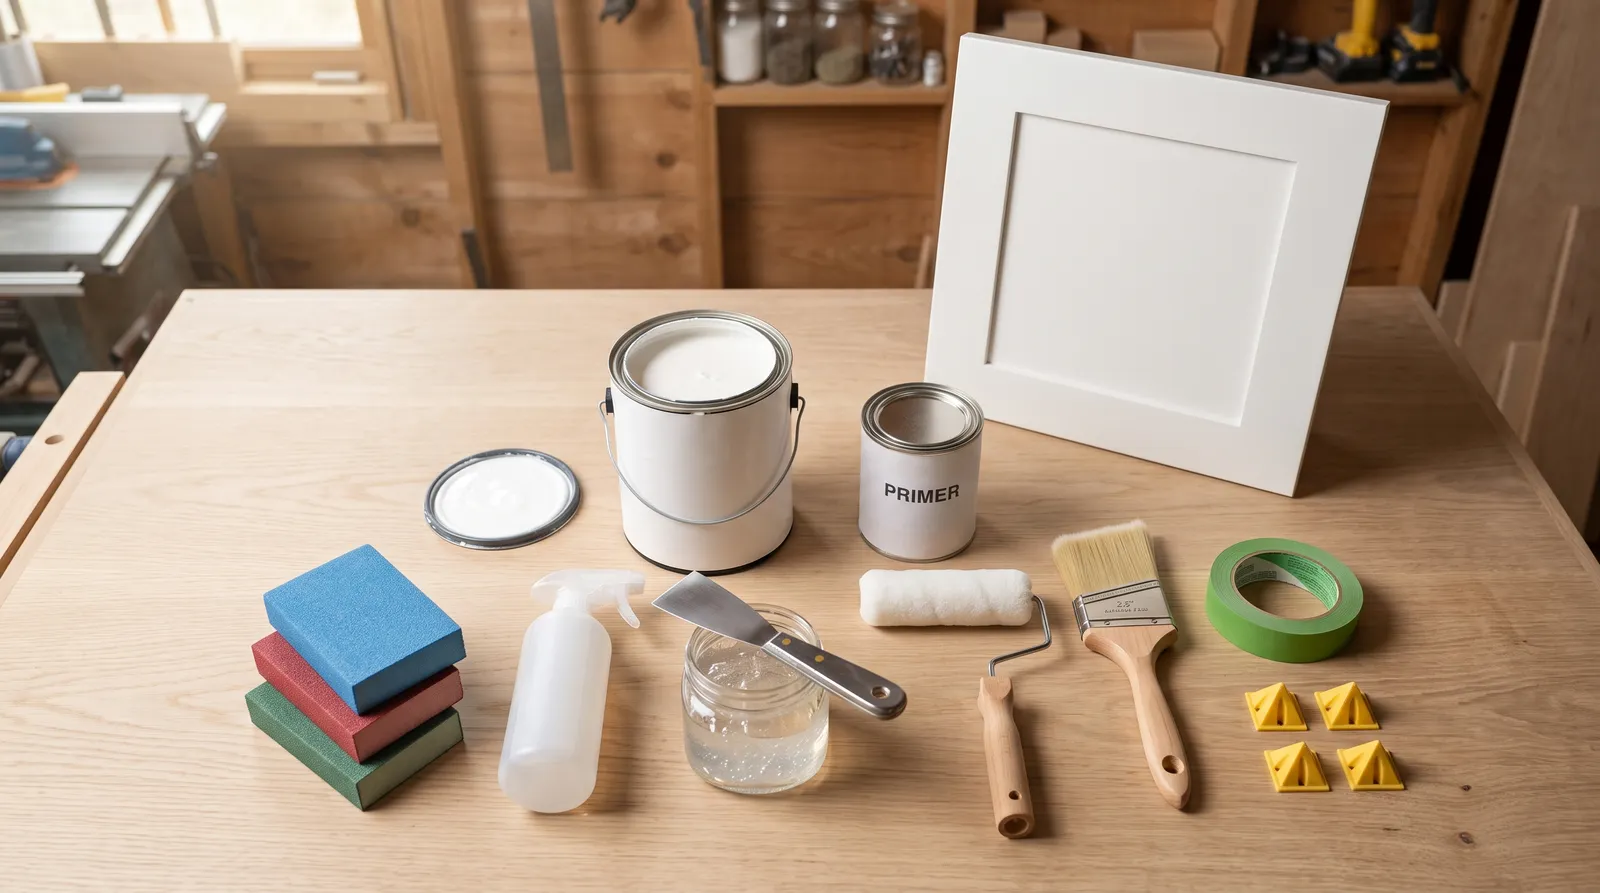
Disclosure: Some links below are affiliate links. We earn a commission if you buy through them, at no extra cost to you.
Top pick: INSL-X Cabinet Coat. It’s a waterborne acrylic-urethane in satin or semi-gloss, it levels its own roller texture, and it dries hard enough that a stack of doors came apart clean at 48 hours in my block test. Everything else on this list exists to give Cabinet Coat something to hold onto. Krud Kutter Pre-Paint Cleaner for the grease, Gloss-Off for the sheen, INSL-X Stix where the old finish is slick, Zinsser B-I-N where oak tannin is going to bleed pink through your white. Eleven items, about $210 for the full kit, closer to $120 if your cabinets are already painted and in decent shape.
The paint is the cheap part of a cabinet job.
I ran this list across two kitchens and a bench rack of twelve sample doors over nine weeks: a 1994 red oak set with 34 raised-panel doors and a grease problem, and a 2006 maple slab set wearing factory conversion varnish, which is the finish that defeats most water-based primers. Every failure I found came from prep, not from paint.
The Shopping List, Priced
| Item | What it does | Price tier |
|---|---|---|
| INSL-X Cabinet Coat | The enamel. Two coats, satin or semi-gloss | $$$ |
| INSL-X Stix Bonding Primer | Grips laminate, thermofoil, conversion varnish, old oil | $$$ |
| Zinsser B-I-N | Blocks oak tannin, knots, smoke, grease ghosting | $$ |
| Krud Kutter Pre-Paint Cleaner | Strips cooking grease before anything else touches the door | $ |
| Krud Kutter Gloss-Off | Chemical degloss, reaches into profile corners | $ |
| 3M Pro Grade Precision sponges | 220 grit before primer, 320 between coats | $ |
| Aqua Coat Clear Grain Filler | Levels open oak grain for a slab look | $$ |
| Wooster Jumbo-Koter mini rollers | Lays the flat film on panels and boxes | $ |
| Purdy Nylox Glide 2-1/2 inch | Cuts rails, stiles, and panel corners | $$ |
| Painter’s Pyramid stands | Both sides of a door in one day | $ |
| FrogTape Multi-Surface | Masks boxes to walls, counters, hinge cups | $ |
Two of these are optional and I’ll say which ones. B-I-N only matters if your cabinets are oak, pine, or have lived above a stove. Aqua Coat only matters if you want oak to stop looking like oak.
How I Tested It
Twelve bench doors, split six ways, so every prep path got a controlled run on the same substrate. Cleaner only. Cleaner plus deglosser. Cleaner plus deglosser plus a scuff sand. Then Stix over each, B-I-N over each, and Cabinet Coat straight onto deglossed varnish with no primer at all.
Same enamel on every door: two coats of Cabinet Coat satin, rolled with a 1/4-inch microfiber mini roller, cut in with the 2-1/2 inch Nylox Glide. Same room, 68 to 74°F, July, indoors.
Three things got scored. Adhesion, by scoring a crosshatch at seven days and pulling tape across it, counting squares that released. Block resistance, by stacking painted doors face to face under a 10-pound weight at 24, 48, and 72 hours and looking for transfer. Finish quality, under a raking LED work light held at eye level, the light that finds every roller mark you told yourself wasn’t there.
The unprimed doors over conversion varnish released paint on the tape pull. The same doors with Stix under them released nothing. That is the entire argument for buying a bonding primer, and it took seven days and a roll of tape to settle.
Buy It in the Order You’ll Use It
The sequence is what makes this a kit instead of a pile.
Degrease first. Nothing bonds through cooking grease. Not deglosser, not primer, not a self-priming enamel with a good reputation. Krud Kutter Pre-Paint Cleaner, both sides, then a clean-water wipe.
Degloss second. Gloss-Off on the whole door, including the coves and inside corners a sponge will never reach.
Fill and sand third. Grain filler on oak if you’re going for slab-smooth. Then 220 on the flat faces to knock down nibs and give the primer tooth.
Prime fourth, and pick the right one. Stix for adhesion on slick finishes. B-I-N for bleed on oak, pine, and smoke damage. On a raw-wood red oak door with a slick old varnish, you need both: B-I-N for the tannin, Stix over it for the grip.
Enamel last. Two coats of Cabinet Coat, six hours apart, 320-grit sponge between them.
Skip a step and the kit stops working. Every one of my failed test doors failed at a step someone would have called optional.
1. INSL-X Cabinet Coat, the Enamel Everything Else Serves
Cabinet Coat is the reason this kit is built the way it is. Waterborne acrylic-urethane, satin or semi-gloss out of the same tint base, and it flows out flat after a mini roller instead of holding stipple the way a wall-grade semi-gloss does. On my panels the roller texture closed inside a minute and read smooth under raking light at eye level.
The hardness is what separates it from a good trim paint. Stacked face to face under weight, my Cabinet Coat doors transferred at 24 hours and came apart clean at 48. A standard interior semi-gloss on the same rack was still tacky enough at 48 hours to pull paper-thin flakes off the mating face. Cabinets get shut, bumped, and leaned on all day. Block resistance is the spec that decides whether your kitchen still looks good in March.
It wins on levelling and cure hardness. It falls short on color depth. Deep navy and true black take three coats and still telegraph what’s underneath, and at that point a sprayed lacquer from a cabinet shop starts making financial sense.
| Spec | Value |
|---|---|
| Type | Waterborne acrylic-urethane enamel |
| Sheens | Satin, semi-gloss |
| Dry / recoat | Touch 1 hour, recoat 6 hours |
| Coverage | About 400 sq ft per gallon on sealed cabinetry |
| Price | Roughly $50 per gallon |
Buy it if: you want a hard, self-levelling white or light-color finish you can apply with a roller and a brush. Skip it if: you’re going near-black or navy, or you’re renting a sprayer anyway. See the best kitchen cabinet paint round-up for the sprayed alternatives.
2. INSL-X Stix, the Primer That Makes Slick Finishes Paintable
Stix is the answer to “my cabinets are that shiny factory stuff.” Acrylic urethane, water cleanup, and it grips conversion varnish, thermofoil, laminate, melamine, and old oil enamel. That list covers nearly every kitchen built after 1990.
It sands at 320 to a chalky, tooth-y surface that Cabinet Coat sits on beautifully. Recoat is 3 to 4 hours and full hardness takes 3 to 4 days, and the second number is the one people ignore right before they hang doors and dent them with a thumbnail.
Its weakness is stain blocking, which is genuinely mediocre. Red oak tannin walked straight through it on my test doors and turned a white finish faintly pink at the grain lines. Stix is a grip primer. It is not a stain primer, and the label doesn’t pretend otherwise.
Buy it if: you can’t identify the old finish, or you can and it’s slick.
3. Zinsser B-I-N, for Oak, Knots, and Grease Ghosts
Shellac-base, and nothing in the consumer aisle blocks bleed as completely. One coat stopped tannin on every oak test door where the water-based primers let pink through at the grain. It also seals nicotine, water rings, and the greasy ghosting that shows up on the doors flanking a range even after you’ve cleaned them.
It dries to sand in about 45 minutes, so a full set of doors gets primed and scuffed in a morning.
The fumes are punishing. You want a respirator, open windows, and nobody else in the house for a couple of hours. See our respirator round-up if you don’t own one, because a dust mask does nothing against shellac solvent. Cleanup is denatured alcohol only, and a brush parked in it for ten minutes is a dead brush, so use a cheap chip brush and throw it away.
Skip this if: your cabinets are already painted, not oak, and not near a stove. You won’t need it.
4. Krud Kutter Pre-Paint Cleaner, the Step Everyone Skips
This is the first thing you use and the one people leave out of the cart. Cabinet doors around a range carry a film of aerosolized cooking oil that no primer bonds through. You can’t see it. You can feel it if you drag a knuckle across the door above the stove and compare it to a door across the room.
pH 12 to 13, no phosphates, no mandatory rinse, 0% VOC. One 32-ounce bottle covered both test kitchens with product left over.
It cleans. It doesn’t degloss much, so it doesn’t replace the deglosser. Wipe the last pass with clean water or it leaves a faint film that shows through satin enamel. If you’d rather use real TSP, the trade-off is a mandatory rinse and a lot more caution around finished floors. Our TSP substitute explainer covers that choice.
5. Krud Kutter Gloss-Off, the Deglosser
Two passes with Gloss-Off knocked factory cabinet sheen down to a dull, chalky surface that took primer evenly. Thinner deglossers needed four passes to reach the same place.
The reason it earns a slot instead of just sanding: profile corners. A raised-panel door has coves and inside corners a sanding sponge bridges right over. Those untouched spots are where the finish lifts first. Chemistry reaches them.
The trade-off is that it does nothing about grease and nothing about nibs. Clean first, degloss second, sand the flat faces third. For the longer argument, see deglosser vs sanding and the sand vs deglosser comparison.
6. 3M Pro Grade Precision Sanding Sponges
Two grits do the whole job: 220 before primer, 320 between coats. Buy four sponges of each.
What the ultra-flexible version buys you over a rigid block is the ability to fold into a shaker rail corner and actually touch it. A hard block spans the profile and sands nothing but the high spots. These rinse out and come back for a second and third door set, where a sheet of 220 paper is finished after one door.
They wear rounded at the corners, and once rounded they stop reaching tight inside corners, so retire them to flat-face duty. If the old finish is failing rather than just glossy, a sponge is the wrong tool and you want an orbital sander instead. More options in our sanding sponge round-up.
7. Aqua Coat Clear Grain Filler, Only for Oak
Optional, and expensive per door, and the only way to make 1990s red oak look like a factory slab.
Water-based, goes on clear with a putty knife, sands at 30 to 45 minutes, cleans up under the tap. Because it dries clear, a missed patch is a texture problem instead of a visible color patch under your enamel.
Two coats got my oak test doors to about 80 percent filled. Three coats got them to flat. Each coat needs sanding back, so a 34-door kitchen buys you an extra full day of work. That’s the trade-off, and it’s a real one. Painted oak with the grain left open still looks good. It just looks like painted oak.
Skip this if: you like visible grain, or your cabinets are maple, MDF, or already painted.
8. Wooster Jumbo-Koter Mini Rollers
The 4-1/2 inch microfiber cover in 1/4-inch nap lays the flattest film I’ve gotten from any mini roller on waterborne cabinet enamel. Roll a panel, leave it alone, and the stipple closes on its own inside a minute. Overwork it and you’ll leave the marks you were trying to avoid.
Capacity is small, so you re-dip every 12 to 18 inches. It feels slow for the first hour and then you stop noticing.
Covers cost a few dollars for a two-pack, so use a fresh one per coat. A tired cover sheds fibers into your last coat, which is the failure you notice at eye level a week later. Counterfeits show up on Amazon; check the seller and the printed end cap. The full roller cover round-up covers frames and naps for walls.
9. Purdy Nylox Glide, 2-1/2 Inch
The brush cuts rails, stiles, and panel corners, and everything else gets rolled.
100% nylon filament holds a soft edge in waterborne enamel and releases paint slowly enough that brush marks close instead of setting. 2-1/2 inch is the width that fits a shaker rail without hanging over into the panel. Wider is faster on boxes; narrower fights you on stiles.
The filament goes limp in a warm room with a thick enamel, so keep it off a sunny bench. It costs three to four times a store-brand angled sash brush, and the difference only shows above satin sheen. Mine is on its fourth kitchen. See the brush round-up for wall and trim alternatives.
10. Painter’s Pyramid Stands, 10-Pack
Ten small plastic tripods. They turn a two-week kitchen into a five-day kitchen, and they cost less than a quart of primer.
Paint the back of a door, wait for it to set, flip it onto the pyramids, and paint the show face the same day. The tips leave a pinpoint witness mark, which is why the pyramids always go under the back face, never the face people see.
They slide on a smooth bench under a heavy door. Put them on cardboard or a canvas drop cloth. If you’re doing more than 20 doors, a proper rack is the better buy, and our cabinet door drying rack round-up has the telescoping options.
11. FrogTape Multi-Surface
Cabinet boxes meet walls, counters, and backsplashes, and enamel creeps under a cheap tape line at every one of those junctions. The gel edge stops the creep.
1.41-inch is the width that masks a hinge cup or a drawer slide in one strip. Pull it within 24 hours of your last coat. Left on a sun-warmed door for a week, it leaves adhesive behind. If the adjacent wall is freshly painted, use a delicate-surface tape there instead. Head-to-head details are in FrogTape vs ScotchBlue.
What I Left Out of the Kit
A sprayer. An HVLP gives a better finish than any roller, and I’d still tell most people to skip it for one kitchen. Masking a live kitchen for overspray takes longer than rolling the doors, and a first-timer’s spray finish is worse than a careful roller finish. If you’re doing this twice or you already own one, our HVLP sprayer guide is the place to start.
Tack cloths. A microfiber rag lightly dampened with water picks up sanding dust just as well and doesn’t leave wax residue under a waterborne enamel.
Liquid sander instead of Gloss-Off. Klean-Strip Liquid Sandpaper is a fine product and my results were similar. Gloss-Off worked in fewer passes on factory cabinet enamel, which is why it’s the pick.
Wood filler for grain. Standard wood filler shrinks back in open oak grain and shows up as a dotted line months later. That’s what grain filler exists for. Use wood filler for gouges and old hinge holes, not for grain.
TSP. It works. It also requires a rinse and takes finished floors seriously. The substitute is the easier buy for a kitchen people are living in.
Three Kits, Three Budgets
The already-painted kitchen, about $120. Pre-Paint Cleaner, Gloss-Off, sponges, two gallons of Cabinet Coat, mini rollers, brush, pyramids, tape. No primer needed if the existing paint is sound and you’ve cleaned it.
The slick-finish kitchen, about $175. Add a gallon of Stix. This is the 2006-maple-with-conversion-varnish case, and the primer is not optional.
The oak kitchen, about $260. Add B-I-N for the tannin and a quart of Aqua Coat per ten doors if you want the grain gone. This is the most work and the biggest visual payoff of the three.
Against $4,000 to $9,000 for professional cabinet refinishing, all three are cheap. Against a $300 cabinet refinishing kit in a box, this list costs a little less and finishes considerably harder.
What Survives to the Next Job
The Nylox Glide, the pyramids, and the roller frame are permanent. Clean the brush with warm water and a brush comb, work the paint out of the heel where it hides, and hang it to dry by the handle. A cabinet enamel left to dry in the heel stiffens the brush and it never cuts a clean line again.
Mini roller covers are consumables. One per coat, then bin them.
Sponges rinse and go back in the drawer until the corners round off. Leftover Cabinet Coat keeps about two years in a sealed can stored above freezing, and you want that can for touch-ups, so write the room and the color on the lid with a marker.
B-I-N is the one to buy in the smallest size you need. Shellac in a partly-used can thickens on the shelf and the second half of a gallon is usually wasted.
Mistakes That Cost Me Doors
- Painting over grease. The doors flanking a range have an invisible oil film. They’re the first ones to peel. Degrease every door, not just the ones that look dirty.
- Trusting “no sanding required.” Deglosser reaches the profiles, sandpaper gives tooth on the faces. Doing one and calling it prep is how a kitchen fails at the drawer pulls in eighteen months.
- Recoating at four hours. Cabinet Coat says six. In a humid kitchen it means six. An early second coat drags the first and you’ll see the streaks forever.
- Painting doors on the hinges. Runs on the bottom rail, paint in the hinge cups, brush marks where you fought the swing. Take them down and number the backs with tape.
- Hanging doors on day two. Dry is not cured. Give it a week and leave the doors slightly ajar for the first few days so two painted faces aren’t pressed together.
- Buying exactly enough paint. Buy one extra quart. Touch-ups in two years need the same can; a re-tint never quite matches.
If your cabinets are already painted and sound, buy five things: the Pre-Paint Cleaner, Gloss-Off, a pack of 220 and 320 sponges, two gallons of Cabinet Coat, and the mini rollers. Add the Stix only when you can’t identify what’s under there, and add the B-I-N only when the wood is oak, pine, or has been breathing bacon smoke for a decade. Then take the doors off, and work the step-by-step cabinet project guide from there.
Ask a Question