Best Sanding Sponges
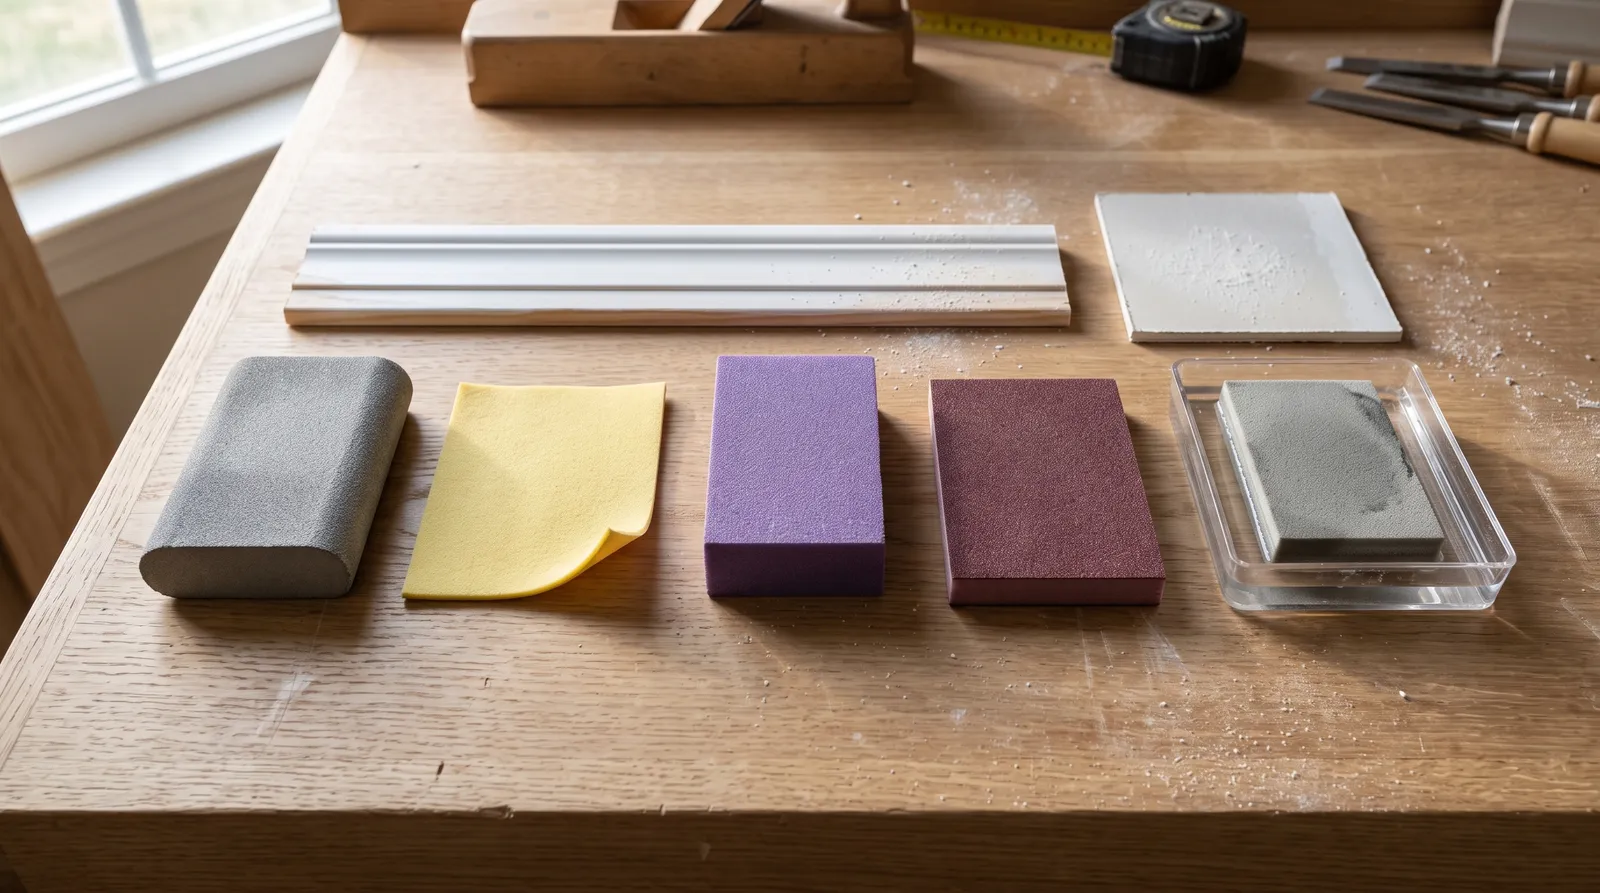
Five sanding sponges tested on trim, cabinet doors, drywall patches, and a between-coats wet sand. Top pick: 3M Pro Grade Precision Ultra Flexible, plus where each one falls short.

Disclosure: Some links below are affiliate links. We earn a commission if you buy through them, at no extra cost to you.
Top pick: the 3M Pro Grade Precision Ultra Flexible Sanding Sponge. About three to four dollars a block, and the only sponge in this test that bent into a cove profile and still had a square corner left for the flat surface next to it. It wins on shape versatility and on rinse recovery. It falls short on price per piece and on grit selection, since home centers stock one grit per package and a full prep-to-finish range means three purchases. If you are prepping trim profiles or curved molding, the Dura-Gold Very Fine Cut softback pads bend further for a fraction of the money. For flat cabinet doors, the four-sided Dura-Gold brick keeps the panel flat where a floppy pad would dish it. For drywall patches and bulk prep, the 180 grit double-sided box is thirteen dollars for ten pads and you use them like paper towels. For a wet sand between enamel coats, the microfine 1200 to 1500 box is the one.
Buy two grits, not five.
Most homeowners need a medium block for prep and a fine softback pad for scuffing, and everything else on this page is a specialty.
Why a Sponge Beats a Folded Sheet
A folded sheet of sandpaper has one problem: your fingers. Three fingertips on the back of a sheet put three narrow bands of pressure on the surface, and on a curved molding those bands cut three flat spots into what should be a smooth arc. You do not see it while sanding. You see it after the enamel dries and the light rakes across the trim at four in the afternoon.
Foam solves that by spreading pressure. Squeeze a sponge against a bead of colonial casing and it wraps the bead, cutting the whole profile at the same rate instead of scalloping it. That is the entire reason this category exists.
The trade-off is flatness. Foam follows whatever is underneath it, so a sponge on a dished cabinet panel sands the dish deeper rather than cutting the high edges down. That is what the rigid-backed sponges in this test are for, and it is the single spec most buyers get wrong.
There is also the dust question. A sponge holds a surprising amount of it inside the foam, which is why they load and glaze on fresh joint compound while paper on a pole sander keeps cutting. On drywall, the sponge is a patching tool. On trim, it is the tool.
What We Bought and How We Scored It
Five sponges, bought at retail, run through five weeks of prep across four jobs.
Sixty-two linear feet of painted colonial trim and baseboard in a 1954 ranch, scuff-sanded before two coats of Benjamin Moore Advance in semi-gloss. Six shaker cabinet doors taken to primer and prepped through 320 grit before waterborne enamel. Eleven drywall patches, from nail pops to a 6-inch plug, feathered out to paint-ready. And a between-coats wet sand on two interior doors after the first enamel coat had cured 48 hours.
Five scoring axes, weighted in this order: cut rate on a cured enamel test panel, profile conformance on colonial trim, loading resistance on fresh joint compound, rinse recovery after a tap wash and a full dry, and edge durability after two hours of work.
The scratch check is the part most round-ups skip. After each panel, we wiped it with mineral spirits and looked at it under a raking work light before recoating. A wet wipe under raking light shows you exactly what a grit left behind, and it is the difference between a sponge that says 220 on the wrapper and a sponge that actually cuts like 220.
One honest note about the field. Softback sanding sponges come out of a small number of plants, and a lot of what you see on shelves under different names is the same foam with a different wrapper. We bought across brands anyway, and the differences that mattered came down to backing stiffness, abrasive retention after a rinse, and whether the grit on the package matched the scratch on the panel. Two of the five did not.
Grit, Backing, and the Two Words That Actually Matter
Backing stiffness decides where a sponge belongs. A rigid block (one inch of dense foam or a plastic core) cuts high spots flat. A softback pad, which is a thin abrasive sheet on a few millimeters of foam, follows every contour. Block for panels and doors. Softback for molding, spindles, and anything with a radius. Buy one of each and you have covered ninety percent of interior prep.
Grit is the other one, and the numbers on sponge packaging run coarser in feel than the same number on paper because the foam presses more of the abrasive into the surface. Practical ranges:
| Job | Grit | Format |
|---|---|---|
| Stripped exterior wood, paint runs | 60-80 | Rigid block |
| Bare interior wood, first pass | 100-120 | Rigid block |
| Feathering joint compound and spackle | 150-180 | Double-sided flat pad |
| Scuffing cured paint or primer before recoat | 220 | Block or softback |
| Cabinet prep under enamel, between-coat scuff | 320-400 | Softback |
| Wet sanding dust nibs out of a finish coat | 800-1500 | Softback, wet |
The word to ignore is “flexible.” Every sponge on the shelf says it. What varies is how far, and the only way to know is to bend one in the aisle before it goes in the cart.
Grit range also tells you what a package is for. A box sold in a single grit is a production tool for someone sanding the same thing all day. A variety pack is for a homeowner with one project. Neither is wrong; buying the production box for a single bathroom is.
Side by Side
| Brand / Model | Grit | Backing | Best for | Reusable | Price tier |
|---|---|---|---|---|---|
| 3M Pro Grade Precision Ultra Flexible | 60-220 (single grit per pack) | Rigid foam block, rounded edges | Trim, doors, general prep | Yes, rinses well | $$ |
| Dura-Gold Very Fine Cut Softback | 320-400 | Thin softback pad | Molding profiles, curves, scuffing | Yes, until it tears | $$ |
| Dura-Gold 4-Sided Block | 320 | 1-inch four-faced brick | Flat cabinet doors and panels | Yes, rotate faces | $ |
| Dura-Gold Double-Sided Flat Pad | 180 (60-2500 available) | 0.5-inch flat pad | Drywall patches, bulk prep | Somewhat; loads fast | $ |
| Dura-Gold Microfine Softback | 1200-1500 | Thin softback pad | Wet sanding between finish coats | Yes | $$ |
1. 3M Pro Grade Precision Ultra Flexible Sanding Sponge, Top Pick
The Pro Grade Precision block is the one that stayed on the bench for all five weeks. Roughly 4.5 by 2.5 by 1 inch, abrasive on all four long faces, with edges that are rounded just enough to run a corner without gouging.
What separates it is the combination nothing else pulled off. On the colonial casing it bent far enough to wrap the bead and the cove, then squared up on the flat face of the same piece of trim without leaving a transition line. Every other block in the test did one or the other. The softback pads bent further, but they could not hold an edge crisp on the flat.
Rinse recovery is the second reason it wins. We loaded a 220 block on cured semi-gloss, rinsed it under a tap while squeezing, dried it 24 hours, and it came back close enough to new cut that we finished the trim run on the same sponge. Nothing shed onto the primer across six cabinet doors, either, which matters because loose grit under a roller is a defect you can see from the doorway.
It is expensive per piece. Three to four dollars for one sponge, when a box of ten softback pads runs eighteen. Home centers stock one grit per package, so covering 120 through 220 through 320 means three separate buys and three partly used sponges in a drawer. And the one-inch block is too fat to reach the back of a tight mullion or a narrow cabinet reveal; you will still want a thin pad for that.
| Spec | Value |
|---|---|
| Size | About 4.5 by 2.5 by 1 inch block |
| Grits | 60 coarse through 220 fine, single grit per pack |
| Backing | Rigid foam, four abrasive faces, rounded edges |
| Wet or dry | Both |
| Approx. price | $3-$4 per sponge |
Buy it if: you are prepping painted trim, doors, or furniture and you want one sponge that handles the profile and the flat. Skip it if: you are sanding eleven drywall patches, where a thirteen-dollar box of ten is the smarter money.
2. Dura-Gold Very Fine Cut Softback Pads, Best for Profiles and Curves
Different tool, different job. Where the 3M block bends, these fold.
The very fine cut pads are 5.5 by 4.5 inches of 320 to 400 grit abrasive on a thin foam backing, and they will wrap a molding bead completely. On the 1954 ranch trim there is a run of quarter-round with a tight radius that the block could reach but not follow. Fold one of these in half, run it along the radius, and the whole profile scuffs at one rate. The larger sheet size also covers more surface per stroke than a block, which shows up as real time saved over 62 feet.
At about eighteen dollars for a box of ten, that is under two dollars a pad for a genuinely fine cut. The scratch check under mineral spirits came back clean and uniform, which is more than we can say for a couple of no-name pads we tried and cut.
No rigid core is the cost. On a flat cabinet panel these follow the dip instead of removing it, and you end up polishing a defect rather than fixing it. They also tear at the fold line after a couple of hours of hard use, which is the trade-off for being thin enough to fold. And 320 to 400 is a finishing grit. It will not touch a raised grain nib, a paint run, or anything you actually need to remove.
Buy it if: your job is molding, spindles, carved doors, or a between-coats scuff. About $18 for ten.
3. Dura-Gold 4-Sided Block Sponges, Best for Cabinet Doors
Cabinet doors are the job that punishes soft backing. A shaker panel needs an even scuff across a flat field, and a flexible pad dishes the middle because your hand pressure lands in the center.
This is a one-inch four-faced brick, 3.9 by 2.75 inches, sold in 320 grit at about twelve dollars for six. On the six-door test set it held the panel flat, gave an even dull sheen across the whole field, and the four faces meant we rotated to a fresh face instead of stopping to rinse. One brick got through three doors before it loaded enough to bother us.
The square profile is wrong for the inside corner where a shaker rail meets the panel. You need a folded softback pad for that, so this is not a solo purchase. It also comes one grit per box, so a job that starts at 180 and finishes at 320 needs two boxes. And the foam compresses with heavy use, at which point the brick starts riding on its edges and cutting harder at the perimeter than the middle. Replace it when you feel that happen.
Verdict: cabinet-grade flat prep at hardware-aisle pricing. Pair it with the very fine softback pads for the corners.
4. Dura-Gold 180 Grit Double-Sided Pads, Best Value in Bulk
The pad you use like a paper towel.
Thirteen dollars for ten flat double-sided pads, half an inch thick, at 180 grit (the same line runs from 60 to 2500 if you want a different number). On the eleven-patch drywall job this was the right stiffness for feathering compound out to nothing without tearing the paper face of the board, which is what happens the moment you go coarser than 150 on a patch edge.
It loads fast. Fresh joint compound dust packs into the abrasive rather than clearing, and we were knocking each pad out on a bench edge every few minutes. The half-inch thickness that makes it good on a patch also makes it thin under your fingertips, which you feel on a long overhead run. And 180 leaves a scratch pattern you will see under semi-gloss, so this is a prep grit only. Follow it with 220 before you paint.
Buy it if: you have patches to feather, filler to knock down, or any job where the sponge is a consumable. About $13 for ten.
5. Dura-Gold Microfine Softback Pads, Best for Wet Sanding a Finish Coat
Specialty pick, and it earns the slot on exactly one job.
After the first coat of enamel on the two test doors cured 48 hours, there were dust nibs. Everyone gets them, especially painting doors flat in an occupied house. At 1200 to 1500 grit, wet, these knocked the nibs off without cutting through to primer, and the second coat leveled over the sanded area with no visible ghosting. A 320 pad would have gone through the color on the first pass.
Wet sanding means a bucket, a rag, and patience. It is slow, and on a large job the time cost is real. These are also useless for anything other than a finish coat, since at this grit the pad polishes rather than cuts. And they cost the same eighteen dollars a box as the very fine pads, for something most homeowners will reach for twice a year.
Skip this if: you are painting walls. Nobody wet sands a wall.
Sponges That Didn’t Make the Cut
- 3M Softback Sanding Sponge (very fine). A good product and a shop standard for scuffing between coats, but the Dura-Gold very fine pads do the same work at a third of the cost per pad.
- Angled drywall sanding sponges. The dual-angle wedge shape is sold for inside corners. In practice the angle rounds off after fifteen minutes and you are holding a rectangle again.
- No-name variety packs from marketplace sellers. Two of the packs we bought had grit numbers on the wrapper that did not match the scratch on the panel. A pad labeled 220 that cuts like 120 will ruin trim.
- Melamine “sanding” pads. These are cleaning sponges. They are not abrasive in the way this job needs.
- Sponges with the abrasive on one face only. Half the sponge, same price, and you will flip it out of habit and sand nothing.
Washing, Reviving, and When to Throw One Out
Most people throw sanding sponges out at about thirty percent of their life.
Rinsing. Run the sponge under a tap and squeeze the foam repeatedly while you work the loaded face with your thumb. The paint dust comes out as a grey slurry. Squeeze it dry, then let it air dry fully before the next use, because a damp sponge loads twice as fast.
What kills them. Oil-based finish, and fresh joint compound left to harden overnight. Both set inside the foam and no amount of rinsing brings the cut back. If you are sanding an oil-based enamel or a shellac primer, treat the sponge as disposable and buy the bulk box.
Storage. Dry, in a bag, away from the grit of the garage floor. A sponge that picks up a piece of stray 60 grit will put a single deep scratch across a panel you just spent an hour prepping, and you will not find the cause until you do it again.
When it’s done. Two signals. The abrasive face goes shiny and glazed and stays that way after a rinse, or the foam has compressed enough that the block rides on its edges. Either one means the sponge is now polishing instead of cutting, and you will spend twice the effort for half the result.
Realistic life on cured paint: one medium 3M block covered roughly 60 linear feet of trim before we noticed the drop. On fresh compound, under ten minutes.
Where Sponge Jobs Go Wrong
- Using a softback pad on a flat panel. It follows the dip and deepens it. Use a rigid block or a sander on anything you want flat.
- Going too coarse on trim. 80 grit on painted casing leaves a scratch pattern that telegraphs through two coats of enamel. Start at 220 on cured paint, and only drop to 120 where you have a real defect to remove.
- Skipping the dust wipe. Sanding dust left on the surface is the number one cause of a gritty finish coat. Vacuum, then wipe with a damp microfiber, then let it dry. A tack cloth after that if you are spraying.
- Sanding compound before it is fully dry. Damp compound gums the sponge in seconds and tears rather than feathers. Wait the full dry time on the bucket, not the time you have.
- Buying one sponge for a whole house. A single loaded sponge cuts slower every minute you use it, and you will unconsciously press harder to compensate. Harder pressure on a foam pad is how flat spots happen.
- Trusting the number on the wrapper. Wipe your first test panel with mineral spirits and look at it under a raking light before you commit the sponge to visible trim. Two of the five packages we bought were mislabeled by two grit steps.
- Deglossing when you needed to sand. Chemical deglosser dulls a surface. It does not flatten brush marks or drips. If your old finish has texture, the sponge is the answer and the bottle is not.
What to Buy for a Typical House
For a homeowner with a trim repaint and a few patches ahead: two 3M Pro Grade Precision blocks in 120 and 220 (about $8), one box of Dura-Gold very fine softback pads in 320 to 400 ($18), and one box of the 180 grit double-sided pads ($13). Call it $39, and it covers trim, doors, patches, and the scuff before your topcoat.
Add the four-sided 320 bricks ($12) if cabinets are on the list. Skip the microfine box until you are actually chasing nibs out of a cured enamel door.
If you are only buying one thing, buy the 220 block. It is the grit that fixes the most surfaces and ruins the fewest. For the sheet-and-disc side of the same prep question, see the sandpaper round-up; for the machines that replace a sponge on big flat work, the orbital sander picks. Prepping cabinet doors specifically? The kitchen cabinet project guide covers the grit sequence in order, and if you are deciding whether to sand at all, the deglosser comparison settles it. Brush marks in the old finish are a sanding problem, not a paint problem, and the brush marks fix explains why.
Sand the trim, wipe the dust, then paint.
Ask a Question