Best Detail and Mouse Sanders
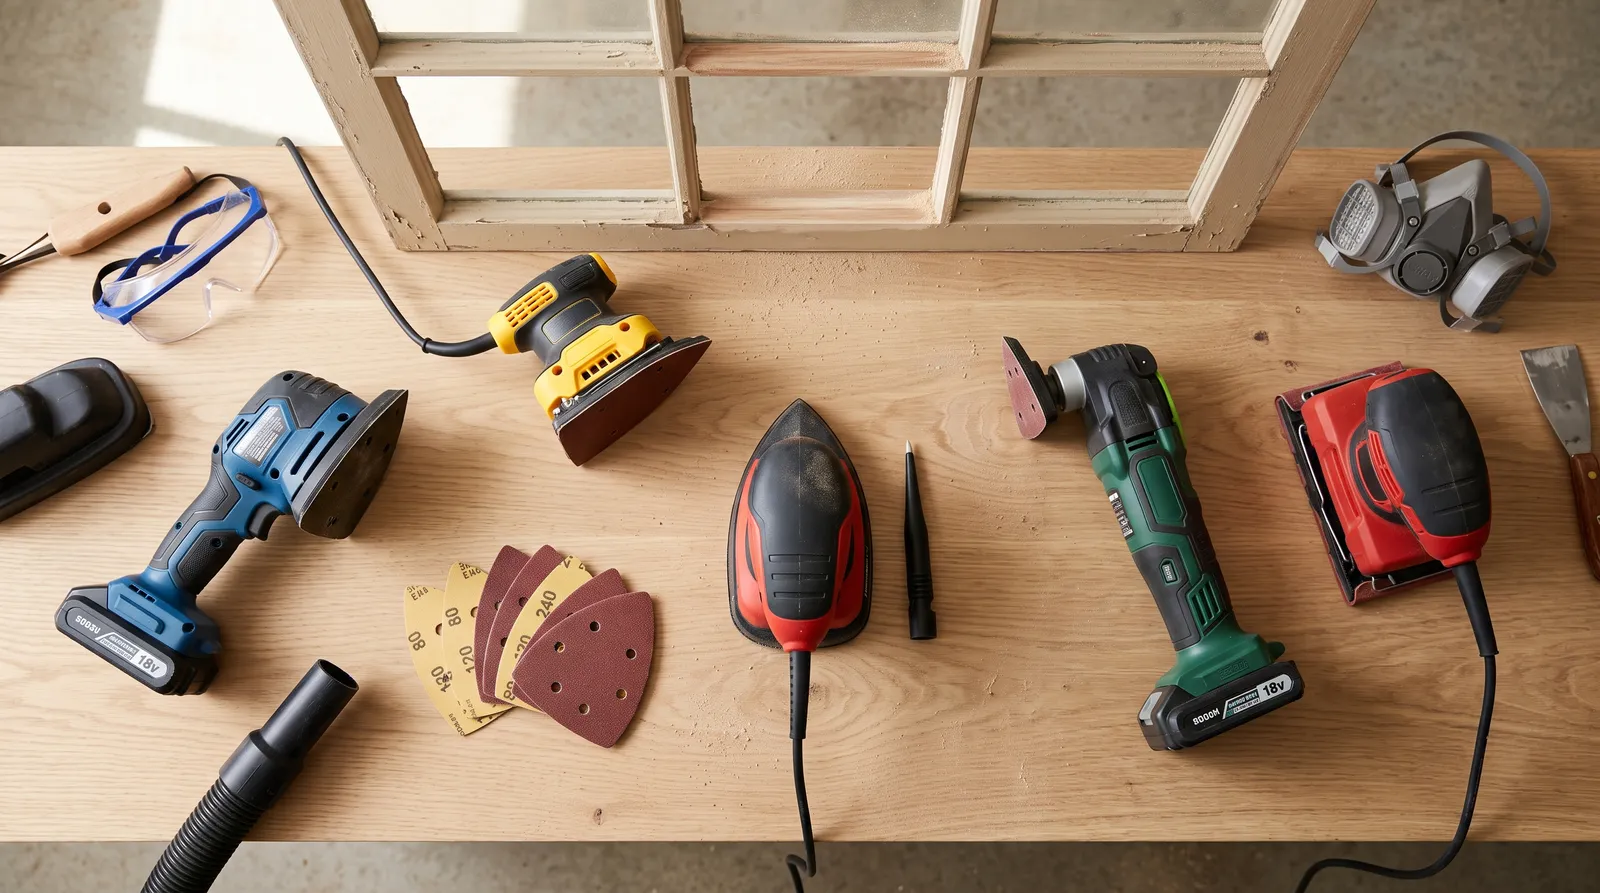
Five detail and mouse sanders tested on window sash, louvered doors, stair balusters, and cabinet face frames. Top pick: BLACK+DECKER BDEMS600 — plus where each one falls short.

Disclosure: Some links below are affiliate links. We earn a commission if you buy through them, at no extra cost to you.
Top pick: the BLACK+DECKER BDEMS600 Mouse, $35.99 direct. A 1.2-amp corded detail sander with a teardrop pad and a slim finger attachment that reaches into the muntin corner of a divided-lite window sash, which is the one spot every other sander in this test stopped short of. It wins on shape and on price. It falls short on dust capture, where the onboard canister collects roughly half of what the pad throws. Skip this if you already own an 18V battery: the RYOBI Corner Cat PCL416B does the same work cordless for $49.97 bare, and on exterior sash work the missing cord is worth more than the money.
A detail sander is a shape, not a horsepower rating.
That’s the whole category in one line, and it’s why the cheapest tool here beat tools costing four times as much on the job the category exists for. If you need to strip a door or flatten a wall patch, buy a random-orbital sander instead and don’t look back.
The Four Jobs That Sent Us Shopping
Nobody buys a detail sander because it’s fun. You buy one the day you meet a surface your palm sander cannot physically enter.
Ours were four. Six divided-lite window sashes in a 1961 ranch, with 60 years of oil enamel built up in the muntin corners. Two louvered pine closet doors, 38 slats each, needing a scuff between shellac primer and topcoat. An oak stair rail with 22 turned balusters where the old varnish had chipped at the handrail and needed feathering. And 18 kitchen cabinet fronts getting a face-frame scuff before waterborne alkyd.
Every one of those is a geometry problem. The sash corner is a 90-degree inside corner about three-quarters of an inch on a side. A louver slat is an inch and a quarter wide with a two-inch gap above it. A turned baluster has no flat surface anywhere on it. And a cabinet face frame has a hard stop where the stile meets the rail.
Here’s the thing the marketing doesn’t tell you: no power sander gets fully into a 90-degree inside corner. The orbital ones can’t, because the pad has to move to work and the corner won’t let it. The best of them stop about a sixteenth of an inch out, which is close enough that paint hides the transition. The worst stop an eighth out, and you see the line under a raking light after the second coat.
That gap is the whole test.
How We Ran It
Same abrasive progression on every tool where the sheet format allowed: 120 grit to feather, 180 grit to finish. Fresh sheets logged and counted per tool, because consumable burn is a real cost on a category where a triangle sheet costs more per square inch than any other sandpaper you buy.
Corner reach. Measured with a feeler gauge against a machined 90-degree test block: how close could the working edge of the pad get before the housing hit? Recorded in inches.
Swirl. After 180 grit, every panel got inspected under a raking LED work light held at about 15 degrees. Visible scratch pattern was a fail. This is the check most people skip, and it’s why trim looks fine in the shop and terrible on the wall.
Dust. Crude but consistent: same drop cloth, same 4-by-4-foot work zone, swept and weighed after each session. Onboard collection versus what hit the floor.
Fatigue. A continuous 45-minute run per tool on the louvered doors, which is the closest thing to a torture test this category has. Vibration, heat at the grip, and how much the tool wanted to walk off the work.
Sheet changes. Timed. Hook-and-loop against clamp-and-punch-plate.
Every session ran with a shop vac in the room and a respirator on my face. The 1961 house means lead, and sanding pre-1978 paint without containment is the fastest way to turn a weekend project into a medical problem. If your house predates 1978, test before you sand.
Side by Side
| Brand / Model | Pad shape | Power | Corner reach | Dust | Price |
|---|---|---|---|---|---|
| BLACK+DECKER BDEMS600 | Teardrop + finger attachment | 1.2-amp corded, 14,000 OPM | Best in test with finger fitted | Canister, weak; vac-adaptable | $36 |
| RYOBI Corner Cat PCL416B | Triangle | 18V ONE+ cordless | Good | Adaptor sold separately | $50 bare |
| WEN 6301 | Angled-tip rectangle | 1-amp corded, 13,500 OPM | Fair | 1-3/8 inch port, standard | $24 |
| Milwaukee 2526-20 | Delta pad on oscillating head | M12 cordless, 10,000–20,000 OPM | Into the corner, fully | None on the sanding pad | $150 bare |
| Makita BO4556K | 4-1/2 by 4 inch rectangle | 2-amp corded, 14,000 OPM | Poor by design | Through-the-pad, best in test | $75 |
1. BLACK+DECKER BDEMS600, Top Pick
The Mouse has been on shelves in some form since the late 1990s, and the reason it’s still there is that nothing has beaten the shape. A teardrop pad narrows to a point that follows a mitered corner, and when the point isn’t enough, the detail finger accessory bolts on and turns the tool into something closer to a powered emery board.
On the sash job that accessory was the difference between the tool working and the tool being a paperweight. With the standard teardrop pad, I got within about a sixteenth of an inch of each muntin corner. With the finger fitted, I got into the corner itself. Nothing else here did that without switching to an oscillating tool.
The 1.2-amp motor runs 14,000 orbits per minute and never bogged on the old oil enamel, even when I pushed it harder than I should have. Corded is the right call for this tool. Two hours of louver scuffing is exactly the session where a battery tool sends you looking for a charger, and at 2.4 pounds and 10.1 inches long, the Mouse balances on a vertical stile instead of levering itself off the work. The three-position grip sounds like packaging copy until you use it: palm-over for flats, front-hold for edges, pinch-hold when the finger attachment is on.
Dust is where it loses points. The canister caught roughly half of what the pad made across our sessions, and the other half went on the drop cloth. That’s typical for the category and it isn’t a defect, it’s physics on a tool this small. Put a shop vac on it if you can.
Two more real cons. The hook-and-loop on the pad wears out well before the sander does; after about a dozen hours the sheets start lifting at the tip and chattering, and a replacement pad fixes it for a few dollars. And the pointed tip of each sheet burns through in about four minutes on cured paint, so you’re rotating sheets constantly. Buy them in bulk and stop thinking about it.
| Spec | Value |
|---|---|
| Pad | Teardrop detail pad, plus detail finger attachment |
| Motor | 1.2-amp corded, 14,000 OPM |
| Weight | 2.4 pounds; 10.1 inches long |
| Dust | Onboard canister; adapts to a shop vac |
| Warranty | 2-year limited |
| Approx. price | $36 |
Buy it if: you have window sash, louvers, or carved trim, and you want the cheapest tool that actually solves the geometry. Skip it if: you already own an 18V platform, or if your work is flat panels and doors.
2. RYOBI 18V ONE+ Corner Cat PCL416B, Best Cordless
Different problem, different answer. On an exterior sash job you’re on a ladder with a wet primer coat below you, and a cord is a liability every single time you reposition. The Corner Cat solves that for $49.97 bare, and if you own any RYOBI 18V ONE+ battery already, $49.97 is the whole cost.
The triangular hook-and-loop base changes sheets in about four seconds with no punch plate to align. It’s noticeably calmer in the hand than the corded Mouse over a long run, which matters more than the spec sheet suggests once you’re at slat 26 of 38.
On paper the triangle should reach corners better than a teardrop. In practice it gets close and then stops, because there’s no finger attachment in the system. On the sash muntins I finished the last sixteenth by hand with a folded sheet. On the balusters it was the better tool of the two, since a triangle rides a curved surface more predictably than a point does.
Runtime is the honest limitation. On a 1.5 Ah pack you’ll want a second battery before you finish one louvered door. And vacuum hookup needs the A21CCV1 Corner Cat adaptor, about $14, which should have been in the box.
Buy it if: you’re already in the RYOBI 18V ONE+ system or you’re working on ladders and exteriors.
3. WEN 6301, Best Budget
$24.04 direct from WEN. That is less than a decent respirator and about what two quarts of primer cost.
The 6301 is a rectangle with an angled tip, which is a different geometry bet than either the teardrop or the triangle. The 3.75 by 5.5 inch pad covers more flat area per pass than the Mouse, so on door casings and window stops it moved faster. At the sash corner it was the weakest of the orbital tools, stopping about an eighth of an inch out.
Two pounds even. Lightest tool in the test, and on a two-hour session at ceiling-height casing your wrist notices. The 1-3/8 inch dust port takes a standard shop-vac adaptor with no brand-specific fitting, which is genuinely better than what RYOBI ships.
The one-amp motor at 13,500 OPM slows visibly when you lean on it over cured alkyd. Fit and finish is what $24 buys: the switch feels cheap, the pad has more runout than the BLACK+DECKER, and the warranty is one year.
Verdict: the right buy if this is a one-project tool, or a second sander you keep loaded with 180 grit so you’re not swapping abrasives all afternoon.
4. Milwaukee M12 FUEL 2526-20, Best for True Inside Corners
This is not a detail sander. It’s an oscillating multi-tool with a delta sanding pad, and it’s on this list because it’s the only tool here that gets all the way into a 90-degree inside corner. The head doesn’t orbit, it oscillates through a 3.9-degree arc, so the point of the triangle can sit hard in the corner and still be working.
On the cabinet face frames that mattered. Where a stile meets a rail, every orbital tool in this test left an unsanded margin I had to finish by hand. The M12 didn’t.
The 12-setting dial runs 10,000 to 20,000 OPM, and the low end is the setting nobody uses and everyone should: on cured enamel, full speed burns through the abrasive and into the substrate before you’ve registered what happened. Dial it down and it scuffs cleanly. Swap the sanding pad for a scraper blade and the same tool takes off old caulk and glazing putty, which on a sash restoration is half the work anyway.
The cons are real. It costs about four times the BLACK+DECKER bare, more if you’re buying into M12 from zero. Oscillating motion cuts rather than polishes, so you’ll still finish with an orbital or by hand before primer goes on. And delta abrasives are a consumable line that adds up faster than you expect.
Buy it if: you’re restoring sash or refinishing cabinets, where inside corners and old caulk are most of the job. Skip it if: you want one tool that both cuts and finishes.
5. Makita BO4556K, Best Step-Up for Flats
Included because half the people searching for a detail sander don’t need one.
The BO4556K is a quarter-sheet finishing sander with a 4-1/2 by 4 inch pad, and on a door stile it covered in two passes what the Mouse needed six passes for, with a flatter result. Ball-bearing construction makes it the quietest and smoothest-running tool in this test by a wide margin. The through-the-pad dust collection genuinely pulls dust off the work, which none of the small tools managed.
Square corners, so it stops about an eighth of an inch short of every inside corner by design. The punch-plate-and-clamp sheet system is slower than hook-and-loop and the clamps chew sheet edges. And it’s the wrong tool for louvers, muntins, or anything narrower than the pad.
Verdict: at around $75 with a case, this is what you buy if your “detail” work turns out to be doors, drawer fronts, and flat trim. Pair it with the $24 WEN for the tight spots and you’ve spent $99 covering both jobs properly.
Tools We Looked At and Passed On
- Corded Corner Cat CFS1503GK ($59). Fine tool, but the cordless PCL416B costs less bare and the corded version doesn’t do anything the $36 Mouse can’t.
- RYOBI P401. Still all over search results and review sites. It’s discontinued; PCL416B replaced it. Don’t buy old stock at a markup.
- Cordless mouse sanders under $40 from unbranded sellers. We tried two. Both had visible pad runout out of the box, which is the one defect no technique fixes.
- Festool DTS 400. Genuinely the best delta sander made. At the price of every other tool on this list combined, it belongs in a cabinet shop, not on a homeowner’s trim job.
- Sanding sponges. Not a sander, but on balusters and turned spindles a flexible sponge still beats every powered option here. Keep a few in the kit.
Pad Shape, Grit, and the Consumable Math
Pad shape is the buying decision. A teardrop with a finger attachment reaches a mitered corner. A triangle rides curves and reaches a flat corner within a sixteenth. A rectangle with an angled tip covers area and reaches nothing. A delta pad on an oscillating head reaches everything and finishes nothing. Pick the shape that matches your actual work, not the one with the biggest motor.
Grit. 180 to 220 for scuffing between coats. 120 up to 180 for feathering a chipped edge. 60 or 80 to take paint down to wood, with the caveat that sanding is a poor way to remove a lot of paint. Never skip more than one step in the progression, and stop at 180 on anything you’re painting. Sanding to 320 polishes the surface closed and gives your primer less to grab. The full sandpaper breakdown covers grit sequences by substrate.
The consumable is the real cost. Triangle and teardrop sheets run more per square inch than any other abrasive format, and the tip of every sheet dies first. Across the sash job the BLACK+DECKER burned through 22 sheets and the Makita burned through 6 for a comparable area. Factor that in before you decide the $24 tool is the cheap one.
Hook-and-loop versus clamps. Hook-and-loop wins on speed and loses on lifespan; the pad backing wears out and needs replacing. Clamps last the life of the tool and cost you fifteen seconds per change plus a punch plate you’ll lose. For detail work, take hook-and-loop.
Dust, Lead, and Not Poisoning Yourself
Sanding paint makes fine airborne dust, and fine airborne dust is the entire hazard.
If the house was built before 1978, assume lead until a test says otherwise. Sand wet where you can, seal the room, run a vacuum on the tool, and wear a real respirator rather than a dust mask. A P100 cartridge is the standard for lead; an N95 is the floor for ordinary latex dust. Our respirator round-up covers the difference in detail.
Onboard canisters on tools this small are close to decorative. Half the dust, at best. A shop vac on the port changes the picture completely, and the port fitting is worth checking before you buy: the WEN takes a standard 1-3/8 inch adaptor, the RYOBI needs its own $14 Corner Cat adaptor, and the Makita pulls dust through punched sheets into a bag.
Vacuum the surface and wipe with a damp cloth before primer. Dust left on trim gets encapsulated by the first coat and shows as grit under a raking light forever. This is the same discipline that makes a cabinet repaint look sprayed instead of brushed.
Mistakes That Cost You a Finish
- Leaning on it. Small pad, all your weight in a few square inches, orbit stalls, swirl appears. Let the tool’s own weight do the work and guide it.
- Skipping a grit. 120-grit scratches under a 180-grit pass show through two coats of enamel under raking light. Every time.
- Sanding to remove a lot of paint. Heat gun or stripper first, scrape, then sand the last skim. On flaking exterior work, diagnose the cause before you touch it: our peeling paint guide walks through why it let go in the first place.
- Running a dead pad. When the hook-and-loop goes bald on one side the sheet lifts and chatters, and no technique fixes it. Replacement pads cost a few dollars. Check the pad before you blame yourself.
- Ignoring the corner you can’t reach. If the tool stops an eighth of an inch out, finish that eighth by hand with a folded sheet. It takes ninety seconds and it’s the difference between trim that reads clean and trim that reads sanded-around.
- No respirator on old paint. Nothing else on this list can hurt you. This one can.
What I’d Actually Buy
Weekend homeowner with one sash or louver job ahead: the BLACK+DECKER BDEMS600 at $36, a shop vac adaptor, and a bulk pack of 120 and 180 sheets. Under $60 all in, and it solves the job the palm sander can’t.
Already in the RYOBI 18V ONE+ system: the PCL416B at $49.97 plus the $14 Corner Cat adaptor. Skip the corded tools entirely.
Doing cabinets or restoring sash for real: the Milwaukee M12 FUEL with a delta pad for the corners and the caulk, plus the $24 WEN loaded with 180 grit for everything flat. The M12 gets you into the corner. The WEN finishes what the M12 leaves rough.
And if you open the box, look at your work, and realize it’s all flat doors and drawer fronts, return the detail sander and buy the Makita.
Ask a Question