How to Spray Paint a Mirror Frame
Spray paint a mirror frame without wrecking the glass: how to mask, what primer each frame material needs, spray distance, dry times, and the fixes when it goes wrong.

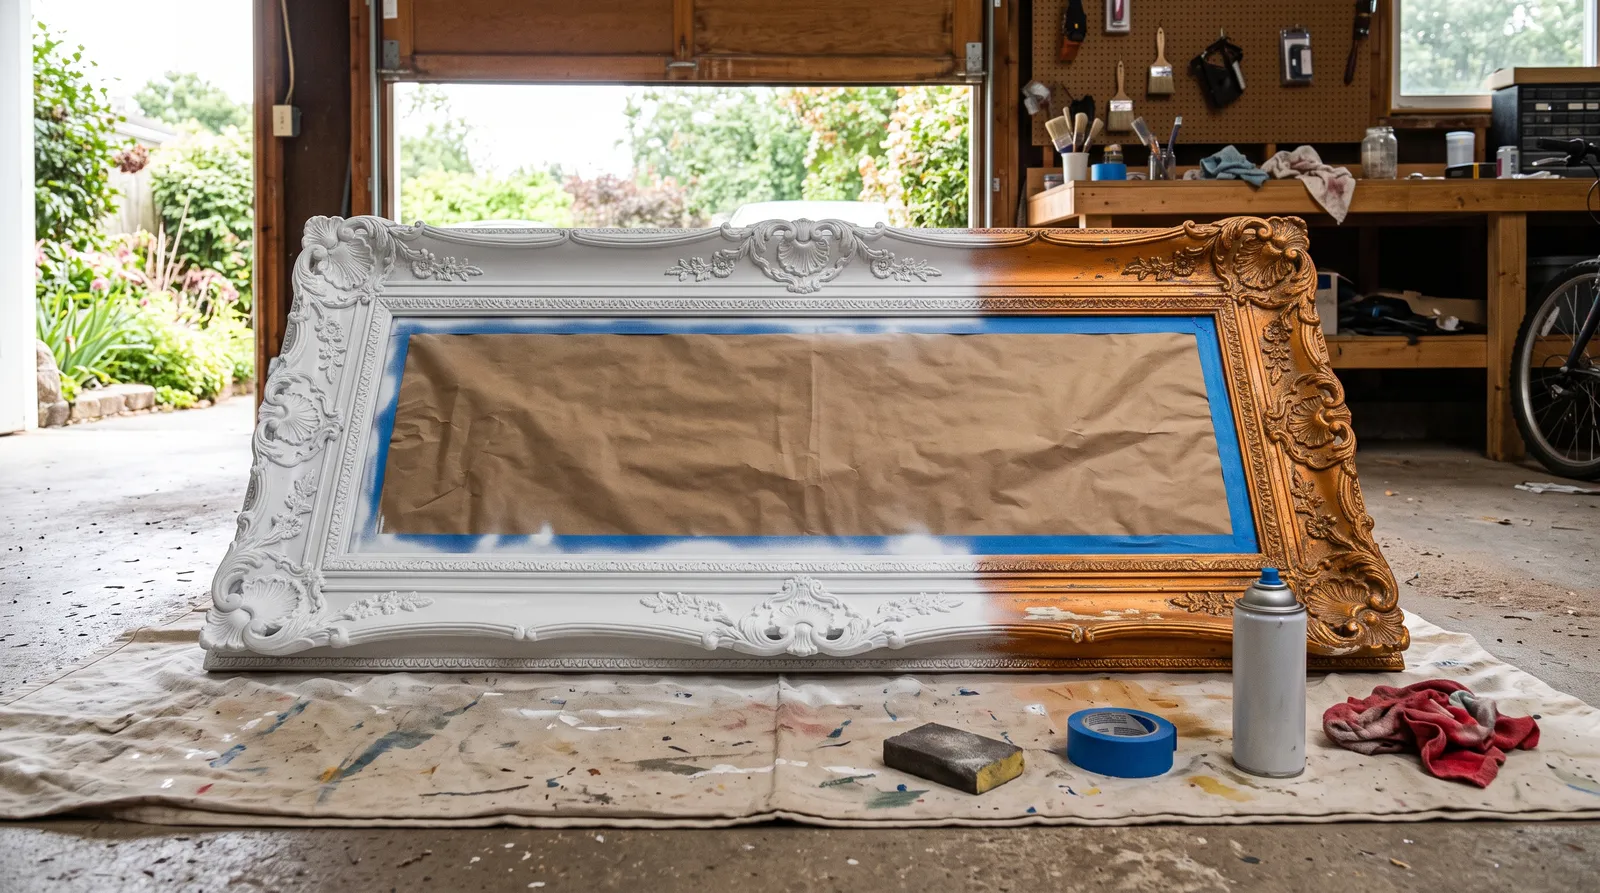
Okay, so there’s a mirror leaning against your garage wall and the frame is the problem. Gold curlicues you inherited. Orange-toned oak from 1994. That shiny molded plastic thing every big-box store sold for eighty dollars. The mirror itself is fine. You want the frame to be black, or white, or brass, and spray paint is the right tool for that job.
The part that worries you is the glass. Everybody worries about the glass.
Don’t. Masking a mirror is the easy part, and I’ll walk you through it in a way that gets a crisp line at the frame edge. What actually ruins these projects is spraying too close and too heavy, so the paint pools in the carved detail and stays soft for a week. That’s the failure I want you to avoid.
What You End Up With
A frame in the color you actually wanted, with a clean edge where the paint meets the glass and a finish that doesn’t feel gummy under a fingertip. Done right, it reads as a mirror you bought.
How Hard This Actually Is
Easy, with one honest caveat: ornate frames take three times longer than flat ones. Every carved leaf is a spot where paint hides on one side and pools on the other, so you spray from several angles.
Active work is an afternoon. Elapsed time is longer because you wait between coats, and because the paint needs a night before you trust it on a wall hook.
| Frame type | Active time | Ready to hang | Skill |
|---|---|---|---|
| Flat or simple wood frame | 1–1.5 hrs | Next morning | Easy |
| Molded resin or plastic frame | 1.5 hrs | Next morning | Easy |
| Ornate carved or gilded frame | 2.5–3 hrs | Next morning | Easy-medium |
| Metal frame | 1.5 hrs | Next morning | Easy |
First, Figure Out What Your Frame Is Made Of
This decides your primer, and primer is the whole difference between paint that stays on and paint that peels off in sheets in six months.
Tap it with a fingernail. Wood gives a dull knock and you can usually see grain somewhere on the back edge. Molded resin or polystyrene sounds hollow, and the carved detail repeats identically around the frame (real carving doesn’t). Metal is cold and heavy. Old gilded plaster feels chalky at the corners and chips if you press hard.
Resin or plastic: Krylon Fusion All-In-One, no separate primer. Glossy or stained wood: a shellac-base spray primer like Zinsser B-I-N first, then any topcoat. Bare metal: self-etching primer. Antique gilded plaster: think hard about whether you want to paint it at all, because that isn’t reversible and some of those frames are worth money.
For the full breakdown of which primer grabs which surface, see the spray primer round-up. The two-can debate that comes up most often is covered in Rust-Oleum 2X vs Krylon Fusion.
The Shopping List
Paint and Primer
One can of color covers most mirror frames. Buy two if the frame is over three feet on the long side, or if you’re going from dark to white, which always takes an extra coat.
- Color coat: Rust-Oleum Painter’s Touch 2X Ultra Cover on wood and primed surfaces, Krylon Fusion All-In-One on resin and plastic. Both spray smooth in a normal garage.
- Matte look: Rust-Oleum Chalked spray. Flat, slightly powdery, distresses beautifully, and needs a clear coat over it because bare chalk finish marks up.
- Metallic: Krylon Premium Metallic in Gold Leaf gives a real metal look instead of that flat brassy tone. Rust-Oleum Metallic Accents is the cheaper alternative.
- Primer: Zinsser B-I-N shellac-base spray for glossy or stained wood, Rust-Oleum Self Etching Primer for bare metal.
- Clear top coat: Rust-Oleum Painter’s Touch 2X Clear in matte or satin. Optional on a decorative frame, worth it on a bathroom or entryway mirror that gets bumped.
More options in the best spray paint round-up, and for a metal frame the spray paint for metal picks are the relevant list.
Tools
Sanding sponges in 220 and 320. A tack cloth. Painter’s tape (FrogTape Delicate Surface if the old finish looks like it might lift, and the painter’s tape round-up explains what the colors mean). Kraft paper. A soft old toothbrush for the carved detail. A screwdriver. A drop cloth or a flattened moving box.
And a respirator. I’m going to be annoying about this one. Spray paint in a garage with the door open is still spray paint, and an N95 does nothing against solvent vapor. Get a cartridge respirator from the painting respirator picks and wear it every time.
Mirror In or Mirror Out?
Two ways to do this, and I want to talk you out of one of them.
Leave the mirror in. Mask the glass, spray the frame, pull the tape. Fifteen minutes of careful masking and no risk to the glass. This is what I’d do on nine mirrors out of ten.
Take the mirror out. Faster spraying, no masking, and the inner lip of the frame gets painted. It’s also how mirrors get broken. Old frames hold glass with brittle glazier points, staples, or hardened adhesive, and the glass edge is raw and sharp. Only pull the mirror if the inner lip actually shows when the thing is hanging, or if the glass is damaged and you’re replacing it anyway.
Everything below assumes the mirror stays in.
Step 1: Take the Hardware Off
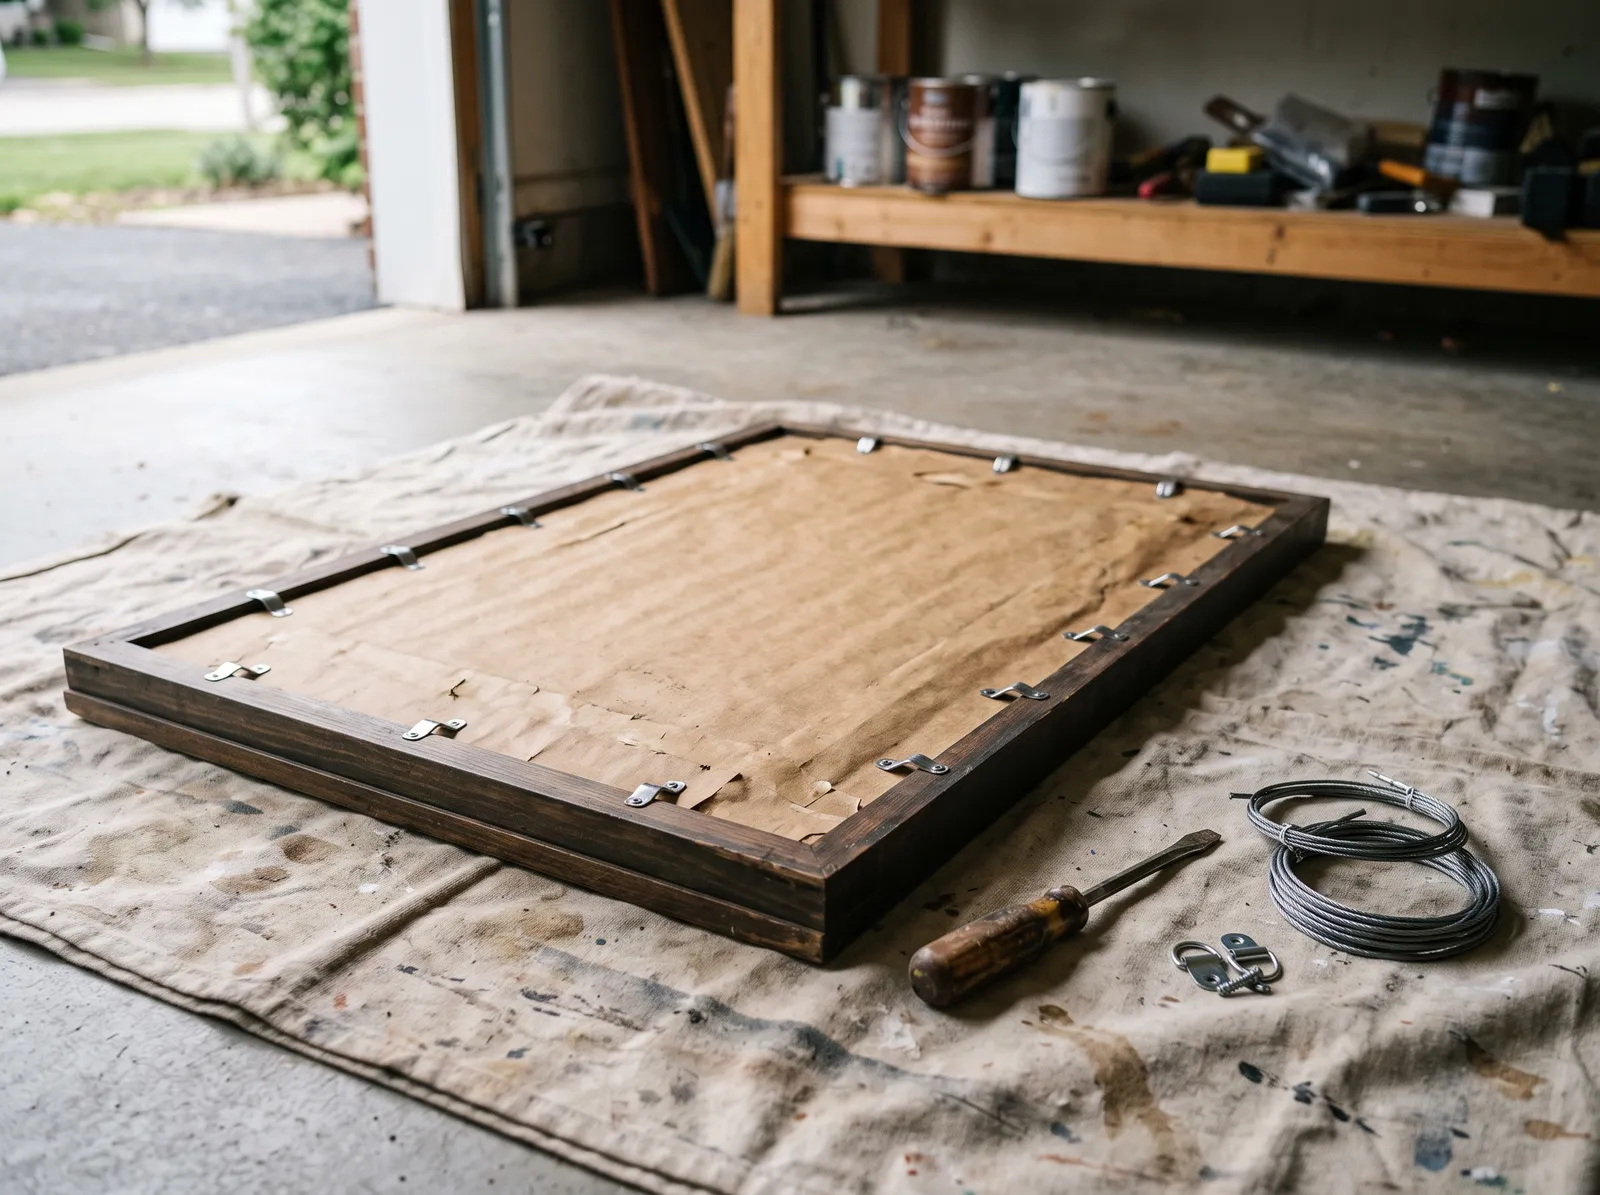 Face-down on a drop cloth. Wire, clips, and any loose trim come off before anything else.
Lay the mirror face-down on a drop cloth or a flattened box. Take off the hanging wire, the D-rings, the sawtooth hanger, and any decorative rosettes that unscrew. Anything you leave on is something you’ll paint around badly. While you’re back there, trim a torn paper dust cover flush with a utility knife so it can’t flap into your wet paint.
Watch out for frames held together by the backing. Cheap mirrors often have corner joints that rely on the retaining clips for rigidity. If yours flexes when you lift it, work flat and don’t stand it up until the paint has cured.
Step 2: Mask the Glass
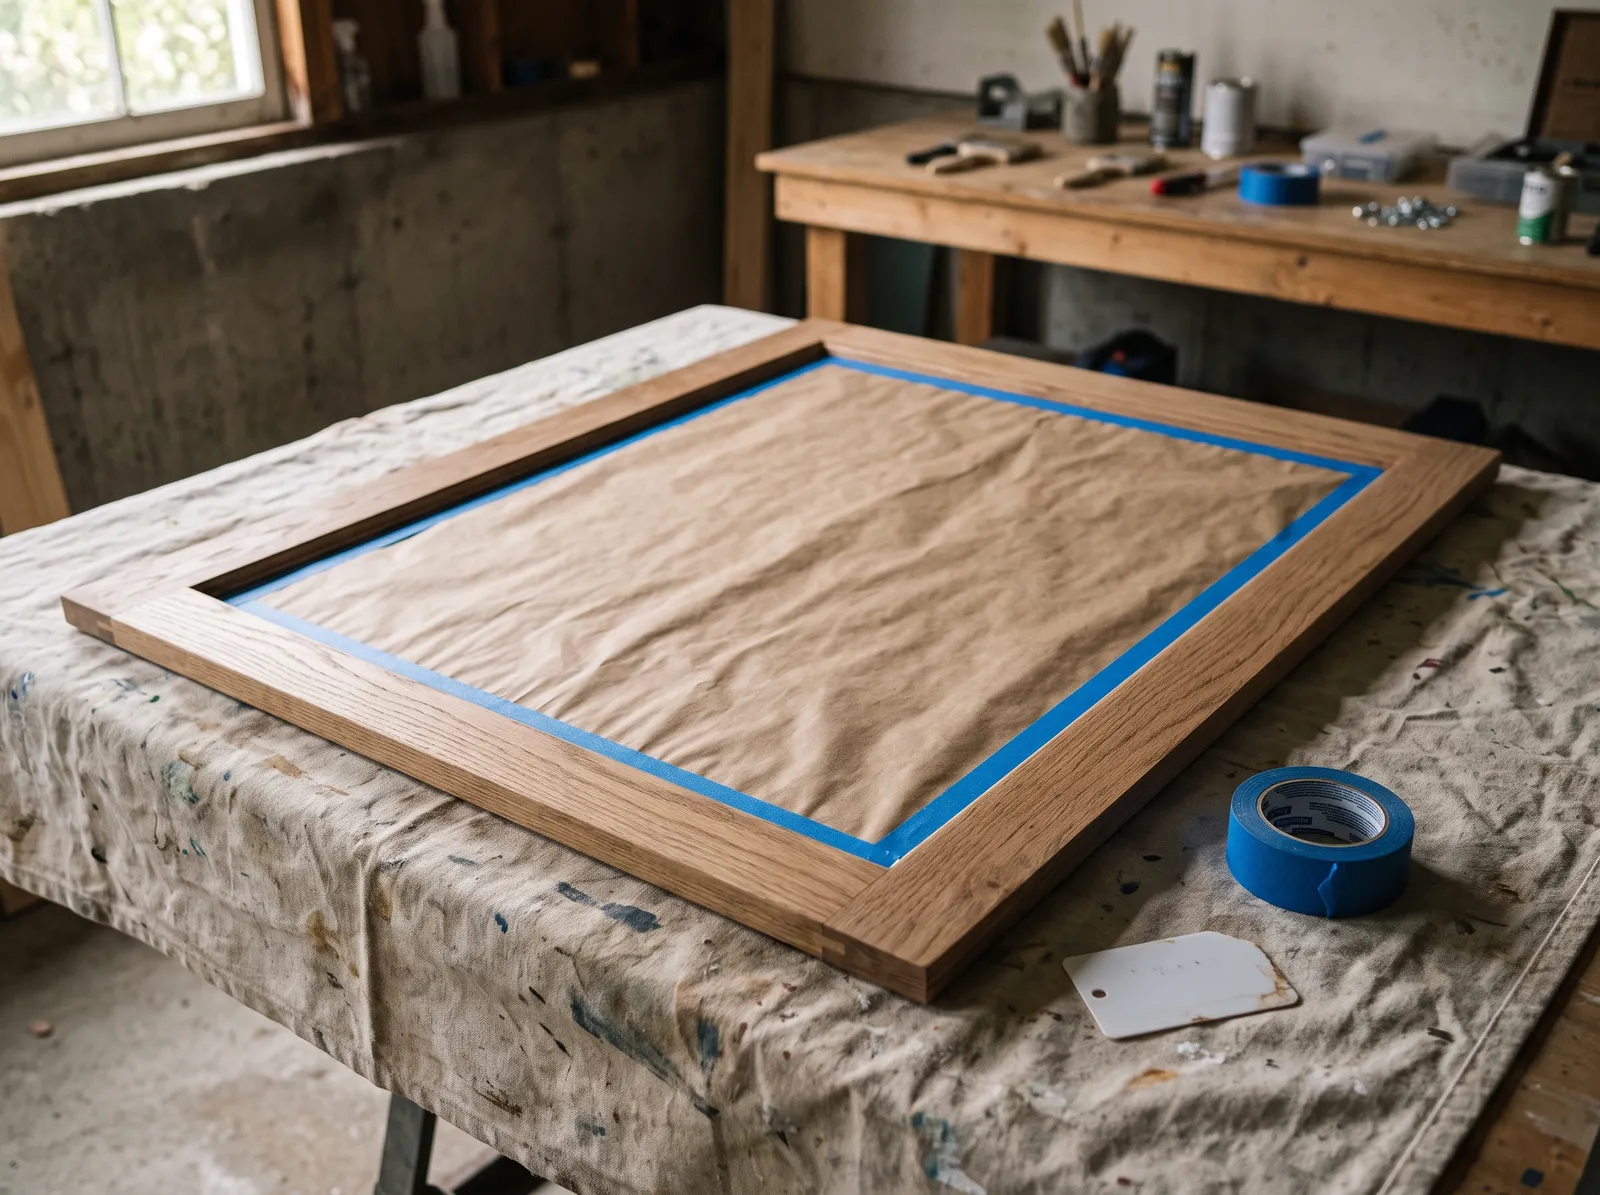 Paper covers the field, tape seals the seam. Burnish the tape edge so overspray can’t creep under.
Cut kraft paper, newspaper, or thin cardboard to roughly the size of the glass and lay it in. It doesn’t need to be exact. Then run painter’s tape along the inside edge of the frame so it holds the paper down and seals that seam.
Here’s the part people rush. Press the tape edge down hard with your fingernail or the corner of a plastic card, working the whole way around. Overspray behaves like dust, not liquid. It gets under any tape edge that’s even slightly lifted and leaves a hazy gray band on the glass an inch wide.
Tape the outside back edge too, about a quarter inch in, if you don’t want paint wrapping around.
Watch out for masking days ahead. Tape left on glass in a hot garage gets harder to pull and leaves adhesive. Mask and paint the same day.
Step 3: Clean, Then Scuff
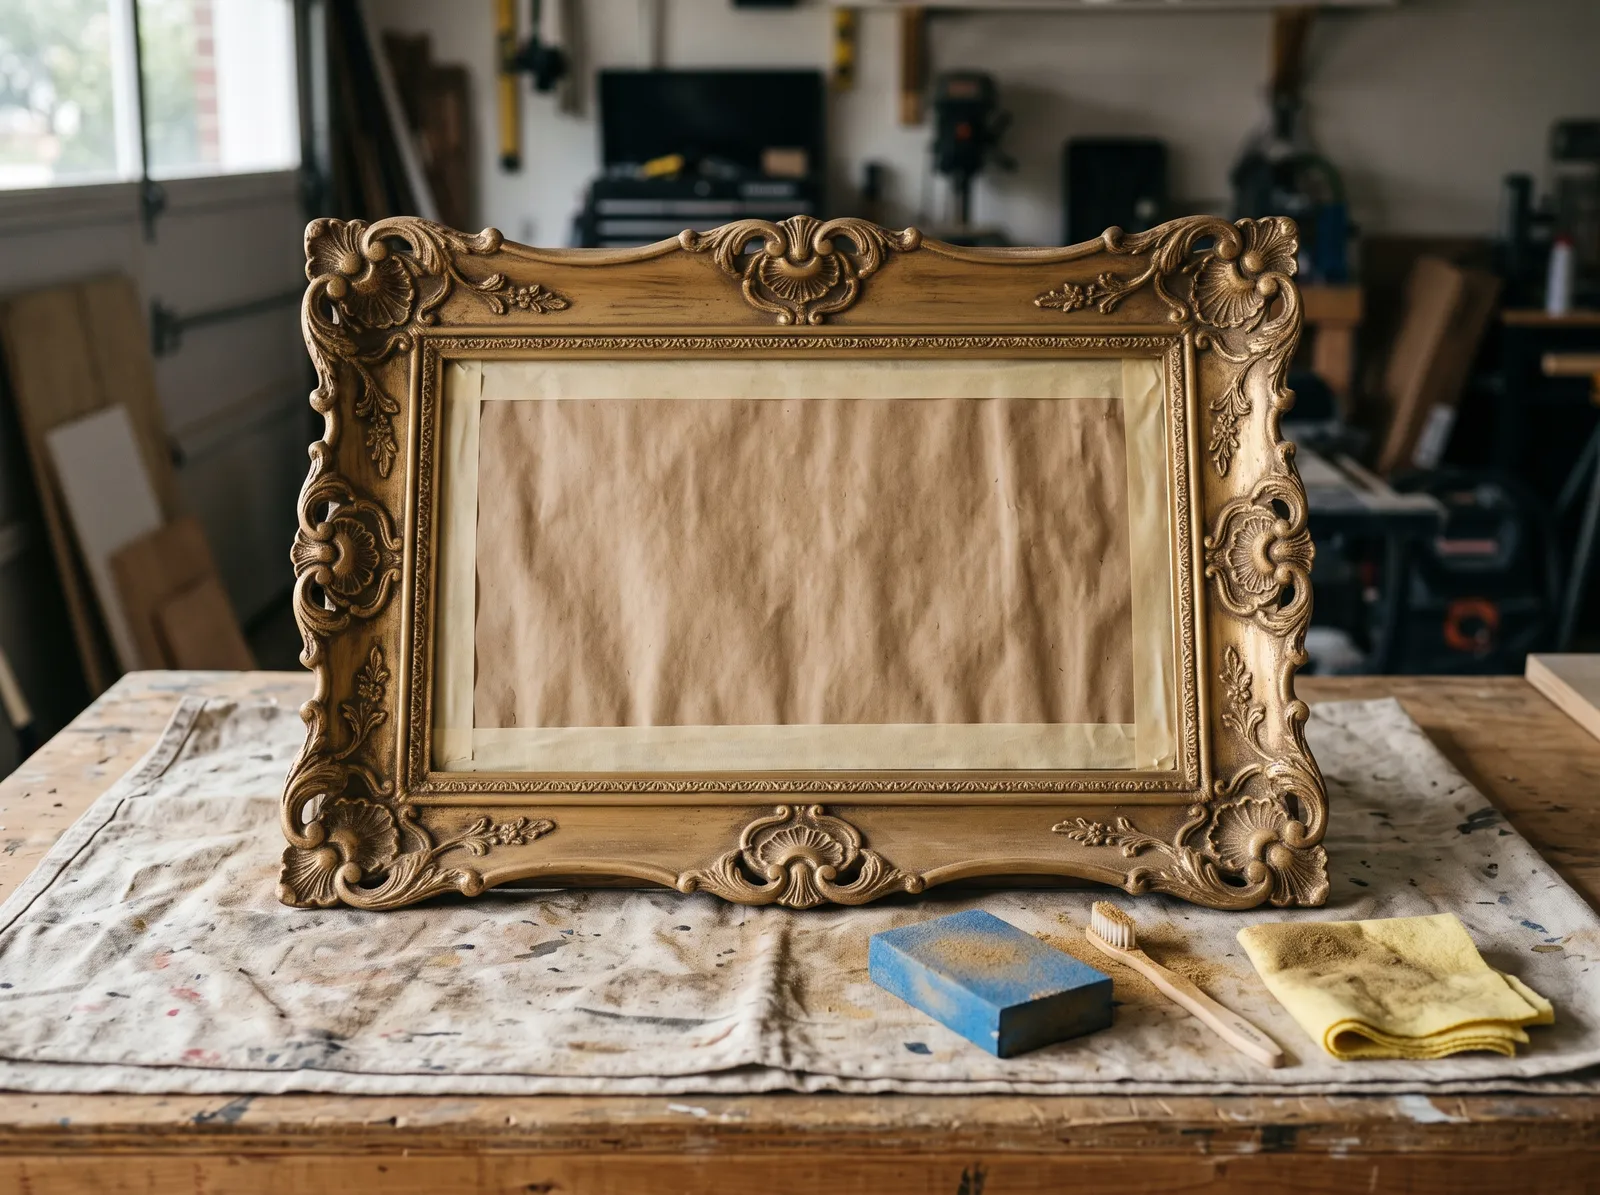 Dull all over, no shine anywhere. Carved detail brushed out, dust lifted with a tack cloth.
Wash the frame before you sand it, not after. Mirror frames collect a film of dust, hairspray, and kitchen grease, and sanding drives that film into the surface. Warm water with a squirt of dish soap does most frames; for real buildup use a TSP substitute and rinse. Get the toothbrush into the carved detail and let it dry fully.
Then scuff. You’re not removing the old finish, you’re taking the shine off so primer has something to bite. A 220-grit sponge on flat wood, 320 on molded resin, light pressure on both. When the whole frame looks uniformly dull with no glossy patches left, you’re done. You’ll know it when you see it: the surface stops reflecting the garage light.
Ornate plaster or composition frames that crumble when you sand them get liquid deglosser on a rag instead. Wipe it on, let it flash off, don’t scrub. Deglosser vs sanding covers when each one is the right call.
Finish with a tack cloth. Sanding dust under spray paint reads as a gritty texture you can feel with a fingertip forever.
Step 4: Prime
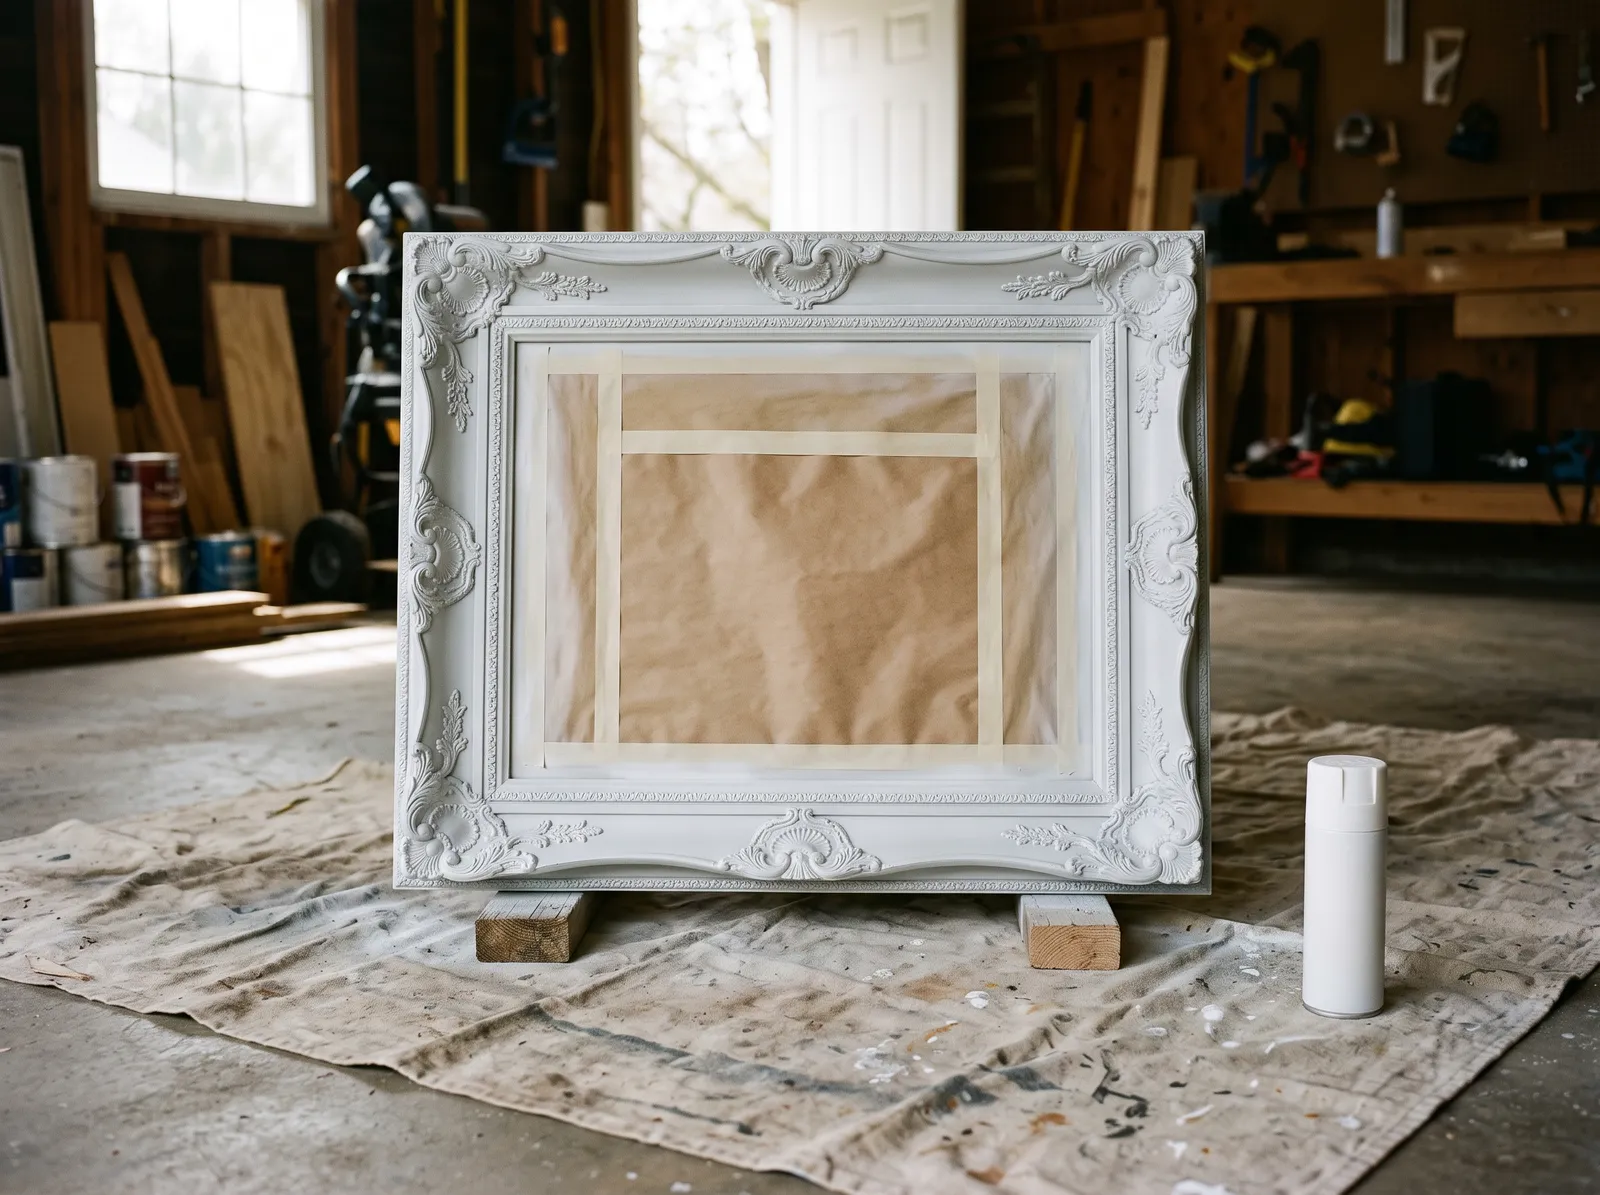 Frame up on blocks so the outer edge gets covered too. Two mist coats beat one wet one.
Set the frame on two scrap blocks or upside-down cans so it’s lifted an inch off the drop cloth. That way you can angle the can and hit the outer edge without the frame sticking to the cloth.
Shake the can for a full minute. Not ten seconds. A full minute, until the ball rattles freely, and shake it again every couple of minutes while you work. Hold the can 8 to 12 inches away, start your pass off the edge of the frame, sweep across, and release past the other end. Overlap each pass by about a third.
Two light coats, 5 to 10 minutes apart. The first one should look thin and patchy and that’s correct. If your first coat looks fully covered and glossy-wet, you sprayed too heavy and it’s going to run in the corners.
Watch out for the carved recesses on an ornate frame. Spray them from a low angle, then from the opposite low angle, then straight down. One direction always leaves a shadowed strip bare, and you won’t see it until the color coat goes on and that spot looks slightly different.
Step 5: Color Coats
Same technique, more patience. Three light coats gets you a better finish than two heavy ones every single time, and the whole thing still only takes twenty minutes of actual spraying.
Watch the recoat window on the can, because Rust-Oleum 2X has a specific one: recoat within 1 hour, or wait 48 hours. Spray a fresh coat at the six-hour mark and the solvent in the new coat softens the half-cured layer underneath, and you get wrinkling that looks like crumpled fabric. Krylon Fusion is more forgiving and lets you recoat any time. Read your can.
Temperature matters more than people expect. Below 50°F the paint goes on grainy and takes days to harden. Above 90°F it dries mid-air and lands like sandpaper. Humid days leave a milky haze on dark colors. A 65 to 80 degree afternoon with the door open is the window, and the spray paint dry time guide has the full table.
Watch out for the moment the frame looks almost covered and you’re tempted to hold the can closer to finish the job. That’s how runs happen. Back off, do another pass, let it build.
Step 6: Clear Coat, Pull the Tape, Cure
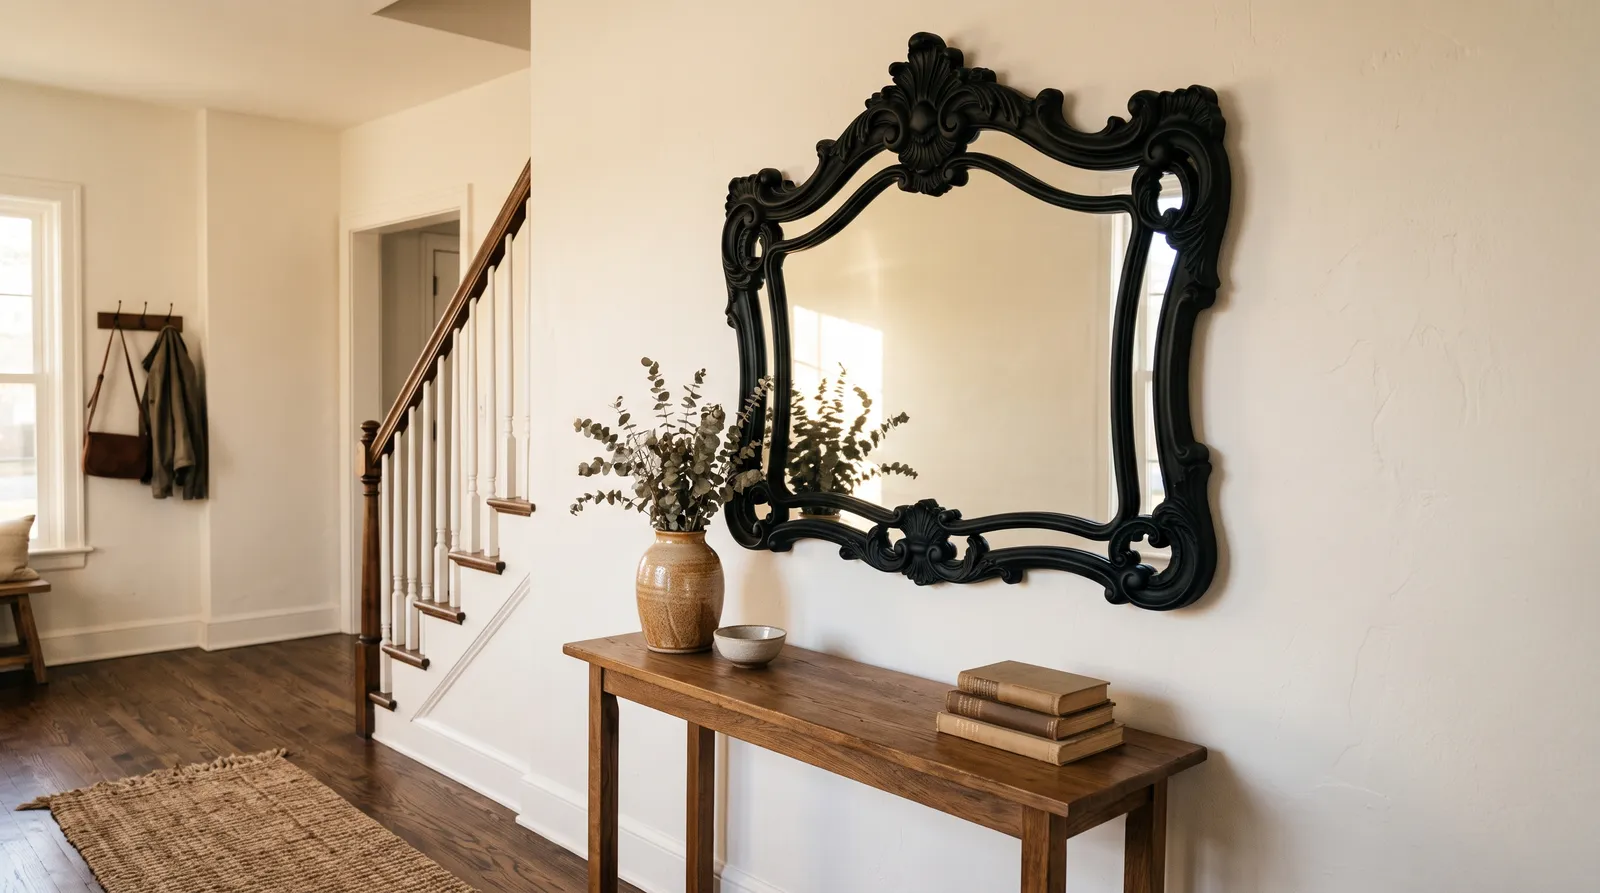 Tape pulled at the one-hour mark, glass wiped clean, mirror back up the next morning.
Clear coat is optional on a bedroom mirror and worth doing in an entryway, bathroom, or kids’ room. Two light coats of Rust-Oleum Painter’s Touch 2X Clear in matte or satin, 10 minutes apart. Matte clear over Chalked spray keeps the flat look and makes it wipeable.
Pull the tape about an hour after the last coat, while the paint is set but not fully hard. Pull it back on itself at a shallow angle, slowly. If you wait until the paint is rock hard, the film bridges the tape edge and tears a jagged line when you peel.
If overspray got past your tape, don’t panic. A razor blade held almost flat against the glass scrapes dried spray paint off a mirror without scratching it. Work from the middle outward and keep the blade angle low.
Where People Go Wrong
- Spraying from four inches away. The label says 8 to 12 inches and it means it. Close-up spraying floods the surface and leaves the low points of the carving pooled and soft for a week.
- No primer on a glossy gold resin frame. That metallic coating is slick and nothing grabs it. Your matte black scratches off with a fingernail in a month. Use Krylon Fusion or prime with B-I-N.
- Recoating in the dead zone. Rust-Oleum 2X wrinkles if you recoat between roughly 1 hour and 48 hours. Sand back and start the color coats over.
- Skipping the wash before the sand. Grease gets sanded into the surface instead of off it, and the paint releases in patches later.
- Leaving the tape on for three days. Adhesive bakes onto the glass and the cured film locks the tape edge in. Pull it at the one-hour mark.
Dry Times and When You Can Hang It
| Time after last coat | What’s safe |
|---|---|
| 20–30 minutes | Dust free; don’t touch it |
| 1 hour | Pull tape, handle the frame by the edges |
| 4 hours | Move it, stand it up against a wall |
| 24 hours | Hang it, reattach hardware |
| 7 days | Wipe it down, lean things against it |
| 30 days | Fully hard, clean it like anything else |
Cold garages stretch every one of these. At 55°F, double them.
Touch-Ups Later
A painted frame on a wall lasts years, because nothing touches it. The chips that do happen are at the corners, usually from moving the mirror.
Keep the can. Spray a little into the cap, let it thicken for a minute, and dab it on the chip with a small artist’s brush. Don’t spray straight at a chip on a hanging mirror unless you want a soft halo of overspray around it.
What It Costs
| Item | Cost |
|---|---|
| Spray primer (1 can) | $7–$14 |
| Color coat (1–2 cans) | $6–$20 |
| Clear top coat (1 can) | $8–$12 |
| Tape, paper, sanding sponges | $12–$18 |
| Total | $25–$55 |
A comparable framed mirror runs $120 to $400 new. If the frame is sound, the math isn’t close.
If It Goes Wrong
Runs and drips: let them cure a full 48 hours, sand flat with 320, respray that section. Fixing a run while it’s still wet always makes it worse.
Gritty, sandpapery finish: you sprayed too far away or on too hot a day and the paint dried mid-air. Sand smooth with 320, then one more coat closer in on a cooler day.
Wrinkled surface: that’s the recoat-window mistake, and it has to come off. Sand back to a sound layer and rebuild the color coats within the right window.
Flaking off weeks later: the surface wasn’t clean, or wasn’t primed for the material. That’s a redo, and the redo starts with the right primer. See paint bubbling and peeling fixes for the diagnosis.
None of these are disasters. Each one is a sanding sponge and another twenty minutes, which is the nice thing about spray paint on something small.
What I’d Actually Buy
Molded gold resin frame going matte black: one can of Krylon Fusion All-In-One in flat black, a 320 sponge, a roll of FrogTape Delicate Surface, and a sheet of kraft paper. No primer, no clear coat. Mask it after lunch, three light coats by dinner, hang it the next morning.
Orange-oak wood frame going white: a can of Zinsser B-I-N spray primer, then two coats of Rust-Oleum Painter’s Touch 2X in flat white, then a matte clear. The B-I-N stops old wood tannin from bleeding a yellow shadow through your white a month later, which is the most common complaint I hear about painted wood frames.
Never used a spray can before? Do a test patch on the back of the frame. Two passes, watch how the paint lands, get a feel for the distance. Nobody sees the back.
Ask a Question