How to Fix Paint Bubbling and Blistering (and Stop It Coming Back)
Bubbles and blisters in a paint film mean heat, trapped solvent, moisture, or contamination — not a bad can of paint. Diagnose which one, fix the cause, then scrape, prime, and recoat so it actually holds.

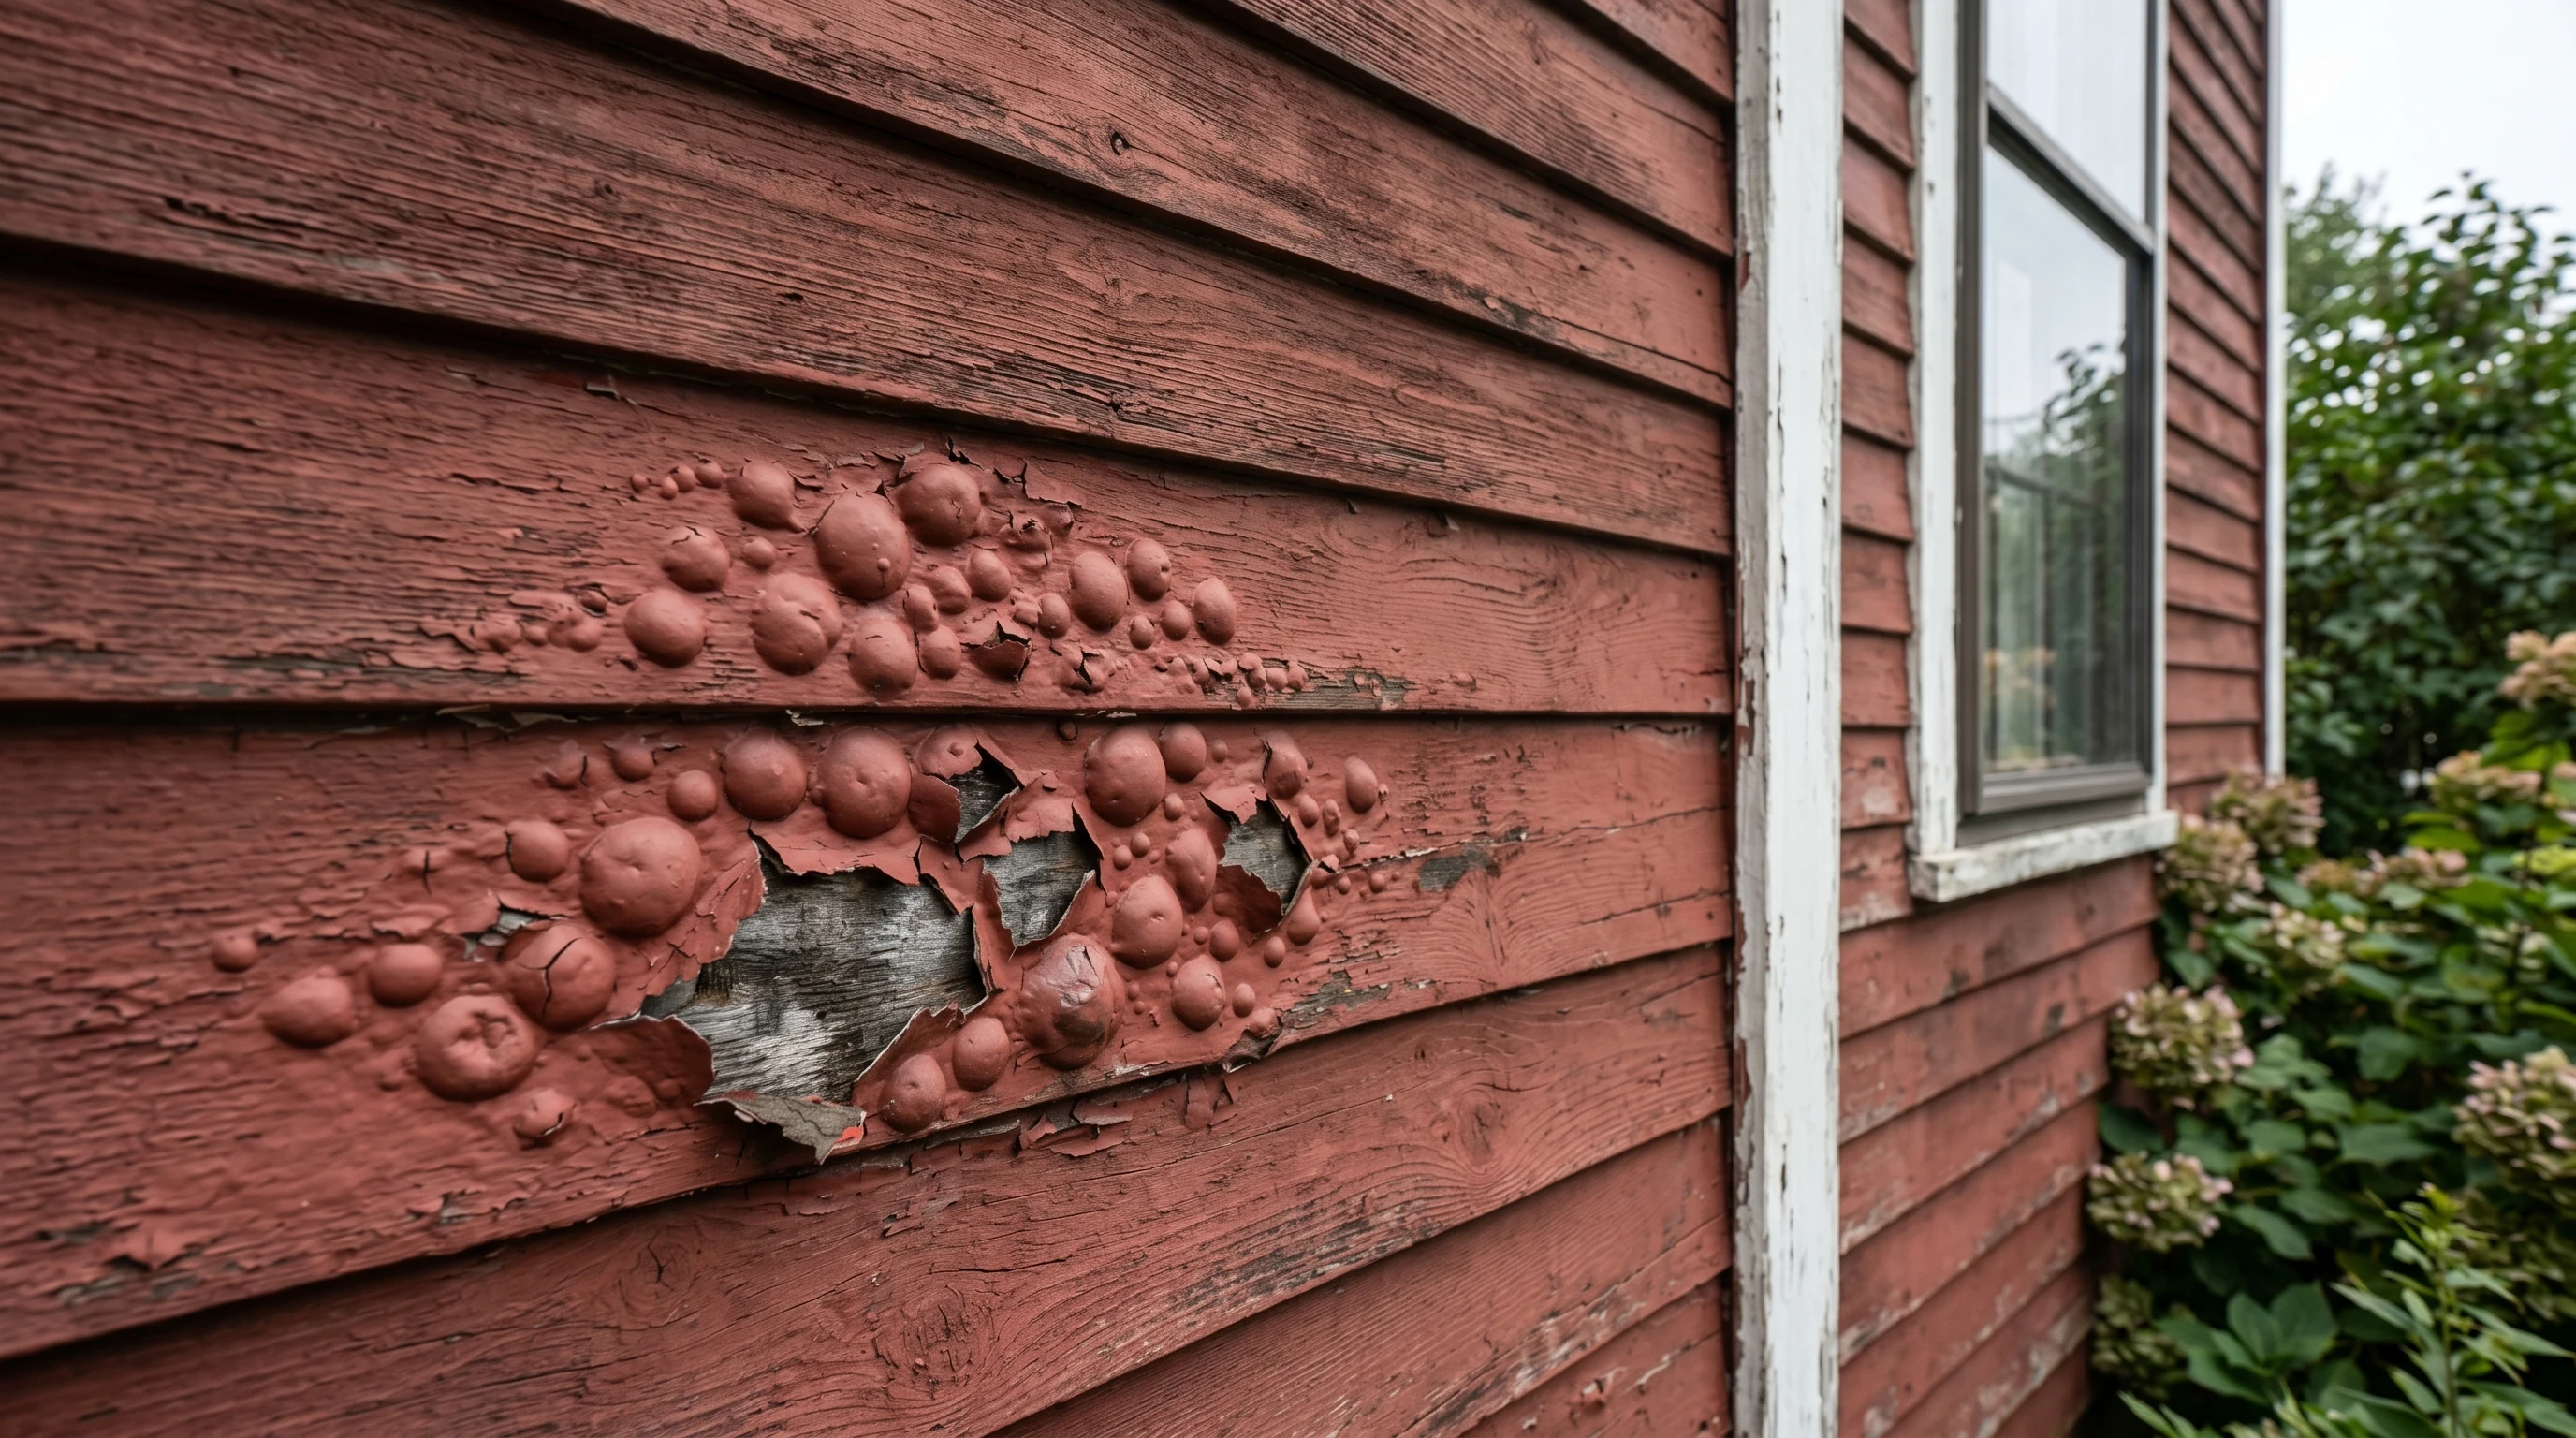
Bubbles aren’t a paint problem. They’re a moisture problem the paint exposed. Or a heat problem. Or a solvent problem. The wall is telling you what it’s been doing, and the film just made it visible. Find which one before you scrape.
Does This Match What You’re Seeing?
Look at the bubbles before you touch them. The pattern is the diagnosis.
- Round hollow blisters within hours or days of painting: heat or trapped solvent. Film flashed before the layer underneath could outgas.
- Round blisters weeks or months later, especially after rain: moisture. Vapor or liquid pushed up from behind.
- Bubbles that pop and reveal damp gray substrate: active moisture. Stop and trace the source.
- Bubbles that pop dry and the substrate looks fine: heat or solvent. Usually clustered on a sun-exposed wall.
- Soap-style blisters on interior, no sun, no moisture: TSP residue or surface contamination. Common after a kitchen wash with no rinse.
- Mixed pattern across a whole side of the house: prep failure plus moisture.
Bubbling is not the same as wholesale peeling, where the film lifts at edges in long strips. See peeling paint for that fix. It’s also not alligator cracking, which is linear and age-related. Bubbling is adhesion failure in spots.
How Serious Is This?
- Heat blisters on a sun-baked wall, dry substrate, no recurrence pattern. Same-weekend fix. Lance, sand, prime, recoat in cooler conditions.
- Moisture blisters appearing seasonally, wet substrate when popped, traceable source. Two-weekend job. Fix the source first, let the wall dry, then strip and recoat.
- Whole-wall blistering across cladding and trim, soft wood under popped bubbles, paint returning inside 12 months of a repaint. Stop. Building-envelope problem, not a paint problem. Get a moisture inspection before another can opens.
Why This Is Happening (root Cause)
Four things cause almost every blister. Ranked by frequency on jobsites I’ve worked.
1. Heat blisters and solar blistering. You painted a south-facing wall at 2pm in July, or used a dark color over a hot substrate. Surface temp on dark siding in full sun runs 130 to 150 degrees. The film skins over fast on top while solvent in the layer below hasn’t released. Pressure builds, the film lifts in domes. Blisters appear within hours to a few days, no moisture under a popped bubble, clustered on the sun side. Most common on dark colors, full-sun walls, and exterior metal doors painted in the afternoon.
2. Moisture-driven blisters. The most common cause overall. Water vapor is migrating outward through the wall: bathroom or kitchen humidity pushing through siding without a vapor barrier, a bath fan dumping into a soffit, rainwater behind cladding from a failed flashing, gutter overflow soaking the rim joist. Blisters break and reveal damp substrate. Pattern follows rain events and concentrates at corners, behind downspouts, under gutters, and on north walls in heating season.
3. Solvent trapping. Second coat went on before the first was cured. Trapped solvent sits in the lower layer, and when sun warms the wall it vaporizes and bubbles the topcoat. Common with oil-based primers and waterborne alkyds where the recoat window says 4 hours but the cure isn’t there yet. Cool weather extends every cure number on the can.
4. Substrate contamination. Oil, soap, mildew, or release agents under the new film. Soap blisters from a poorly-rinsed TSP wash are the textbook case. Silicone caulk overspray is another. Mildew growing under fresh paint pushes domes up as the colony expands. Pattern is uniform across the wall, not following sun or moisture lines.
The causes overlap. A south-facing wall with no flashing and a fresh dark color is a heat blister and a moisture blister at the same time. Diagnose by what you find under a popped bubble.
The Diagnostic Flow
Three questions before you grab a scraper. When did the blisters appear? Hours after painting means heat or solvent. Weeks or months later means moisture or contamination. Where on the building? South-facing dark color means heat. Behind plumbing, under gutters, or on north exteriors in winter means moisture. Everywhere across one wall regardless of orientation means contamination or prep failure. Is the substrate damp under a popped blister? Wet means moisture, full stop. Dry means heat, solvent, or contamination.
If the answers don’t line up, run a tape test on the surrounding film. Paint coming with the tape means widespread adhesion failure, and the repair has to extend wider than the popped spots.
The Fix
The cause changes the fix. Don’t run the same procedure for all four.
If the Cause Is Heat
Lance every blister with a utility knife. Scrape the loose film with a 2-inch carbide scraper at 30 degrees, two-handed, light pressure. Feather the perimeter with 80 grit, then 120, until the edge feels flush under your fingertip. Wash with TSP, rinse twice with clean water (this is the step that prevents soap blisters next round), let dry 24 hours.
Spot-prime bare wood with Zinsser Cover Stain (oil-based, locks tannin, holds in heat). Prime bare metal with a rust-inhibitive primer. Topcoat in early morning, ambient under 80°F, surface temp under 90°F. A ten-dollar surface thermometer pays for itself the first job. For dark colors on full-sun walls, don’t skip the primer thinking the topcoat is self-priming. Self-priming on weathered exterior is a marketing claim, not a substrate prep.
If the Cause Is Moisture
Stop the source first. This is the step homeowners skip and the reason bubbles return in six months.
- Gutter directly above: clean it, check the slope, extend the downspout to 6 to 10 feet from the foundation.
- Caulk on every trim joint within 6 feet: cut out painter’s caulk, replace with a 50-year urethane.
- Bath fan vented into a soffit: reroute through the roof. That one mistake destroys north-facing exteriors from the inside out.
- Soil grade at the foundation: 6 inches of fall over the first 10 feet.
Dry the wall. Indoor RH above 60% is feeding the bloom; run a dehumidifier. Don’t paint until the substrate has been visibly dry for 48 hours.
Now the surface work. Scrape, feather, wash, rinse twice, dry. Spot-prime with a vapor-permissive exterior primer. Benjamin Moore Fresh Start All Purpose Primer is my default for exterior wood and siding when there’s still some vapor drive working through the wall. Sherwin-Williams PrepRite ProBlock is the equivalent in the SW system. Don’t reach for a vapor-impermeable alkyd primer here; it turns small bubbles into giant sheets next time vapor tries to escape.
BM Aura’s topcoat is breathable enough to function as a system on a moisture-tolerant primer. Apply in spec: no painting below 40°F overnight, surface dry, recoat windows respected.
If the Cause Is Solvent Trapping
Lance, scrape, feather, wash, rinse, dry. Check the previous can’s recoat window. Most modern oil-based primers say 4 hours, but cool weather doubles or triples that. Waterborne alkyds (BM Advance, SW Emerald Urethane Trim) are notorious for re-bubbling if you topcoat at 4 hours when the temp is 55°F.
The fix is to wait the full cure. 30 days for an alkyd primer in cool weather, 7 to 14 days in warm. Then recoat respecting label numbers. If only the surface bubbled and the previous coat is locked into the substrate, sometimes you sand to dull, prime over with the same product family, and recoat. More often you scrape the bubble zone fully and start clean.
If the Cause Is Substrate Contamination
Prep wins or loses this one.
Re-scrape every blister. Wash the entire affected wall with TSP. Rinse twice with clean water and a fresh sponge each pass. Soap left on the wall is the most common cause of a second round of blisters. Let dry 24 hours.
If you suspect mildew under the film, treat with Concrobium Mold Control or a 1:10 bleach solution before the TSP. Never mix bleach with vinegar, ammonia, or hydrogen peroxide. Produces toxic chlorine gas. See how to fix mold on walls.
Prime with a bonding primer. Insl-X Stix is my default for glossy, slick, or contaminated surfaces; it grabs almost anything. Zinsser Bulls Eye 1-2-3 Plus is the comparable big-box pick. Two thin coats beat one thick coat. Topcoat per label.
Safety
PPE during scraping and sanding: N95 minimum, P100 if pre-1978 home (lead until tested), eye protection overhead, gloves for chemical work, cross-ventilate during priming. Lance blisters on metal doors with the door open and a fan running; some primers out-gas hard.
Common DIY Mistakes
- Scraping and repainting without addressing the moisture cause. Bubbles return inside 6 months. Always.
- Using a vapor-impermeable alkyd or shellac primer over a wall with active moisture migration. Turns small bubbles into giant sheets next freeze-thaw cycle.
- Painting in afternoon sun on a south wall. Heat blisters before you’ve cleaned up the brushes.
- One rinse after TSP. Soap blisters two months later all over the cleanest section of wall. Two rinses with a fresh sponge.
- Topcoating before the recoat window. The label number is the floor in warm weather, not a guarantee in cool weather.
- Touch-up over a small bubble without feathering. New paint bridges a failing edge. New bubble shows up an inch away in 90 days.
Recommended Product
Benjamin Moore Fresh Start All Purpose Primer is what I reach for when bubbles came from moisture and I need a primer that holds adhesion without trapping vapor. 100% acrylic, breathable, sticks to chalky old paint, takes any topcoat. For severe contamination cases (soap, oil, glossy old film), step to Zinsser Cover Stain instead: oil-based, more aggressive bond, less vapor-permissive. Match the primer to the cause.
Prevention
- Don’t paint exterior in 90°F+ direct sun. Surface thermometer in the back pocket.
- Don’t recoat early. Label window is a floor, not a guarantee.
- Don’t skip the rinse after TSP. Two clean-water passes with a fresh sponge.
- Fix moisture sources before painting. Gutter, downspout, caulk, vapor barrier, vent routing, foundation grade.
- Check vent routing on every bath fan. If it ends in the soffit, reroute through the roof.
When to Call a Pro
- Whole-side exterior blistering returning within 12 months of a proper repaint.
- Blisters with damp substrate plus water staining on interior drywall above or below. Building-envelope problem.
- Soft, dark, or sagging substrate under popped bubbles. Water has been in the wood long enough to rot it.
- Pre-1978 home with widespread blistering. Lead-paint RRP rules apply.
- Bubbling above 12 feet on a two-story exterior, especially around fascia and soffits.
- Mold colony visible under multiple bubbles. See EPA’s 10 sq ft threshold for professional remediation.
What’ll Bite You in Two Years
A bubble is a measurement. The wall is telling you the moisture, heat, or contamination it’s been holding. Repaint without naming which one and the same domes show up next August, with a little more rot underneath each time. I’ve watched homeowners scrape the same south wall three summers running before they admitted the bath fan was venting into the soffit. One afternoon to reroute the duct. The wall hasn’t blistered since.