How to Spray Paint Brass Fixtures
Spray paint brass light fixtures, cabinet pulls, curtain rods, and vent covers so the finish holds: the lacquer problem, the primer that grabs plating, and the color that suits your light.

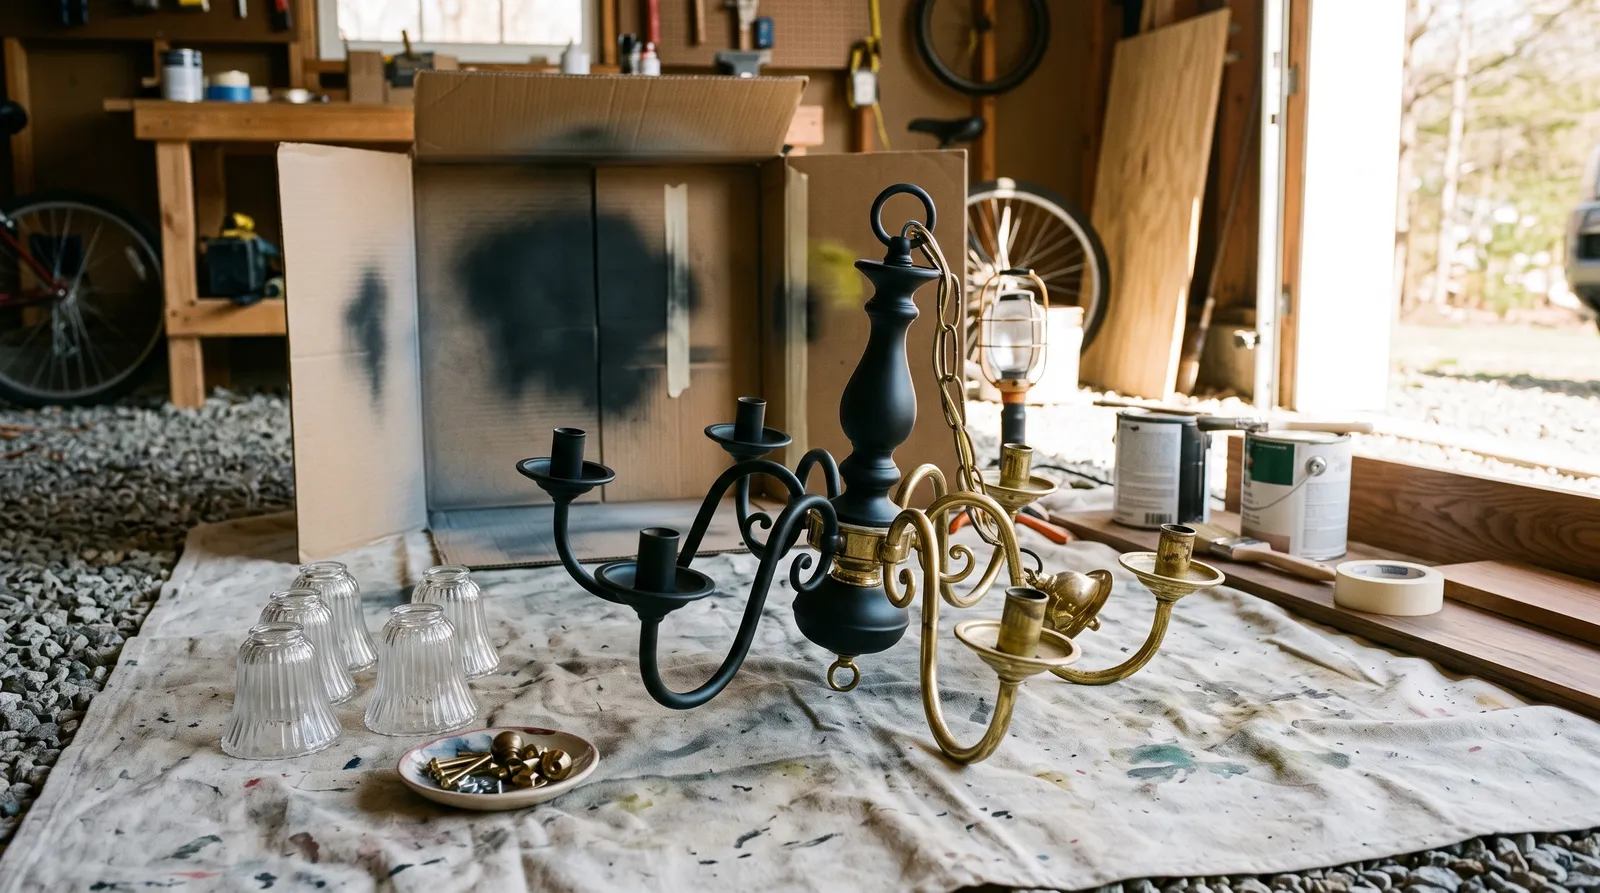
Brass isn’t a color so much as a reflection, which is why it never behaves. A polished flush-mount in a north-facing hallway reads greenish-yellow at ten in the morning and goes hot orange under the same bulb at seven at night. The walls didn’t change. The fixture is just handing you back whatever light the room is holding, and in most houses built between 1985 and 2005 there are eleven of them doing it at once.
Replacing a hallway of fixtures, pulls, and rods runs into real money. Two cans and a Saturday gets you the same shift in how the room reads, and with honest prep the finish holds for years. Done the way most people do it, straight over the shine, it flakes off a curtain rod by the second month.
What You End Up With
Light fixtures, cabinet pulls, curtain rods, towel bars, and vent covers that recede into the room instead of announcing the decade they were installed, in one finish that looks factory-applied rather than sprayed in a garage.
First, Decide Whether Yours Should Be Painted
Two minutes with a magnet saves you from the one version of this project people regret.
Hold the magnet against the fixture. If it grabs, you have brass-plated steel, which is what nearly all builder-grade lighting from that era is. Paint it without hesitation. If the magnet does nothing, scratch a hidden spot with a screwdriver tip. Silver-grey under the yellow means brass-plated zinc, also fair game. Yellow all the way down means solid brass, and solid brass from before about 1950 is worth stripping the lacquer and letting it live. Unlacquered aged brass has a depth no can produces, and it has quietly come back into favor.
Then check the clear coat. Run a fingernail across the surface in a few places. Factory lacquer that is intact and smooth can be scuffed and primed over. Lacquer that is flaking or lifting in patches has to come off entirely with lacquer thinner or a citrus stripper, because your new finish maps every flake underneath and shows it in raking light forever.
Time, and How Much of It Is Waiting
Easy work, slow calendar. The hands-on portion of a whole floor of fixtures is under three hours. Everything after that is dry time and a cure you shouldn’t shortcut.
| Scope | Active time | Total elapsed | Skill |
|---|---|---|---|
| A set of cabinet pulls | 45 min | 2 days | Easy |
| One flush-mount or sconce | 1 hr | 3 days | Easy |
| Five-arm chandelier | 2–2.5 hrs | 4 days | Medium |
| Curtain rods, rings, and finials | 1 hr | 3 days | Easy |
| Whole floor, mixed fixtures | 3–4 hrs | 1 week to full use | Easy |
What Color the Room Is Asking For
The can you buy matters less than where the fixture hangs, and this is the decision you’ll live with on every ceiling in the house.
Matte black is the default for a reason. It reads as a silhouette rather than an object, so a busy chandelier stops competing with the room and becomes a shape against the ceiling. In a south or west room with good afternoon light, flat black looks crisp and intentional. In a north-facing hall where the light stays cool and even all day, flat black goes a little heavy and graphic. Satin black is the better call there, because it catches enough light to keep some form. The sheen guide covers how much difference that one step in gloss makes.
Oil-rubbed bronze reads warm brown-black, never true black. It sits beautifully against oak floors, cream trim, and greige walls, and it lets a fixture recede without going cold. Against a blue-grey wall the brown undertone turns muddy and the whole thing looks dirty rather than dark. Rust-Oleum Universal Metallic makes the most convincing version, with a faint shimmer under the dark that keeps it from reading as flat paint.
Then there is the question of going back to brass, which people ask more often than you’d think. A warmer, softer, unlacquered-looking gold is genuinely in style, and champagne and antique-brass sprays exist. They are the hardest finish to pull off in a can, because real brass gets its character from reflection and a paint film has none. On a flat vent cover or a straight curtain rod they look fine. On a rounded knob or a curved chandelier arm they read costume. If you want that look, the metallic spray paint round-up is where to start, and go in with modest expectations.
A painted fixture never has the depth of solid metal, because light bounces off the film instead of traveling into a polished surface. On a ceiling twelve feet up nobody registers that. On a towel bar at arm’s length, some people do.
The Shopping List
Paint and Primer
Primer is the entire job. Lacquered brass plating is slick by design, sealed at the factory to stay bright, and ordinary paint slides off it the way water sits on a waxed hood. A self-etching primer bites into the metal chemically instead of relying on grip. Rust-Oleum Automotive Self Etching Primer and Dupli-Color both run around $9 and both work. When a fixture mixes metal with plastic canopy pieces or a resin socket cup, use a universal bonding primer instead so one product handles both. The spray primer round-up sorts out which primer grabs which surface, and the primer explainer covers why the etch matters more here than on wood.
For color, Rust-Oleum 2X Ultra Cover in flat or satin black, Rust-Oleum Universal Metallic for the bronze family, or Krylon Fusion All-In-One when a fixture mixes materials. The two brands behave differently on curved parts, and the Rust-Oleum 2X vs Krylon Fusion comparison has the side-by-side. For metal-specific picks see the best spray paint for metal, and for the category across every surface, the spray paint round-up.
Keep a can of Rust-Oleum Specialty High Heat on hand for socket cups if you’re staying with incandescent bulbs. If everything in the house is LED already, skip it.
Clear coat goes on anything hands touch. Rust-Oleum Crystal Clear Enamel for normal use, Spraymax 2K Clear for kitchen pulls, which have a hardener you release inside the can and cure to something a fingernail won’t mark.
Tools
A drill, 320-grit and 400-grit wet/dry paper or a maroon scuff pad, denatured alcohol, a tack cloth, nitrile gloves, painter’s tape, and zip bags for screws. Grit choice matters more on plated metal than on wood, and the sandpaper picks cover which papers hold up when used wet.
A large flattened carton on its side is your booth. Long screws pushed up through a cardboard base give small parts a stand. A length of scrap lumber across two sawhorses, with coat-hanger wire, lets a chandelier hang and turn while you spray it. Put a drop cloth under all of it, because overspray drifts further than you expect and settles as a fine grit on a concrete floor.
Wear an organic-vapor respirator, not a dust mask. Etching primer in a closed garage is unpleasant and the cartridge difference is real, which the respirator picks explain.
The Fixtures to Leave Alone
Faucets, shower valve trim, anything with standing water on it daily. Paint film loses to soap, water, and a scrubbing hand within a season, and it chips at the spout where it shows worst. Replace those and paint everything around them.
Exterior brass handles in full sun are the second group. They get hot, they take wet hands, and they wear fastest. The front door project guide covers the exterior version of this. Interior knobs are worth doing, with their own quirks in the door hardware guide.
Step 1 — Take It Down and Map It
Kill the breaker before a single fixture comes off a ceiling. Test the wires, cap them, and tape the box.
Take everything apart further than feels necessary. Glass shades off, finials off, socket cups unscrewed if they’ll come, canopy separate from the body. A fixture sprayed while assembled has bare shadow lines at every joint, and they appear the moment it goes back up and catches side light.
Bag the screws per fixture and write the room on the bag.
Watch out for bulb sockets. Nothing goes inside them, ever. Mask each one with tape and a twist of paper, and mask the threaded ends of any rod that has to screw back together.
Step 2 — Degrease, Dull, Degrease Again
Order matters more than effort. Wipe everything with denatured alcohol first, before any sanding. Sand a greasy fixture and you drive twenty years of hand oil and cooking film down into the fresh scratches, where no primer reaches it.
If the lacquer is sound, scuff with 320-grit until the whole surface reads uniformly hazy with no reflection anywhere. If it’s flaking, wipe it down with lacquer thinner until the clear coat is gone, then scuff. Chandelier arms and rounded pulls need attention on the undersides and the necks, which are the two places everyone misses and the two places a finish lifts from first.
Kitchen fixtures carry a grease film alcohol alone won’t cut. Wash those with a degreaser first, which the TSP substitute explainer covers, then rinse and dry fully.
Then alcohol again, then a tack cloth. Two wipes, not one.
Watch out for pitting or green corrosion in the crevices of an older fixture. That has to be dealt with before primer or it keeps working underneath. The rusted metal guide walks through converting corrosion on mixed-metal pieces.
Step 3 — Etch Prime, Two Thin Coats
Hang or stand every piece so you can reach all the way around it without touching it. Shake the can a full minute past the point you think it’s mixed.
Hold about 10 inches off, start the pass before the part and release after it, and keep moving the whole time. Two thin coats, five to ten minutes apart. Curved arms want you to circle them in light passes rather than hit one side hard, because the flooded side runs while the shadowed side stays bare. Primer flashes fast on small metal, so by the time you’ve worked down a chandelier the first arm is ready again.
Step 4 — Color in Three Passes
Three light coats beat two heavy ones on every single one of these parts. The first pass should look patchy and wrong. The second gets close. The third evens it out.
Respect the recoat window printed on the can. Rust-Oleum enamel wants a second coat either within one hour or after 48, and coating at hour six is how a smooth surface wrinkles and alligators and has to be sanded back off. This trap catches people constantly, and the spray paint dry time chart lays the numbers out by product.
Spray between 50°F and 90°F with humidity under roughly 65 percent. A muggy August evening in a closed garage gives you a cloudy, soft film that stays tacky for days.
Watch out for pooling where a part meets its stand, and at the bottom of every curve. Lift each piece between coats and check underneath while the paint is still wet enough to feather out.
Step 5 — Clear, Cure, Rehang
Two light coats of clear enamel on pulls, rods, and towel bars. Skip it on ceiling fixtures and vent covers, which nothing rubs.
Then leave everything alone. Touch dry at 30 minutes means very little here. Enamel stays soft under its skin for days, and threading a finial onto a rod that feels dry stamps the thread pattern into the finish permanently.
Give it three days before anything gets reassembled, longer for parts that clamp against each other. Rehang, restore power, glass shades last.
Where It Goes Wrong
- Spraying straight over the lacquer. The factory clear coat is sealed glass as far as paint is concerned. Scuff it dull or strip it. This one failure accounts for most of the peeling-in-sheets photos you see.
- Skipping the first degrease. Hand oil is invisible and it is the reason a pull peels in a ring exactly where fingers land. Alcohol before sanding, alcohol after.
- Recoating inside the dead window. Between roughly one hour and 48 hours, a second enamel coat attacks the first and wrinkles it. Early or late, never in between.
- Standard enamel next to an incandescent bulb. It yellows within a season and blisters at the socket cup. Switch to LED bulbs or use high-heat enamel on the hot parts.
- Painting the ceiling fixture and leaving the vent cover. The eye reads a room whole. One remaining polished brass register in the corner of a hallway pulls attention straight to itself and undoes the rest.
Dry Times and What’s Safe When
| Time after final coat | What’s safe |
|---|---|
| 30 minutes | Touch dry, safe to move on the stand |
| 2 hours | Handle gently by the edges |
| 24 hours | Vent covers and sconces back up |
| 3 days | Reassemble threaded parts, rehang chandeliers |
| 7 days | Normal daily handling on pulls and rods |
| 30 days | Full cure, wipe down with a damp cloth |
Living With It
Ceiling fixtures and sconces hold five years and more, because nothing touches them but dust. Cabinet pulls and curtain rings are the wear points, and they go two to four years before the grip spot thins and the old warm brass starts to glow faintly through the dark.
Fix a chip early. Scuff the spot with 400-grit, dab primer if it’s down to bare metal, and touch the color on with a small artist’s brush loaded from the spray cap. Caught the first week it vanishes. Left alone, the chip edge keeps lifting and the bare patch spreads across the whole grip.
Clean with a damp cloth and nothing else. Solvent cleaners soften enamel.
What It Costs
| Item | Cost |
|---|---|
| Self-etching primer (1 can) | $8–$12 |
| Color enamel (1–2 cans) | $8–$20 |
| Clear enamel (1 can) | $8–$14 |
| High-heat enamel (optional) | $9–$14 |
| Lacquer thinner or stripper | $10–$18 |
| Sandpaper, alcohol, tape | $12–$18 |
| Total | $36–$82 |
One replacement chandelier in a comparable style runs $180 to $600, and a hallway of new pulls, rods, and flush-mounts runs well past a thousand. Two cans covers the lot, and if the color turns out wrong in a year you are out $16 rather than starting over.
If It Were My Hallway
Builder-grade brass flush-mounts and a matching chandelier in a north-facing hall with cool even light: alcohol wipe, 320 scuff, alcohol wipe, Rust-Oleum Automotive Self Etching Primer, three coats of Rust-Oleum 2X Ultra Cover in satin black, LED bulbs going back in. Satin rather than flat, because that hallway light has nothing warm in it and flat black there sits dead against the wall.
Warm oak floors, cream trim, a dining room that gets late western sun: oil-rubbed bronze in Rust-Oleum Universal instead. It stays quietly warm at the hour you actually eat dinner in that room, where black would go hard and cut against the wood.
Ask a Question