The Exterior Paint Prep Kit
The nine exterior paint prep tools I actually buy before a repaint, tested on 1960s cedar and 1990s fiber cement. Top pick: the Bahco 665 carbide scraper.

Disclosure: Some links below are affiliate links. We earn a commission if you buy through them, at no extra cost to you.
Top pick of the whole kit: the Bahco 665 carbide scraper, about $40. It is not the most expensive thing on this list and it is not the one people shop for first, and it is still the item that decides how long your paint lasts. It wins on edge retention, pulling a full elevation of 1962 cedar clapboard on a single carbide edge while a carbon steel scraper of the same width needed a file twice before lunch. It falls short on finesse, because that 2.5-inch blade cuts soft old wood as happily as it cuts paint, and it will not fit a window muntin. Pair it with the Hyde MAXXGrip Pro for the tight work.
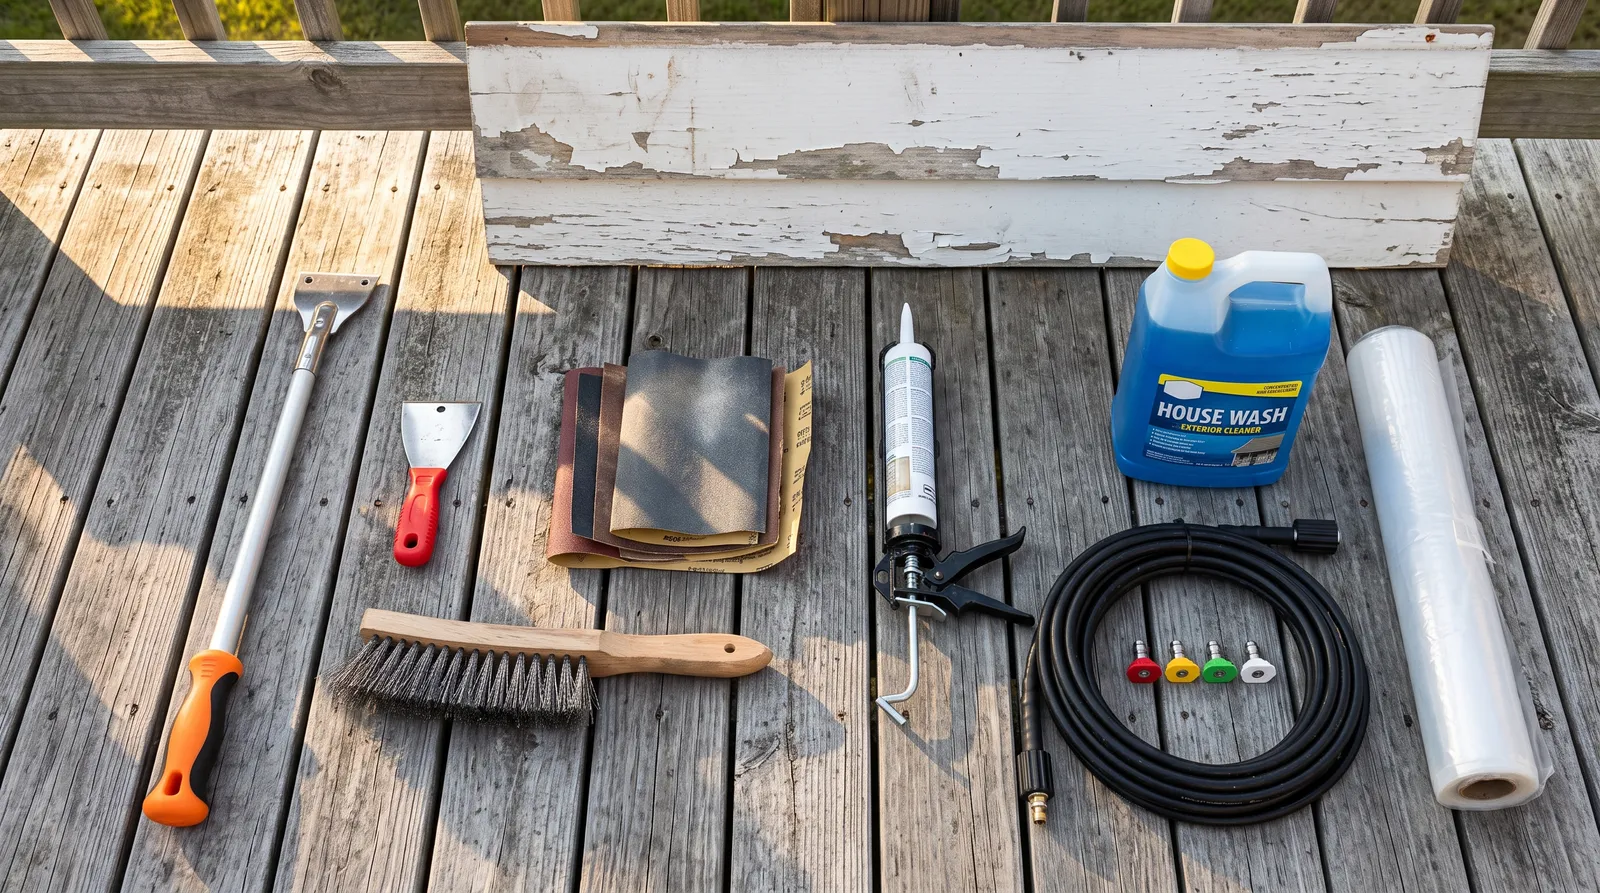
Nine tools. About $300 for the whole kit, and the pressure washer is more than half of that.
What This Kit Is and What It Is Not
This is a shopping list, not a tournament. Exterior prep is a sequence, and each of these tools owns one step in it. Skip a step and the next one has to work harder or the finish pays for it in year two.
The list came out of two real repaints run back to back this spring: a 1962 cedar clapboard two-story with a peeling south gable and mildew on the north wall, and a 1996 fiber cement ranch that had chalked hard on the west elevation. Different houses, different failure modes, mostly the same tools.
What is not here: paint, primer, brushes, rollers, sprayers, and ladders. Those are their own conversations. For the coating side, see the best exterior paint round-up and the primer explainer. For the platform you will be standing on all week, the ladders for painting round-up is the one to read before you rent something wrong.
A respirator belongs on this list and I broke it out separately, because the choice depends on what you are disturbing. Post-1978 house, a basic N95 handles sanding dust. Anything older, you want a P100 cartridge respirator and the full containment routine. The respirators for painting round-up walks that fork properly.
The Kit at a Glance
| Item | Pick | What it is for | Price tier |
|---|---|---|---|
| Carbide pull scraper | Bahco 665 Ergo | Production paint removal on siding and flat trim | $$ |
| Hand scraper | Hyde MAXXGrip Pro 3-Edge | Sash, brick mold, profiles, under lap edges | $ |
| Pressure washer | Sun Joe SPX3000 | Applying and rinsing the wash on two-story work | $$$ |
| House wash concentrate | Zinsser JOMAX | Killing mildew and cutting chalk before paint | $ |
| Wire brush | Forney 70505 scratch brush | Rust on railings, chalk on metal, joint cleanout | $ |
| Sandpaper | 3M Pro Grade Precision multi-pack | Feathering scrape edges so they do not telegraph | $ |
| Exterior sealant | Sashco Big Stretch | Every trim joint that moves seasonally | $ |
| Caulk gun | Newborn 250 | Delivering a consistent bead over 200+ feet | $ |
| Plastic sheeting | Trimaco Leakproof Plastic | Shrubs, decks, walkways, chip containment | $ |
How I Tested These
Same protocol on both houses, and the protocol is mostly about counting things.
Scrapers got scored on linear feet of clapboard per sharpening, gouge count on a marked 40 square foot cedar panel, and honest fatigue at hour six of an eight-hour day. That last one is not a lab metric and it is the one that separates a good scraper from a punishing one.
The wash step got a chalk-transfer test. Black cotton rag wiped across a marked 12-inch square before treatment and again after the rinse dried. Visible chalk on the rag is a fail, and a fail means the paint you put over it is sitting on loose powder. The west elevation of the fiber cement house failed the first pass and passed on the second with a longer dwell.
Mildew kill was judged against a masked control square at 24 hours and again at 30 days, so I could tell a real kill from a bleach-out that grew back.
Sandpaper got counted by sheets consumed per 100 square feet, then checked the way it actually matters: does the scrape edge still read through two finish coats when the sun hits the wall at a low angle in the evening. That is the moment bad feathering shows up, and it is not visible at noon.
Caulk beads were cut open and inspected at 60 days, across a swing from a damp 48-degree week to a 94-degree one.
Both houses got a cross-hatch tape pull at 30 days to confirm the finish system was actually bonded.
1. Bahco 665 Carbide Scraper, Top Pick
The 665 is the tool that made the cedar house possible in a week instead of three.
Failed paint on 60-year-old clapboard does not come off politely. It comes off in sheets where it is loose and in stubborn islands where it is still bonded, and the whole job is a negotiation between those two states. A carbide blade wins that negotiation because it stays sharp long enough for you to keep a rhythm. I pulled the entire south elevation, roughly 480 square feet of heavily failed paint, on one carbide edge. Flipped it for the east wall. The carbon steel comparison scraper needed a file at 90 minutes and again at 3 hours.
The pull geometry matters more than the marketing suggests. A push scraper works off your wrist. A two-hand pull scraper works off your shoulders and body weight, and you feel the difference the next morning. On a ladder, pulling down and toward yourself is also the safer direction of force.
Where it falls short: it will gouge. Soft old cedar under a hard alkyd is exactly the substrate where an aggressive carbide edge digs a furrow, and every furrow is a fill-and-sand repair later. Keep the blade flatter than feels natural and let the edge do the work. It also has no business near a window muntin or a piece of profiled brick mold.
| Spec | Value |
|---|---|
| Blade | Tungsten carbide, roughly 2.5-inch, reversible |
| Handle | Two-hand ergonomic pull |
| Best for | Field siding, flat trim boards, fascia |
| Replacement blade | About $12, covers a full house |
| Approx. price | $35–$45 |
Buy it if: you are prepping more than one elevation of failed paint. Skip it if: the job is a front door and two shutters. For that, the scrapers round-up has cheaper picks that do fine.
2. Hyde MAXXGrip Pro 3-Edge, the Detail Scraper
The Bahco creates a problem and this fixes it.
Every house has 20% of its surface area in places a 2.5-inch blade cannot reach: window sash, glazing rabbets, the underside of a lap where water has gotten in, corner boards, brick mold, the gap behind a downspout bracket. The MAXXGrip is short, controllable, and has three usable edges on one blade, so you rotate the blade rather than climbing down to change hardware.
It is carbon steel, so it dulls. On the alkyd-over-cedar sash of the 1962 house I was touching it up with a file every two or three windows. That is fine. It costs $14 and it is doing finish work, not production work.
Verdict: buy two, keep one in the bucket. Do not try to use it as your main scraper on open siding or you will still be scraping in October.
3. Sun Joe SPX3000, the Wash Step
Here is the mild rant. Pressure is not what cleans a house. Chemistry and dwell time clean a house, and pressure is the delivery mechanism plus the rinse. People buy 3,200 PSI gas machines to wash siding and then use the red 0-degree tip because it is dramatic, and they drive water behind the lap, blast the glazing out of a window, and etch the fiber cement.
The SPX3000 is a 14.5-amp electric that runs off a normal outlet, has two onboard detergent tanks, and ships with the 40-degree white tip that is the only tip that belongs on siding. It cost about $160. It washed a two-story cedar house and a single-story fiber cement ranch without complaint.
What it is not is a machine you use every week. The pump is homeowner-grade, the 20-foot hose and 35-foot cord mean you are constantly repositioning the unit, and a professional running siding all summer would kill it by August. For that person the pressure washer round-up covers the gas options, and the SIMPSON MegaShot is the one I would buy with my own money.
| Spec | Value |
|---|---|
| Motor | 14.5 amp, 120V |
| Tips | Five quick-connect, including 40-degree and soap |
| Detergent | Two onboard tanks |
| Best for | One or two houses a year, decks, walkways |
| Approx. price | $150–$180 |
Buy it if: you have a two-story house and no realistic way to hand-wash a soffit. Skip it if: your house is one story and you own a pump sprayer and a pole brush. Save the $160 for paint.
4. Zinsser JOMAX, the Chemistry
A gallon of concentrate makes 20 gallons of working solution once you add bleach and water, which is roughly $14 to wash an entire two-story house. Nothing else in this kit has that ratio of cost to consequence.
What JOMAX does that plain bleach does not is stay put. The surfactant package keeps the solution on a vertical wall through the label dwell instead of sheeting straight down to the foundation, which is why bleach-only washes come out striped: the bottom of every lap course gets four times the contact the top gets. It also cuts chalk, and chalk is the quiet killer here. A 1996 fiber cement wall that looks clean will hand you a gray smear on a black rag, and paint over that smear is paint over loose powder.
The west elevation failed my chalk-transfer test on the first pass. Second pass with a longer dwell and a harder rinse came back clean.
Two real cons. You mix the bleach yourself and the ratio is not a suggestion. And the rinse is mandatory, because hypochlorite salt left on siding is a bond breaker. There is no residual protection either, so if mildew keeps coming back on the north wall, the problem is drainage or shade, not the cleaner. The exterior mildew and moisture side of that is worth reading before you blame the paint.
Buy it if: you are painting the outside of a house. This is not optional equipment.
5. Forney 70505 Scratch Brush, the Wire Brush
Ten dollars, wood shoe handle, four rows by 16 of carbon steel wire.
The shoe handle is the reason this one is in the kit instead of a $4 toothbrush-style brush. You push with a flat palm, which keeps even pressure across the face, and on a 30-foot iron porch railing even pressure is what gets you a uniform profile for the primer. The little brushes make you work off your fingertips and you end up polishing some spots and skipping others.
It did three jobs on these houses. Rust at the base plates of the porch railing on the fiber cement house. Chalky oxidized aluminum around a window wrap. And cleaning out old failed caulk joints after cutting the bead, which is a step almost everyone skips and which decides whether the new sealant bonds to siding or to 15-year-old crumbs.
Hand power has limits. Heavy scale wants an angle grinder with a knotted cup brush, and one more warning worth stating plainly: carbon steel wire embeds particles that flash-rust on aluminum and galvanized metal. Keep a separate stainless brush for those substrates. On badly rusted steel, brushing alone is not the answer either. See what a rust converter actually does before you prime.
6. 3M Pro Grade Precision Sandpaper
Feathering is the step people cut, and it is the step that shows.
When you scrape a failed area down to wood, you leave a ridge where the remaining sound paint stops. Prime and paint over that ridge and it disappears at noon and reappears at 7pm when the sun rakes across the wall. Every scraped patch reads like a map. The fix is 80 grit to knock the ridge down and 120 to 220 to blend the transition out over an inch or two.
The Pro Grade Precision multi-pack covers that whole range in one buy, and the open-coat grain matters more on exteriors than anywhere else because old chalky paint dust clogs a cheap sheet in about two minutes. I went through roughly a third fewer sheets per 100 square feet than the bargain pack I ran alongside it.
It costs about double a generic pack. And hand sanding a two-story elevation is genuinely miserable work. My cutoff is about 600 square feet of failed paint; past that, rent an orbital and buy discs. The sandpaper round-up has the disc picks, and the orbital sander round-up covers the machines.
Buy it if: you are scraping anything. Which you are.
7. Sashco Big Stretch, the Caulk
Rated to 500% elongation, which is the only spec that means anything on an exterior joint.
A siding-to-trim joint is not static. It opens in January and closes in August, and a builder-grade acrylic tube rated to 25% movement splits down the middle the first winter. Big Stretch moves with it. I cut open beads on both houses at 60 days after a swing from a damp 48-degree week to a 94-degree one. No splits, no pull-away from either face.
Water cleanup and paintable, so it slots into a normal prep day. Thirteen stock colors including Woodtone and Redwood, which matters when the trim is stained rather than painted and the bead is going to be visible forever.
It slumps in a wide gap. Anything over about 3/8 inch needs backer rod first, and skipping the rod is why beads sag before they skin. It also cures slowly in cold damp weather, so a 50-degree October afternoon can push your recoat window well past what the label suggests. And it runs about three times a builder-grade tube, which stings right up until you count the joints you are not cutting out again in three years.
The 1962 house took nine cartridges across 240 linear feet of trim joints. About four hours of work. Cheapest four hours in the project. For the full comparison against silicone hybrids and interior trim sealants, see the caulk round-up.
8. Newborn 250 Caulk Gun
Buy the gun before you buy the caulk. A $4 ratchet-rod gun turns good sealant into a bad joint.
The 250 has a smooth hex rod and a steel cradle frame that does not flex under load. Those two things together give you a bead that is the same width at the end of a 12-foot trim run as it was at the start, because you are not fighting the stutter of a ratchet catching and releasing. Over 240 feet of joints that difference is the whole finish quality of the caulk work.
The built-in cutter and seal punch save you the utility knife and the bent nail on every cartridge, which sounds trivial and is not when you are doing it nine times on a ladder.
No automatic pressure release on this model, so twist the rod when you stop or the cartridge oozes onto whatever is below it. And it is heavier than the cheap gun. After 200 feet overhead your forearm files a complaint.
Buy it if: you have more than about 50 feet of joints. Under that, any gun works.
9. Trimaco Leakproof Plastic Sheeting
The unglamorous one.
Exterior prep produces debris that interior prep does not: scraper chips, wash runoff carrying bleach and dead mildew, sanding dust, primer overspray on a windy afternoon. Plastic under the work zone catches all of it and rolls up at the end of the day with the debris inside. On a pre-1978 house that is not tidiness, it is the containment plan, and it is the difference between a cleanup and crawling through mulch hunting paint chips.
Tape or weight every edge. A loose sheet in wind is a sail, and it will wrap your ladder. Wet plastic on a finished deck is a real slip hazard, so use canvas anywhere you are walking with a wet roller. And uncover the shrubs at the end of each session, because plantings tented under plastic in July sun will cook.
For the canvas side of the decision, the drop cloth round-up covers what goes on a deck you will be standing on.
The Order You Use Them In
Wash, dry, scrape, sand, brush the joints, caulk, spot prime. In that order, and the order is not flexible.
Wash first because washing after scraping soaks bare wood and adds two days to the schedule. Give it 24 to 48 hours of real drying, longer on anything porous or north-facing. A pinless moisture meter under 15% is the honest check. Without one, the rule is two dry sunny days with air movement.
Scrape second, sand third, and do both before you go anywhere near a caulk gun. Caulk before scraping means you scrape off your own bead.
Wire brush the cut-out joints before you caulk. Fresh sealant bonded to 15-year-old crumbs is fresh sealant that fails in a year.
Prime the bare spots the same day you finish sanding them. Bare cedar left open for a week weathers, and weathered wood is a different substrate than fresh-scraped wood. The exterior wood guide covers the primer choice for bare siding, and it is not the same answer for cedar as for fiber cement.
One exception to the sequence. If there is active rust on a railing or a steel lintel, hit it with the wire brush and get metal primer on it early. Bare steel left overnight in humid air flashes right back and you brush it twice.
What I Left Out and Why
- Heat guns. They work, and on window sash with thick alkyd buildup they work better than a scraper. They also carry a fire risk in a soffit cavity and are flatly wrong on a pre-1978 house because heat volatilizes lead. If you want one for sash work specifically, the heat gun round-up covers the temperature limits.
- Chemical strippers. Right answer for a front door or a porch column, wrong answer for 2,200 square feet of siding. The math on material cost and neutralizing rinse stops making sense past about 100 square feet. See the paint stripper round-up for the door-scale version.
- Two-part epoxy wood consolidant. Genuinely the right product for a rotted sill or a soft window bottom rail, and genuinely not something most repaints need. If you are poking a screwdriver into punky wood, that is a repair project before it is a paint project.
- A dedicated exterior filler. I used a two-part filler on four spots across both houses and a standard exterior spackle would have failed on all four. Small enough need that it did not earn a kit slot. The wood filler round-up has the picks.
- A $6 five-in-one tool. Useful, and you probably already own one. It is not a scraper, whatever the packaging says.
Buying the Kit in Stages
Nobody has to buy all nine at once.
Minimum viable prep, about $90. JOMAX, a pump sprayer you probably own, the Bahco 665, the 3M sandpaper pack, Big Stretch, and the Newborn gun. Wash by hand with a pole brush. This is the whole kit minus the pressure washer and the plastic, and it covers a one-story house.
Add the plastic, about $105. Non-negotiable on anything pre-1978 or with plantings against the foundation.
Add the pressure washer, about $265. The moment there is a second story, this stops being optional. Rent one for $50 a day if this is a once-a-decade job. Buy if you have a deck, a driveway, and a house that all need washing on the same weekend.
Full kit, about $300. All nine, sized for a two-story house with a mix of siding and painted trim.
For context: a professional exterior prep on the 1962 cedar house was quoted at $4,200 for prep alone, before paint. The kit is 7% of that number.
Cleanup and What Survives Storage
Carbide blades outlast the tool if you keep them dry. Wipe the Bahco blade and give it a shot of light oil before it goes in the box, because a carbide edge in a damp garage picks up rust on the steel body and seizes the blade screw.
Flush the pressure washer per the manual and pull it out of an unheated garage before the first freeze. A cracked pump housing is the standard way these machines die, and it happens in December, not in July.
Rinse the wire brush after any bleach contact. Hypochlorite eats carbon steel wire fast, and a brush left wet after a wash job is a rusted brush by the next weekend.
Caulk cartridges do not keep well once opened. A nail in the nozzle buys you a few weeks, not a season. Buy what the job needs plus one.
If you buy one thing off this page and nothing else, buy the JOMAX. A $14 jug of concentrate is what stands between your new paint and the chalk layer underneath it.
Ask a Question