The Drywall Repair and Paint Kit
The nine-item drywall repair and paint kit I actually keep on the shelf. Top pick: the 3M High Strength Large Hole Repair Kit, plus the primer everybody skips and the patch shows because of it.

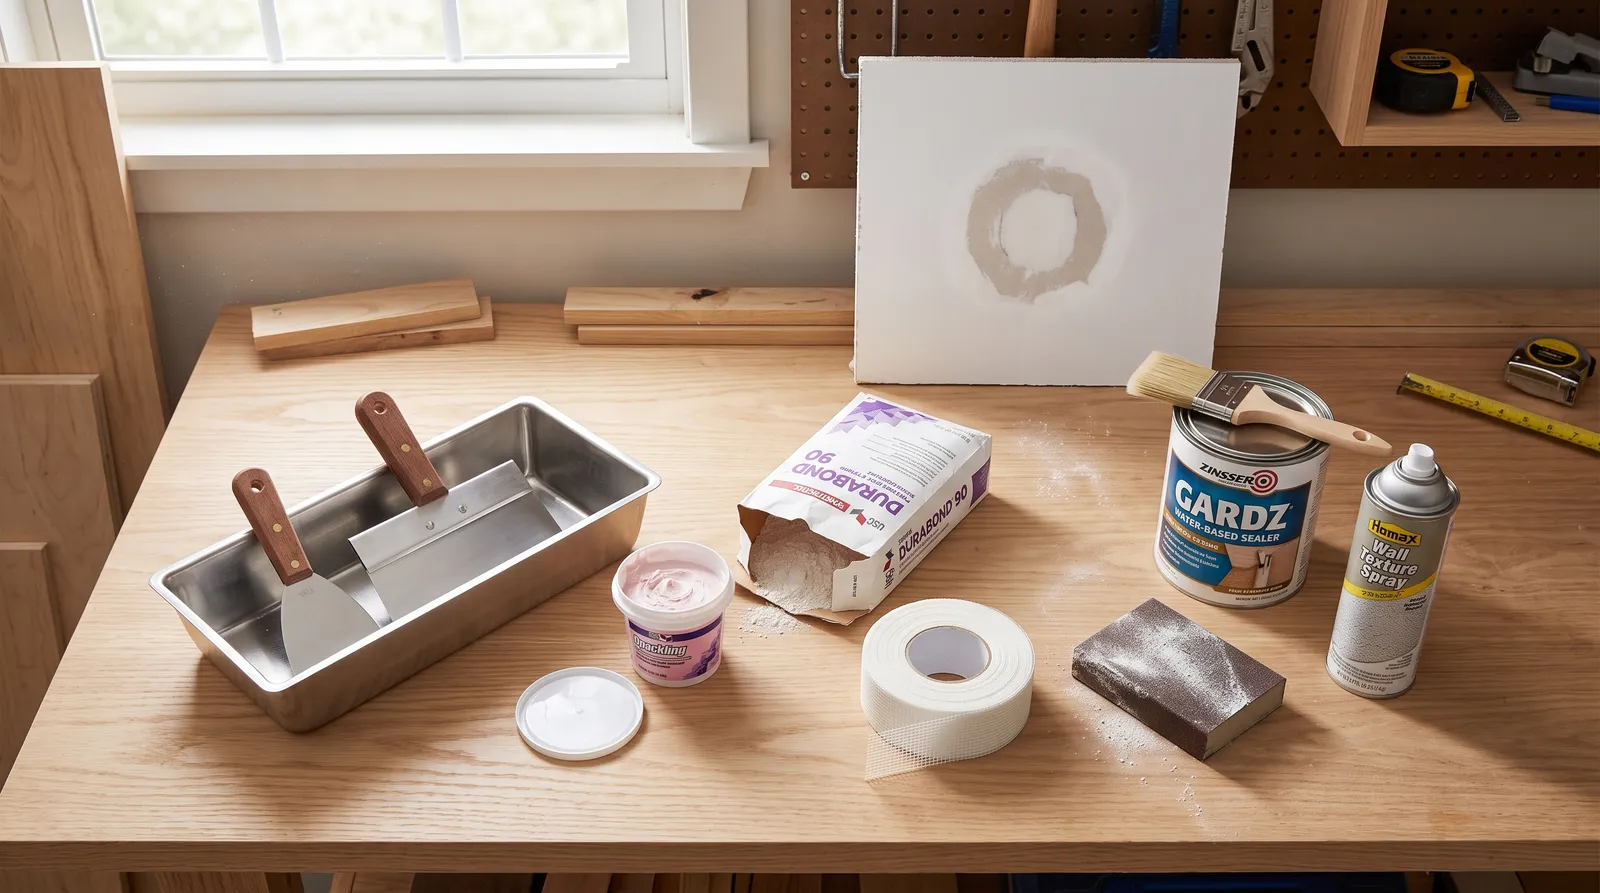
Disclosure: Some links below are affiliate links. We earn a commission if you buy through them, at no extra cost to you.
Top pick: the 3M High Strength Large Hole Repair Kit, about $18, the one box that handles the repair most people are actually standing in front of. A doorknob hole in a hallway. Rigid aluminum-backed patch, high-strength compound, no wood backer, no cutting a square out of a sheet of drywall you had to buy. It wins on speed and on strength. It falls short on the sanding pad in the box, which is too coarse for the last pass, and on the patch height, which sits proud enough that you are feathering compound a foot wide to bury it. The rest of the kit is nine items and about $150 total, and one of them costs $14 and decides whether anybody ever sees your work: Zinsser Gardz.
Skip the primer step and the patch will show. Not right away. In eggshell, under afternoon light coming down a hallway, about a week later.
What Goes in the Box, and Why
This is a shopping list, not a tournament. Every item here does a job the others can’t, which is why nine of them and not three.
| Item | What it is for | Price tier |
|---|---|---|
| 3M High Strength Large Hole Repair Kit | Holes 2 to 5 inches; doorknobs, shelf brackets | $$ |
| DAP DryDex Spackling | Nail holes, anchor holes, dings under 1/4 inch deep | $ |
| USG Sheetrock Easy Sand 20 | Deep fills, screw pops, same-day three-coat patches | $ |
| FibaTape Perfect Finish Wall Repair Patch | Hairline cracks, reopened seams, small holes | $ |
| Hyde Pro Stainless Taping Knives (6 and 10 inch) | Filling and feathering | $$ |
| Hyde 12-inch Stainless Mud Pan | Holding and wiping compound | $$ |
| Hyde Dust-Free Sponge Sander Kit | Sanding the patch flat without dusting the room | $$ |
| Zinsser Gardz Problem Surface Sealer | Sealing the repair so paint doesn’t flash | $$ |
| Homax Pro Grade Wall Texture, Knockdown | Matching orange peel or knockdown texture | $ |
Nine items. Two of them are consumable. The knives, the pan, and the sander outlive the house.
How I Ran the Testing
Eleven repairs, five weeks, two houses. A 1998 tract home with light orange-peel walls and a 1962 ranch with flat walls and a plaster-skimmed hallway. The repair list was whatever the houses gave me: 38 picture-nail holes, six anchor holes, four screw pops, two hairline cracks running off a door header, a 2-inch shelf-bracket hole, a 4.5-inch doorknob blowout, and one 9-inch water-damaged ceiling section that got cut out entirely (the case where this kit stops being the answer).
Shrinkage was measured with a straightedge laid across the repair at 24 hours, plus a fingertip check in raking light from a work lamp held at roughly 15 degrees off the wall. That raking-light check is the whole test. A patch that looks flat under a ceiling fixture will show a dish you can feel when the light comes across it sideways, and that dish is exactly what the topcoat highlights.
Knives got scored three ways: blade flex, feather quality at the 10-inch pass, and whether they came out of a wet mud pan rusty the next morning. Sanding got scored on dust escape. I wiped an equal patch of floor under each repair with a black cloth and compared. Every finished repair got primed and topcoated with the same eggshell latex, then photographed at 24 hours under raking light and under flat daylight to check for flashing and edge halo.
The doorknob hole is the repair that separates the products. Everything patches a nail hole.
1. 3M High Strength Large Hole Repair Kit, Top Pick
The reason this is the top pick has nothing to do with the compound in the box.
It’s the patch. A rigid aluminum plate under a fiberglass mesh face, stiff enough to span a 4.5-inch hole with no backing behind it. Older repairs of this size meant cutting a clean square, screwing a scrap of 1x3 inside the cavity as a backer, cutting a drywall plug to fit, then taping four seams. That’s an hour and a trip to the store. The 3M patch is a peel-and-stick that took me nine minutes to set and skim.
I ran the doorknob hole with this kit. Patch stuck flat on the first try after I wiped the wall with a damp rag. Two skim coats with the included high-strength compound, one at 6 inches wide and one at about 11, roughly three hours apart. Sanded with a 150-grit sponge, not the pad in the box. At 24 hours under raking light: no dish, no perimeter ridge, no telegraphing mesh pattern.
Where it falls short is the height. The aluminum plate sits about a sixteenth of an inch off the wall face, and a sixteenth of an inch is a lot when you’re trying to hide it. You cannot feather that in a 6-inch pass. It needs a 10-inch or a 12-inch knife and a wide, patient second coat, and if you rush it you will see a soft square shadow in the finished wall forever. The sanding pad in the box is too coarse for the final pass and will cut fuzz into the paper around the repair.
| Spec | Value |
|---|---|
| Max hole size | About 5 inches |
| Includes | Rigid patch, high-strength compound, spreader, sanding pad |
| Recoat | 2 to 4 hours depending on depth |
| Approx. price | $15 to $20 |
Buy it if: there is a doorknob, shelf bracket, or vacuum-handle hole in the house and you don’t want to open a sheet of drywall. Skip it if: the hole is over 5 inches or the board around it is soft from water. Cut it out.
2. DAP DryDex, the Nail-Hole Workhorse
Pink going on, white when it’s dry. That indicator is a gimmick that turns out to be useful, because the failure mode with spackle is sanding it early.
38 nail holes in one afternoon, one loaded pass each with a 6-inch knife, done. DryDex barely shrinks at nail-hole depth, so almost none of them needed a second hit. It sands with a 220-grit sponge and light pressure without scuffing the paper around the hole, which matters more than people think. Scuffed face paper raises fuzz, fuzz shows through eggshell, and now you have a bigger problem than the nail hole.
Anything deeper than a quarter inch dishes. I filled the 2-inch shelf-bracket hole with DryDex as a control and it sank visibly at 24 hours. That’s not a defect, that’s the wrong product for the depth. The cured film also stays soft enough to dent, so keep it off outside corners and door edges where a ladder or a hip is going to hit it.
Verdict: the tub that lives on the shelf and gets used ten times a year. About $6. Its whole job is holes you could cover with a dime.
3. USG Sheetrock Easy Sand 20, for Everything Deeper
Setting-type compound is the piece most homeowners have never bought and it changes the schedule of the entire job.
Premixed lightweight compound dries by losing water. Deep fills lose a lot of water, so they shrink, so you coat again the next day, and a real patch becomes a three-day project. Easy Sand hardens chemically in about twenty minutes whether it’s a skim or a half-inch fill. I did the four screw pops and both header cracks in a single afternoon, three coats each, and primed the same evening.
The trade-off is discipline. You mix what you can spread in fifteen minutes and you dump the rest. If any of it kicks in the pan, that pan has to be scraped and rinsed before the next batch or you’re dragging hard lumps through wet compound. It also sands harder than premixed, which is fair punishment for a lazy knife pass. Get it close with the knife and you’ll barely sand at all.
The 20-minute version is the one to buy. Easy Sand 5 sets before a beginner has it out of the pan; Easy Sand 45 and 90 give up the same-day advantage.
Buy it if: you have anything deeper than a quarter inch, or you want the job finished today.
4. FibaTape Perfect Finish Wall Repair Patch, for Cracks and Seams
Different failure, different tool. Cracks aren’t holes. A hairline crack running diagonally off a door header is a seam that moved, and filling it with spackle means it comes back next winter.
The Perfect Finish patch is a fine self-adhesive mesh, and the word doing the work is fine. Standard mesh tape is thick enough that you’re building compound four coats deep to bury the edge. This stuff feathered out in two. I ran both header cracks with it: score the crack open lightly with a utility knife, wipe the dust, stick the mesh, bed it with Easy Sand at 6 inches, feather at 10. Both are still invisible.
The adhesive is the weak point. It will not grab a dusty or glossy wall, and if it lifts a corner under the knife you’ll drag mesh through your bed coat and have to start over. Wipe with a damp rag and let it dry first. Anything over about 3 inches across is outside this product’s range, and that’s where the rigid 3M patch takes over.
5. Hyde Pro Stainless Taping Knives, the 6 and the 10
Two knives. Buy the 6-inch and the 10-inch and ignore the rest of the rack.
The 6-inch is the fill knife. It loads compound, presses it into the hole, and cuts it off flush. The 10-inch is the feather knife, and the 10-inch is the one people don’t own, which is the single biggest reason home drywall patches are visible from across the room. A patch is hidden by the width of its transition, not by how smooth the middle is. You cannot make a 12-inch transition with a 6-inch blade.
Stainless matters for a boring reason. Carbon-steel knives rust if you leave them in a wet pan overnight, and every homeowner leaves them in a wet pan overnight. I did it on purpose as part of the test. The Hyde Pro Stainless came out clean. A carbon-steel control knife came out with orange freckling along the blade edge, which then transfers into white compound on the next job.
Blade flex on the 10-inch is well judged. It bows enough under pressure to leave a slight crown you sand off, instead of a hard ridge at each edge of the pass. The hammer end in the handle sets a proud nail head below the surface without going back to the toolbox. The 4-inch in the range is fine for scooping and useless for filling. Skip it.
Buy it if: you will patch drywall more than once in your life. About $16 to $22 each, and they last decades. For the wider prep-tool conversation, the scrapers and putty knives round-up covers what else belongs on that shelf.
6. Hyde 12-Inch Stainless Mud Pan
Nobody’s favorite purchase. Buy it anyway.
Working out of the compound tub means dragging a knife across the tub rim, which leaves compound curing on the lip, which flakes into the next batch. A pan gives you two clean metal wiping edges that strip a blade in one pull, and it holds enough for a full wall of nail holes without a reload. The folded stainless body rinses clean in about thirty seconds under a faucet, and nothing cures in a corner because there are no seams for it to hide in.
The knock is price. About $28 when a plastic pan is $9 and does most of the job. The plastic ones scratch, and scratched plastic holds dried compound that you will find in a finish coat six months later. Sharp corners on the stainless will scratch a finished floor, so set it on a drop cloth rather than the hardwood.
7. Hyde Dust-Free Sponge Sander Kit
Drywall dust is the reason people put off patching a bedroom.
Sanding a 12-inch feathered patch with a bare sponge puts a fine white film on the floor, the baseboard, the bed, and the inside of the return air vent. The Hyde kit hooks to a standard shop vac and pulls most of it at the source. My black-cloth floor test on the doorknob repair: the vacuum-attached sponge left a faint grey smudge, the bare sponge on an identical patch left a cloth I could have written my name in.
The sponge body is the other half of it. A rigid sanding block cuts a flat spot into the middle of a feathered crown, and a flat spot in a crown is a dish, and a dish shows. A sponge follows the curve.
The vac has to run the whole time. It’s loud, you’re dragging a hose, and on a ladder that hose has opinions. For one hole in a garage this is over-buying; get a plain angled sanding sponge in 150 and 220 grit for $4 and open a window. For a bedroom, a hallway, or anywhere with carpet, the kit pays for itself the first time. If you’re sanding whole walls rather than patches, the drywall sander round-up has the pole and power options.
8. Zinsser Gardz, the Item Nobody Buys
Here’s the one I’ll argue about.
Every failed drywall patch I’ve inspected in ten years of doing this failed the same way, and it wasn’t the filler. The compound was flat. The sanding was fine. The patch showed anyway, as a dull halo the exact shape of the feathering, visible in eggshell under raking light and invisible under a ceiling fixture. That’s flashing, and it happens because dried joint compound and torn drywall face paper drink topcoat at a completely different rate than the painted wall around them.
Gardz is a water-thin sealer that soaks in and locks that surface down. It’s not a hiding primer and it isn’t trying to be. On the doorknob patch I sealed half the feathered area and left half bare, then rolled two coats of eggshell over the whole thing. At 24 hours under raking light the sealed half was uniform and the bare half had a visible sheen shift along the boundary. Same paint, same roller, same day.
It dries clear, which is the annoying part. You genuinely cannot see where you’ve been, so work with a lamp raking across the wall and watch for the wet edge. Over a dark existing color you still need a pigmented primer on top of it. For the general primer decision, the primer explainer covers when sealing beats hiding, and the interior primer round-up has the pigmented options.
$14 a quart. It is the cheapest insurance in this kit.
9. Homax Pro Grade Wall Texture, Knockdown
Optional, unless your walls have texture, in which case it isn’t optional at all. A dead-flat patch in an orange-peel wall reads as a bruise regardless of how well you sanded it.
The Pro Grade can has an adjustable head that actually changes the splatter size, which the cheap cans mostly don’t. That adjustment is the reason to buy this one. Spray a scrap of drywall, look at it next to the wall, adjust, spray again. Two or three tries on cardboard and you’ll be close.
Match the texture type first. Orange peel is fine even splatter with rounded peaks left alone. Knockdown is the same splatter flattened with a wide blade about ten to fifteen minutes later, so it reads as small flat islands with valleys between them. Get that wrong and no amount of spray adjustment saves you.
One can does a patch and a practice board, and you need the practice board. It sprays poorly under about 60 F, so don’t do this in an unheated garage in February. Prime after 24 hours, not before.
What I Left Out
- A drywall saw and a scrap of 1x3. They belong in the kit for holes over 5 inches. I left them off because at that point you’re doing carpentry, not patching, and the holes in drywall guide covers that job properly.
- Paper tape. Better than mesh for a professional bedding a long seam. Worse for a homeowner, because it bubbles if the bed coat is thin and there’s no forgiveness in it.
- A pole sander. Overkill for patches. Right tool for a whole ceiling.
- All-in-one “wall repair kits” under $10. The patch inside is usually a thin mesh square and the spreader is a plastic card. Fine for a 1-inch hole, not what you want on a doorknob.
- Fast-drying premixed “20-minute” tub compounds. They dry fast at the surface and stay soft underneath, which is worse than either honest option.
The Order That Makes It Work
Fill, tape if it’s a crack or over an inch, coat wide, sand, seal, texture if needed, prime, paint. The two steps people reorder are the sanding and the sealing, and reordering them costs you the whole job.
Sand before you seal, never after. Gardz cures hard and glossy in the pores; sanding it opens the surface back up and you’ve undone the seal. And give the compound its full dry time before sanding. Press a fingernail into the center of the fill. If it dents, it’s still damp in the middle, it will shrink a hair more as it finishes, and your flat patch becomes a shallow dish two days after the paint goes on.
For the topcoat itself, roll the repair with the same nap you rolled the wall with. A patch rolled with a smooth mini-roller against a wall rolled with a half-inch nap leaves two different stipple patterns side by side, and that shows about as loudly as flashing does. The roller cover round-up has the nap matching. On a newly boarded wall rather than a repair, the new drywall painting guide is the one to follow instead.
Mistakes That Make a Patch Show
- Filling a 3-inch hole with lightweight spackle. It dishes. Use setting compound over mesh or a rigid patch.
- Feathering with a 6-inch knife. The transition is too abrupt and light catches the edge. Buy the 10-inch.
- Sanding compound that’s still cool in the center. It gums, then it shrinks after the paint is on.
- Skipping the sealer. The single most common cause of a visible patch on an otherwise good repair.
- Texturing without a practice board. Splatter size is the whole match and you will not guess it right.
- Sanding hard enough to fuzz the face paper. Raised paper fibers telegraph through eggshell. Light pressure with 220 grit at the end.
- Painting the patch only. Roll the full wall, corner to corner. A touched-up rectangle in a five-year-old wall never matches, no matter how good the repair underneath is.
Care and Storage
Rinse the knives and the pan before the compound sets, every time. Stainless forgives a lot, but cured compound on a blade edge chips off into your next bed coat. Store the knives blade-up in a bucket or flat in a drawer, never blade-down in a toolbox where the edge gets dinged; a nicked blade leaves a line down every pass.
Spackle and premixed compound go bad. A tub of DryDex opened two years ago and left with a dry crust is a tub that will drag grit through your finish coat. Press plastic wrap onto the surface before you snap the lid on and it’ll keep a year or more. Setting compound is a powder and lasts as long as it stays dry, so roll the bag closed and get it off a concrete floor.
Gardz skins over in a partly used can faster than most primers. Decant what you need into a small jar and keep the quart sealed.
If you’re buying one thing off this page today, buy the Gardz. You probably already own something to fill the hole with.
Ask a Question