How to Spray Paint a Lamp: Base and Shade Makeover
Spray paint a lamp base and shade without runs, blotches, or a wrecked socket: what to tape off, which primer your base needs, and the recoat window that ruins finishes.

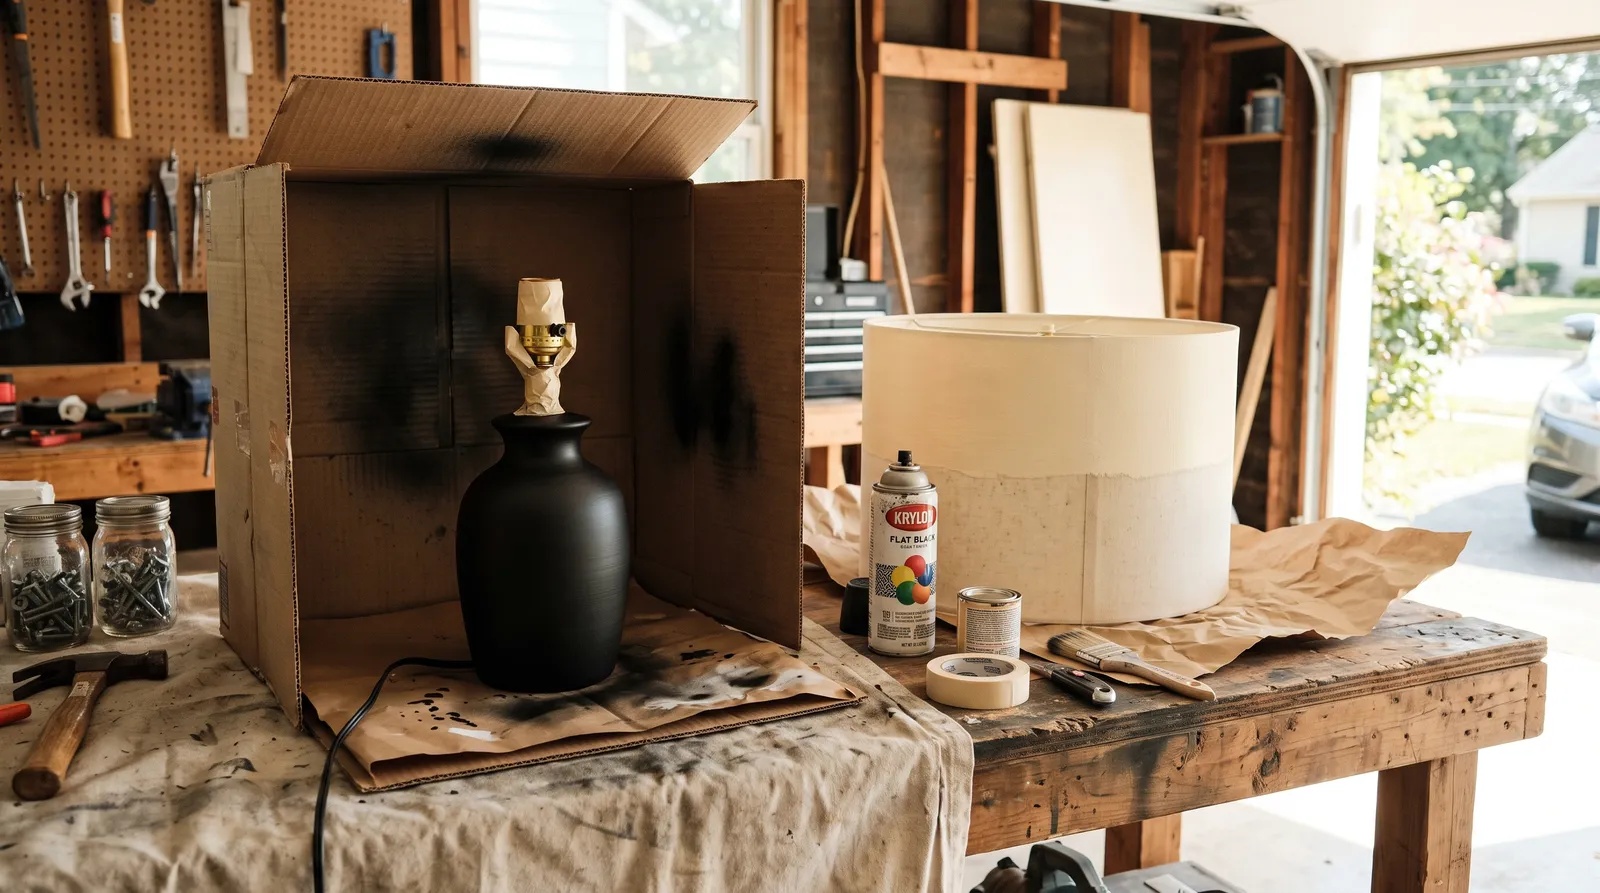
Okay, so there’s a lamp. Maybe it’s the brass one that’s been brass since 1987, or a $6 thrift store base in a beige nobody has ever loved. You want it black. Or white, or that muddy olive you keep screenshotting.
And there’s the thing in the back of your head stopping you, which is that a lamp has a cord and a socket and electricity in it, and spraying paint over something electrical feels like a decision you might regret.
It isn’t. A lamp is one of the friendliest spray paint projects there is. Keep paint off three small parts, give the finish more dry time than you think it needs, and the whole thing costs less than a takeout order. The shade is the part that trips people up, and we’ll deal with that honestly instead of pretending every shade takes paint.
What You’ll Get
A lamp that looks like it came from a store you can’t afford, for about $25, with maybe two hours of actual hands-on time spread across a weekend.
Honest Take on Difficulty and Time
This is easy. Genuinely easy, not “easy if you already know how” easy. The hard part is patience, because most of the schedule is you standing around waiting for coats to flash off.
Realistic timing: 20 minutes to take it apart and tape it, 20 minutes to clean and scuff, then coats. Each coat is about 90 seconds of spraying and 15 minutes of waiting. Three color coats plus primer puts you at roughly an hour and a half of elapsed time, and then it sits overnight before you touch it.
| Base material | Extra prep needed | Active time | Skill |
|---|---|---|---|
| Glazed ceramic | Bonding primer | 1.5 hrs | Easy |
| Brass or metal | Self-etching primer | 1.5 hrs | Easy |
| Glass | Bonding primer, extra-light coats | 2 hrs | Easy-medium |
| Plastic or resin | None with Krylon Fusion | 1 hr | Easy |
| Wood | Light sanding, standard primer | 1.5 hrs | Easy |
What You’ll Need
Paint and Primer
The primer is the decision that matters, and it’s decided by what the base is made of, not what color you want.
Glazed ceramic and glass are slick, non-porous, and paint has nothing to bite into. They need a bonding primer, which is a primer formulated to grip surfaces that normal primer slides off. Rust-Oleum Bonding Primer or Zinsser Bulls Eye 1-2-3 in a spray can both do it. Bare or polished metal wants a self-etching primer instead, which contains a mild acid that microscopically roughens the metal so the coating locks on. Rust-Oleum Self Etching Primer is the one you’ll find everywhere. If you’re fuzzy on why any of this exists, the primer explainer covers it in plain language, and the spray primer round-up has the picks for each surface.
Plastic and resin bases are the exception. Krylon Fusion All-In-One bonds to plastic with no separate primer at all, and it’s the one product I’d genuinely call a shortcut worth taking.
For color, Rust-Oleum Painter’s Touch 2X Ultra Cover covers well and comes in flat, satin, and gloss. Krylon ColorMaster is the same tier. If you want brass or brushed nickel back on the lamp, Rust-Oleum Metallic and Krylon Premium Metallic both read as real metal instead of glitter paint. The best spray paint round-up sorts the cans by what they’re actually good at, and if your base is bare metal, spray paint for metal narrows it further. For the head-to-head, see Rust-Oleum 2X vs Krylon Fusion.
Sheen matters more on a lamp than on most things, because a lamp sits at eye level with a light source inside it. Gloss shows every ripple in the ceramic. Flat and satin hide them. For a thrifted base with dings, go flat. The sheen guide walks through the rest.
Tools
A big cardboard box, open on one side, laid down as a spray booth. That box is the difference between a clean job and overspray on your car. A lazy Susan or a cheap plastic plant saucer to stand the base on so you can spin it without touching it. A 220-grit sanding sponge, a tack cloth, painter’s tape, degreaser, and a drop cloth.
Wear a respirator. The fumes off three coats in a garage are worse than people assume, and the respirator picks are cheap. Nitrile gloves too. Tape and abrasive picks live in the painter’s tape round-up and the sandpaper round-up.
First, Decide What the Shade Is Doing
Three valid paths, and picking one now saves you a wasted afternoon.
Paint it. Works on a smooth, tight fabric or paper shade in a light color, going to a darker color. Use a fabric spray like Design Master ColorTool, not hardware-store enamel.
Recover it. Smooth fabric, spray adhesive, one seam. More work, better result, and it’s the only path if you want a lighter color or a pattern.
Replace it. A new drum shade runs $20 to $50 and takes zero effort. If your shade is pleated, textured linen, or already stained around the top rim, this is the answer. Don’t spend Saturday fighting a shade that was never going to cooperate.
Step 1: Take It Apart
Unplug it. Then lift the shade off, unscrew the finial (the little decorative nut on top), and squeeze the harp arms inward to pop the harp out of its base bracket. Set all of it aside in one place, because the finial is small and it will roll under the workbench.
Now wrap every part that stays unpainted: the socket, the switch, the felt pad on the bottom, and the first foot of cord. Painter’s tape around the socket, then a little cone of tape or foil over the top of it. Paint on socket threads means the bulb won’t seat properly, and paint inside a rotary switch makes it stick.
Watch out for the cord where it exits the bottom of the base. Tape it flat against the base so it can’t flop into your spray path halfway through a coat.
Step 2: Clean It Like You Mean It
Lamps are dust magnets and they sit near where people cook and where candles burn. There’s a film on it whether you can see it or not.
Wash the base with a degreaser or a TSP substitute, rinse it, and let it dry completely. Bathroom and kitchen lamps especially need this. If you’re not sure what to use, the TSP substitute explainer sorts it out. Grease under primer is the number one reason a spray finish comes off in a sheet later.
Step 3: Scuff and Prime
Scuff the whole base with a 220-grit sanding sponge until the shine is gone. You’re not removing anything, just taking the gloss off so primer has tooth. On glazed ceramic this feels like it isn’t doing anything. It is. You’ll know it when you see it, because the surface goes from shiny to slightly hazy. Wipe with a tack cloth after.
Stand the base in the box, on the lazy Susan, and shake the primer can for a full minute. Hold it 10 to 12 inches away and spray in steady side-to-side passes, spinning the base a quarter turn between passes. One thin coat. The old color should still ghost through it. That’s correct. Primer isn’t there to hide anything.
Let it dry per the can, usually 20 to 30 minutes. Then a very light scuff with 220 to knock down any grit, another tack cloth wipe, and you’re ready for color.
Watch out for priming in a cold garage. Below 50°F spray paint goes on gritty and stays soft for days. Above 90°F it dries in the air and lands as dust. Mid-morning on a mild day is the window.
Step 4: Color, in Light Coats
Three light coats beat one heavy one, every single time. A heavy coat runs down the curve of a lamp base within about four seconds and you’ll be sanding it back tomorrow.
Same technique as the primer. Twelve inches off, keep the can moving before you press the nozzle and after you release it, overlap each pass by about a third, spin the base a quarter turn. The first coat will look thin and patchy. Don’t fix it. Let it flash off for 10 to 15 minutes and put a second coat over it. By the third coat it’s even.
Here’s the thing about recoat windows, and it’s the one detail that ruins more spray jobs than anything else. Rust-Oleum enamels want to be recoated either within one hour or after 48 hours. Spray a fresh coat at the four-hour mark and the solvent in the new paint attacks the half-cured film underneath, and you get wrinkling that looks like elephant skin. There is no fixing it except sanding back to primer. Read the side of your can and set a timer. The spray paint dry time breakdown has the windows for the common brands.
Step 5: The Shade
If you’re painting it, set the shade on kraft paper and spray it the way you’d spray anything else, but lighter. Fabric drinks paint, so two whisper-thin coats beat one wet one. Spray the outside only. Paint on the inside changes the color of the light in a way you will not like.
Expect the shade to read a little dimmer afterward, because the paint film blocks light. On a bedroom lamp that’s fine. On a reading lamp, replace the shade instead.
Step 6: Clear Coat, If It Gets Handled
Optional, and most lamps don’t need it. A bedside lamp you switch on and off by touching the base does. One light coat of Rust-Oleum Matte Clear or Satin Clear over fully dry color adds real scratch resistance. Match the clear’s sheen to the color coat or you’ll shift the whole look.
Do not clear coat the shade.
Step 7: Cure, Then Reassemble
Touch dry in 30 minutes doesn’t mean ready. Spray enamel stays soft under the skin for a day or more, and the fastest way to ruin a good finish is to screw the harp back on that evening and leave a permanent dent where the bracket sits.
Give it 24 hours minimum. Then harp, finial, shade, bulb, plug it in. Use an LED bulb, which runs cool and won’t warm the base from the inside while the film is still hardening.
Common Mistakes
- Spraying too close. Anything under 10 inches floods the surface and runs down the curve. Back up. If you already have a run, let it dry hard, sand it flat with 220, and recoat.
- Missing the recoat window. The 1-hour / 48-hour rule on Rust-Oleum enamels is real. Recoating between those points wrinkles the finish permanently.
- No primer on glazed ceramic or glass. It looks fine for a week, then peels off in a sheet when something bumps it. Bonding primer is not optional on slick surfaces.
- Painting the socket. Paint in the threads means the bulb sits crooked or won’t tighten, and that’s an actual electrical problem, not a cosmetic one. Tape it before you shake the can.
- Regular spray paint on a fabric shade. It dries stiff and blotches along the seams. Fabric-specific spray or nothing.
- Working in a cold garage in November. Under 50°F the finish comes out gritty and never fully hardens. Wait for a mild day or spray inside a warm space with real ventilation.
Dry and Cure Schedule
| Time after final coat | What’s safe |
|---|---|
| 30 minutes | Touch dry, pull tape |
| 1 hour | Move the base gently by the bottom |
| 24 hours | Reassemble, wire up, switch on |
| 3–5 days | Handle normally, wipe with a damp cloth |
| 7 days | Fully hard, scratch-resistant |
Pull your painter’s tape at the 30-minute mark, not after it fully cures. Tape pulled off hard paint takes flakes of the finish with it.
Maintenance and Touch-Ups
A primed and sprayed lamp base holds up for years indoors. Dust it with a dry microfiber cloth, and wait a full week before anything damp touches it.
For a chip, scuff the spot lightly with 220, spray a little paint into the can’s cap, and dab it on with a small artist’s brush. Spot-spraying straight from the can leaves a halo of overspray that looks worse than the chip did.
Cost
| Item | Cost |
|---|---|
| Spray primer (1 can) | $6–$10 |
| Color spray paint (1–2 cans) | $6–$18 |
| Fabric spray for the shade | $8–$12 |
| Sandpaper, tape, tack cloth | $8–$12 |
| Total | $18–$45 |
A new lamp in the same look runs $80 to $200. The math is not close.
If It Goes Wrong
Runs sand out. Wrinkled paint from a blown recoat window has to come back to primer, which is annoying but not a disaster on a surface this small. Blotchy shade? That one you replace, and a $25 drum shade over a base you painted yourself still reads as a made-over lamp.
The thing nobody tells you: do a test patch on the bottom of the base first. Two minutes, and it tells you whether your primer grabs and whether the color reads the way it did on the cap.
What I’d Actually Buy
Thrifted glazed ceramic base going to flat black: one can of Rust-Oleum Bonding Primer, one can of Rust-Oleum 2X Ultra Cover in Flat Black, and a new $25 linen drum shade. That’s the combination that looks the most expensive for the least money, and the flat sheen forgives every flaw in a base that’s been knocking around since the Reagan administration.
Brass lamp you want to keep as metal: Rust-Oleum Self Etching Primer, then Rust-Oleum Metallic in Oil Rubbed Bronze. Two thin coats, and don’t chase full coverage on the first one.
Ask a Question