The Complete Room Painting Kit for Beginners
Everything you need to paint one room, for about $98. Eleven items tested on a real bedroom repaint, with the two you shouldn't cheap out on and the boxed kits to skip.

Disclosure: Some links below are affiliate links. We earn a commission if you buy through them, at no extra cost to you.
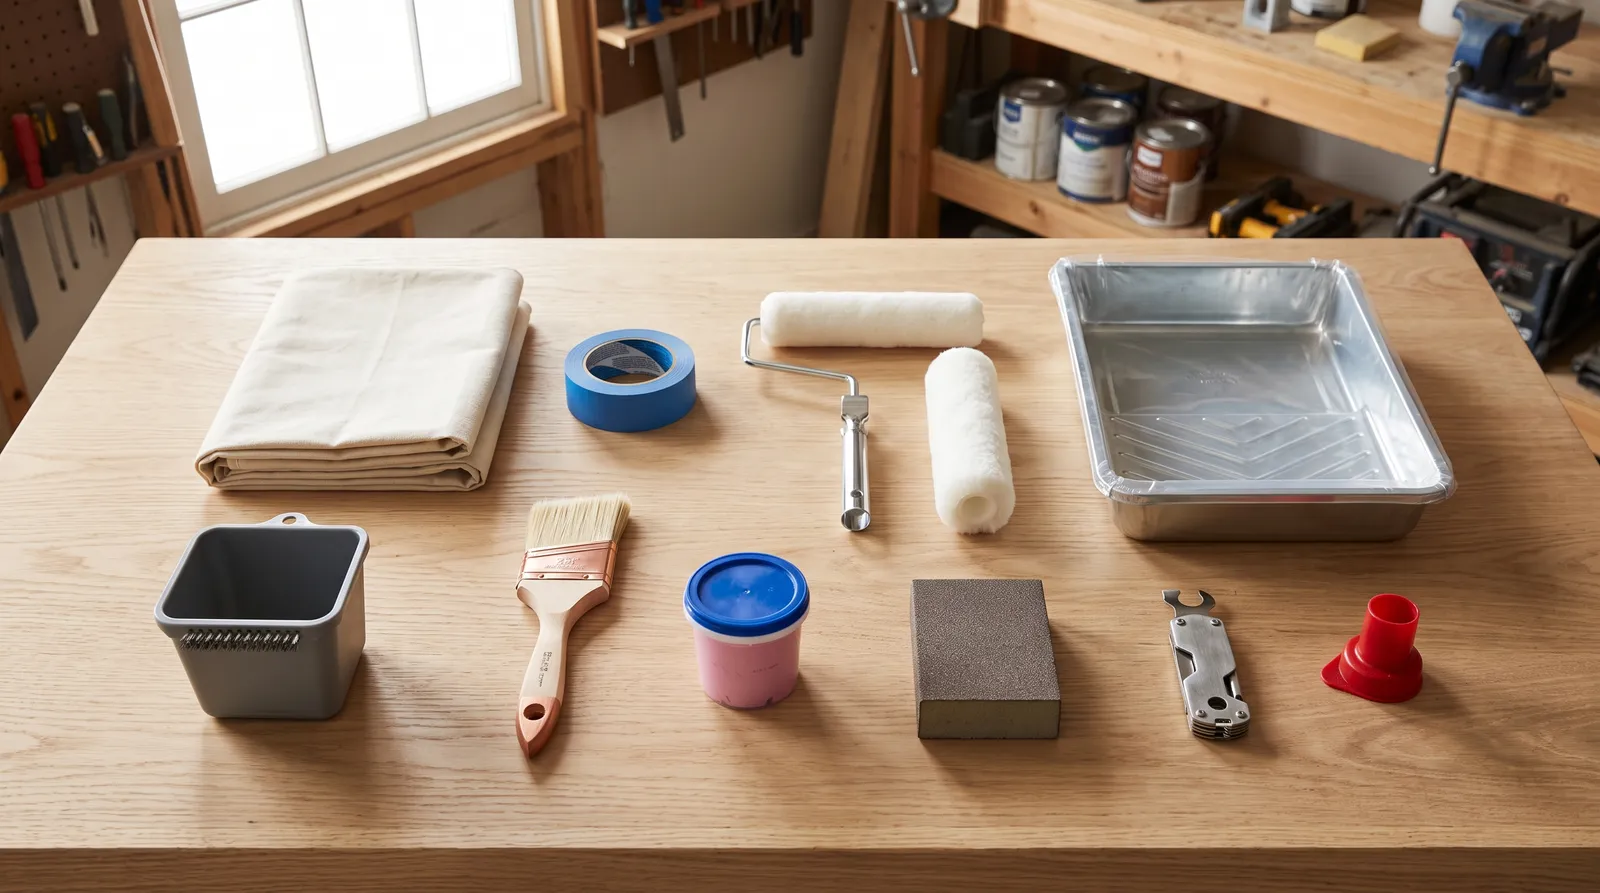
Top pick: the Purdy Clearcut Glide 2.5-inch angular sash brush, about $17. It is the most expensive single item on this list and the one that moves your results the most, because for a first-timer the cut line is the difference between a room that looks painted and a room that looks repainted. The full kit runs about $98 at a home center: brush, roller frame, roller cover, tray, cut-in pail, tape, canvas drop cloth, spackling, sanding sponge, a 5-in-1 tool, and a pour spout. That is everything you need to paint one bedroom except the paint.
Buy the list. Skip the boxed kit in the bin by the register.
Those boxes fail on exactly the two items that show up on the wall. The brush is a stiff polyester paddle that leaves tramlines in eggshell, and the roller cover is a bargain polyester that sheds fiber into your second coat. Everything else in the box is fine, which is why the box feels like a deal until you are sanding lint off a wall you just finished.
What $98 Actually Buys
| # | Item | Price tier | What it is for |
|---|---|---|---|
| 1 | DAP DryDex Spackling, 8 oz | $ | Filling nail holes and dents before anything else |
| 2 | 3M Pro Grade Precision Sanding Sponge | $ | Flattening patches, scuffing old trim |
| 3 | Purdy Contractor 5-in-1 | $ | Opening cans, spreading spackling, scraping, drying the roller |
| 4 | ScotchBlue Original 2090, 1.41 in | $ | Masking trim, casing, and window frames |
| 5 | Trimaco 9 x 12 cotton canvas drop cloth | $$ | Catching roller spin-off, protecting the floor |
| 6 | Hyde 1-gallon pour spout | $ | Getting paint out of the can without flooding the rim |
| 7 | Wooster Hefty deep-well tray | $ | Loading the roller, holding close to a quart |
| 8 | Bercom HANDy Paint Pail | $ | Cutting in a full wall without climbing down |
| 9 | Purdy Clearcut Glide 2.5-inch angular | $$ | Every straight line in the room |
| 10 | Wooster Sherlock 9-inch frame | $ | Holding the cover round under pressure |
| 11 | Wooster Pro/Doo-Z 1/2-inch nap cover | $ | Rolling the field of every wall and the ceiling |
Prices move around, but the whole cart landed at $98 the week I bought it. Nine of the eleven items survive into your second room. The spackling and the sanding sponge are the consumables.
How I Built and Broke This Kit
Eleven items bought off the shelf at retail, then run through a 12 x 14 ft guest bedroom: four walls and the ceiling, 340 sq ft of wall area, 21 nail and anchor holes, and a run of builder-grade semi-gloss trim that needed scuffing before it would hold paint. Benjamin Moore Regal Select eggshell on the walls, flat white on the ceiling, two coats each, five gallons total.
I ran a control alongside it. A $28 boxed all-in-one painter’s kit from the same store, used on the closet interior with the same paint on the same drywall, so the shedding and the tramlines had somewhere to show up side by side.
They showed up. The closet needed a sanding pass and a third coat.
Scoring ran on five axes. Beginner-forgiveness, meaning does the tool cover a shaky hand or expose one. Cut-line straightness, checked against a chalk line at three points per wall. Lint and stipple counted on the second coat under a raking work light. Cleanup time logged per item on a phone timer. And survival, which meant taking the same kit into a second room two weeks later and seeing what still worked.
The Prep Half of the Kit
Prep is where beginners lose the job. Not on the wall.
1. DAP DryDex Spackling, 8 Oz
The pink-to-white color change is the feature. A first-timer’s instinct is to sand a patch too early, which drags a soft plug half out of the hole and leaves a crater you then have to fill twice. DryDex goes on pink and turns white when the surface is dry enough to sand, so the guessing stops.
Twenty-one holes in the test room, all of them nail and small anchor size. One pass each, no second fill, no visible shrink ring after two coats of eggshell. The 8 oz tub used maybe a fifth of its volume.
The color cue reads surface dryness, not a full cure. A deep gouge can go white on top while the core is still soft, so give anything wider than a nickel a full hour before you touch it with the sponge. And this is not the product for a hole you could put a fist through. That is a backer-and-joint-compound repair, and the drywall hole repair guide covers it properly.
Buy it if: your walls have picture holes and door-knob dings, which is every rental and most bedrooms.
2. 3M Pro Grade Precision Sanding Sponge
Two grits on one flexible block. Medium knocks the patch flush with the wall, fine scuffs old semi-gloss trim so the new coat has something to bite. For $5 it does the two prep jobs a beginner is most likely to skip.
The flexible body is what earns it over a rigid block. It follows a rounded casing profile and a corner bead without cutting through the drywall paper, which a hard block does in about two seconds of enthusiasm.
It loads up fast if you sand spackling before it is fully white. Rinse it, let it dry, keep going. One sponge covered the bedroom and the closet with life left. If you are flattening a whole skim-coated wall, this is the wrong tool and you want a pole sander from the sandpaper round-up instead.
3. Purdy Contractor 5-in-1 Painter’s Tool
Best value on the list. Nine dollars replaces a can opener, a putty knife, a scraper, a roller-cleaning crescent, and a nail set, and the stainless blade rinses clean instead of hardening into a paint brick the way cheap carbon steel does.
The tip flex is the part that matters for a beginner. Stiff enough to scrape a flaking spot down to sound paint, flexible enough at the edge to bed spackling flat in one pull so you barely have to sand it. I patched all 21 holes with this and nothing else.
The blade is 1.5 inches wide. That makes it a patching tool, not a taping knife, so it will not help you feather a wide repair. And the roller-cleaning notch flings paint if you drag it fast; run it with the cover over the tray.
Masking and Floor Cover
4. ScotchBlue Original Multi-Surface 2090, 1.41 In
The 1.41-inch width is the beginner spec. A 0.94-inch roll is what pros buy because they can hold a line; the wider roll gives you a shield deep enough that a wobbly roller pass never reaches the trim. That extra half inch is worth more to a first-timer than any other upgrade in the masking aisle.
Stuck to baseboard, casing, and window frame on day one, released clean at day six with no lifted paint and no adhesive haze. It unrolls without splitting down the middle, which the store-brand blue tapes do constantly and which will make you hate taping.
It still bleeds under the edge on a textured wall unless you seal the line. Press the tape down with the flat of the 5-in-1, then run a thin pass of the wall color along the edge and let it dry; that seals the gap with the color that is already there. For the full bleed comparison against the green stuff, see FrogTape vs ScotchBlue.
Skip this if: your trim was painted in the last 24 hours. Fresh latex is not cured, and Original 2090 will pull it. Use the Delicate Surface tape there.
5. Trimaco 9 X 12 Ft Cotton Canvas Drop Cloth
Fifteen dollars and the single most reused item in the kit.
Canvas over plastic, for two reasons. Canvas absorbs roller spin-off instead of letting it bead on the surface and get tracked across the room on a shoe. And wet plastic on a hardwood floor is genuinely the most dangerous footing in a house you are working in. I have watched someone go down on it.
A 9 x 12 does not cover a 12 x 14 bedroom corner to corner. You move it as you work, which is fine, and it is the size most people should own. It is not leakproof either; a tipped tray reaches the floor in under a minute, so put the tray on the cloth and not on the edge of it. Shake a new cloth out outdoors before the first job, because they all shed cotton lint fresh out of the package. Our drop cloth round-up covers the butyl-backed upgrade if your floors are the expensive kind.
Getting Paint out of the Can and onto the Brush
6. Hyde 1-Gallon Pour Spout
Five dollars, and it solves a problem you do not know you have until the lid will not reseal.
Pouring straight from a gallon floods the rim groove. Paint dries in the groove, the lid never seats airtight again, and the leftover half gallon skins over in the garage before you need it for touch-ups. The spout snaps into the rim and gives you a clean stream into the tray with nothing in the groove.
Fits standard 1-gallon US cans. Pry it out gently at the end, because levering hard with the 5-in-1 dents a thin can lip.
7. Wooster Hefty Deep-Well Tray
A deep well holds close to a quart, which means you reload the roller instead of topping up the tray every eight minutes. The walls are rigid enough that picking it up one-handed off a drop cloth does not send a wave over the side, which is exactly what a flexed plastic tray does.
Buy the liners with it. A liner turns cleanup from a ten-minute scrub into pulling one sheet out and binning it.
The ramp is shorter than a full contractor tray, so a heavily loaded cover drips on the way out. Roll it out further on the ramp before you lift.
8. Bercom HANDy Paint Pail
This is the item people skip and then buy after their first room.
A quart of paint strapped to your off hand means you cut an entire wall without climbing down to a can on the floor. The built-in magnet parks the brush inside the pail, so it stops living on a windowsill and leaving a ring. Disposable liners make a color change a ten-second job.
A full pail plus a loaded brush is real weight after 40 minutes on a ladder, and the magnet loses its grip on a heavy 3-inch brush. With the 2.5-inch Clearcut Glide it held fine all day.
Buy it if: you are cutting in more than one room, ever.
The Two Tools That Touch the Wall
Everything above is support. These are the two where the money shows up.
9. Purdy Clearcut Glide 2.5-Inch Angular Sash, Top Pick
The chiseled tip is the whole argument. A $4 brush and a $17 brush both cut a straight line for the first ten feet. Then the cheap one splays, the tip goes round, and every line after that wanders. The Clearcut Glide held a chisel edge across all four walls of the test room and was still chiseled after a rinse.
Measured against a chalk line at three points per wall, the Glide stayed within about a sixteenth of an inch of the mark. The control kit’s brush wandered visibly by the second wall, enough that I re-cut the ceiling line.
Paint release is the second thing. The nylon-polyester blend lets go of paint slowly and evenly, which gives the film time to level before it sets. That is what kills brush marks. If you already have ridges from a previous job, the brush marks fix guide is the repair path.
The 2.5-inch angular is the one width that handles a ceiling line, door casing, and baseboard without swapping brushes. Wider gets heavy and unwieldy on a ladder. Narrower runs dry too fast and doubles your trips to the pail.
It is waterborne acrylic only. The soft synthetic filament goes limp in oil-based enamel and mineral spirits, so if you are painting an oil-based trim job you want a different brush from the paint brush round-up. Counterfeits circulate online; check the stamped ferrule and buy from a seller you recognize.
Buy it if: you are painting anything with a straight line in it. Which is a room. Skip it if: you are working in oil-based enamel or thinning with solvent.
10. Wooster Sherlock 9-Inch Roller Frame
A five-wire cage instead of the stamped three-wire in the bargain bin. Under roller pressure a three-wire cage flexes from round to oval, and an oval cover lays an uneven film with a heavy edge stripe you will see in raking light. The five-wire holds its shape.
The threaded handle is the other reason. It takes any standard extension pole, and a pole is how you reach a ceiling line without dragging a ladder around the room four times. Poles are cheap and covered in our extension pole round-up; add one if you have 9 ft ceilings.
Covers slide off with a push rather than a fight, and nothing spins loose mid-wall. It costs about triple the stamped frame. It will also outlive the next four roller covers you put on it.
11. Wooster Pro/Doo-Z 9-Inch, 1/2-Inch Nap
Zero lint specks on the second coat. That is the whole review.
The control kit’s polyester cover left fuzz I had to sand out of the closet before recoating. The Pro/Doo-Z ran the full bedroom, four gallons through one cover, and left a clean film both coats. The sheath glue held through a wash and the cover was still round for room two.
Half-inch nap is the correct default for standard drywall, flat or lightly textured. It is the nap that covers roughly seventy percent of interior wall jobs in American houses. Wrong nap for a popcorn ceiling, where you want a 3/4-inch cover, and wrong nap for a glass-smooth Level 5 wall, where a 3/8-inch lays flatter. The roller round-up has the full nap-to-surface chart.
What I Left out, on Purpose
- A paint edger pad. They work on a perfectly flat wall meeting a perfectly flat ceiling, and almost nothing in a real house is either. Learn the brush. If you want to try one anyway, the paint edger round-up is honest about which ones hold up.
- A sprayer. Masking a bedroom for spray takes longer than rolling it. Sprayers earn their keep on cabinets, doors, and whole-house exteriors.
- A pole sander. One room of nail holes does not justify it. A sponge does the job.
- A second brush. A 2.5-inch angular does every line in a bedroom. Buy the second brush when you find the job it is for.
- Primer. Not a tool, and not always needed. Over sound same-color latex you can skip it; spot-prime the patches and go.
- A roller spinner. Nice to own eventually. For one room, spinning a cover in the tray with the 5-in-1 works fine.
The Order You Actually Use It In
Move furniture to the center. Spread the canvas. Patch every hole with the 5-in-1 and DryDex, and go find the ones you forgot by running a flashlight sideways across each wall at a shallow angle. Wait for pink to go white.
Sand the patches with the medium side, scuff the trim with the fine side, wipe the dust off with a damp cloth. Tape the trim, press every edge down with the flat of the 5-in-1.
Then open the can with the 5-in-1, snap the spout in, fill the pail for cutting and the tray for rolling. Cut in the ceiling line, the corners, and the trim first. Roll the field while the cut edge is still wet, so the two blend instead of stacking into a visible band.
Second coat after the recoat window on the can, not after it feels dry to a finger. Pull the tape while the last coat is still slightly soft, at a shallow angle back on itself.
That order is not negotiable. Rolling before you cut in gets you a visible frame around every wall.
Keeping the Kit Alive for Room Two
The brush. Rinse under warm water until the water runs clear, work the filaments with your fingers, comb it out, then wrap it in the cardboard sleeve it came in and hang it. The sleeve is what keeps the chisel edge chiseled. A Clearcut Glide cleaned this way lasts years. One left in a pail overnight is a $17 loss.
The roller cover. Scrape it out with the 5-in-1 crescent over the tray, rinse until clear, spin it dry by rolling it hard on a scrap of cardboard, stand it on end. A Pro/Doo-Z survives eight to twelve washes before the nap mats.
The pail and the tray. Pull the liners, bin them, done.
The canvas. Shake it outside, wash it cold with no fabric softener, hang it to dry. Never a hot dryer. And flip it before the next job, because dried paint on the underside stamps itself onto the next floor.
The tape. Whatever is left on the roll goes stale. Adhesive on an opened roll of 2090 stiffens in a hot garage over a season, and stale tape lifts mid-job. Store it inside, in a bag.
Mistakes I Watched Beginners Make with This Exact Kit
- Sanding the spackling while it is still pink. You drag the plug out of the hole and now you are filling it twice. Wait for white, then give it another twenty minutes.
- Skipping the trim scuff. New latex over glossy builder-grade semi-gloss peels off in sheets in about a year. Thirty seconds with the fine side of the sponge fixes it. If the trim is heavily glossed, a liquid deglosser is faster; see deglosser vs sanding.
- Loading the brush to the ferrule. Dip a third of the bristle length. A brush loaded to the metal drips down the handle, floods the ferrule, and dries there until the brush is stiff forever.
- Rolling a dry cover. Pre-wet the roller cover with water, spin it out, then load it. A dry cover drinks the first third of a gallon and lays it back down unevenly.
- Pulling tape the next morning. Cured paint bridges the tape edge and tears when the tape comes off. Pull while the last coat is still slightly soft.
- Buying flat because it hides everything. It hides everything until someone touches it. In a bedroom, eggshell is the sheen that survives a household. The sheen guide has the full range.
- Trusting the tape to make the line. Tape is insurance, not a technique. The straight line comes from the brush.
If You Only Have $40
Buy four things: the Purdy Clearcut Glide 2.5-inch, the Wooster Pro/Doo-Z 1/2-inch cover, the Purdy 5-in-1, and the DryDex. That is about $50, so trim the spackling to the smallest tub and you are close.
Borrow a roller frame. Use an old sheet doubled over for the floor, accept that it wicks, and keep the tray off it. Skip the tape entirely and cut freehand with the Glide, which is more achievable than it sounds once the brush holds an edge for you.
The tools that touch the wall are the ones worth your money. Everything else on the list is convenience you will be glad you bought the second time.
Ask a Question