Cold-Weather Paint Failures (and How to Spot Them)
Cold weather paint failure happens when latex dries below its coalescence temperature. How to spot cracking, poor adhesion, and surfactant streaks, and how to fix it.

Most cold-weather paint failures come down to one cause: the paint dried before it could turn into a film. Latex doesn’t cure by drying the way most people picture it. Water leaves, and then the binder particles have to fuse together, and that fusion stalls or stops below a temperature your can prints on the label. Paint a wall or a fascia board too cold and you get a coat that looks dry but never became a continuous film. It cracks, powders, lifts, or weeps brown. The fix depends on whether the cold coat is sound or not, so the first job is telling those apart.
TL;DR
- The cause: latex forms a film in two stages, and the second (binder particles fusing) needs warmth. Below the paint’s minimum film-formation temperature, the particles never coalesce. The coat dries but doesn’t cure.
- What you see: fine cracking, a chalky surface that rubs off, poor adhesion, a film soft for weeks, and brown surfactant streaks.
- The number that matters is surface temperature, not the forecast. Most latex needs 50°F through the whole dry, including overnight. Low-temp formulas go to 35°F.
- The fix: if the cold coat cracks or powders, scrape and sand off the loose film, feather the edges, prime bare wood, and recoat in mild weather. If it’s only chalky or streaked, wash, prime, and topcoat.
- Don’t repaint cold. A new coat over a failed cold coat, or in the same cold, fails the same way.
Does This Match What You’re Seeing?
Cold damage wears a few different faces depending on how cold it got and how wet. Look at the film and touch it.
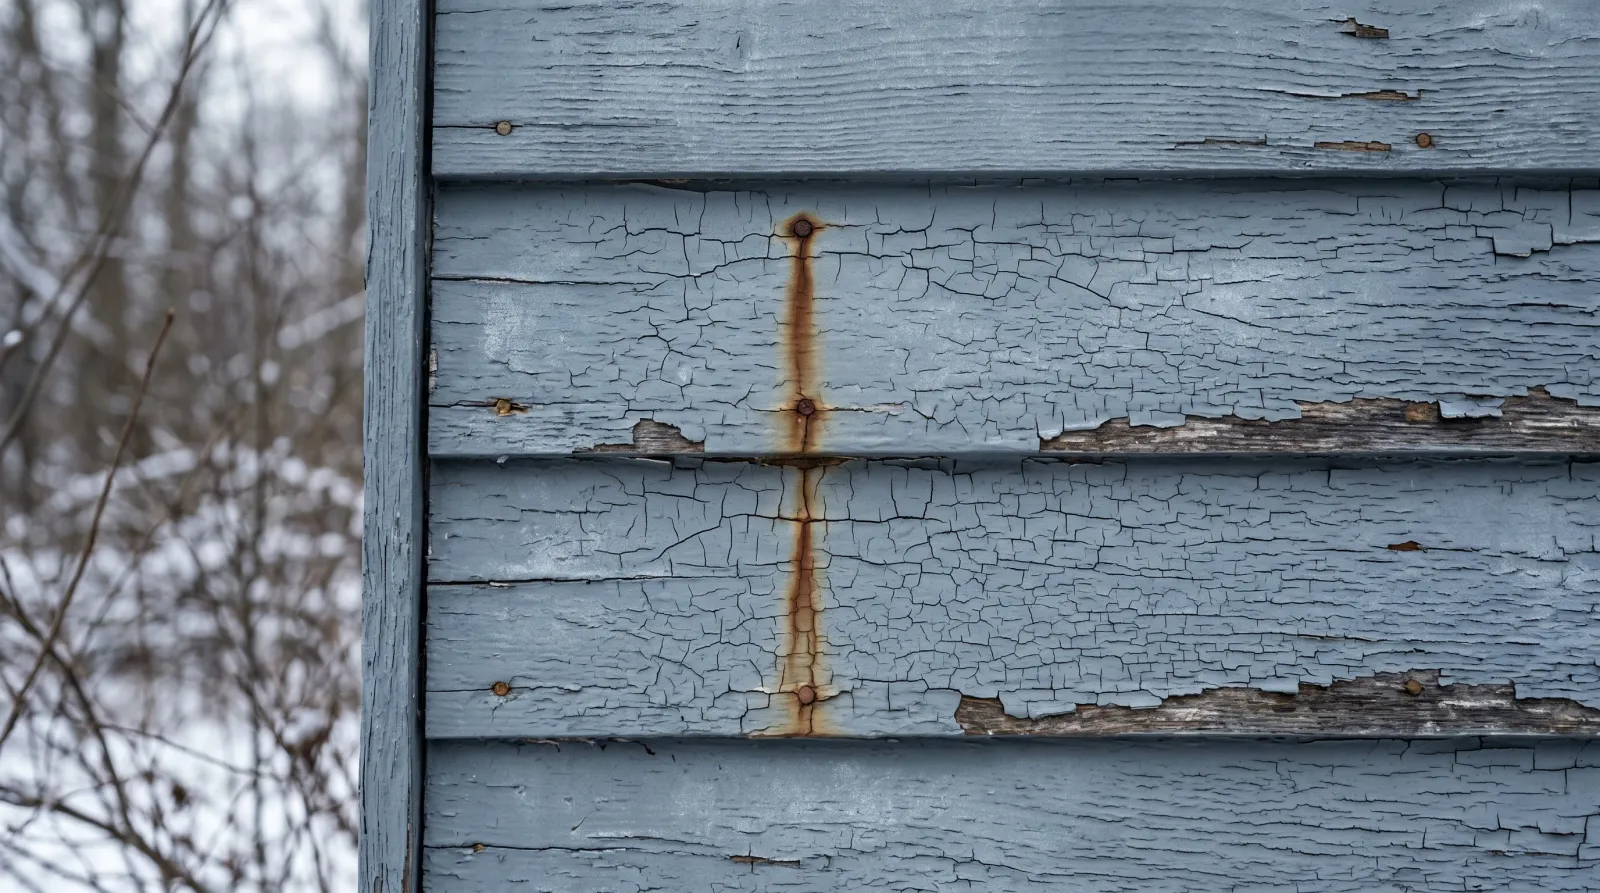
- Fine cracking or a mud-crack pattern across the surface. The classic tell. The film tried to shrink as water left but couldn’t knit together, so it split. The strongest sign the paint went below its minimum temperature.
- A chalky, powdery surface that rubs off white on your hand. The binder never locked the pigment into a film, so it sits loose at the surface. Normal weathering chalk takes years; this shows up within weeks of a cold job.
- Paint that lifts, flakes, or peels with almost no effort. Poor coalescence means poor adhesion. Press painter’s tape on and pull. If the film comes with it, the coat never bonded.
- A film that stays soft or tacky for weeks. Cold doesn’t just slow the dry, it can stall the cure. A coat that won’t harden long after a normal recoat window has cold written on it.
- Brown or tan streaks running down the surface, worst near drips and lap lines. Surfactant leaching, covered in the surfactant leaching fix. On its own it’s cosmetic.
A couple of look-alikes to rule out. Blistering is the film bubbling up off the surface, usually from moisture or heat behind the paint, not cold coalescence; that’s the blistering fix. Moisture-driven peeling sheets off in large pieces with damp wood behind it, a water problem rather than a temperature one. Cold-failure cracking is finer and more uniform, and it tracks to a job you painted on a cold day or into a cold night.
How Serious Is This?
Cosmetically loud, structurally minor, and almost always a repaint rather than a disaster. The honest ladder:
- Surfactant streaks on a film that’s otherwise sound: the mildest version. Wash them off, and the paint underneath is fine. No stripping.
- Chalking with no cracking: the binder underperformed but the film is mostly holding. Wash off the chalk, prime, and you can topcoat over what stays put.
- Cracking, powdering, or peeling: the coat failed. It has to come off and go back on in the right conditions. A weekend on trim, a multi-weekend job on full siding.
- Soft film weeks later in a spot that froze before it dried: the worst case, because freezing wet latex can rupture the film outright. That coat is scrap.
The reason it repeats is simple. Cold doesn’t go away on its own schedule, and a repaint in the same window fails the same way. Get the temperature right and the failure stops.
Why This Is Happening (the Chemistry)
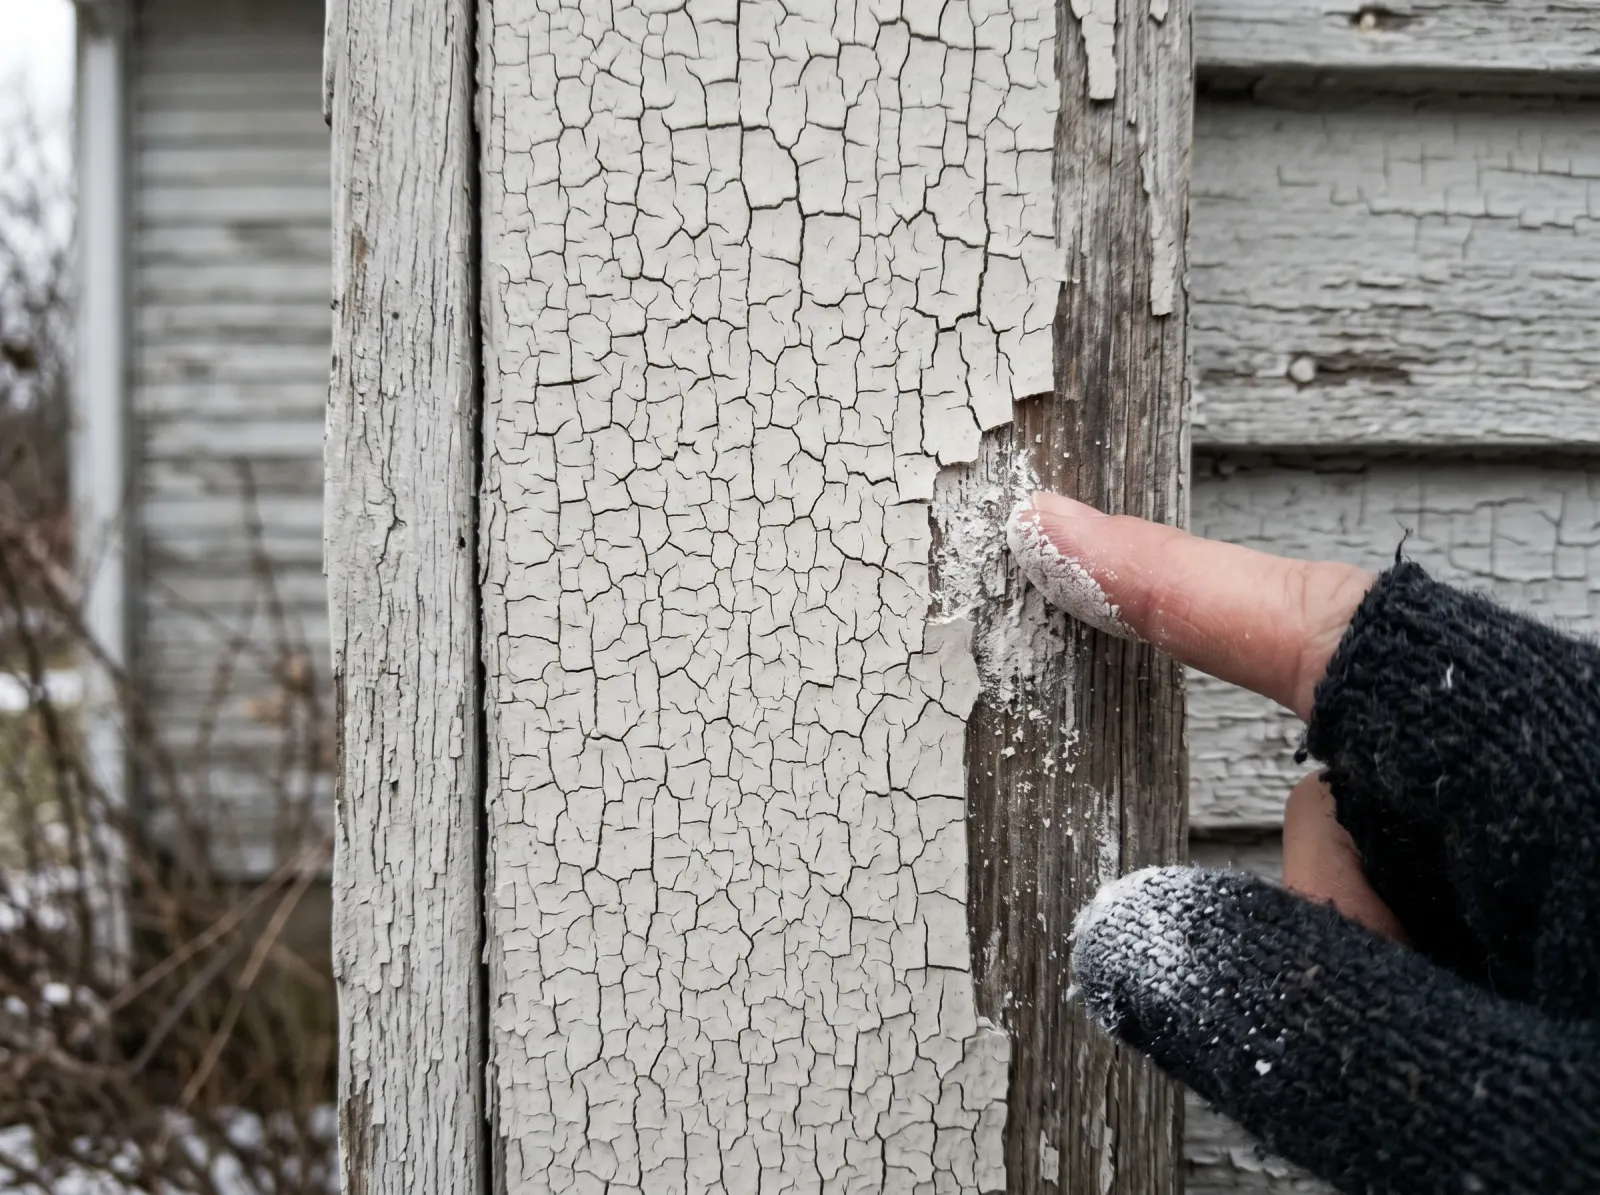 A film that dried below its coalescence temperature cracks into a fine map and powders, because the binder particles never fused.
A latex paint film forms in two stages, and cold attacks the second one. First the water evaporates. That part happens at almost any temperature, which is why a cold coat looks dry and fools you. The second stage is the one that matters. As the water leaves, the binder particles, tiny spheres of acrylic or vinyl-acrylic resin suspended in the paint, are pushed together and have to soften, flow into each other, and fuse into one continuous film. That fusion is called coalescence, and it only happens above a specific temperature.
Every latex paint has a minimum film-formation temperature, the floor below which the binder particles are too rigid to flow together. The reason for that is the binder’s glass transition: below a certain point the polymer behaves like glass instead of a soft solid, and rigid spheres can’t merge. Paint chemists add coalescing solvents to lower that working temperature, which is how a “35°F” low-temp paint exists. Go below the floor and the water still leaves, but the particles stay as separate beads. You’re left with a layer of loose, unfused pigment and binder. It can’t stretch, so it cracks. It doesn’t bond, so it peels. It doesn’t lock the pigment, so it chalks.
The number that catches people is surface temperature, not air temperature, and not the daytime high. A siding board in shade can sit 10°F below the air. Because coalescence takes hours, the surface has to stay above the floor through the entire dry, which outdoors means through the night. A 55°F afternoon that drops to 38°F at dusk fails a 50°F paint, because the film was still coalescing when the temperature crossed the floor.
Cold also brings the brown streaks. Surfactants, the water-soluble wetting agents in latex, are supposed to stay put as the film hardens. When cold and damp drag the dry out over days, those surfactants stay mobile and rise to the surface, where dew or rain rinses them into tan streaks. Same root cause as the cracking: the dry took far too long because the temperature was too low.
Two conditions drive the whole thing. Temperature below the paint’s floor, and a long, slow dry that lets damage and leaching develop. Fix the temperature and both go away.
The Fix
Work in order. The single most common reason this repeats is repainting before the weather is genuinely warm enough through the night.
Step 1. Decide Whether the Cold Coat Is Sound
Before you strip anything, find out if the film failed or just dried slowly. Latex applied a little cool but still above its floor often dries slowly and then cures fine once it warms. Press painter’s tape firmly onto the surface and pull it off fast. If paint lifts, the coat never bonded and has to come off. Drag a fingernail across a cracked area; if it powders or flakes, same answer. If the tape comes away clean and the surface is firm, you may only have chalking or streaking, which is a wash-and-recoat, not a strip.
If the home predates 1978, treat the existing paint as lead until tested with 3M LeadCheck swabs, and follow EPA RRP practice: wet methods, containment, HEPA cleanup, no dry sanding. The lead test kit options cover what to use.
Step 2. Remove the Failed Film
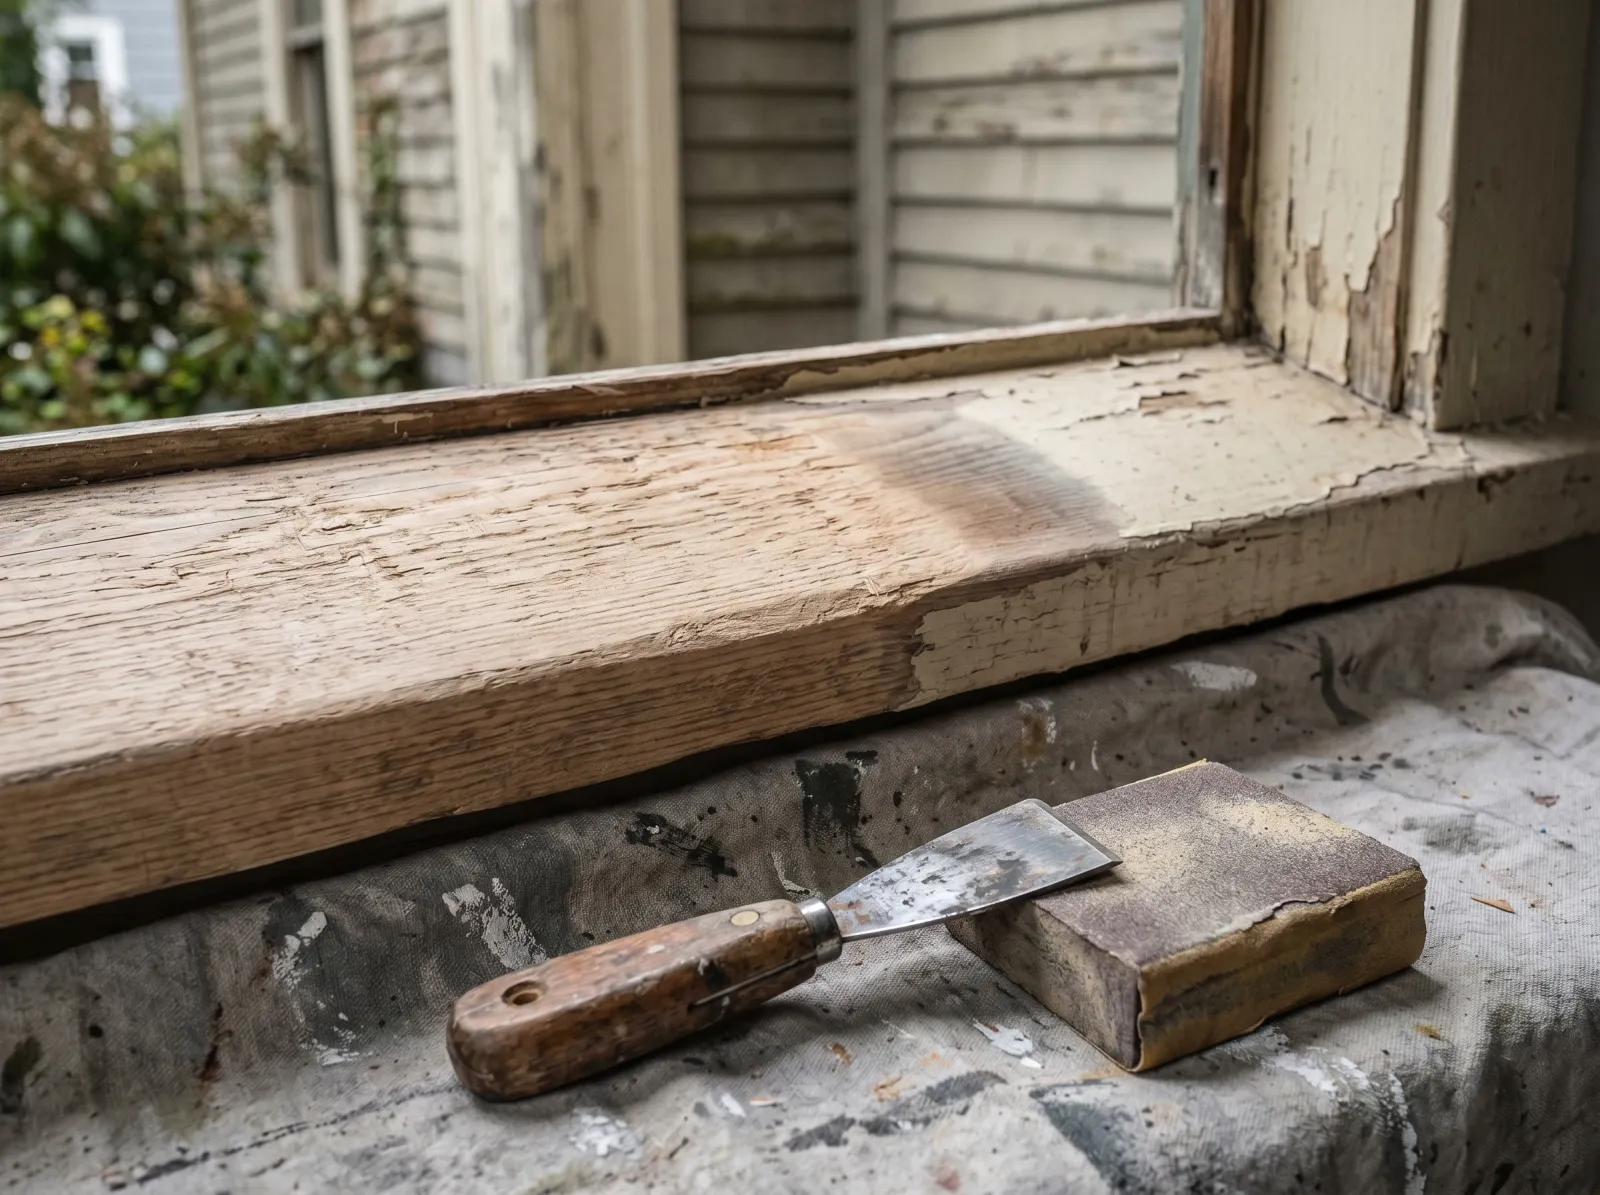 Scrape off everything loose, then feather the cracked edges into sound paint so the repair won’t telegraph.
Scrape off everything cracked, powdery, or lifting with a carbide scraper or stiff putty knife. A coat that failed to coalesce comes off easily, the one upside of the problem. Take it back to a firm, well-bonded edge, then feather the transition with 120-grit so the boundary between bare and sound paint disappears under the topcoat. A wall that mostly chalked rather than cracked skips the scraping and moves to washing.
Step 3. Clean Off Chalk and Surfactant
Wash the whole surface. For chalk and surfactant streaks, scrub with a mild detergent or a TSP substitute, about a quarter cup per gallon of warm water, then rinse thoroughly with clean water and let it dry fully. Chalk left on the surface is a layer of loose pigment, and nothing bonds to it. The surfactant streaks rinse off the same way. Confirm the surface is dry before priming; on exterior wood that can mean a day of dry weather.
Step 4. Prime Bare and Chalky Spots
Spot-prime any bare wood, metal, or feathered edges so the topcoat has uniform suction and a sound base. Use an acrylic exterior primer on bare wood, an alkyd primer over knots and tannin-prone areas. On surfaces that still test a little dusty after washing, an exterior primer formulated to bind chalk gives the topcoat something to grip. For what that bonding-and-sealing layer is actually doing, see what primer does. Prime in the same temperature window you’ll use for the topcoat; primer coalesces too.
Step 5. Recoat in the Right Window
This is the step that decides whether you’re back here next winter. Wait for a stretch where the surface temperature stays above the paint’s printed minimum through application and overnight. Check the can: most standard acrylic latex wants 50°F and up, and dedicated low-temp formulas like Sherwin-Williams Resilience or a paint rated to 35°F let you work colder. Read the surface, not the forecast high. A surface thermometer or an infrared gun on the siding beats guessing.
Paint earlier in the day so the film has daylight hours of warmth to coalesce before the evening drop. Avoid painting into falling temperatures, dew, or a shaded north wall that won’t clear its overnight chill. Two coats, and give each the full recoat time the can lists at the actual temperature, which runs longer when it’s cool. For the full cold-weather application playbook, see painting in cold weather.
Safety
Wear gloves and eye protection for TSP or detergent washes, and cross-ventilate any enclosed space. Never mix bleach with vinegar, ammonia, or hydrogen peroxide if you’re also cleaning mildew off the surface; that combination produces toxic chlorine or chloramine gas. Rinse one cleaner fully and let the surface dry before introducing another. On exterior ladder work in cold months, watch for frost and ice on rungs and on the surface you’re leaning against.
Prevention
The failure needs cold and a slow dry. Deny it the cold.
- Match the paint to the season. For genuine cold-month work, buy a low-temperature acrylic rated to 35°F. Don’t push a 50°F paint into 40°F weather and hope.
- Measure the surface, not the air. A cheap infrared thermometer on the siding tells you the real coalescing temperature. Shaded surfaces sit well below the air.
- Paint early into rising or stable temperatures. Give the film daylight warmth to coalesce before the evening drop, and check the overnight low against the paint’s floor.
- Watch dew and humidity. A slow, damp dry is what drives surfactant streaks. Don’t paint when dew will land on a still-soft film.
- Mind the substrate. Cold metal and masonry hold their chill far longer than wood. The exterior metal guide and cedar guide cover prep that matters more when conditions are marginal.
When to Call a Pro
- Full two-story siding that failed and has to come off and go back on, where staging and weather windows make it a real job.
- Pre-1978 home where scraping the failed coat would disturb lead paint and you need certified RRP containment.
- A wall that froze while wet and ruptured, leaving widespread soft or detached film over a large area.
- Repeat failure after a correct warm-weather repaint, which points to a moisture or substrate problem under the paint rather than temperature.
- Any peeling that traces to water behind the wall instead of cold, which is a different fix; start with peeling exterior paint.