How to Block Water Stains on a Ceiling
A water stain ceiling needs a shellac or oil stain blocker, not more latex. Find the leak, seal the ring, then repaint so the brown never bleeds back through.

A water stain on the ceiling won’t go away with another coat of ceiling paint. The brown is a water-soluble dye, and ceiling paint is water-based, so the stain dissolves right back up into your fresh coat and ghosts through within hours. Seal it with a shellac or oil-based stain blocker first. Find the leak before you do anything, or you’ll be painting the same ring next month.
Does This Match What You’re Seeing?
Look at the spot before you reach for a roller. The shape and color tell you what you’re dealing with.
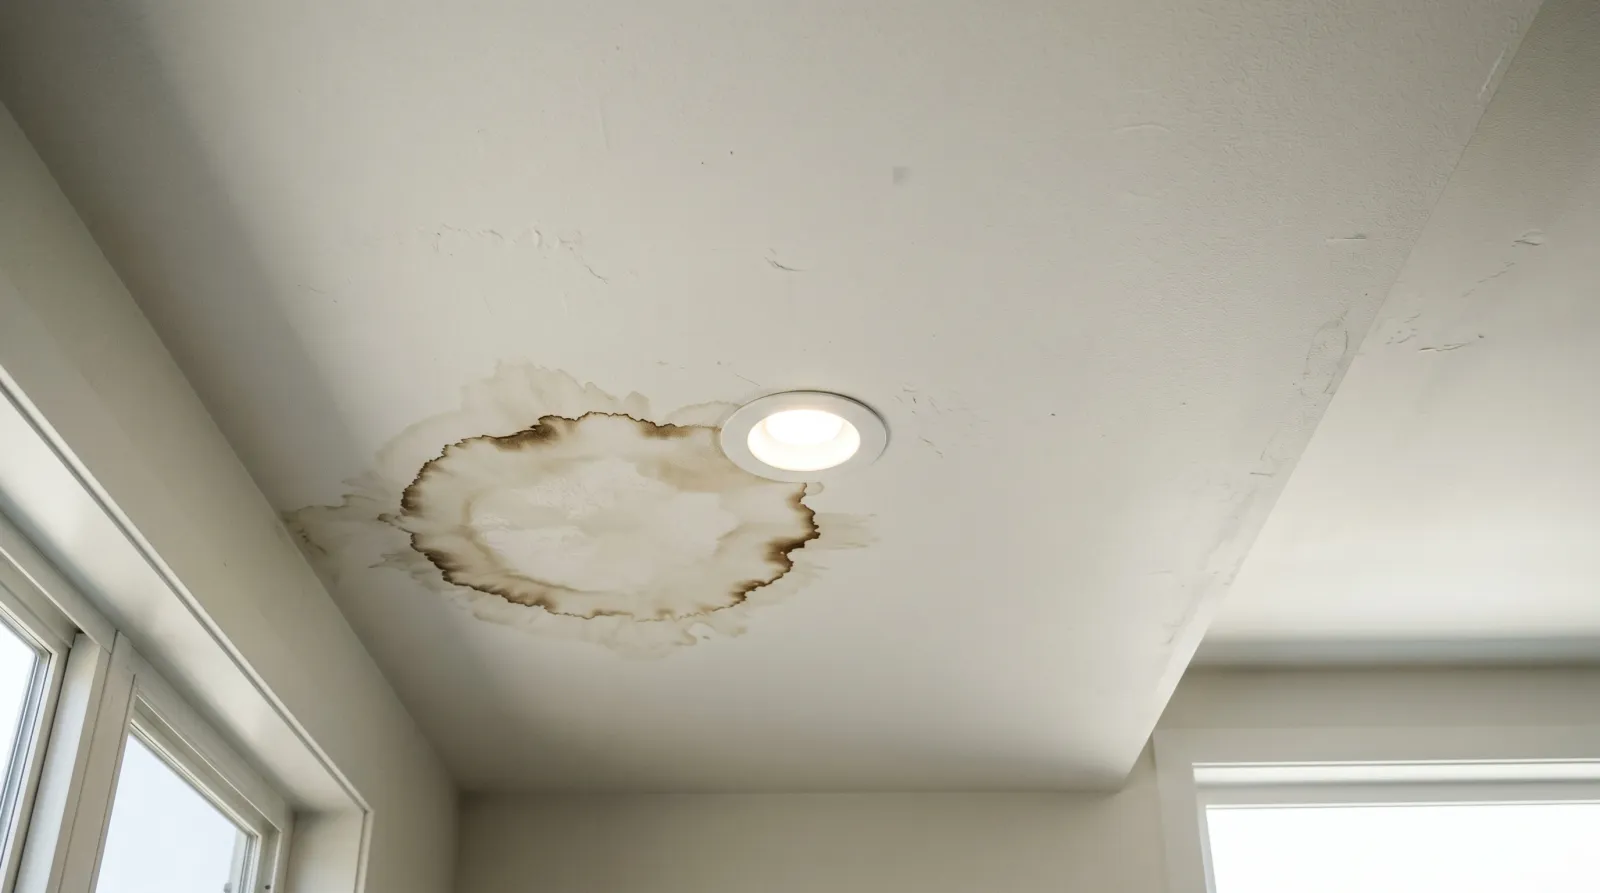
- Brown or tan ring with a hard edge: classic water stain. The water spread, then dried and pushed the dirt to the perimeter, leaving that telltale ring.
- Yellow or amber blotch, no hard ring: a slow, repeated drip. Each event laid down a little more tannin and rust from the wood and nails above.
- Rust-colored streak from a nail head or screw: a popped fastener wicking moisture. See how to block rust stains for that one.
- Fuzzy black or green growth, smears when wiped: that’s mold, not a water stain. Clean it before you prime. Check whether it’s mold or just mildew.
- Sagging, soft, or bubbled drywall: there’s still water in the board. Paint won’t fix it. The drywall has to dry or come out.
If the ring is dark brown and crusty, it’s an old leak that already dried. If it’s pale and the edge is soft, water may still be moving up there.
How Serious Is This?
A single dry ring from a one-time event is a same-afternoon fix. Seal it, paint it, done. The trouble starts when the water is still coming.
Three things push this past cosmetic:
- The spot is damp to the touch. Press a dry tissue against it. Any darkening on the tissue means the leak is live. Find it and fix it first.
- The drywall is soft or sagging. Wet gypsum loses strength. Once it sags, it doesn’t recover. That section comes out.
- The stain grows between rains or after every shower. That’s an active, repeating source. Paint over it and you’ll watch a new ring form over the old one.
A stain that returns after a proper seal job means one thing: water is still getting in. Stop painting and go find it.
Why This Is Happening (root Cause)
The brown isn’t dirty paint. It’s a dye, and it gets there in a specific way.
Water travels through whatever is above your ceiling: a roof leak, a failed shower pan, a sweating supply line, a backed-up AC condensate pan, an overflowing gutter dumping behind a fascia. As the water passes through wood framing, drywall paper, and old dust, it picks up tannins from the lumber and iron oxide from the nails. Then it pools on the back of your ceiling and slowly evaporates through the front. The water leaves, the dissolved color stays. That ring is the high-water mark, the same way a coffee cup leaves a ring on a table.
Here’s why ordinary paint can’t bury it. Latex and acrylic ceiling paints are water-based. When you roll them over a water-soluble stain, the wet film re-dissolves the dye and pulls it up into the new coat. The stain isn’t sitting under your paint. It’s now floating in it. That’s why the brown ghosts back through even after two or three coats. You need a coating that traps the dye and refuses to let water move it. Shellac and oil both do that. Shellac is dissolved in alcohol, oil in solvent, so neither one reactivates the water-soluble stain underneath.
Find the source first. A stain blocker over a live leak is lipstick. The water comes back, the board stays wet, and you’re back on the ladder.
The Fix
Step 1. Find and Stop the Water
Before any primer, locate the source. Stains spread sideways, so the wet spot is rarely directly under the leak. Get into the attic or the floor above with a flashlight and look for the trail: dark framing, a rusted pipe joint, a stained subfloor near a shower or washer.
Common culprits, in the order I find them: roof penetrations (vents, flashing, valleys), shower pans and tub overflows, supply or drain lines, and HVAC condensate pans and lines. If the ceiling is below a bathroom, start there.
Fix the leak, then let the drywall dry a full week minimum. Run a fan on it. Don’t prime until a tissue pressed to the spot comes away dry.
Step 2. Scrape and Sand Any Loose Material
If the stain area bubbled, flaked, or left a crusty ridge, knock it down. A 2-inch carbide scraper takes off anything loose. Sand the edge with 150 grit until your fingertip can’t feel the transition between the damaged spot and the sound ceiling around it.
Popcorn ceiling? Don’t scrape wet, and test it first. Texture sprayed before 1978 can contain asbestos. If the house is that old, leave the texture alone or have it tested before you disturb it.
Step 3. Wipe the Stain Clean
Dust and surface grime stop primer from biting. Wipe the area with a damp microfiber and let it dry. If the ceiling is in a kitchen or over a stove, there’s grease in that stain whether you see it or not. Hit it with a TSP substitute, rinse, and let it dry 24 hours.
Saw mold instead of a clean water ring? Clean it with a mold-killing product before you go further, and read up on the difference between mold and mildew first. Never mix bleach with vinegar, ammonia, or hydrogen peroxide. That combination makes toxic chlorine gas.
Step 4. Seal the Stain with a Stain Blocker
This is the step that does the work. Spot-prime the stain plus a few inches past the ring with a shellac or oil-based stain blocker.
- Shellac, the heavy hitter: Zinsser BIN. Blocks water rings, tannin, smoke, and rust in one coat. Dries to recoat in 45 minutes. Clean the brush with ammonia or denatured alcohol, not water.
- Oil-based, lower odor: Zinsser Cover Stain or Kilz Original. Block nearly as well, smell less, take a little longer to dry. Mineral spirits cleanup.
- Spray can for small rings: Zinsser BIN and Cover Stain both come in aerosol. For a single ring near a light fixture, the spray is faster than dragging out a brush and a roller tray.
Skip the water-based “stain blockers” for a real water stain. PVA drywall primer and the water-base versions reactivate the dye or let it ghost through. A water-based product is a sealer for bare board, not a stain blocker. See what shellac primer actually does for why the alcohol carrier matters here.
One coat is usually enough. If the ring still shadows through after it dries, hit it with a second coat of blocker. Don’t move to paint until the stain is gone under the primer.
Step 5. Repaint the Ceiling
Once the blocker has sealed the stain, repaint. For a clean blend, roll the whole ceiling, not just the patched spot. Spot-painting a ceiling leaves a sheen halo you’ll see every time the light rakes across it.
Use a flat ceiling paint. Flat hides surface imperfection and kills glare. Two coats. Roll away from the window so any seam falls into the leading edge where the light won’t catch it.
If you only sealed and repainted one corner, expect the patch to read slightly different in raking light. A full ceiling coat is cheap insurance against that.
Safety
Shellac and oil primers are high-VOC and strong-smelling. Cross-ventilate, open windows, run a fan. Wear an organic-vapor respirator, not just a dust mask, for the spray cans especially. Eye protection overhead, always. Primer drips the second you point a roller at the ceiling. For picking the right mask, see the respirator guide for painting.
Recommended Product
For a water stain on a ceiling, Zinsser BIN is the can I keep on the truck. Shellac base, one-coat block on most water rings, recoats in 45 minutes, and it doesn’t care whether the stain is water, smoke, tannin, or rust. The smell is sharp and the cleanup needs alcohol, so ventilate. For a low-odor job in an occupied house, Zinsser Cover Stain (oil) is the trade-off: a little slower, smells less, blocks nearly as well.
Both are widely stocked at any home center and online. Compare the full lineup in the primer round-up.
Prevention
The stain is a symptom. Keep the water out and you’ll never see another ring.
- Roofs: check flashing around vents, chimneys, and valleys every fall. Most ceiling stains in single-story homes start at a roof penetration.
- Bathrooms above living space: re-caulk the shower pan and tub surround yearly. A hairline gap at the pan dumps water straight into the ceiling below.
- AC condensate: flush the drain line and check the pan every spring. A clogged condensate line overflows onto the ceiling under the air handler. Common, and people never look there.
- Gutters: keep them clear and aim downspouts away from the wall. Overflow wicks behind fascia and shows up as a stain near an exterior wall.
- Supply lines: a sweating cold-water line in an unconditioned attic drips for weeks before you notice. Insulate it.
If the ceiling stained because the room above runs humid, that’s a ventilation problem, not a leak. The same condensation that stains ceilings shows up on walls too. See how to fix condensation on walls.
When to Call a Pro
- The drywall is soft, sagging, or smells musty. That’s water-damaged board, not a stain. It comes out.
- The leak source is a roof valley, chimney flashing, or anything you can’t safely reach.
- Mold covers more than about 10 square feet (the EPA threshold for professional remediation).
- Pre-1978 popcorn ceiling you’d have to disturb. Test for asbestos first, or hire an abatement crew.
- The stain returns after a proper seal-and-paint. The leak is still live and needs a plumber or roofer, not a painter.
What’ll Bite You in Two Years
Seal the stain over a leak you didn’t fix, and the brown comes back darker, because the water keeps feeding it. The blocker hides the symptom for a season, the board stays wet behind your fresh paint, and one winter later the drywall lets go and you’re patching a hole instead of a ring. Find the water first. The primer is the easy part.