How to Block Tannin Bleed (Knots, Cedar)
Tannin bleed turns white paint amber on cedar, redwood, and pine knots. Here is the chemistry behind it and the oil or shellac primer sequence that actually stops it.

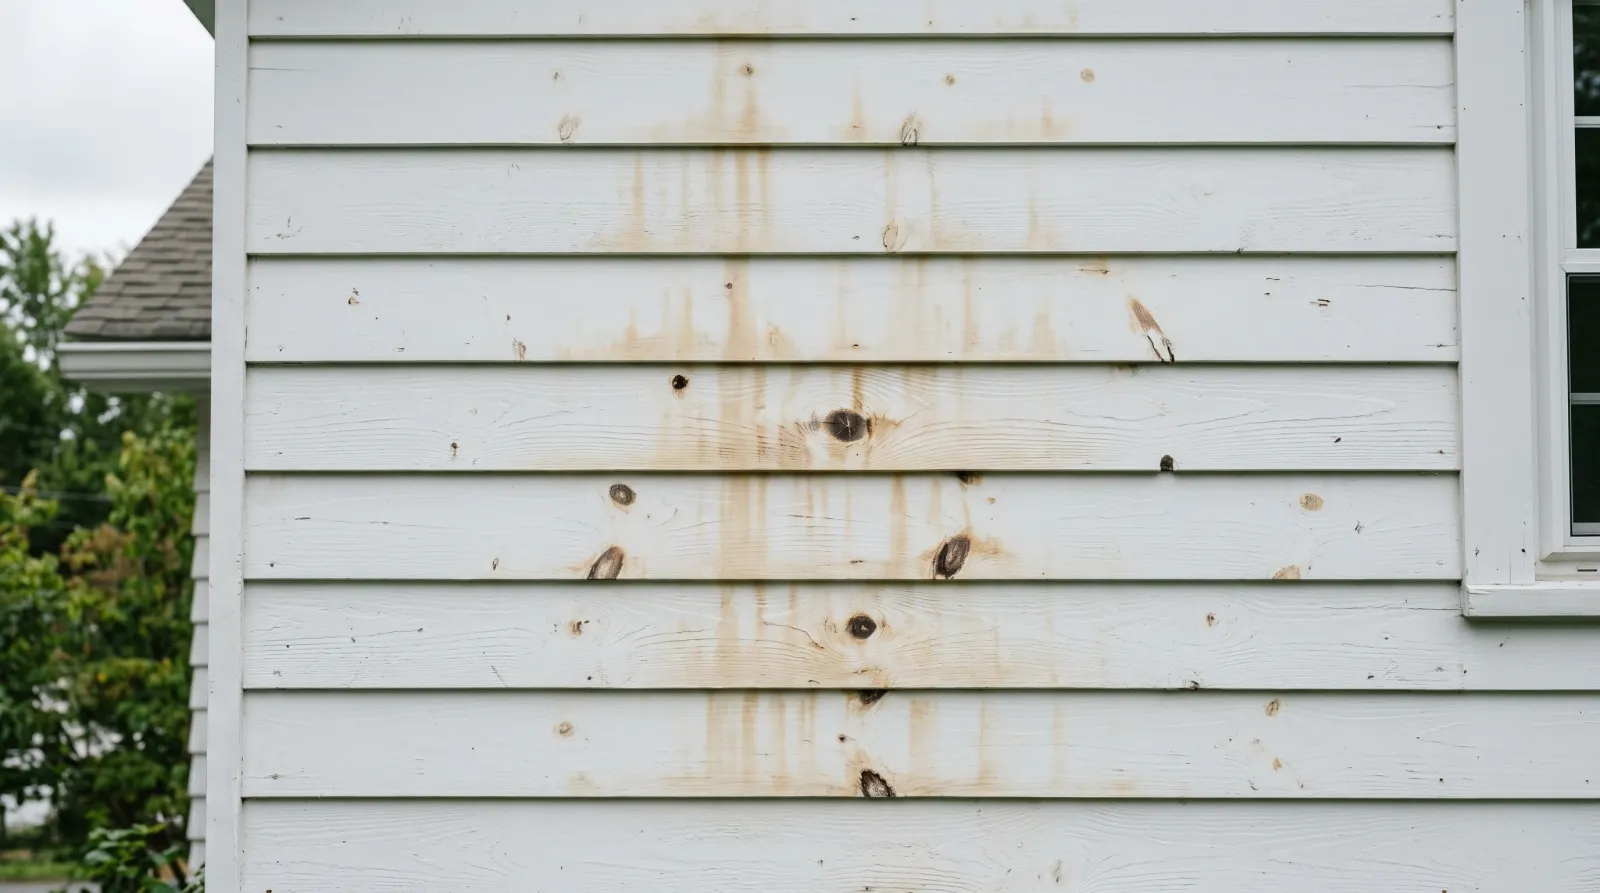
Most people meet tannin bleed a week after the job looks finished. You painted cedar siding a clean white on Saturday, and by the next warm afternoon there are amber streaks rising through the film along the grain, darkest around the knots. The paint didn’t fail. The wood is doing exactly what cedar does, and the only thing that stops it is understanding what’s moving and why.
Does This Match What You’re Seeing?
Tannin bleed gets confused with other stains that need a different fix. Look at the color, the location, and the wood.
- Amber-to-tan streaks following the grain on cedar or redwood siding. Classic tannin bleed. The extractives migrate along the grain lines where the wood is most porous.
- Sharp brown or yellow halos ringing the knots in pine, fir, or knotty cedar. Resin and concentrated tannin at the knot. This is the worst-bleeding spot on any board.
- Pinkish or rusty cast across oak or mahogany. Same mechanism, different extractive color. Oak tannin reads more pink-brown.
- A general dingy yellowing over the whole surface, no grain pattern. Usually not tannin. That’s more likely nicotine, smoke residue, or an aged oil topcoat.
- White crusty deposits, not a stain. That’s efflorescence on adjacent masonry, not wood bleed. See how to fix efflorescence on brick.
If the stain follows the grain and got worse after the wood got wet or warm, it’s tannin. That’s the diagnostic.
How Serious Is This?
Cosmetic, in the sense that the wood and the film are sound. The bond is fine. The problem is that the discoloration won’t stop on its own and won’t hide under another coat of the same paint.
The fix is a same-weekend job on trim or a small wall. On full cedar or redwood siding it’s a one-to-two-weekend job because you’re re-priming everything that’s stained. The one thing that escalates it: bleed that keeps returning after a proper oil or shellac prime almost always means the wood was damp when you primed, or there’s a moisture source feeding it. Fix the water before you fight the stain again.
Why This Is Happening (root Cause)
Tannins are a class of water-soluble extractives the tree stores in its heartwood. Cedar and redwood carry a lot of them, and that’s not a defect. Those same compounds are what make the wood naturally rot- and insect-resistant outdoors. Oak and mahogany carry their own tannins; pine and fir carry less in the field but concentrate resin and extractives at the knots, which is why knots bleed even when the surrounding board behaves.
Here’s the chemistry that matters for painting. Tannins dissolve in water. They don’t dissolve in oil or alcohol. So the moment you put a water-based primer or a latex topcoat on tannin-rich wood, the water in that coating acts as a solvent. It re-wets the extractives sitting at the surface, dissolves them, and as the film dries the dissolved tannin migrates up toward the drying surface and deposits there as a stain. The film didn’t fail. It worked as a transport layer for a dye you didn’t know was in the wood.
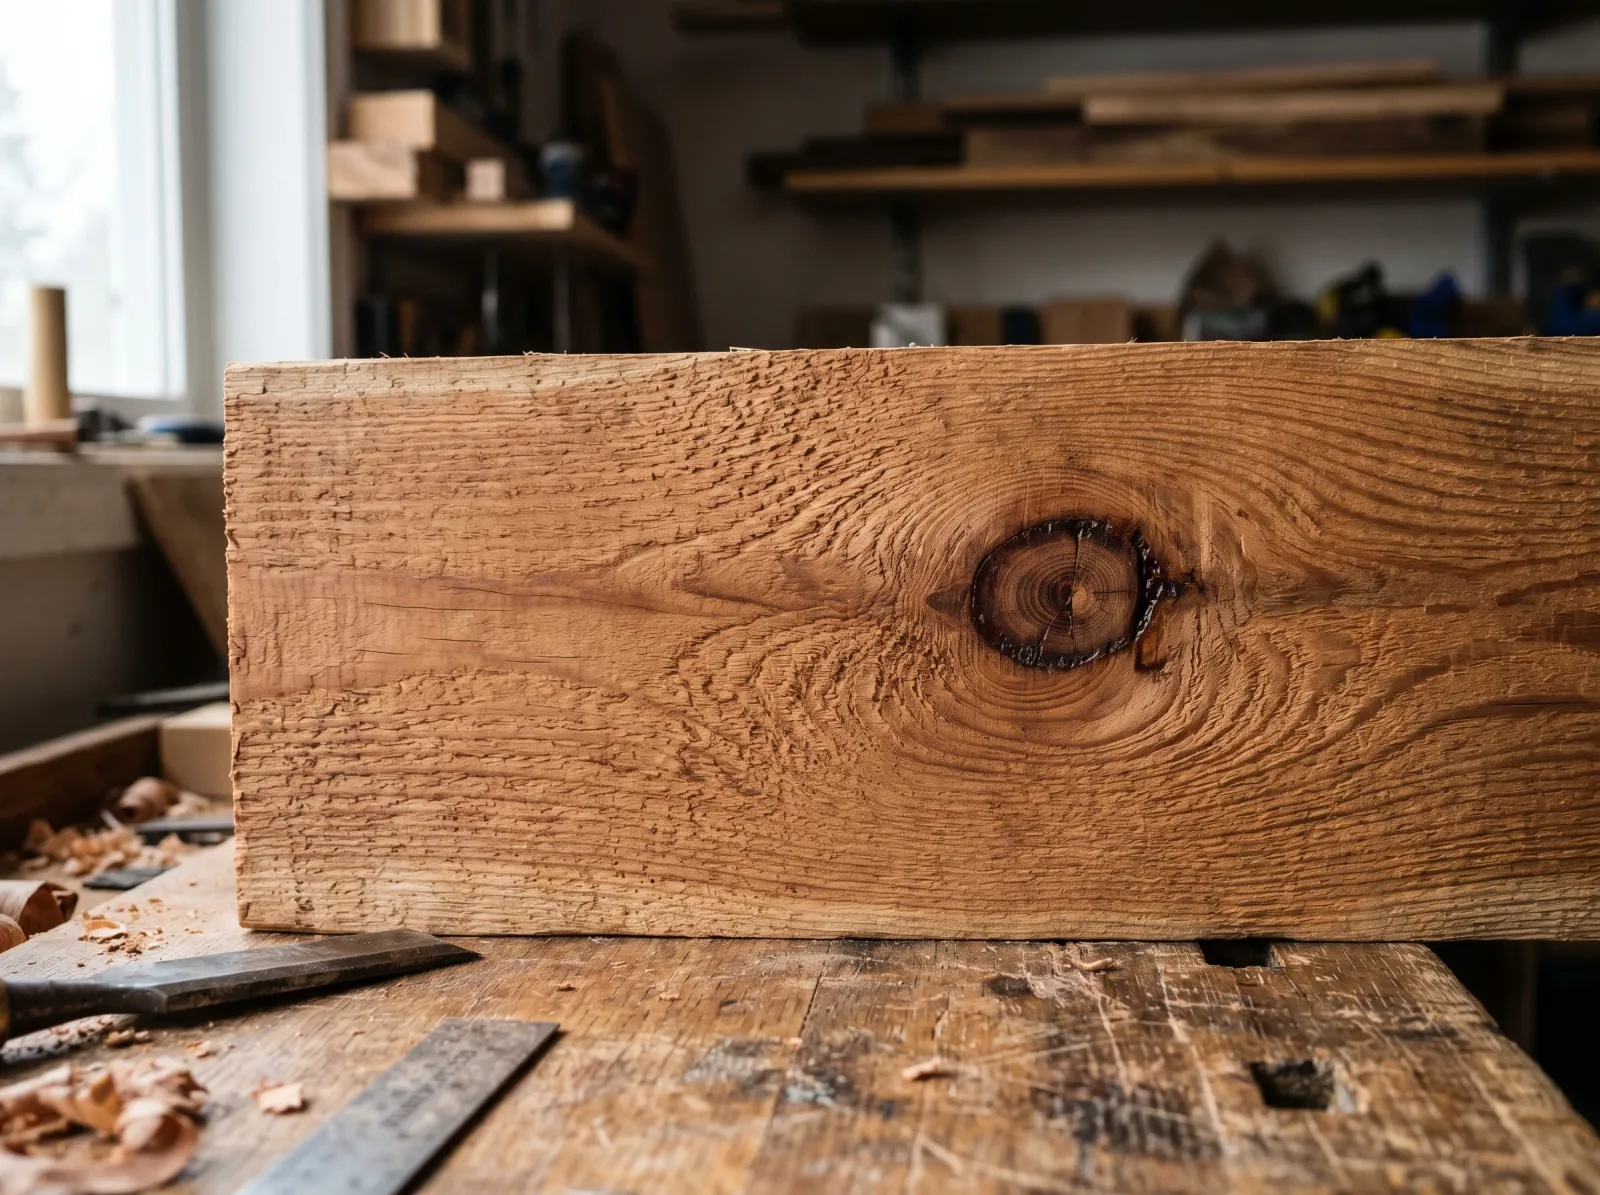 Raw cedar carries water-soluble extractives in the heartwood and concentrates them at the knots.
Two things make it worse. Moisture, because liquid water is the carrier, so damp wood or a wall that wets and dries bleeds far more than dry, sheltered wood. And heat, because warmth drives moisture movement through the wood and speeds the migration. That’s the reason a wall can look perfect at 9 a.m. and show streaks by 3 p.m. on the first warm day. The film was fine. The afternoon sun pulled the tannin through it.
Knock out the water pathway and the stain has no way to travel. That’s the whole strategy: seal the wood with a coating whose carrier is not water, so the tannins never get dissolved and lifted in the first place.
The Fix
The goal at every step is the same. Keep water away from the extractives until a non-aqueous primer has locked them under a continuous film.
Step 1. Confirm the Wood Is Dry
Tannin needs water to move, so priming damp wood is the single most common reason the seal fails later. Check moisture content with a pinless meter if you have one: target 12 to 15 percent for exterior wood, under 12 for interior. No meter? Press painter’s tape to the surface, leave it overnight, and look for condensation under it in the morning. New cedar that arrived shrink-wrapped or rained on needs days of dry weather first.
Don’t prime wood you can’t confirm is dry. You’ll be back here.
Step 2. Clean and Lightly Sand
Wipe the surface free of mill glaze, dirt, and any chalk from prior coats. On smooth cedar, scuff-sand with 120 grit to break the slick mill-glazed surface so the primer can key into the wood. On rough-sawn siding, a stiff brush and a wash is enough. Let it dry fully. If the board is weathered gray and punky, see how to paint weathered wood before you go further, because degraded surface fibers won’t hold any primer.
Step 3. Prime With Oil or Shellac, Not Water-Based
This is the step that does the work. Match the primer to the area:
- Whole cedar or redwood siding, doors, large trim runs: an oil-based alkyd stain-blocking primer. Zinsser Cover Stain or KILZ Original (oil). The mineral-spirit carrier won’t dissolve the tannin, and the film stays flexible enough for exterior movement. One coat on moderate bleed, two on heavy. Dry time roughly 2 hours to recoat in normal conditions, longer when cool or humid.
- Knots and concentrated spot bleed: Zinsser BIN shellac primer, brushed directly on the knot. Alcohol carrier, dries in about 45 minutes, and it’s the strongest sealer for resin pockets. It’s brittle and expensive across large areas, so use it where the bleed concentrates. For the knot-specific sequence, see how to seal bleeding knots in wood.
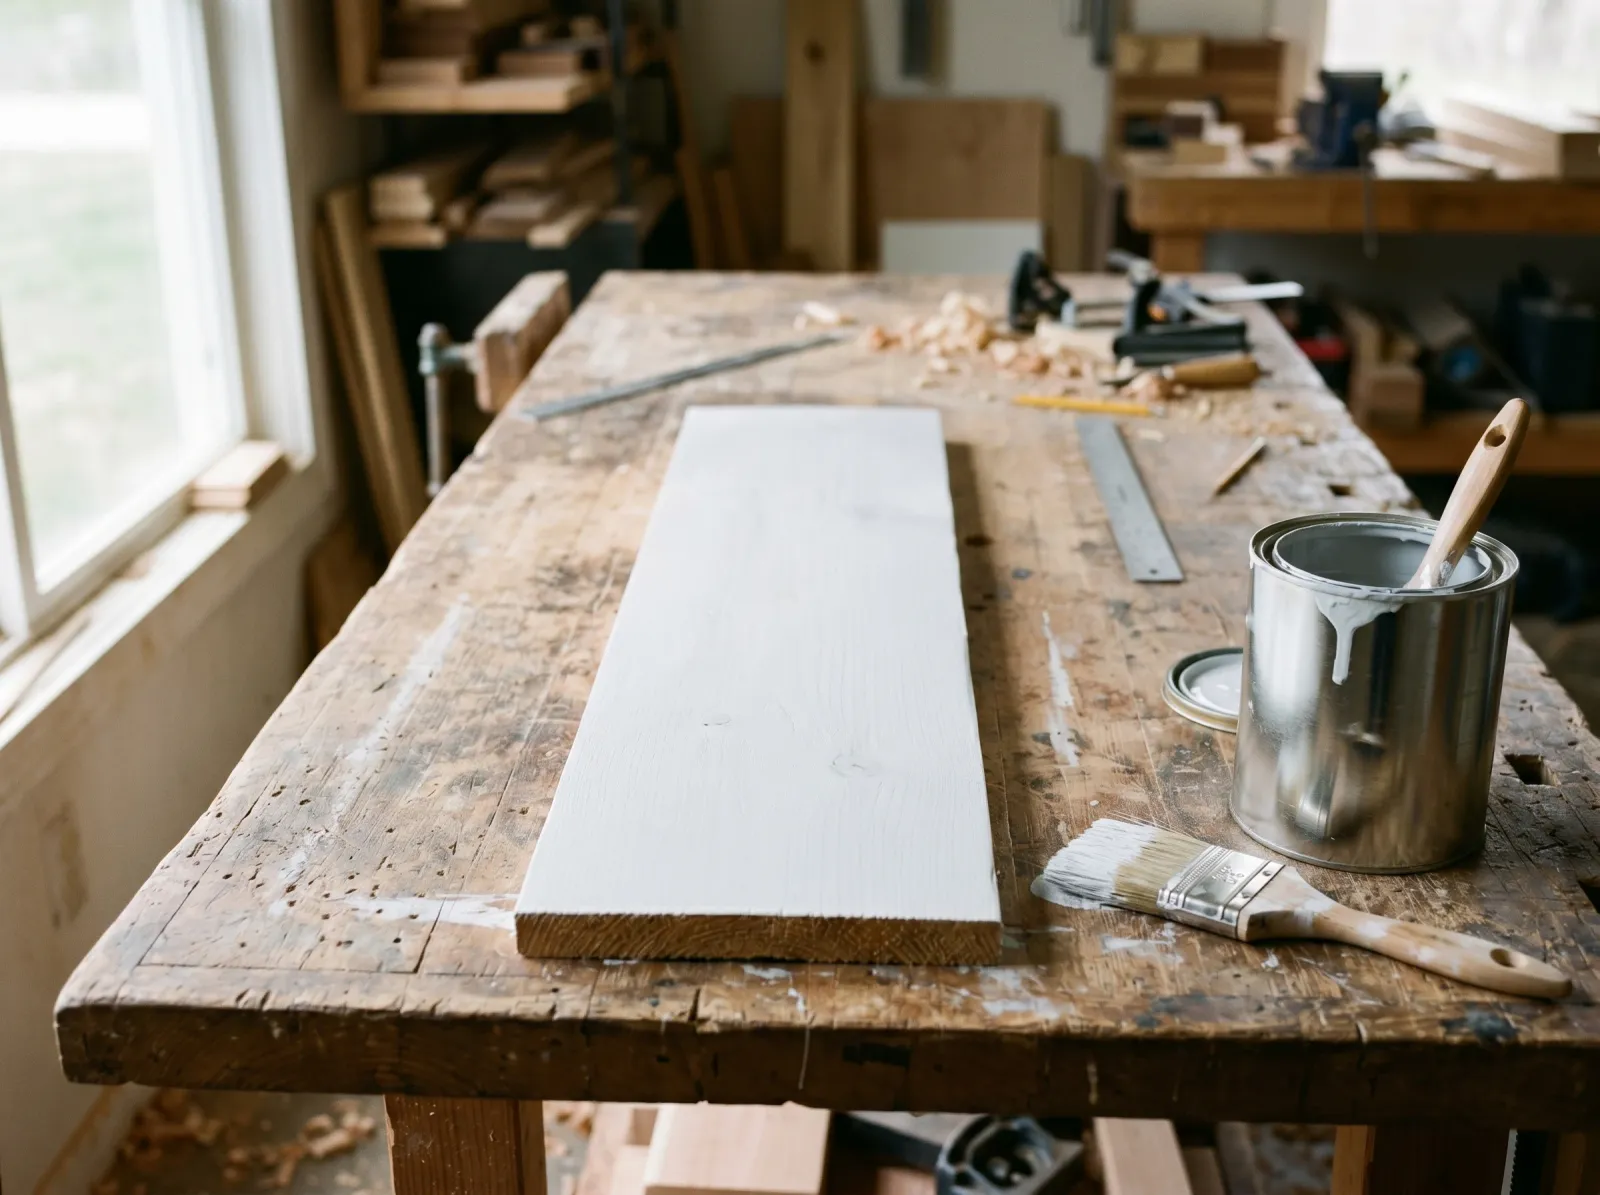 An oil or shellac primer seals the extractives under a continuous film before any water-based topcoat goes on.
Watch for holidays. A pinhole gap in the primer is a channel the tannin will find. Brush, don’t just spray, on the first coat over heavy bleed so you work primer into the grain.
Step 4. Topcoat
Once the wood is sealed under oil or shellac, the topcoat chemistry no longer matters for bleed, because the water in your latex can’t reach the tannin anymore. Use a quality 100% acrylic exterior paint on siding, two coats. The primer is the barrier; the topcoat is the color and weather protection.
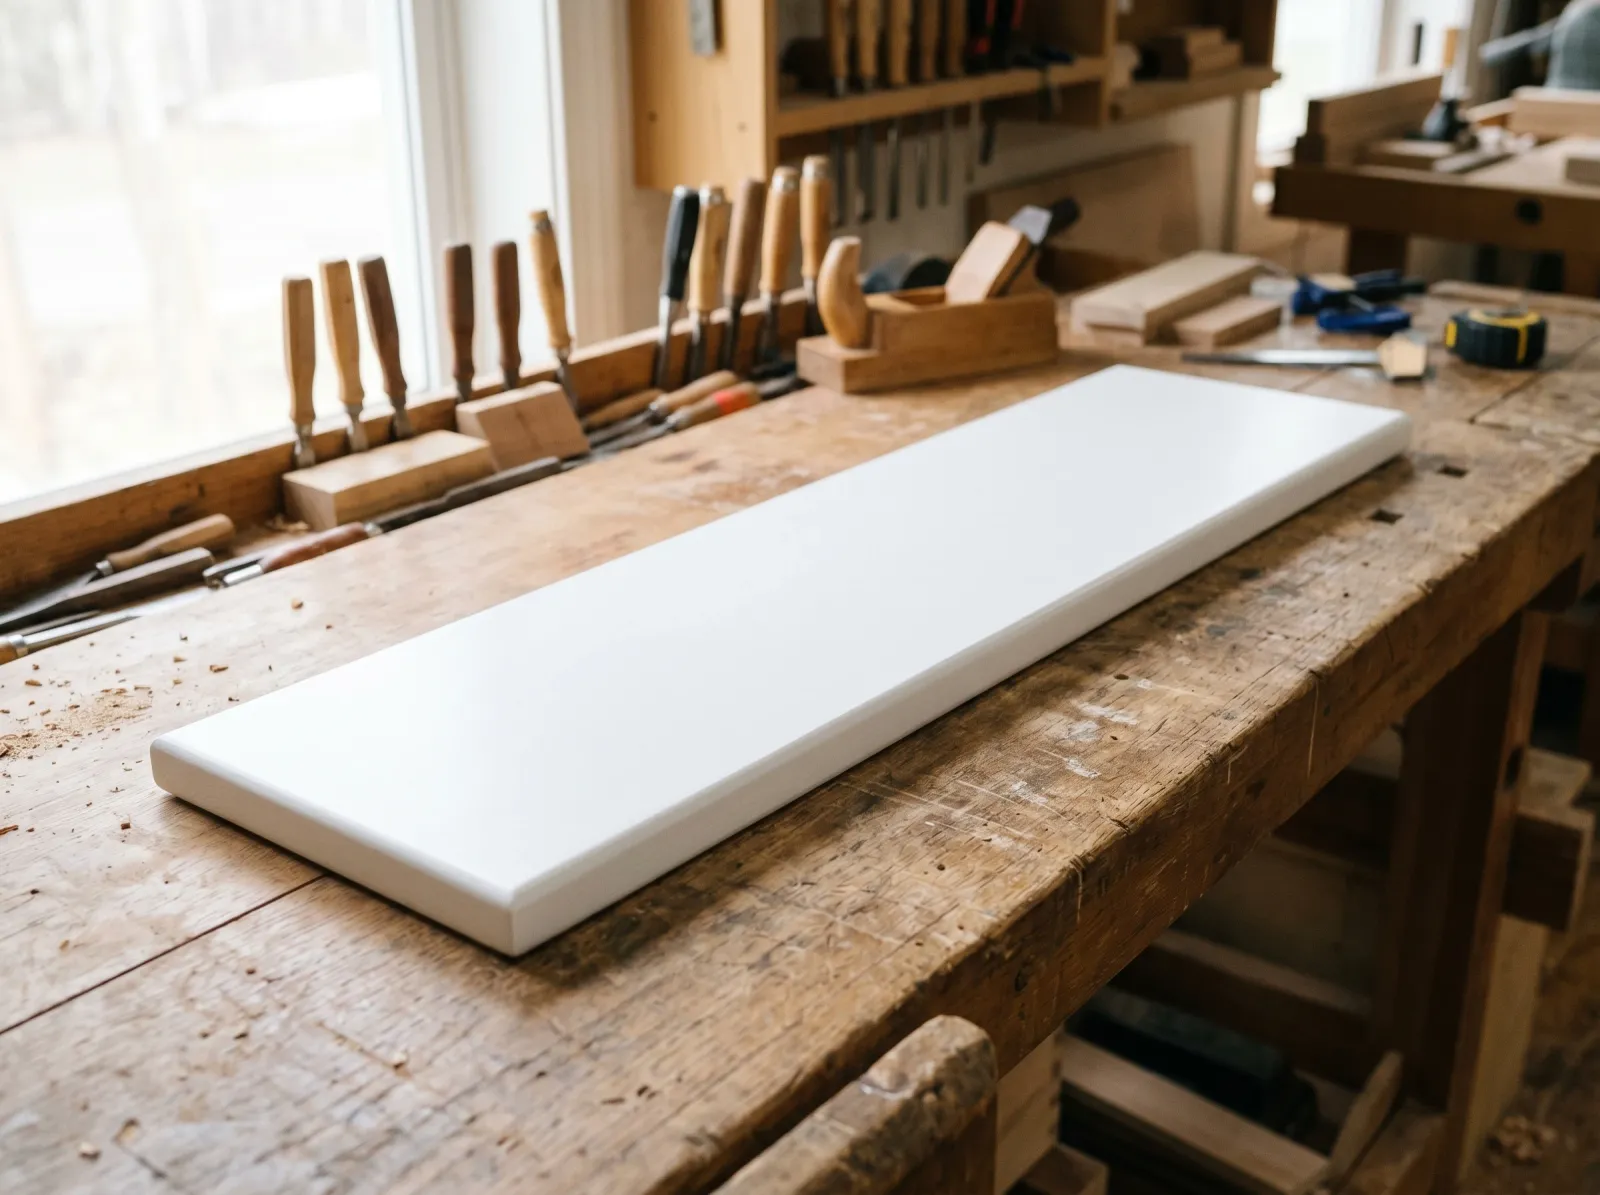 With the extractives locked under the primer, a standard acrylic topcoat stays clean.
Safety
Oil and shellac primers are high in solvents and VOCs. Cross-ventilate, wear an organic-vapor respirator in any enclosed space, and keep them away from ignition sources. Gloves and eye protection. Never mix bleach with vinegar, ammonia, or hydrogen peroxide if you’re cleaning mildew off the wood first; that combination produces toxic chlorine gas. Rinse any cleaner fully and let the wood dry before priming. For the trade-offs behind solvent versus water-based coatings, see oil-based vs water-based paint and what a VOC actually is.
Recommended Product
Zinsser Cover Stain is the right call for whole-board cedar and redwood. It’s an oil-based alkyd, so the carrier never re-wets the tannin it’s sealing, and the film flexes with the wood through seasonal movement outdoors. One coat handles moderate bleed; go two on heavily extractive heartwood. Pair it with a shellac primer on the knots where resin concentrates.
Buy Zinsser Cover Stain on Amazon → · Best primer round-up →
If you want a fully water-based job for VOC or cleanup reasons, understand the gamble: only a few acrylic primers are rated for tannin, and on cedar or redwood the water in them re-wets the very thing you’re trying to seal. I’d use oil or shellac on those species and save the water-based blockers for lighter-bleeding woods.
Prevention
The fixes that keep tannin bleed from coming back are mostly about water, because water is the carrier:
- Prime dry wood only. Most repeat bleed traces back to a board that was damp when it got primed. Confirm moisture content first.
- Back-prime new siding. Seal the back and the cut ends before installation. Tannin and moisture move from any unsealed face, and unsealed end grain wicks water like a straw.
- Keep the wood from getting repeatedly wet. Direct downspouts away, keep sprinklers off the siding, maintain gutters. Wood that cycles wet-and-dry bleeds far longer than sheltered wood.
- Seal knots even on woods that bleed lightly in the field. A pine or fir board may behave across the surface and still ring every knot in amber. Hit the knots with shellac as a matter of course.
- Don’t strip back to bare cedar unless you have to. Every time you expose fresh heartwood, you expose fresh extractives.
For the broader prep sequence on exterior wood, including caulking and topcoat selection, see how to paint exterior wood.
Common Mistakes
- Recoating with latex to “cover” the stain. The water re-dissolves the tannin and lifts it into the new coat. You’re feeding the problem.
- Using a water-based primer on cedar or redwood. Same chemistry. The carrier is the enemy on tannin-heavy species.
- Priming damp or freshly delivered wood. Liquid water in the board is the transport mechanism. Wait for dry.
- Spot-priming only the visible stain. Tannin moves through any unsealed area. On a stained board, seal the whole board.
- Using shellac across a full exterior wall. It works, but it’s brittle and costly at scale and can struggle with exterior movement. Reserve it for knots and spot bleed; use oil for the field.
When to Call a Pro
- The wood is soft, dark, or punky over a wide area, which means rot, not just bleed. The board needs replacing.
- Bleed keeps returning after a correct oil or shellac prime, which points to an active moisture source behind or below the wood that needs diagnosing.
- Pre-1978 home where you’d be sanding old painted wood. Lead test before any sandpaper touches it, and follow EPA RRP containment.
- Full two-story cedar siding where staging, prep, and priming volume make the solvent exposure and the time a real job.