How to Fix Water Stains on a Ceiling (and Stop Them Bleeding Back Through)
Diagnose an active leak vs a cured stain, fix the source first, then spot-prime with the right stain blocker — Zinsser BIN, Cover Stain, or Bulls Eye 1-2-3 — and repaint without flashing.

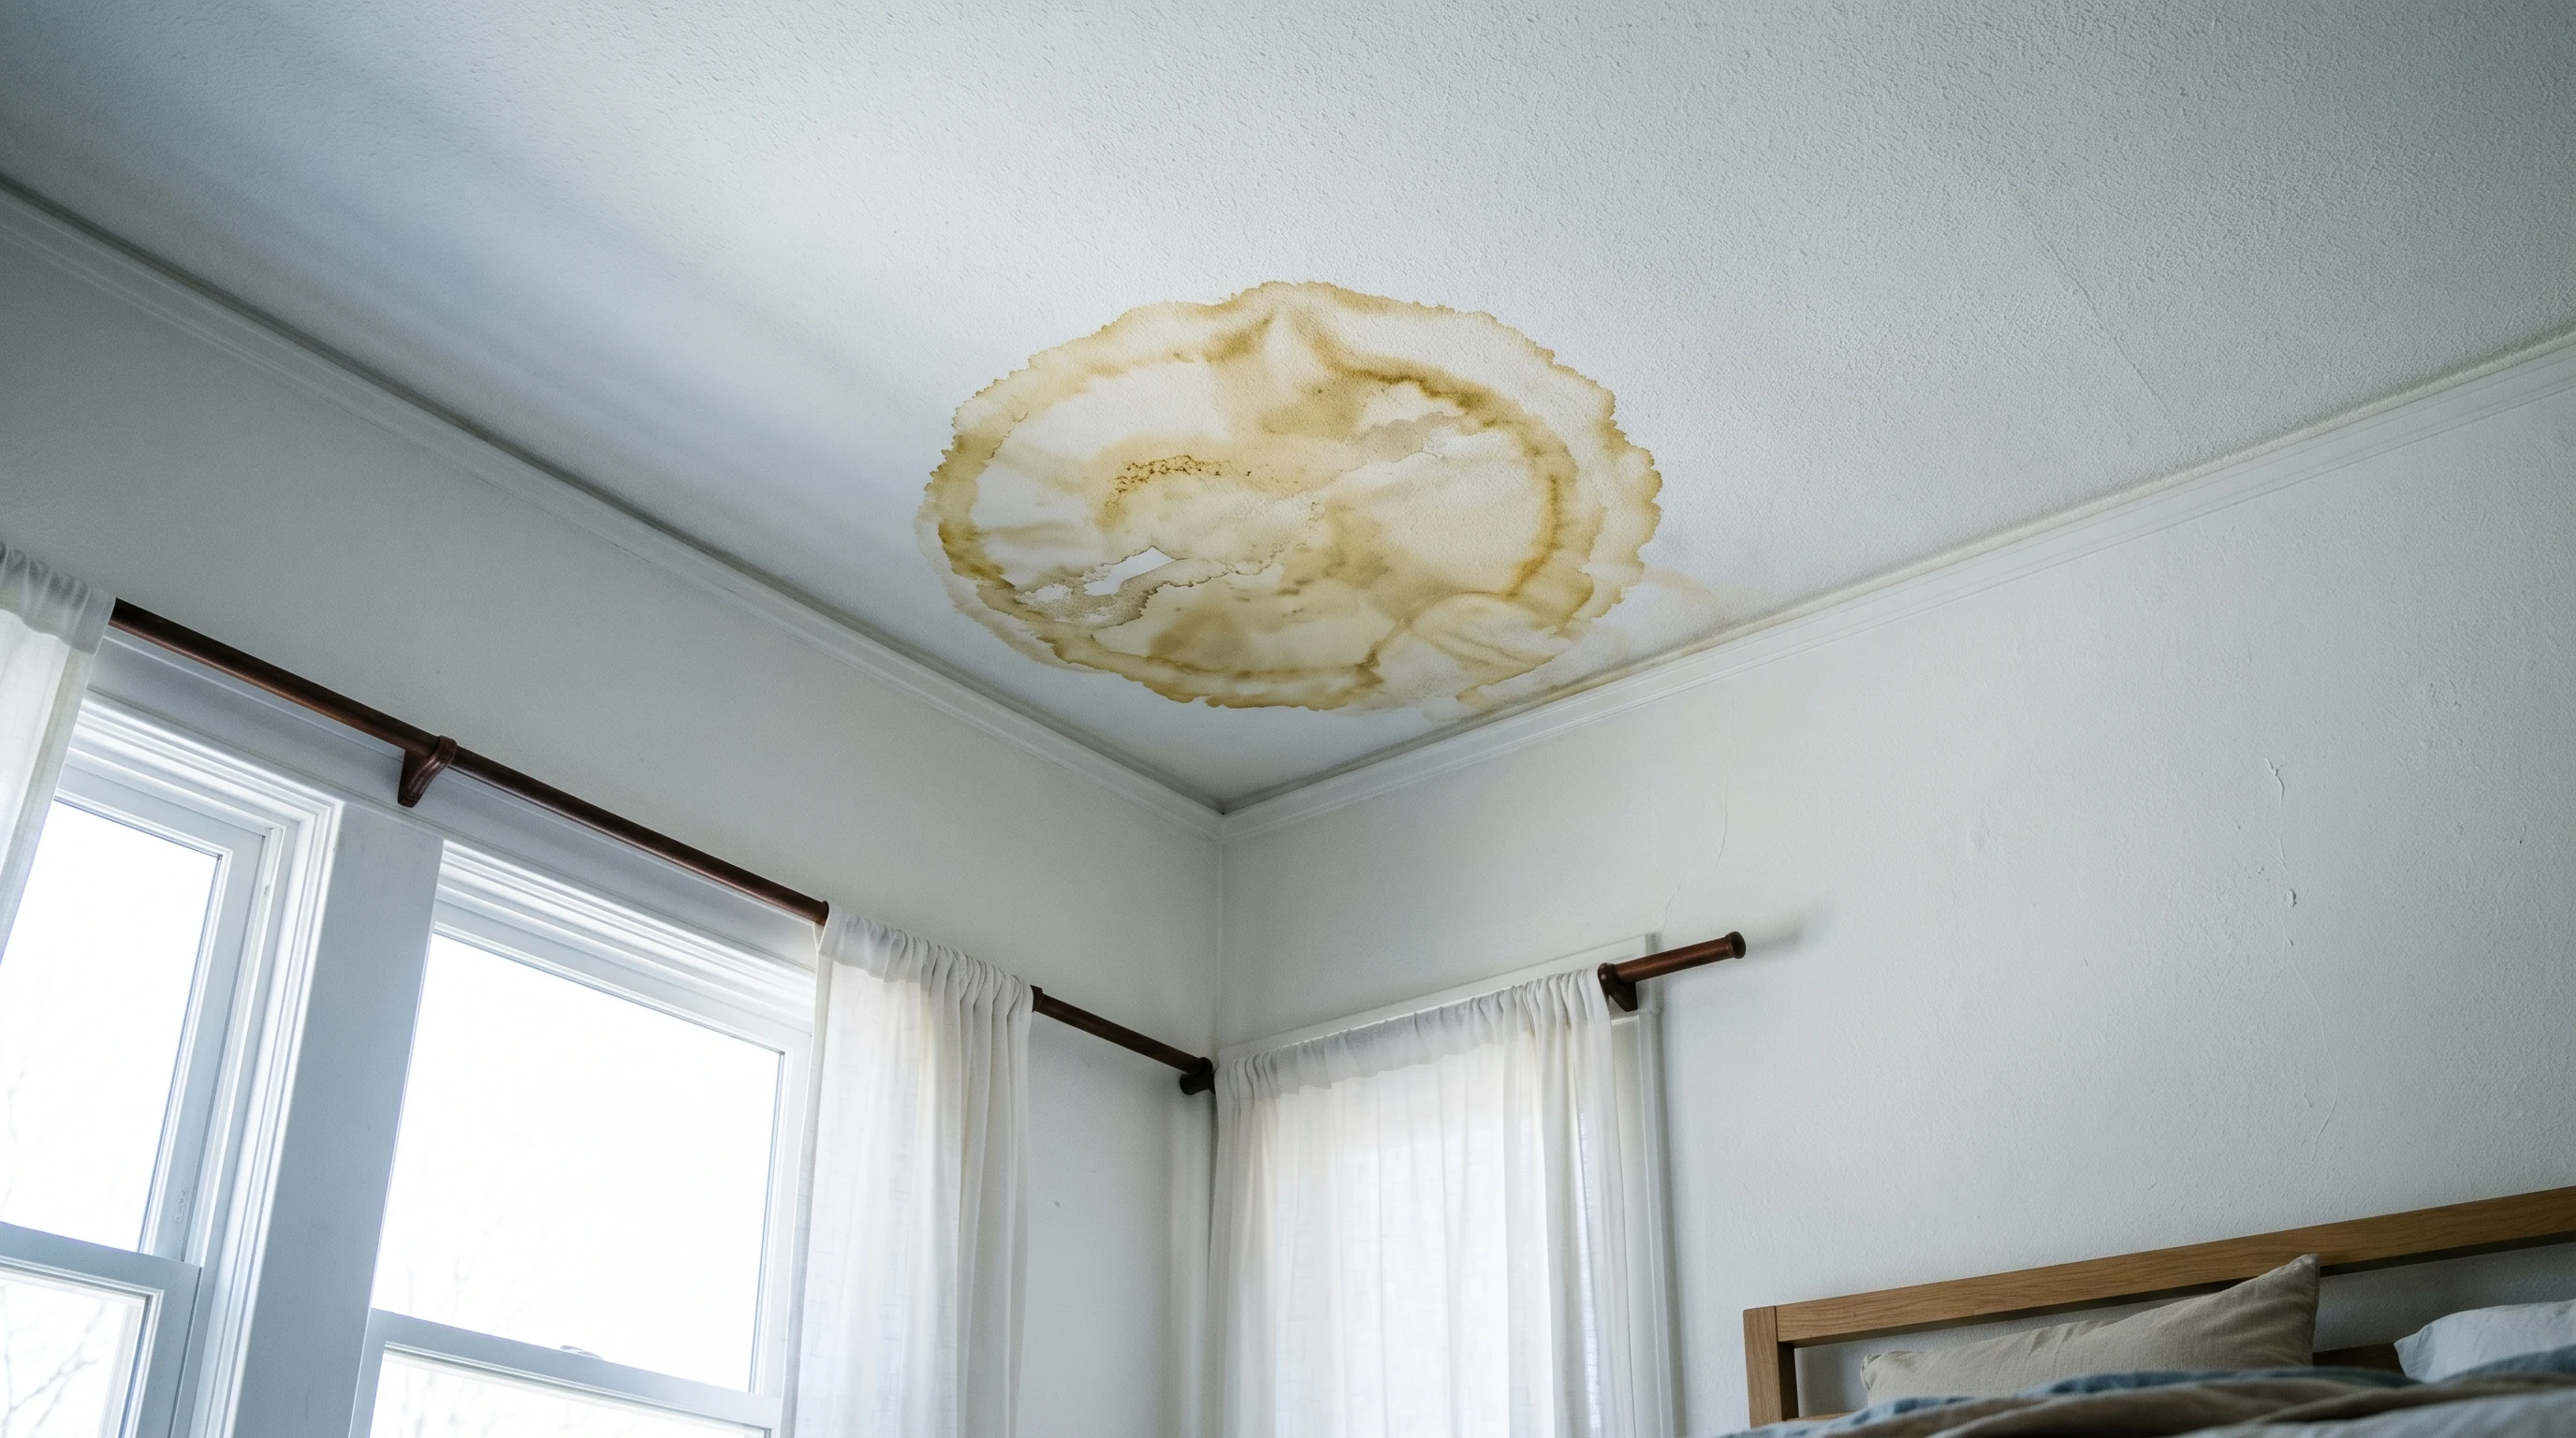
A yellow-brown ring on a ceiling is the easy part. The hard part is figuring out whether the leak that put it there is fixed. Source first. Always source first. Paint over an active leak and you’ll be back here in three weeks watching the same ring come up through fresh primer.
Does This Match What You’re Seeing?
The shape and location of a stain tell you most of what you need to know about the leak.
- Single ring, sharp brown edge, directly under a bathroom or kitchen: plumbing leak. Drain joint, supply line, tub overflow gasket. Usually a one-time event by the time you see the ring.
- Multi-ring or wandering edge along an exterior wall, top floor: roof. Either a flashing failure or a shingle gone. Re-blooms after every storm.
- Single spot at the corner of an exterior wall, second floor: ice dam, gutter overflow, or wall flashing. Seasonal, comes back every February in cold climates.
- Long streak following a ceiling joint: condensation in the attic dripping along the framing. HVAC or insulation issue, not a leak from above.
- Yellow halo without a defined edge, kitchen ceiling: grease and steam. Not water. Wash and prime, no leak hunt needed.
- Black or fuzzy growth around the stain: mold colonized after the wetting. Treat that first. See how to fix mold on walls.
If the pattern doesn’t match cleanly, walk the floor above and the attic. The source is usually obvious once you’re standing over it.
How Serious Is This?
Three tiers, depending on whether the source is fixed.
- Cured stain, dry substrate, source confirmed dead. Single ring under a bathroom where a wax ring got replaced last year. Same-afternoon fix. Spot-prime, topcoat the whole ceiling, done.
- Recent stain, source unclear, substrate still cool to the touch. Don’t paint yet. Run a fan for 7 to 14 days, find the source, fix it, then come back.
- Sagging drywall, soft substrate, mold growth, repeat blooms after rain. Stop. The drywall is compromised and there’s an active intrusion. Cut out the bad section, fix the leak above, replace the rock, then prime and paint.
A bulging ceiling with water in it is a different problem. Punch a small hole at the low point of the bulge, drain it into a bucket, then diagnose. Don’t let it sit and try to dry. The weight will collapse it.
Why This Is Happening (root Cause)
Water moves through framing and gypsum and picks up tannins from wood, rust from drywall screws and steel framing, and salts from the gypsum itself. When the water evaporates at the ceiling surface, it leaves those compounds concentrated in a ring at the edge of the wet zone. That brown halo is the dissolved-solids residue.
The compounds are water-soluble. That matters. Roll a latex topcoat over the ring without primer and the latex carrier redissolves the tannins, lifts them into the wet film, and you watch the ring come up through fresh paint as it dries. Two coats. Three coats. Doesn’t matter. You need a primer that the tannins can’t dissolve into. Shellac and oil-based primers do that job. Latex primers don’t, or only do it for the lightest stains.
The other half of the equation is moisture in the substrate. A damp ceiling will keep pushing water and dissolved solids upward as long as the source feeds it. Any primer applied over wet drywall traps that moisture, breaks bond, and lifts. Substrate has to be dry before primer goes on, period.
The Fix
Step 1. Find and Stop the Source
Walk the floor above. Run the upstairs shower. Flush the toilet. Listen at the supply lines. If the source is on the roof, walk the roof or hire a roofer for a 30-minute look. Don’t skip this step because the stain “looks old.” Some stains are cured. Some are last week’s leak that already dried at the surface.
Don’t paint until the source is fixed. Repeat: stop the source first.
Step 2. Confirm the Substrate Is Dry
Lay your palm flat on the stain. Cool and damp means it’s still wet inside. Same temperature as the surrounding ceiling means it’s dry enough to work. With a fan running, drywall takes 7 to 14 days, plaster up to three weeks. A pinless moisture meter under 1% MC is the pro answer.
If it stays cool and damp past two weeks of ventilation, you have an unresolved leak. Go back to step 1.
Step 3. Spot-Clean
Wipe the stain with a damp microfiber to lift any loose chalk or residue. If mildew is colonizing the ring, treat with Concrobium Mold Control or a 1:10 bleach solution and let dry 24 hours. Never mix bleach with vinegar, ammonia, or hydrogen peroxide. Produces toxic chlorine gas.
Step 4. Pick the Primer
Three options. Match to the stain.
- Zinsser B-I-N Shellac-Base Primer. The gold standard for water, smoke, and nicotine. Dries in 45 minutes, recoat in 60. Smells like a distillery while you’re cutting in. Cleanup with denatured alcohol. Use this if the ring is dark, old, or you’ve already had a primer fail on it.
- Zinsser Cover Stain Oil-Base Primer. Slower (2-hour dry), bigger blocking power on heavy ceiling stains, mineral-spirits cleanup. Use on bigger areas where you need longer open time and the spray-can format isn’t enough.
- Zinsser Bulls Eye 1-2-3 Plus Water-Base Primer. Fastest dry of the three, soap-and-water cleanup. Not as strong on heavy water stains. Use only on a single light ring where you’ve never had a primer fail.
When in doubt, BIN. It’s the one that always works.
Step 5. Spot-Prime, Don’t Whole-Ceiling-Prime
Brush BIN onto the stain with a chip brush, feathering 2 to 3 inches past the visible edge. Don’t prime the whole ceiling. Whole-ceiling priming under a flat ceiling paint creates a sheen difference where the BIN bled into the texture, and the spot still flashes through.
Recoat after 60 minutes if a second pass is needed for full coverage on a heavy ring. Wait the full hour. Recoat early and the second pass redissolves the first.
Step 6. Popcorn Ceilings
Don’t roll. Don’t brush. Buy BIN in the spray can format and hit the stain from 12 to 14 inches in light overlapping passes. A roller will pull the popcorn off the substrate. If you do knock some off, a popcorn texture spray can patch the area, then re-prime once the texture has cured 24 hours.
Step 7. Plaster Ceilings
Same primer choices. Check for cracks or sagging around the stain before you prime. A spider-web crack pattern around the wet area is plaster losing its key from the lath, and that’s a structural moisture problem, not a paint problem.
Step 8. Topcoat the Whole Ceiling
Two coats of ceiling paint across the whole ceiling, not just the spot. Cut in the perimeter, roll the field while the cut-in is still wet, don’t stop in the middle. If the ceiling is matte and the spot still flashes after one topcoat, a second pass blends the sheen the rest of the way.
For a bathroom ceiling, swap regular ceiling paint for a mildew-resistant satin like Zinsser Perma-White. See best bathroom paint.
Common Mistakes
- Painting over a wet stain. The substrate has to be dry. A damp ceiling bleeds back through any primer.
- Using regular wall paint as a stain blocker. Latex paint isn’t a primer. The tannins redissolve in the carrier and come right back up.
- Recoating BIN inside the dry window. Wait 60 minutes. Recoat early and you redissolve the first pass.
- Whole-ceiling-priming a single ring. Spot-prime, then topcoat the full ceiling. The reverse leaves a halo.
- Skipping the source diagnosis because the stain looks old. Half the “old” stains I get called on are last week’s slow leak that already dried at the surface.
When to Call a Pro
- Ceiling drywall is sagging, soft, or has visible mold growth.
- Stain re-blooms within a week of priming with shellac. The source isn’t fixed.
- Pre-1978 home with cracking or peeling ceiling paint near the stain — test for lead first.
- Stain is on a plaster ceiling with widespread cracks or visible sag from the lath.
- You can’t identify the source after walking the floor above and the attic. A leak detection service or a roofer beats guessing.
- Mold area greater than 10 sq ft per EPA guidance.
What’ll Bite You in Two Years
Skip the source diagnosis and the same ring comes back. Every time. I had a homeowner repaint the same ceiling under a second-floor bathroom three times in two years before he pulled the toilet and found the wax ring had been weeping since the install. Twenty minutes with a new wax ring and the stain hasn’t come back since. Source first. Always source first.