Best Texture Rollers and Patch-Blending Tools
Six texture rollers, aerosols, and knockdown tools tested on real drywall patches. Top pick: Wooster Cirrus X 1-inch nap, plus the aerosol that saves a small repair.

Disclosure: Some links below are affiliate links. We earn a commission if you buy through them, at no extra cost to you.
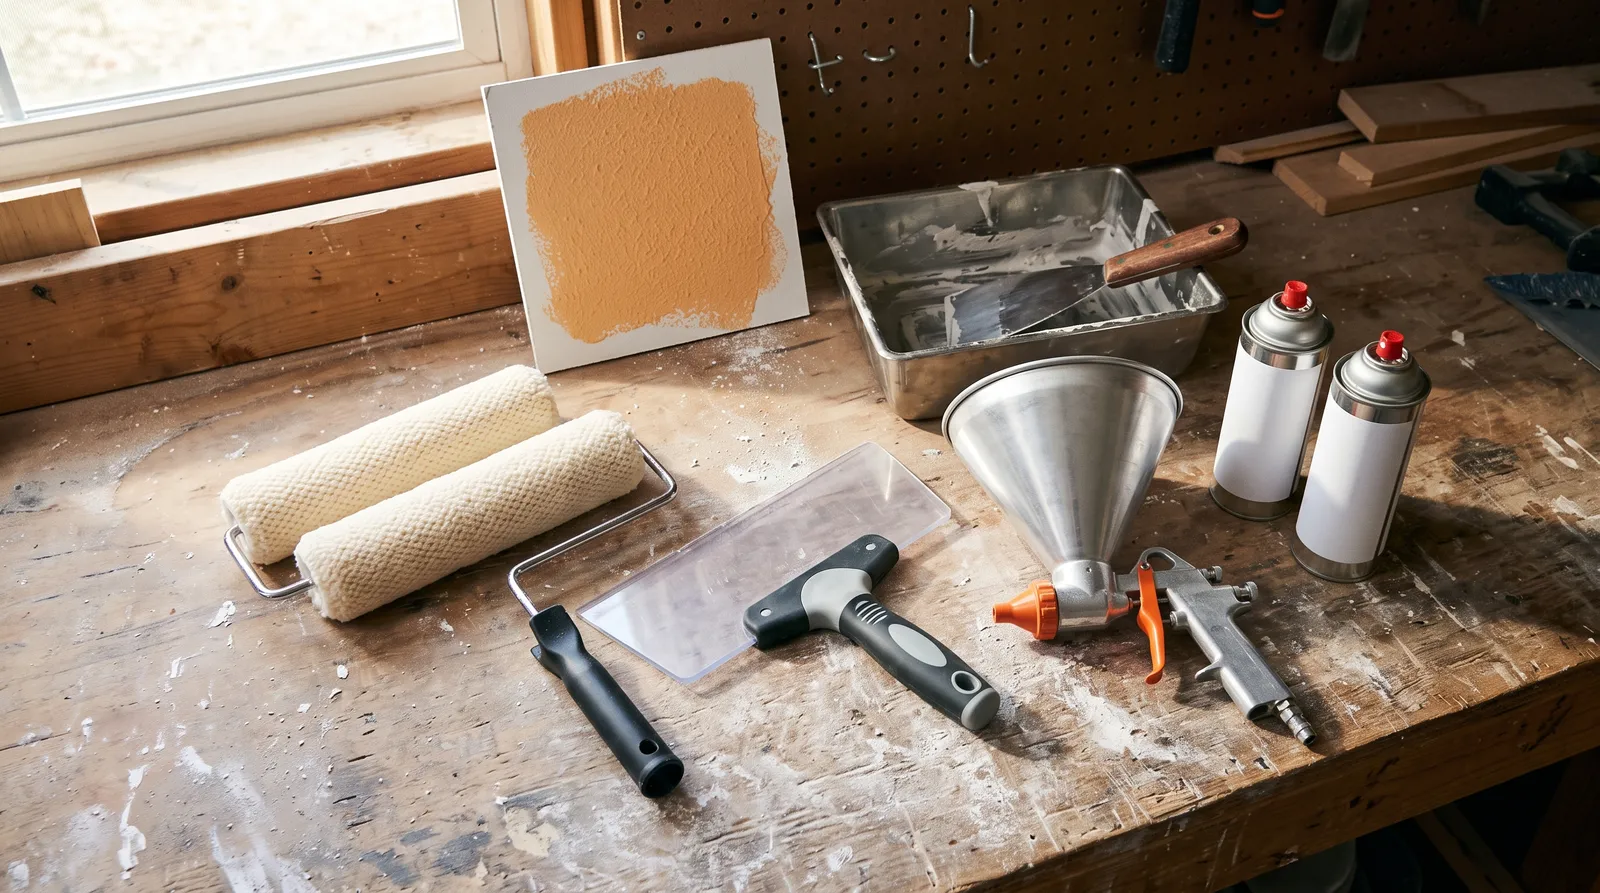
Top pick: the Wooster Cirrus X in a 1-inch nap. About $12 a cover, woven European polyamide, and the only roller in this test that carried a full load of thinned joint compound without collapsing flat or shedding fiber into the wet mud. It wins on load capacity and on the stipple it leaves, which sits close enough to a builder orange peel that a flat topcoat hides the transition. It falls short at cleanup, where a cover left loaded overnight is a total loss. If you’re blending a patch smaller than a cereal box, skip the roller and buy the Homax PRO GRADE Knockdown aerosol instead. The Purdy Colossus is the runner-up for stucco and repeat use. The Homax Texture Gun & Hopper is the only tool here that does a ceiling in one afternoon. And a Hyde clear-blade knockdown knife is the $31 that decides whether the finished repair reads as a repair.
A texture roller is not one tool solving one problem.
It’s a category where the right answer flips based on how big the damaged area is, and most people buy the wrong end of it.
Six Tools, Three Different Jobs
Search “texture roller drywall” and you get two different intents mashed together. Half the people want to roll texture onto a wall. The other half want to roll paint over a wall that’s already textured and are wondering why their 3/8-inch nap skips the valleys. Both need a long woven nap, for opposite reasons.
Then there’s a third group, and it’s the biggest one: somebody patched a hole, the patch is smooth, the wall is not, and now the repair is a flat island in a sea of orange peel. That’s not a roller job at all. Aerosol texture with an adjustable nozzle blends a small patch better than any roller will, because you can feather the spatter outward until the new pattern dissolves into the old. A roller leaves a rectangle with an edge.
So this round-up covers all three. Two roller covers, two aerosols, one hopper gun, one knockdown blade. I bought everything at retail, hung four sheets of 1/2-inch drywall on a garage test wall, textured them to orange peel, knockdown, and a rolled sand finish, then cut real damage into each one. Every tool had to blend into an existing pattern rather than create one on a blank board. That distinction is the whole test. Creating texture from scratch is easy. Matching what’s already there is the part that goes wrong.
Matching the Texture You Already Have
Before you buy anything, walk over to the wall with a flashlight and hold it flat against the surface so the light rakes across. That tells you which of four patterns you’re dealing with.
Orange peel. Fine even spatter, no flat spots, looks like citrus rind. The most common interior wall texture in American tract housing since roughly the 1980s. Sprayed, never rolled. Match it with an aerosol on a fine nozzle setting, or a hopper gun with a thin mix.
Knockdown. Spatter that’s been flattened with a wide blade, leaving mottled plateaus with low valleys between. Second most common. The look depends entirely on when you flatten it, which is why the blade matters more than the can.
Rolled sand or stipple. Continuous raised pattern with a visible directional grain from the roller. This one is a roller texture, applied with a heavy nap over roll-on compound. If your wall has a repeating stipple that runs in one direction, it was rolled, and a roller is how you fix it.
Skip trowel and hand texture. Trowel-applied, irregular, often on Southwest ceilings. No tool here matches it well. That’s a taping knife and patience.
Get this wrong and everything downstream is wasted. Spraying orange peel onto a rolled-sand wall gives you a patch that reads wrong under every light in the room, and the fix is sanding back to paper.
Nap, Nozzle, or Hopper
Three specs decide which tool you need, and only one of them is on the packaging.
Patch size. Under two feet square is aerosol. Two feet to a full wall is roller. A full room or any ceiling is hopper gun. The economics flip hard at each boundary. A ceiling in aerosol is eight cans, $150, and a hand cramp; the same ceiling in thinned all-purpose compound through a hopper gun is about four dollars of material.
Nap length and fabric. For laying texture compound, 1-inch woven nap. Woven, not knit. A knit cover sheds fiber, and a fiber lying in wet mud dries into a hair you can see from across the room and can’t sand out without wrecking the pattern. Both picks here are woven polyamide for that reason. For painting over existing texture, drop to 3/4-inch on knockdown and 1/2-inch on light orange peel, and read the roller cover round-up for the full nap chart.
Droplet control. On an aerosol this is the nozzle. Cheap cans have a fixed spray; the PRO GRADE line has a genuinely adjustable one, and it’s the difference between matching a wall and approximating it. On a hopper gun, droplet size comes from air pressure and mix viscosity together, which is why the first bucket you mix is always wrong.
One more spec nobody lists: reach. Ceiling knockdown needs a blade on an extension pole. If your knife handle isn’t threaded, you’re moving a ladder every four feet, and by the fourth move the texture has skinned over. Pair the blade with a real pole from the extension pole round-up.
Comparison at a Glance
| Tool | Type | Best patch size | Texture it makes | Needs | Price |
|---|---|---|---|---|---|
| Wooster Cirrus X, 1-inch nap | Roller cover | 2 ft square to full wall | Rolled stipple, sand | Frame, thinned compound | $9–$14 |
| Purdy Colossus, 1-inch nap | Roller cover | Full wall, stucco, block | Rolled stipple, coarse | Frame, thinned compound | $10–$15 |
| Homax PRO GRADE Knockdown, 25 oz | Aerosol | Up to 75 sq ft | Knockdown, orange peel | A knockdown blade | $16–$22 |
| Homax Orange Peel Touch Up, 12 oz | Aerosol | One or two small patches | Orange peel, knockdown | Nothing | $9–$13 |
| Homax Texture Gun & Hopper | Hopper gun | Whole rooms, ceilings | Anything from fine to heavy | 3/4 HP compressor | $50–$70 |
| Hyde Knockdown Knife, 24-inch | Blade | Any knockdown work | Flattens what you sprayed | Extension pole for ceilings | $28–$32 |
How I Ran It
Same protocol on every tool, on the same four test sheets.
Load and shed test. One gallon of USG all-purpose joint compound thinned to heavy cream per cover. I rolled a 4 x 8 sheet, then picked fibers out of the wet surface with tweezers under a raking work light and counted them. A cover that sheds is disqualified no matter how nice the pattern looks, because you can’t remove a fiber from wet texture without wrecking the area around it.
Pattern consistency. Stipple from a freshly loaded cover against stipple from a nearly dry one, photographed side by side. Every roller degrades as it empties; the question is how fast.
Aerosol working window. Each can sprayed on a scrap board to set the nozzle, then onto a patch, then knocked down at 60, 120, and 240 seconds.
The blend test, which is the only one that matters. Two coats of flat white latex over each finished repair, then a work lamp held flat against the wall, raking light across the patch. Every mismatch shows up under raking light. It’s why I don’t trust a texture tool review that stops at the bare compound stage.
Cleanup timed at a utility sink, then a second texture session on the washed covers to see what survived.
The Cirrus X won the shed test outright, with zero fibers pulled from three panels. The Colossus won cleanup and came back usable for round two. The PRO GRADE aerosol won the blend test on knockdown patches. The hopper gun won on speed and cost per square foot and lost on everything requiring setup.
1. Wooster Cirrus X, 1-Inch Nap, Top Pick
Woven European polyamide, 1-inch nap, about $12. On paper it’s a roller cover for stucco and rough exterior. In practice it’s the best texture roller you can buy at a home center, and the reason is fabric construction.
Thinned joint compound is heavy, several times the weight of paint at the same volume, and most covers respond by matting flat against the wall on the second pass. That turns your stipple into a smear. The Cirrus X’s woven pile stands back up. I rolled a full 4 x 8 sheet on one gallon of compound and the pattern at the end matched the pattern at the start closely enough that I couldn’t find the boundary under raking light after paint.
Zero shed. That’s the number I care about most and the one nobody publishes. Three panels, tweezers, work light, nothing to pull out. A knit cover on the same test gave me eleven fibers on one panel, each a visible hair in the dried texture.
The stipple reads as a light builder orange peel once painted flat. On the 30 x 30 inch replaced section it blended into the surrounding rolled-sand texture with one seam visible, and that seam was my fault for stopping mid-wall instead of rolling to a corner.
Cleanup is where you pay. A 1-inch nap loaded with compound takes about ten minutes at a utility sink and a lot of water, and left overnight the cover is trash. Budget one cover per session and stop pretending you’ll save it. On a small patch this is the wrong tool entirely; the aerosols below blend a 4-inch hole in two minutes with no mixing.
| Spec | Value |
|---|---|
| Fabric | Woven European polyamide |
| Naps | 1/2-inch, 3/4-inch, 1-inch |
| Widths | 4.5-inch to 18-inch |
| Best for | Rolling texture compound, painting heavy texture, stucco |
| Approx. price | $9–$14 |
Buy it if: you’re texturing a wall or larger and you want the pattern to stay consistent from the first pass to the last. Skip it if: the repair is smaller than two feet square, or you don’t own a cage frame that fits a 1-inch cover without binding.
2. Purdy Colossus, 1-Inch Nap, Runner-Up
The Colossus is the same idea executed for abuse. Woven polyamide again, built for semi-rough through extra-rough surfaces, and Purdy is explicit that it’s a drywall, masonry, stucco, and rough wood cover.
Where it beats the Cirrus X: durability and washout. I ran it over a concrete block panel that would have shredded a knit cover and the pile came through intact. After one wash it went back on the frame and performed like a fresh cover, which I can’t say for the Wooster.
Where it loses: the stipple is coarser and less even on flat drywall. On a rolled-sand wall that’s fine, arguably better. On a wall you want subtle, the Cirrus X reads cleaner. It also springs back hard off an inside corner, so the first pass near a ceiling line wants a slower hand than you’d expect. It sheds a little on the very first load; break it in on cardboard for thirty seconds and that stops.
Verdict: buy this one if you’re texturing more than once, or if there’s masonry, block, or stucco anywhere in the project. Buy the Cirrus X if this is a one-time interior job and you want the finer pattern.
3. Homax PRO GRADE Knockdown Aerosol, Best for a Knockdown Patch
This is the can I hand people who patched a hole and then discovered their wall has texture.
A 25 oz can covering up to 75 square feet, water-based, with a nozzle that adjusts droplet size rather than just volume. That adjustment is the whole product. Knockdown varies enormously between builders and decades, and a fixed-spray can hands you one pattern to take or leave. With the PRO GRADE I sprayed a scrap board at four settings, held each against the test wall, picked the match, then pointed the can at the repair. The finished patch survived raking light on the 12-inch tape blowout, the hardest blend on the board because the damage is long and thin and your eye follows the line.
Water-based matters more than it sounds. Overspray wipes off trim with a damp rag while wet, and the room is usable the same day. The oil-based versions smell for two days and need mineral spirits off a baseboard.
The working window is short. Roughly one to four minutes between spraying and flattening depending on how warm and dry the room is, and if it skins over you’re sanding it off and starting again. Spray a scrap board at the same moment you spray the wall, then test the board with a corner of the blade every thirty seconds. The can doesn’t tell you that.
Two honest cons. You waste product on the test board, and you have to. And the last fifth of the can loses pressure and coarsens the pattern, so on anything bigger than a couple of patches buy two and switch before the first goes weak.
| Spec | Value |
|---|---|
| Size | 25 oz |
| Coverage | Up to 75 sq ft |
| Texture | Knockdown; orange peel if you skip the flattening |
| Base | Water-based, no prime required on the texture itself |
| Approx. price | $16–$22 |
Buy it if: your walls are knockdown and you have a patch to hide. Pair it with the Hyde blade below.
4. Homax Orange Peel Texture Touch Up, 12 oz, Best Small-Patch Can
Smaller can, same family, and for one outlet-sized hole it’s the smarter buy. 12 oz instead of 25, and it does orange peel straight off the nozzle or knockdown if you flatten it, which between them covers most American drywall.
It’s easier to control at close range than the big PRO GRADE can. Less pressure means less blowout around the patch edge, and on a 4-inch hole that edge is the entire job. I got a cleaner feather with this one on the small defects.
Downside is capacity. A 3-foot repair empties it, and the pattern is finer than a heavy builder orange peel, so on a coarse 1990s wall it can read too subtle and leave the patch looking smoother than its surroundings.
Verdict: the can for one or two small holes. Anything bigger, size up.
5. Homax Texture Gun and Hopper, Best for Walls and Ceilings
Different tool, different economics. The hopper gun shoots thinned all-purpose joint compound straight from a bucket, which drops material cost to roughly a dollar a wall against about $20 a wall in aerosol. Three air settings, and droplet size comes from the air setting and the mix thickness working together.
It needs a 3/4 HP or larger compressor. That’s the gate, and it’s why this sits at number five. Most homeowners don’t own one, and renting a compressor plus buying the gun costs more than a lot of small jobs are worth.
For a whole ceiling nothing else here competes. I ran a fine orange peel across a full test ceiling in about forty minutes of actual spraying. The same ceiling in aerosol is eight cans and most of a day.
Mixing is a skill. First bucket is always wrong, usually too thick, and too thick means the gun spits marbles instead of droplets. Thin toward pancake batter, test on cardboard, adjust, test again. Masking and cleanup take longer than the spraying does, so plan the day around prep. A respirator is not optional with a hopper gun overhead; see the respirator round-up for what filters compound dust.
Skip this if you’re doing anything smaller than a full room. Buy it if you’re texturing a new build, a garage conversion, or a ceiling, and you already have the compressor.
6. Hyde Knockdown Knife, Best Blade
Thirty-one dollars for a piece of plastic on a handle. It’s the best money in this article.
The blade is clear flexible Lexan, and seeing through it is the feature. Steel taping knives hide the texture at exactly the moment you need to watch it flatten, so you work blind and check after every pass. Through the Hyde you watch the peaks fold over and stop when it looks right.
Flex is the second thing. Too stiff scores lines into the valleys and cuts the pattern instead of flattening it. Too floppy just follows the contour. Hyde tuned this one to ride the peaks, and on the knockdown panel it gave me an even flattened plateau with no score lines. Available in 18-inch and 24-inch; get the 24 unless you work in tight closets. The threaded handle takes an Acme extension pole, the only sane way to knock down a ceiling.
It’s not a putty knife. The flex that makes it good at knockdown makes it useless for spreading compound. And it nicks if you set it face-down on a gritty floor, which I did, and which put a line in the next panel I flattened.
Tools I Tried and Cut
- Textured “pattern” rollers with a raised rubber sleeve. Decorative repeating patterns, not drywall texture. Fun for a feature wall, wrong for a repair.
- Foam texture rollers. Cheap, and they collapse under thinned compound by the second pass.
- The Homax manual pump texture gun. Works, no compressor needed, genuinely useful on a small ceiling. It fatigued my forearm in about ten minutes and the droplets drifted coarser as I tired. Worth a look if you’ll never own a compressor.
- Cheap knit 1-inch nap covers. Shed. Eleven fibers on one panel, each drying into a visible hair.
- A wide steel taping knife for knockdown. Everyone tries it because it’s already in the toolbox. Opaque, too stiff, scores the valleys. Fine in a pinch on a patch the size of a playing card.
Getting the Repair to Disappear
The tool is half of it. The order of operations is the other half.
Feather the compound first. A patch standing proud of the wall shows through any texture you put over it, because texture is only a few millimeters deep. Sand it flush and check with a raked flashlight before you texture anything. The drywall hole repair guide covers the patching stage.
Prime the bare patch before texturing. Compound and paper drink at different rates, and a texture sprayed half onto primer and half onto bare paper dries at two thicknesses.
Match on a board, never on the wall. Every texture failure I’ve cleaned up started with somebody spraying at the repair to “see how it looks.”
Then prime again over the finished texture, and only then paint. Fresh texture is porous and thirsty. Paint straight over it flashes to a duller sheen in a patch shape you’ll see from the doorway forever. That’s the most common reason a technically correct texture repair still looks obvious, and it has nothing to do with the texture. The primer explainer covers why porosity drives sheen.
Flat paint forgives texture mismatches; eggshell and satin magnify them. If your walls are satin, expect to repaint the full wall corner to corner. Check the sheen guide before deciding whether you’re patching a spot or repainting a wall.
Cleanup and What Survives
Roller covers loaded with joint compound are consumables. Wash immediately or lose them. Compound sets hard inside the nap within a few hours and soaking won’t bring a cover back. The Colossus survived one wash and a second session. The Cirrus X came back stiffer and gave a different pattern, which on a texture job is a fail even if the cover is technically usable.
Hopper guns need the body and nozzle flushed the moment the bucket empties. Dried compound in the air passage is a rebuild.
Aerosol cans get inverted and sprayed clear for a few seconds after every use. Skip that once and the nozzle is welded shut next time, which is how half-full texture cans end up in the trash. The Hyde blade wipes clean with a damp rag while the material is wet.
Mistakes I Keep Seeing
- Buying a 1/2-inch nap because that’s what the store stocks. It smears compound instead of stippling it. Order the 1-inch.
- Spraying at the wall to test the pattern. Test on cardboard. Always cardboard.
- Knocking down too early. Wet material smears into a flat streak that looks nothing like the wall. Wait for the gloss to go dull.
- Texturing over an unprimed patch. Two absorbencies under one texture coat means two thicknesses of texture.
- Painting over fresh texture without priming. The patch flashes duller than the wall, and the repair is visible from the doorway forever.
- Using a steel taping knife for knockdown. Opaque, stiff, scores the valleys. Buy the clear blade.
- Trying to blend a 4-inch patch with a roller. The roller leaves a rectangle. Use the can.
What I’d Actually Buy
For a homeowner with one patched hole and a textured wall: the Homax Orange Peel Touch Up at $11, a scrap of cardboard, and a quart of drywall primer. Under $30 total, and you’re done in an evening.
For knockdown walls and more than one repair: the Homax PRO GRADE Knockdown 25 oz plus the Hyde 24-inch blade. About $50, and the blade lasts forever.
For texturing a full wall or a room addition: a Wooster Cirrus X 1-inch cover, a heavy-duty cage frame, and a bucket of all-purpose compound thinned to heavy cream. Roll it corner to corner and don’t stop mid-wall.
For a ceiling: rent the compressor, buy the hopper gun, mask everything twice, and give yourself the whole day.
Don’t buy the roller for a patch and don’t buy the can for a ceiling. The category punishes both directions.
Ask a Question