The Nursery-Safe Painting Kit
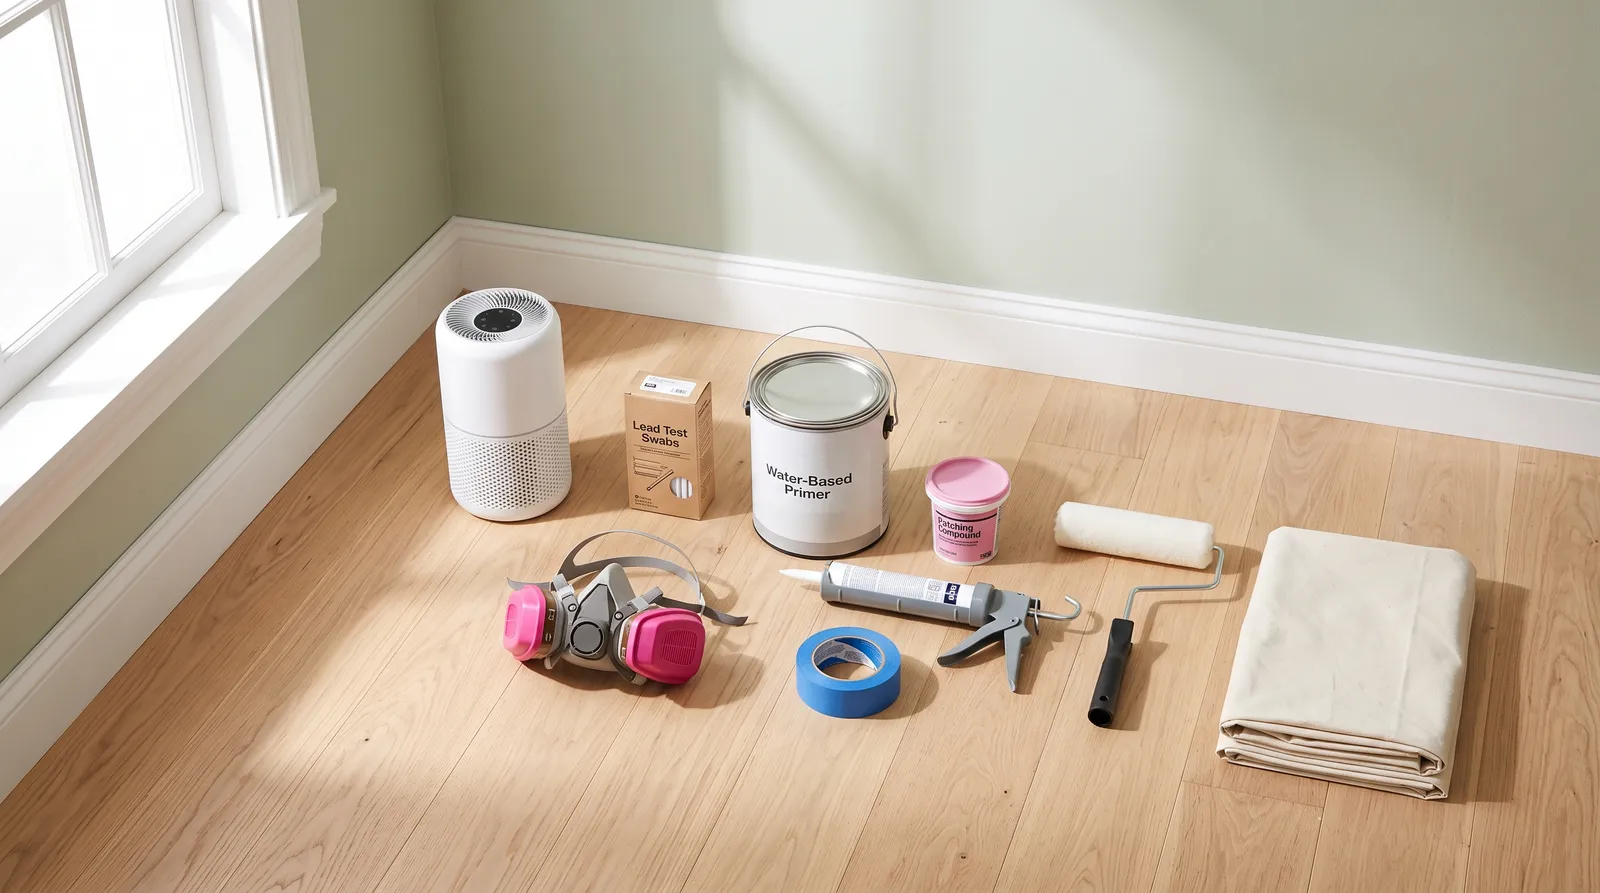
Nine nursery safe paint supplies tested on a real nursery repaint, from the lead test you run first to the air purifier that decides when the crib goes back in. About $240 before paint.

Disclosure: Some links below are affiliate links. We earn a commission if you buy through them, at no extra cost to you.
Top pick: the Levoit Core 300S air purifier. Odd top pick for a painting kit, and I stand behind it. It is the only item here that changes the answer to the one question every parent is actually asking, which is when the crib can go back in the room. It wins on the two things that matter in a closed nursery: an H13 HEPA layer for prep dust and an activated carbon layer for the smell a zero-VOC paint still leaves behind. It falls short as a safety instrument, because it measures nothing and proves nothing. The rest of the kit runs about $110 and most of it outlives the room. Nine items total, roughly $240 before paint.
The paint is not on this list on purpose. That conversation lives in the zero-VOC paint round-up, where it belongs.
Everything else is here.
What “Nursery-Safe” Buys You, and What It Doesn’t
Zero-VOC is a claim about one can. It is not a claim about the room.
The US rule sets zero-VOC at under 5 grams per liter in the base paint, measured before tint. Deep colorants add VOCs back in, which is part of why nursery palettes drift pale. Fine. The larger problem is that people buy the $70 zero-VOC gallon, then caulk the baseboards with a solvent-cure sealant, spot-prime the water stain with an oil-based primer, and wonder why the room still smells like a hardware store on Tuesday.
I did that math on the test room. Two gallons of zero-VOC paint, one 10.1 oz tube of solvent caulk, and a quart of oil primer, and the two small containers put more solvent into an 11 by 12 room than the paint did.
Build the whole system water-based. That is the actual meaning of a nursery-safe kit, and it is why this list is heavier on caulk and primer than a normal starter kit would be.
The second thing nobody says out loud: in a house built before 1978, the paint fumes are not the hazard. The sanding dust is. Lead-bearing trim on a window stool that a toddler will eventually chew is a real problem, and forty seconds with a swab settles it before you make it airborne.
How I Built and Ran This Kit
One real room, bought at retail, on a real deadline.
An 11 by 12 ft second-floor bedroom in a 1961 house, converted from a home office six weeks before a due date. Flat builder beige on the walls, 1990s oil-based semi-gloss on the trim with brush marks you could read from the doorway and two chipped casing corners. Two weekends of work, door closed, one window open.
Order of operations: swab test, fill, sand, caulk, prime, two coats. I filled 34 anchor and picture holes, sanded by hand with a fine sponge rather than a power sander, and ran 46 linear feet of caulk along baseboard and casing gaps. Primer went on the trim and on four water-marked wall patches, not the whole room.
I logged odor by nose at 2, 12, 24, 48, and 72 hours after the last coat, with the purifier running from the first sanding pass onward. Then I ran the same 24-hour check on a second bedroom painted the same weekend with no purifier, as a rough control. I counted splatter on the drop cloth edges and on the bare floor past them. Tape came off at 36 hours and I walked every foot of the trim edge looking for lifted finish.
No lab bench, no meter. Nothing in this article is a VOC measurement. One room, one schedule, one nose.
The Kit at a Glance
| Item | What it is for | Stage | Price tier |
|---|---|---|---|
| Levoit Core 300S | Prep dust and residual odor before the crib returns | Prep through cure | $$$ |
| 3M LeadCheck Swabs | Confirm the trim is safe to sand | Before anything | $$ |
| 3M 7502 Respirator | Sanding dust and any solvent stage | Prep | $$ |
| Zinsser Bulls Eye 1-2-3 Plus | Seal glossy trim and stained patches, water-based | Prime | $$ |
| DAP DryDex Spackling | Fill holes, sand once instead of twice | Fill | $ |
| DAP Alex Flex | Low-odor caulk for baseboard and casing gaps | Fill | $ |
| ScotchBlue Original 2090 | Trim lines that come off clean at 14 days | Mask | $ |
| Wooster Pro/Doo-Z 3/8-inch | Low-shed, low-splatter roller cover | Paint | $ |
| Trimaco 9 by 12 canvas drop cloth | Catch splatter on a floor a baby will use | All | $ |
1. Levoit Core 300S, Top Pick
The purifier earns the top slot because it works on both halves of the job, and most people only think about one of them.
During prep it catches sanding dust. That is the part of a nursery repaint that genuinely loads the air, and it is happening in a closed room with one window open in February. After the last coat it runs on the carbon layer, and in my test room the difference against the no-purifier control was noticeable at the 24-hour check. The control room still read faintly of paint. The purifier room did not. Both were odorless to me by 48 hours, so what the machine bought was about a day.
A day matters when the due date is fixed.
The Core 300S is small, quiet on its low setting, and sits in a corner for three days without being in anyone’s way. It runs a pre-filter, an H13 HEPA layer, and activated carbon. For a paint job, buy the Toxin Absorber replacement filter rather than the stock one; the standard carbon layer is thin and gives up its odor grip faster than you would like.
Here is the honest limit. This machine measures nothing. It does not know whether your room is safe and neither does its app, and it will not beat an open window and a box fan on a mild day. Anyone selling an air purifier as the thing that makes a room baby-ready is selling you a feeling. Run it alongside ventilation, not instead of it.
At around $130 it is more than half this kit.
Buy it if: you are painting in cold or wet weather, the nursery has one small window, or the schedule is tight enough that one saved day is worth $130. Skip it if: it is June, you have cross-ventilation, and four to six weeks before the baby arrives.
2. 3M LeadCheck Swabs, Do This First
Forty seconds and about $3 per swab settles the question that everything else in the prep stage depends on.
The house was built in 1961, which puts it squarely in lead-paint territory. I cut a small notch through the paint layers on the window casing with a utility knife first, because a swab reads the surface and a lead layer buried under four repaints will hide from it. Then eight swabs: window casing, door jamb, baseboard, closet trim, and two wall spots. Crush the tube, shake, rub for 30 seconds. Red or pink means lead.
They are EPA-recognized on wood and metal. On drywall and plaster they are not, so a clean result on a plaster wall is weaker evidence than you want it to be. Use the trim results as your decision point, since trim is where old lead lives anyway.
If a swab goes red, stop. No sanding, no heat gun, no scraper. Encapsulate with primer and topcoat, or bring in an EPA Lead-Safe certified contractor. A nursery is the wrong room to gamble in.
Buy it if: the house predates 1978. That is the whole criterion.
3. 3M 7502 Half Facepiece Respirator
The mask is the item people skip because zero-VOC paint sounds like permission to skip it.
Wrong stage. You need it for prep. Sanding old paint and joint compound in a closed room is what puts particulate in the air, and if the house is old enough that particulate carries lead. The 7502 pairs with 60923 cartridges, which combine organic vapor with a P100 particulate filter, so one setup covers the sanding and any oil-based spot work without a mid-job swap.
Silicone facepiece, three sizes. The silicone matters because a smaller face seals against it in a way it will not seal against the rigid thermoplastic masks, and a respirator that does not seal is a costume. Do a negative-pressure check before every session: cover the cartridges, inhale, and the mask should collapse slightly and hold. Facial hair breaks the seal and no amount of strap tension fixes that. Cartridges start their service clock the moment the bag opens, so seal them in a zip bag between weekends.
For the topcoat with a real zero-VOC acrylic, an N95 is the honest answer. I say that as someone who owns the expensive mask. There is a fuller breakdown in the respirator round-up, including the cartridge-swap schedule.
Skip this if: you have a beard you are not shaving and the job is sand-free. Otherwise it goes in the cart.
4. Zinsser Bulls Eye 1-2-3 Plus, the Water-Based Sealer
This is the pick that makes the zero-VOC topcoat mean something.
Bulls Eye 1-2-3 Plus is a water-based acrylic primer that grips glossy old enamel without sanding to bare wood. On the test room’s 1990s oil-based trim, one coat took the topcoat with no adhesion trouble at the 36-hour tape pull and no chipping on the casing corners I had filled. That saved me the aggressive sanding pass, which saved me the dust, which is the whole argument.
It also blocked the four water-marked wall patches and a stripe of dry-erase marker the previous occupant left behind an office whiteboard. Marker bleed is the classic nursery surprise: you paint over it, it comes back through the second coat two days later looking like a ghost.
Where it falls short: it will not hold back heavy smoke damage or old cat urine. Those need shellac, and shellac has no business in a room a newborn will sleep in six weeks later. If that is your situation, prime with shellac now and give the room three months, or get a different room.
It dries fast enough that a slow roller leaves lap marks on a warm afternoon. Work in three-foot sections and keep a wet edge. If you want the longer version of why primer is not optional on glossy trim, see what primer actually does.
| Spec | Value |
|---|---|
| Base | Water-based acrylic |
| Coverage | About 300 sq ft per gallon |
| Recoat | 1 hour |
| Best for | Glossy trim, stained patches, marker bleed |
| Approx. price | $28 to $38 per gallon |
5. DAP DryDex Spackling
Pink going on, white when it is ready to sand. That indicator is worth more in a nursery than it is anywhere else, because sanding a patch that is not dry means sanding it a second time, and every extra sanding pass is more dust in a room you are trying to keep clean.
I filled 34 holes in the test room with one 8 oz tub and had most of it left. Low odor, water cleanup, nothing about it makes a closed room worse.
The indicator reads surface dryness, not full cure. A deep gouge can look white on top and stay soft underneath, so give anything deeper than a nail hole a second pass and an extra hour. For holes wider than a half dollar, this is the wrong product; use setting-type joint compound and read the drywall hole repair guide first.
6. DAP Alex Flex, the Item Nobody Puts on the List
Caulk is the quiet failure point of a nursery repaint.
Not because it performs badly, but because most people grab whatever tube is nearest at the register, and a solvent-cure sealant will out-gas the zero-VOC paint you spent $70 a gallon on. Alex Flex is acrylic latex. Water cleanup, almost no smell, paintable in about 30 minutes, and it stays flexible through seasonal movement so the baseboard line does not split open in January.
I ran 46 linear feet along the baseboard and casing gaps. The gap at the base of the door casing was 3/16 of an inch, wide enough that I ran two thin beads rather than one fat one.
It tools stiffer than DynaFlex. Keep a damp rag and a wet fingertip going or you leave ridges that read through the topcoat under a window. Not the product for a tub surround, where you want silicone. The caulk round-up has the full sealant comparison if your trim gaps are wider than a nursery’s usually are.
7. ScotchBlue Original 2090
Two features matter here and neither is the cut line.
First, 14-day clean removal. A nursery repaint runs on a stop-start schedule, because the person painting has a job and a due date and a Saturday that got eaten. Tape that has to come off in 24 hours does not survive that reality. Mine sat 36 hours and came off clean.
Second, it does not lift old semi-gloss trim finish on the way off. The test room’s casing was thirty-year-old oil enamel, and lifted finish at 9 p.m. on a Sunday is how a two-weekend job becomes a three-weekend job. Zero lifted spots across the full trim run.
It bleeds under the edge on knockdown or orange-peel texture. Seal the tape line with a thin pass of the wall color first, let it dry, then paint the trim color; the first pass seals the gap with the color that is already there. Deeper comparison in the painter’s tape round-up.
Get the 1.41-inch width. The narrow roll is for detail work and it will not seal a baseboard in one pass.
8. Wooster Pro/Doo-Z, 3/8-Inch Nap
Shedding is a nursery problem in a way it is not in a garage. A fiber in the second coat is in the wall permanently, at eye level, above a crib you will be staring at during 3 a.m. feeds for a year.
The Pro/Doo-Z did not shed. Zero lint specks in the second coat across three walls, and this is a cover I have run four gallons through on previous jobs without the sheath letting go.
Nap length is the other reason it is here. I specified 3/8-inch rather than the usual 1/2-inch because a shorter nap throws less splatter on smooth drywall, and splatter lands on the floor your baby will be crawling on in eight months. Slightly more tray trips, meaningfully less mess. On knockdown texture or a popcorn ceiling this nap is too short and you want a 3/4-inch cover instead, which the roller round-up covers.
Watch the seller online. Counterfeit Wooster covers show up and they shed like a cat.
9. Trimaco 12 Oz Cotton Canvas Drop Cloth
Canvas, not plastic. This is the one place I get preachy.
Plastic pools paint on the surface and turns a hardwood nursery floor into a genuine fall hazard, and you are carrying a gallon can across it. Canvas absorbs the splatter into the weave, stays put once you step on it, washes, and comes back for the next room. A 9 by 12 covers the work zone of an 11 by 12 nursery after the furniture goes to the center.
No backing, so a real spill reaches the floor in under a minute. Blot fast or buy the butyl-backed version. Add a 4 by 15 runner for the baseboard work if you can; the narrow cloth follows a trim run without the bunching a 9 by 12 gives you. The drop cloth round-up has the leakproof options.
The Paint, and Why It Is Not on This List
Paint is a color decision and a chemistry decision at the same time, and it does not compress into one line of a kit table.
What to hold onto: zero-VOC applies to the base before tint, deep colors add VOCs back, and the certification worth checking on a nursery can is GREENGUARD Gold. An 11 by 12 nursery with two coats takes about two gallons. Budget $60 to $150.
Eggshell over flat on a nursery wall, every time. Flat looks lovely for eleven months and then a small person discovers markers, and flat does not wipe.
The full comparison lives in the zero-VOC paint round-up. Recoat windows for the common brands are in the drying times chart, which matters more than usual here because you are working against a fixed date.
What I Left Out
- A power sander. Deliberately. Hand-sanding with a sponge takes twenty extra minutes and produces a fraction of the airborne dust. In a pre-1978 house, an orbital sander on trim is the wrong tool at any speed.
- A paint sprayer. Overspray in an occupied home is a bigger cleanup than a nursery repaint justifies, and masking an 11 by 12 room properly costs more time than rolling it.
- A boxed “nursery paint kit.” They exist. Every one I looked at bundled a $3 chip brush, a plastic tray, and a plastic drop cloth around a gallon of paint, at a price above buying the parts separately.
- A VOC meter. Consumer units under $200 measure total VOCs with wide error bars and no way to tell you which compound they found. It will make you anxious without making you informed.
- A second color for an accent wall. No opinion on the design. It is just a second sample quart, a second cure window, and a second tape line, and the schedule is already tight.
When the Crib Goes Back In
The timeline is the part parents actually want, so here it is from the test room.
Last coat went on Sunday at 4 p.m. At 2 hours, obvious paint smell. At 12 hours, still clearly there. At 24 hours, faint in the purifier room and mild in the control room. At 48 hours, nothing I could detect in either room with a window cracked. At 72 hours, I would have put a crib in it.
That was a genuinely zero-VOC acrylic over a water-based primer, in a room that got one open window and a running purifier. With a conventional low-VOC paint, or with an oil primer anywhere in the stack, add days. With shellac, add months.
The schedule that removes all of this stress is to paint the nursery four to six weeks before the due date. Not the week of. Babies come early and paint does not care.
Trust your nose over the label. If the room smells like paint, it is still off-gassing, whatever the can says.
Mistakes I See in Nursery Repaints
- Zero-VOC paint over a solvent caulk. The two small containers out-gas the two gallons. Match the whole system to the claim you paid for.
- Sanding first, testing second. Once lead dust is airborne it is in the carpet, the closet, and the HVAC return. Swab first. It costs $25 and half a minute.
- Painting the week of the due date. Every parent who does this ends up sleeping in a room that smells like paint, or moving the crib to the living room. Six weeks out.
- Flat paint on nursery walls. It photographs beautifully and it will not survive a marker. Eggshell.
- Skipping primer on glossy trim. Old oil-based semi-gloss does not hold a waterborne topcoat without a bonding primer. It chips off the crib rail in six months, and now there are paint chips in a room with a baby in it.
- Closing the door and calling it ventilated. A closed nursery with a purifier is not ventilated. Open a window, run a fan pointing out, and give the room air exchange.
- Buying the boxed kit. The parts cost less separately and three of the parts are better.
If You Only Buy Three Things
Lead swabs, the water-based primer, and the canvas drop cloth. About $75.
Everything else on this list has a workable substitute you may already own. Those three do not: a swab test cannot be improvised, a bonding primer cannot be skipped on glossy trim, and plastic sheeting on a hardwood floor with a wet gallon in your hands is a bad trade at any savings.
Add the purifier if you are painting in January with one window. Skip it in June.
Ask a Question