Best Drywall Patch Kits
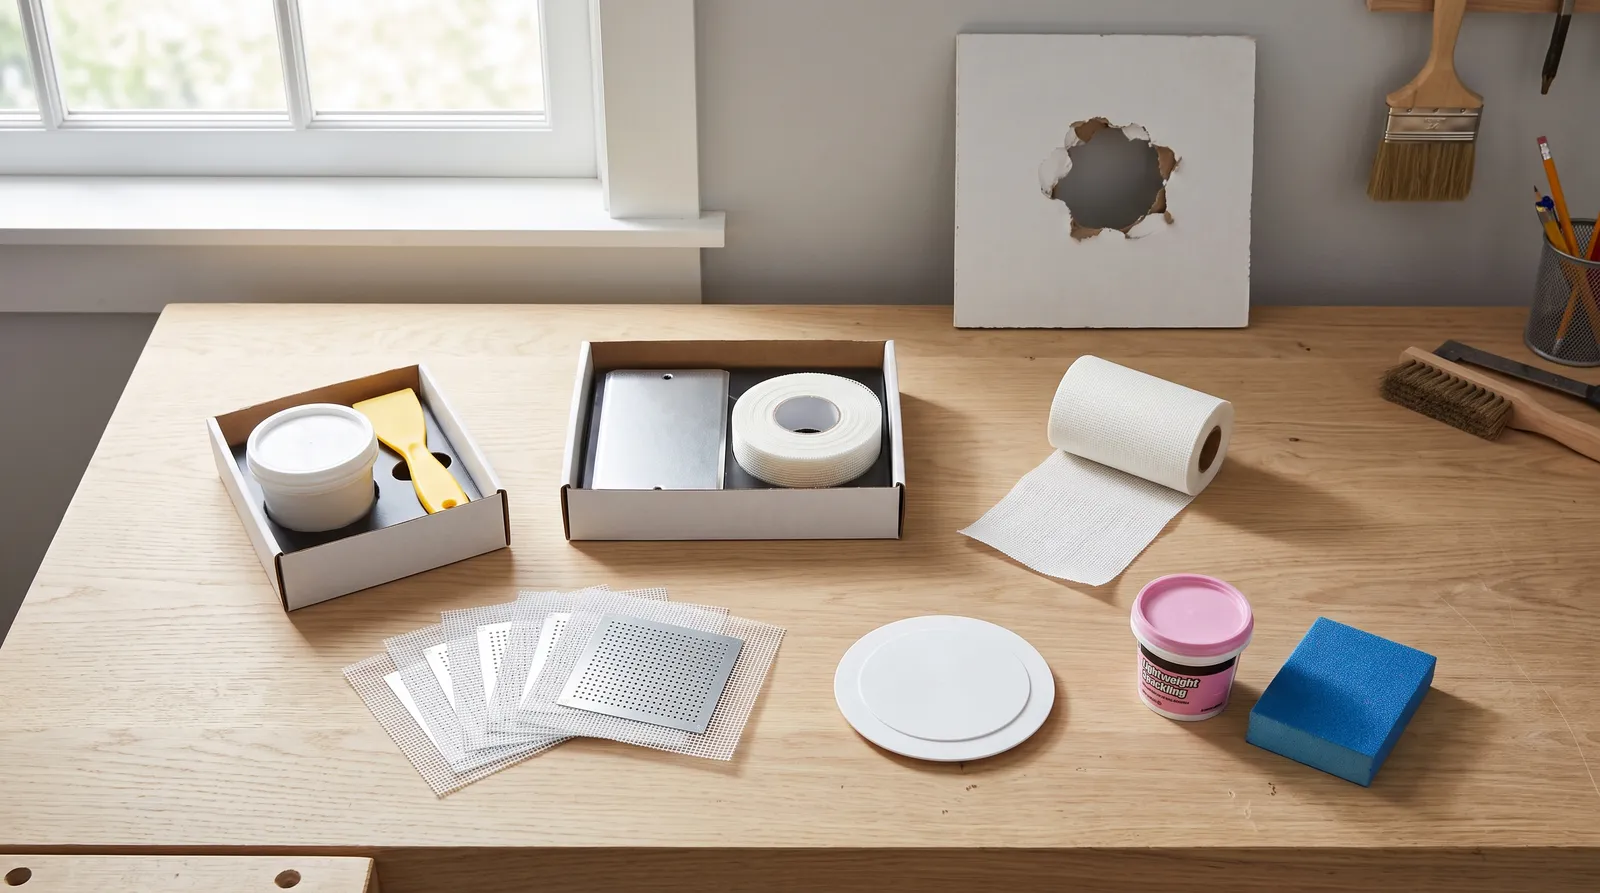
Six drywall patch kits tested on nail holes, anchor blowouts, and a 5-inch doorknob hole. Top pick: the 3M Patch Plus Primer 4-in-1 Wall Repair Kit, plus where each kit falls short.

Disclosure: Some links below are affiliate links. We earn a commission if you buy through them, at no extra cost to you.
Top pick: the 3M Patch Plus Primer 4-in-1 Wall Repair Kit. About $12, and it is the only kit here that took topcoat over a sanded patch without flashing on an eggshell wall. It wins on speed and on the primer already sitting in the compound. It falls short above 3 inches, where the compound has nothing rigid to grab. For a 5-inch doorknob hole, the 3M High Strength Large Hole Repair Kit is the buy. For ceilings, corners, and long cracks, Hyde Wet and Set cuts to any shape with scissors. For the thinnest patch and the shortest feather, the FibaTape Perfect Finish square. For a flush plug that leaves no mesh shadow, the DAP Eclipse. On a budget, the DryDex kit.
Most homeowners need two things, not six: one small-hole kit and one large-hole kit.
Sizing the Hole Before You Buy Anything
Every bad drywall repair I have looked at started at the store, with somebody buying a kit rated for the wrong hole.
Under 1 inch. Nail holes, picture hangers, thumbtacks. You need compound and a knife. A patch is wasted material here, and pushing mesh into a quarter-inch hole makes a bump you then have to sand off.
1 to 3 inches. Anchor blowouts, small impact dents, the pocket left when a toggle bolt pulls through. This is the sweet spot for a self-adhesive patch plus a primer-loaded spackling. Two thin coats, feathered 4 inches past the patch on every side.
3 to 5 inches. Doorknob strikes. Now the patch needs to be rigid, because compound spanning 5 inches of open air over a flexible mesh will crack the first time the door slams. Rigid plate, flush plug, or a California patch cut from scrap drywall.
Over 6 inches. Not a patch job. Cut it square, back it with furring strips, screw in new board, tape the joints. Anyone selling you a 10-inch adhesive patch is selling you a crack that shows up in a year.
The second decision is whether you are buying a kit or a patch. Three of the six products here are the patch alone. If you own no 4-inch knife and no 220-grit paper, that $4 patch is a $16 shopping trip.
What the Test Looked Like
I built a 4 ft by 8 ft test wall, hung half-inch board, finished it flat, then wrecked it on purpose. Fourteen nail holes. Six anchor pockets with the paper face torn out around them, which is the failure everybody actually has. Two impact dents. One 5-inch hole punched through with a hammer handle at doorknob height. One 9-inch crack cut along a factory seam.
Then I took the kits into two occupied rooms, because a test wall is too flat and too clean to be honest. A hallway with 22 picture-hanger holes in Benjamin Moore Regal Select flat. A bedroom ceiling with two anchor pull-throughs. A stairwell in eggshell for the flashing test, which is the test most round-ups skip and the one readers actually care about.
Where a kit shipped its own compound, I used it. Where a kit was a patch alone, every one got compound from the same tub, so the patch was the variable and not the filler.
The scoring: time from bare hole to paint-ready, coats needed to hide the edge, sanding effort at 150 then 220 grit, telegraphing under a work light held at a raking angle 18 inches off the wall, flashing after one topcoat with no separate primer, and crack return at three weeks.
That raking light is the whole review. A patch that vanishes in flat afternoon light and reappears when a table lamp throws a low beam across the wall has failed, and it fails in the exact conditions people live in.
Patch Kits at a Glance
| Brand / Model | Patch type | Rated hole size | What is in the box | Primer in compound | Price tier |
|---|---|---|---|---|---|
| 3M Patch Plus Primer 4-in-1 Kit | Self-adhesive mesh | Up to 3 in. | Patch, spackling, knife, sanding pad | Yes | $$ |
| 3M High Strength Large Hole Repair Kit | Rigid plate + fiber tape | Up to 5 in. | Plate, tape, compound, 6 in. knife, pad | No | $$$ |
| Hyde Wet and Set | Water-activated fabric | Cracks and holes to about 4 in. | Roll only | No | $$ |
| FibaTape Perfect Finish | Perforated aluminum + mesh | 4 to 8 in. squares | Patch only | No | $ |
| DAP Eclipse Rapid Wall Repair Patch | Rigid flush plug | Roughly 2 to 4 in. | Patch only | No | $ |
| DAP Wall Repair Kit with DryDex | Mesh square | Up to 4 in. | Patch, DryDex, knife, sanding pad | No | $ |
1. 3M Patch Plus Primer 4-in-1 Wall Repair Kit, Top Pick
The reason this one wins is boring and it is the whole point: the primer is already in the compound.
On the stairwell eggshell wall I patched six anchor pockets with this kit, sanded at 220, and rolled one coat of the wall’s original paint straight over the repairs. No spot-priming. At three weeks, under a raking work light, I could not pick the patched spots out of the wall. Every other compound in this test flashed at that sheen without a primer coat, showing up as a slightly duller circle you notice at dusk and cannot unsee afterward.
Speed is the second reason. The label says paintable in about 30 minutes, and on a nail hole or a shallow dent that holds. I filled 22 hallway picture holes, made coffee, sanded, and rolled the wall in the same morning. On a deeper anchor pocket the claim stretches. Compound that fills a half-inch cavity shrinks slightly as it dries, and you will see a small dimple where the pocket was. Second thin pass, another half hour, done.
The kit gives a beginner everything: the patch, the compound, a plastic putty knife, a sanding pad. That knife is the weak part. It flexes under pressure, and a flexing blade rides over the compound instead of cutting it flat, which leaves a low spot in the middle of your patch. A $6 stiff 4-inch steel blade fixes that and you will own it forever.
Above 3 inches this kit is out of its depth. The mesh has nothing rigid behind it and compound bridging open air over flexible mesh will crack.
| Spec | Value |
|---|---|
| Patch type | Self-adhesive mesh square |
| Rated hole size | Up to about 3 in. |
| In the box | Patch, Patch Plus Primer spackling, putty knife, sanding pad |
| Dry to paint | About 30 minutes on shallow repairs |
| Approx. price | $10–$14 |
Buy it if: you have a wall’s worth of small holes and you want to paint the same day. Skip it if: the hole is bigger than a golf ball, or your wall is semi-gloss and you were going to spot-prime anyway.
2. 3M High Strength Large Hole Repair Kit, Best for Holes up to 5 Inches
Doorknob hole. Hammer handle, punched clean through at 36 inches, torn paper for an inch around the perimeter. This is the repair that separates real kits from decorated mesh.
The kit gives you a rigid repair plate roughly 5.5 in. by 6 in., fiber tape, fiber-reinforced compound, a 6-inch knife, and a sanding pad. The plate is the point. It goes behind the opening and gives the compound something solid to bear on, so the finished patch behaves like drywall instead of like a drum head. At three weeks I pushed on the repair with a thumb. Nothing moved and nothing cracked.
The fiber-reinforced compound sands differently than lightweight spackling. It cuts harder, which is a nuisance at the feather edge and a benefit everywhere else, because it does not crumble when a 220 sheet catches the perimeter.
This is a three-session job. Plate, tape, first coat, wait. Second coat, wait. Sand, prime, paint. Anyone expecting the 30-minute experience of the small-hole kit will be annoyed. Give it overnight between the heavy coat and the finish coat, and give it a real primer before topcoat, because there is no primer in this compound.
The 6-inch knife that ships in the box is too narrow. Feathering a 5-inch patch with a 6-inch blade means your knife edge is landing on the patch itself instead of on flat wall, and you end up chasing ridges. Use a 10-inch or 12-inch drywall blade for the last coat. It is the single change that takes this repair from acceptable to invisible.
Buy it if: you have a doorknob hole, a dryer-vent cutout to close, or an exterior soffit patch. Skip it if: the hole is under 3 inches. You are buying dry time you do not need.
3. Hyde Wet and Set, Best for Ceilings, Corners, and Odd Shapes
The trick with this one is the scissors.
Wet and Set comes as a roll of fabric that you cut to whatever shape the damage is. My 9-inch seam crack got one continuous strip. A square patch would have needed three overlapping pieces and three overlapping edges to feather, which is three chances to leave a ridge. You wet the fabric, press it on, and it hardens into a rigid shell in about 30 minutes. Then you skim it.
Ceilings are where it separates from the pack. Self-adhesive mesh squares on a ceiling peel at one corner while you are still spreading compound, every time, because gravity is patient. The Wet and Set piece I put over a bedroom ceiling anchor pull-through stayed exactly where I laid it and hardened flat.
Inside corners are the other win. Nothing else in this group will follow a corner without kinking.
It is thicker than mesh. On a flat wall in raking light, a Wet and Set patch skimmed the way you would skim a mesh square shows a soft hump. Feather it wider than you think, 6 inches past the patch, and the hump disappears. And you get one shot at placement. Wet fabric grabs the wall on contact, so measure before, not during.
Sold by the roll, which is generous for a contractor and excessive for a homeowner with two holes. If you own an older house with plaster and seasonal cracking, the roll pays off.
Verdict: the patch for shapes that are not squares. Ceilings, corners, long cracks, torn paper around a blown anchor. About $8 for the small roll, $19 for the contractor roll.
4. FibaTape Perfect Finish Patch, Best Thin Mesh Patch
Thinnest patch here, and thin is the whole argument.
A patch’s thickness sets your minimum compound build. Thicker patch, more compound, wider feather, more sanding, more chance of a visible transition. The Perfect Finish square is a perforated aluminum center bonded to fiberglass mesh, and it sits so close to the wall plane that two genuinely thin coats bury it. On the test wall I put a 6-inch square over a 2-inch impact dent and had it paint-ready faster than any mesh patch I have used.
The aluminum center matters more than the marketing suggests. Plain fiberglass mesh dents inward when you press compound through it, and a dented patch means you are filling a bowl. The aluminum holds its plane.
One coat is not enough. Skim it once and the aluminum edge telegraphs a faint square you will find under raking light and never stop seeing. Two thin passes, crossed directions, feathered wide.
The adhesive wants a clean surface. On a dusty stairwell wall the corner lifted while I was working. Wipe the area first with a damp rag and let it dry.
No compound, no knife, no paper. It is a patch, not a kit, and priced accordingly.
Buy it if: you already own compound and tools and want the least visible mesh patch for anchor blowouts.
5. DAP Eclipse Rapid Wall Repair Patch, Fastest Fix for a Doorknob Hole
Different mechanism, different result. Instead of bridging over the hole, the Eclipse plugs it. A backer goes through the opening, and the rigid face lands flush with the wall surface. You are then skimming a shallow depression rather than building compound over a raised bump.
That is the fastest path from bare hole to painted wall in this test. No mesh shadow at all, because there is no mesh. On the second doorknob hole I cut in the test wall, the Eclipse repair took one coat of compound, a light 220 sand, and a spot-prime. Straight-on it is gone. Under raking light it is gone.
You have to size the hole to the patch, not the patch to the hole. If your damage sits between sizes, you enlarge it with a utility knife until the next size up fits. Cutting a wall bigger to fix it feels wrong the first time. Do it anyway.
Rigid faces need flat walls. On old plaster with a bow, the patch face and the wall plane disagree, and you spend the compound you saved fixing the disagreement.
Verdict: the cleanest-looking small-to-medium repair in the group, if you own a knife and compound already.
6. DAP Wall Repair Patch Kit with DryDex, Best Budget All-in-One
Cheapest complete kit here, and the pink-to-white dry indicator earns its place.
DryDex goes on pink and turns white when it is dry. In a dim hallway, judging whether compound has cured by looking at sheen is a coin flip, and sanding damp compound tears it into a smeared mess that you then have to fill again. The color change removes the guess. I watched a first-time patcher use this kit correctly with no coaching, which is not something I can say about the others.
No primer in the compound. On the eggshell stairwell, DryDex patches flashed after one topcoat, showing as duller circles at a raking angle. Spot-prime and they disappear. On a flat wall the flashing is much harder to see, which is why this kit is fine for a bedroom and wrong for a satin kitchen wall.
The mesh square in the box is ordinary and will shadow if you skim it thin. The sanding pad is too coarse for a finish pass; keep it for knocking down the first coat and finish with 220 from your own stash.
Buy it if: you want one cheap box that does 20 nail holes and you do not mind a spot-prime step.
Kits I Bought and Wouldn’t Buy Again
- Generic no-name aluminum patches from a marketplace multi-pack. The adhesive released at the corners on two of six, and the aluminum was soft enough to dent under thumb pressure. Saving $3 on the patch is not a saving.
- Peel-and-stick “instant” patches sold as texture-matched. The printed texture never matches your wall, and it reads as a sticker under any raking light.
- Toothpaste and bar soap. They stay in circulation because they are free. They shrink, they do not take paint evenly, and toothpaste stays slightly soft forever.
- Setting-type joint compound in a bag for a homeowner with two holes. It is the right product for a pro closing large openings and the wrong one for you. It sets hard on a timer, sands like concrete, and half the bag will go stale in your garage.
- The full 4-gallon bucket of all-purpose mud. Same problem. Buy a pint tub.
Sanding, Priming, and the Flash You Didn’t Expect
Sanding is where good patches get ruined.
Start at 150 grit only if you have a ridge to knock down. If the surface is already close, go straight to 220. Sand in a circle, not a line, and stop the second the patch is level with your hand. Fingertips read a wall better than eyes; run a bare palm across the repair with your eyes closed and you will feel a transition your eye cannot find. For a big patch, a sanding sponge beats a block because it follows the feather. A drywall sander is overkill for anything under 6 inches, and it will eat the paper face if you lean.
Vacuum the dust. Then wipe with a barely damp cloth. Compound dust left on the wall keeps primer from bonding, and you get a patch that lifts at the edge months later.
Primer is not optional above eggshell. Sanded compound is more porous than the cured paint film around it, so it drinks topcoat differently and dries duller. That difference is what flashing is, and it is why a patch you cannot see in daylight jumps out when a lamp comes on. What primer actually does covers the porosity math. The short version: a fast-drying stain-blocking primer on the patch, feathered slightly past the compound, then topcoat. Our primer round-up has the picks.
The 3M Patch Plus Primer compound is the exception on flat and eggshell, and only there. Under semi-gloss, prime it too.
Texture Matching Is the Real Job
Here is the part no kit solves and every product page ignores: if your wall has orange peel or knockdown, a perfectly executed smooth patch still looks like a repair.
Buy an aerosol wall texture in the pattern that matches. Shake it hard, and spray a test card first, always. Nozzle settings vary between cans of the same product, and the first two seconds of spray from a fresh can are always heavier than what follows. Get the pattern right on cardboard, then shoot the patch from about 18 inches with the lightest pass you can manage.
Under-textured is fixable. Wait, spray again. Over-textured means sanding the entire patch flat and starting the finish coats over. Err light.
For knockdown, spray, wait the time on the can, then flatten the peaks with a wide drywall blade held nearly flat. The wait is the hard part. Too early and you smear it, too late and the peaks are locked in.
Prime the texture before topcoat. Fresh aerosol texture is thirsty, and a paint coat straight onto it dries visibly flatter than the wall around it.
More detail on getting a repaired wall to disappear under paint is in the repaired drywall painting guide, and the full step-by-step on the repair itself is in how to fix holes in drywall.
Mistakes That Show Up at Night
- Overfilling. New patchers pile compound on, planning to sand it back. You end up sanding through the patch edge and starting over. Three thin coats beat one thick one every time.
- Feathering too narrow. A 4-inch patch needs compound out to roughly 12 inches across, tapering to nothing. Narrow feathers make a visible plateau.
- Sanding damp compound. It tears and smears instead of cutting. If your paper loads up and the surface goes gummy, stop and wait an hour.
- Skipping primer under sheen. Every flashed patch I have looked at came from this. Sheen exaggerates porosity differences and turns an invisible repair into a dull spot.
- Patching a crack that is still moving. A seam crack that returns after a proper patch is a structural or humidity issue. Patch it twice, then stop patching and find the cause.
- Painting a spot instead of a wall. Touch-up rarely matches, even with the original can, because the wall has aged. Cut in and roll corner to corner.
- Using a flexible plastic knife on a wide feather. It rides instead of cuts. A stiff steel blade is $6.
What I’d Actually Keep in the Closet
One 3M Patch Plus Primer kit for the small stuff, about $12. One 3M High Strength Large Hole Repair Kit sitting unopened for the day a door handle goes through the wall, about $22. A stiff 4-inch steel putty knife and a 10-inch drywall blade, about $20 for the pair. A pack of 220-grit sheets and a sanding sponge. That is roughly $60 and it covers every drywall repair a normal house throws at you for years.
Add a can of matching aerosol texture only if your walls have texture, and buy it before you need it so you can test the pattern on a card without a hole in the wall waiting on you.
If you rent and you are patching anchor holes before a walkthrough, the DryDex kit and a spot-prime is enough. Nobody at a move-out inspection is holding a work light against the wall at a raking angle.
Ask a Question