How to Paint a Tray Ceiling
Painting a tray ceiling without messy lines? Here's the order, the two-color trick, where the cut lines go, and how to keep the edges crisp. Every term explained.

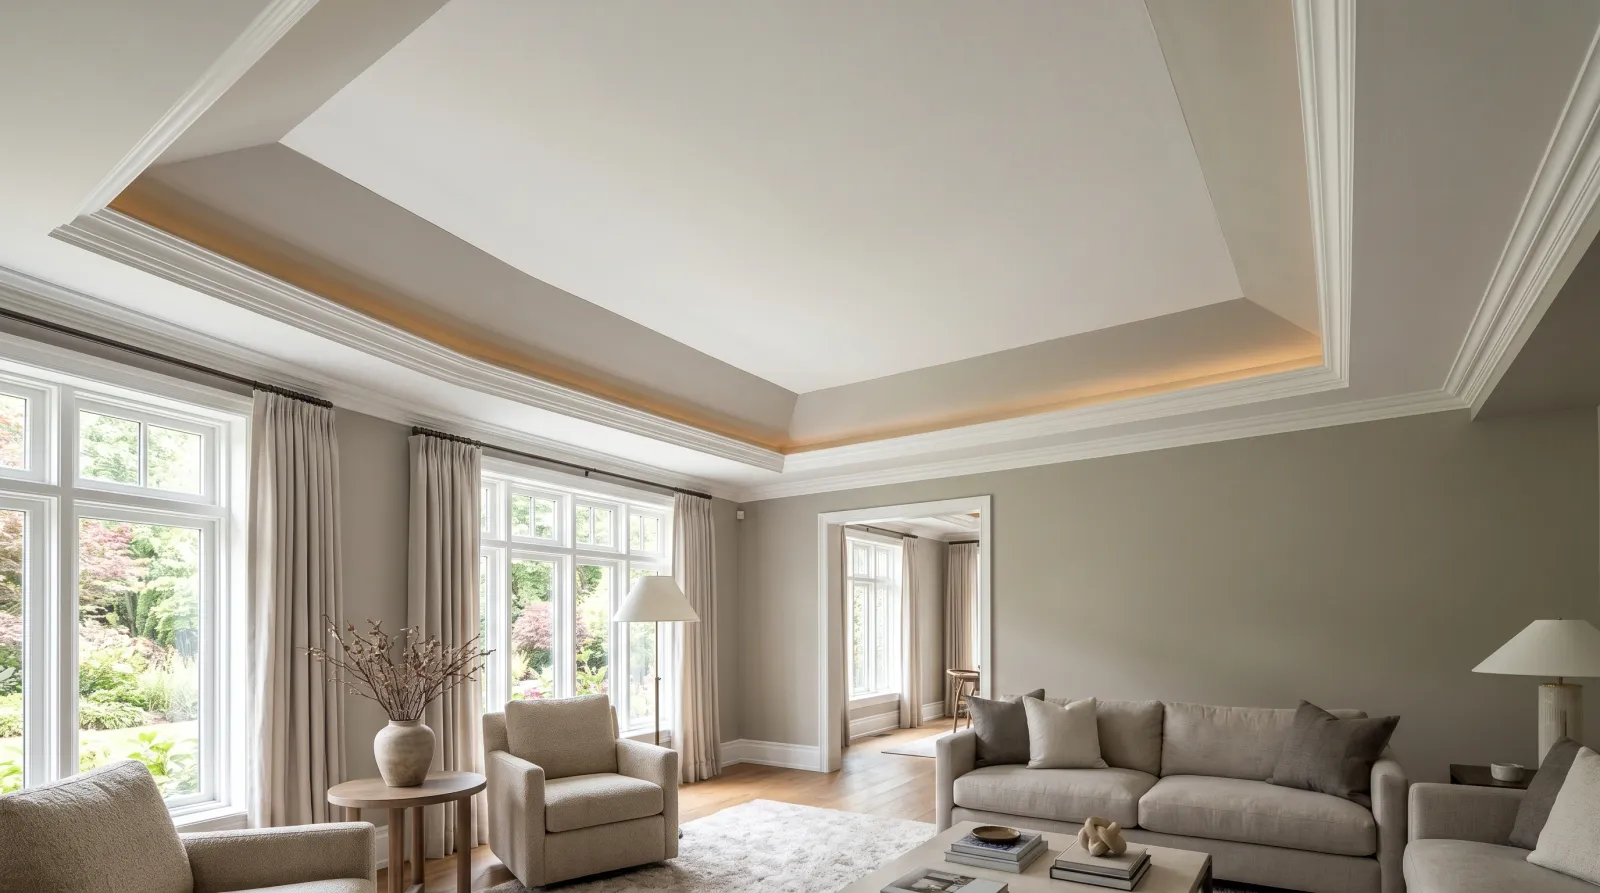
Okay, so you’re standing under a tray ceiling with a roller in your hand, and the thing has corners. A regular ceiling is one flat plane and you just roll it. A tray ceiling has a recessed center, slanted or straight-up-and-down sides, and a hard inside corner where the two meet. That corner is what makes people nervous. It’s where the line either looks crisp or looks like a kid colored outside the lines.
Here’s the thing: a tray ceiling is a regular ceiling with a frame around it. Paint it in the right order and the corner stops being scary. You do the easy flat part first, tape the corner, then do the sides. Every sloppy edge gets covered by the next step. That’s the whole game.
A quick word on the parts, since the names matter for the rest of this guide. The flat top of the recess is the center. The angled or vertical band that connects it down to the room ceiling is the sides (sometimes called the perimeter or the slant).
What You’ll Get
A clean tray ceiling with a crisp line at the corner, in one color (quiet) or two (center one shade, sides another). Done in a weekend, dry overnight.
Honest Take on Difficulty and Time
A flat ceiling is easy. A tray ceiling is a notch harder, and the difference is the corner and the height. You’re reaching up into a recess, often on a taller ladder, cutting a line you can’t see straight on. Budget about 8 working hours for a standard tray, more if you’re doing two colors with a seal coat.
This is a medium project, and I’d rather tell you that now than have you find out at hour six. If you’ve painted a room before, you can do this. First paint project ever? Do a flat room first (the whole-room-paint walkthrough starts from zero) and come back for the tray.
The biggest time sink isn’t painting. It’s the ladder. A tray sits higher than a normal ceiling, so you’ll reposition a 6-foot ladder constantly. Don’t lean and overreach. Move the ladder.
What You’ll Need
Paint and Primer
A gallon of flat or matte ceiling paint for the recessed center. Flat is a no-shine finish that hides drywall ripples, and overhead, where light rakes across at a low angle, you want all the flaw-hiding you can get. Doing two colors? Add a quart of eggshell (a soft low-shine wall finish) for the slanted sides. Eggshell catches a touch of light and reads as deliberate.
You only need stain-blocking primer (Zinsser BIN or KILZ Original) if there’s a water stain up there or you’re going from a dark color to a light one. Spot-prime the problem. Don’t prime the whole tray for no reason.
For the full picks, see the best ceiling paint round-up, and if you’re stuck on flat-versus-eggshell for the sides, the sheen guide lays it out.
Tools
A 2-inch angled sash brush for cutting in the corner (painting the clean edge a roller can’t reach). A 9-inch roller and extension pole for the flat center. A 4-inch mini roller for the narrow sides, because a full 9-inch roller won’t fit a 10-inch band without smearing the corner. Painter’s tape, a 6-foot ladder, and a headlamp.
The headlamp isn’t optional, and most guides skip it. A ceiling throws its own shadow down on itself. Without a raking light you can’t see thin spots and roller marks until the paint dries and it’s too late. Clip a work light to the ladder or wear a headlamp and aim it across the surface.
The tape is the other place not to cheap out on a two-color tray. Cheap tape lets paint bleed under it and your crisp line turns fuzzy. The painter’s tape picks cover which ones actually seal.
Step 1: Clear the Room and Patch the Corner
Move furniture to the center of the room and sheet it, or push it 3 feet off the walls and drape it. Lay the canvas drop cloth under your work area. Canvas soaks up drips and doesn’t slide like plastic.
Now look hard at the inside corner where the center meets the sides. Tray ceilings crack there. The drywall seam at that angle moves with the house and opens a hairline gap over the years. Press spackle into any crack, scrape it flush, let it dry, and sand smooth with the 220 sponge.
Watch out for painting over a crack without patching it. A crack telegraphs right through fresh paint within a season and you’ll be back up the ladder. Two minutes of spackle now saves the redo.
Step 2: Decide One Color or Two, and Where the Line Goes
This is a planning step, and it saves you from a tray you hate.
One color is the quiet option. Paint the whole tray, center and sides, the same flat ceiling white. The tray reads as a soft architectural shadow, not a feature. Safe pick, always looks clean.
Two colors makes the tray a feature. The most common move: center stays ceiling white, sides get the wall color, so the walls look like they reach up and frame the center. The reverse works too. If you like a layered look, the two-tone walls guide covers the color-pairing logic.
The line between the two colors lands at the corner, always. Don’t run a color partway up the slant. The eye reads the corner as the natural break, and any other line looks like a mistake.
Step 3: Tape the Corner
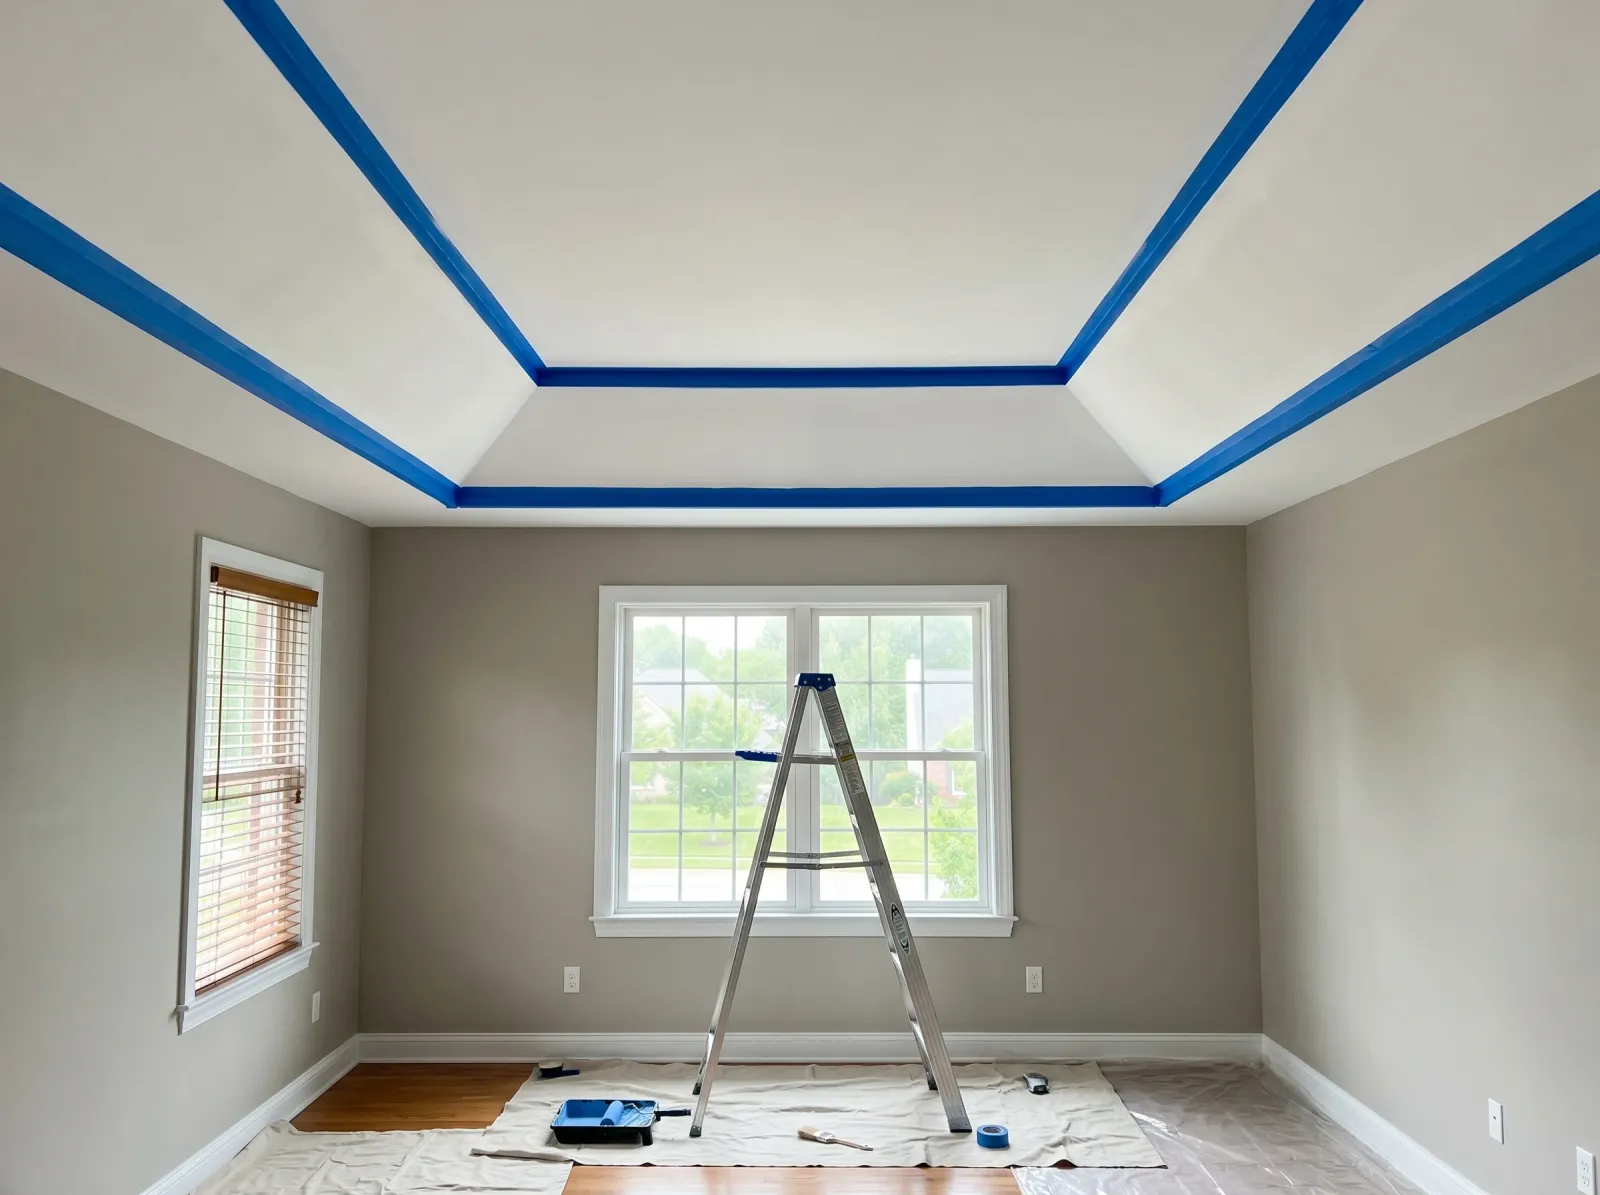
Tape runs the full inside corner, pressed down hard so nothing bleeds under.
If you’re doing one color, skip this step and roll the whole thing. If you’re doing two, tape the inside corner all the way around the tray.
Run the tape along the corner on the side you’re painting second. Press the edge down hard with your fingernail or the putty knife. Bleed is paint sneaking under the tape and leaving a fuzzy line. Pressing the edge stops it.
Don’t tape and walk away for a day. Tape that sits too long, especially in a warm room, can lift and let paint creep. Tape the corner the same day you paint it.
Step 4: Roll the Recessed Center
Center first. Roll the flat panel in one direction, then a second coat the other way.
Cut in the center first. With the 2-inch angled brush, paint a 2-inch band around the edge of the recessed panel where the roller can’t reach the corner. Then load the 9-inch roller, roll off the excess on the tray ramp, and roll the center in W-shapes. Make a big W about 3 feet wide, then fill it in.
One coat usually isn’t enough on a ceiling. Let it dry the time the can says (usually 4 hours for water-based), then roll a second coat. Aim your headlamp across the surface between coats to find thin spots.
Watch out for roller spatter in your eyes. Wear safety glasses. You’re rolling straight up and the fine mist comes back down.
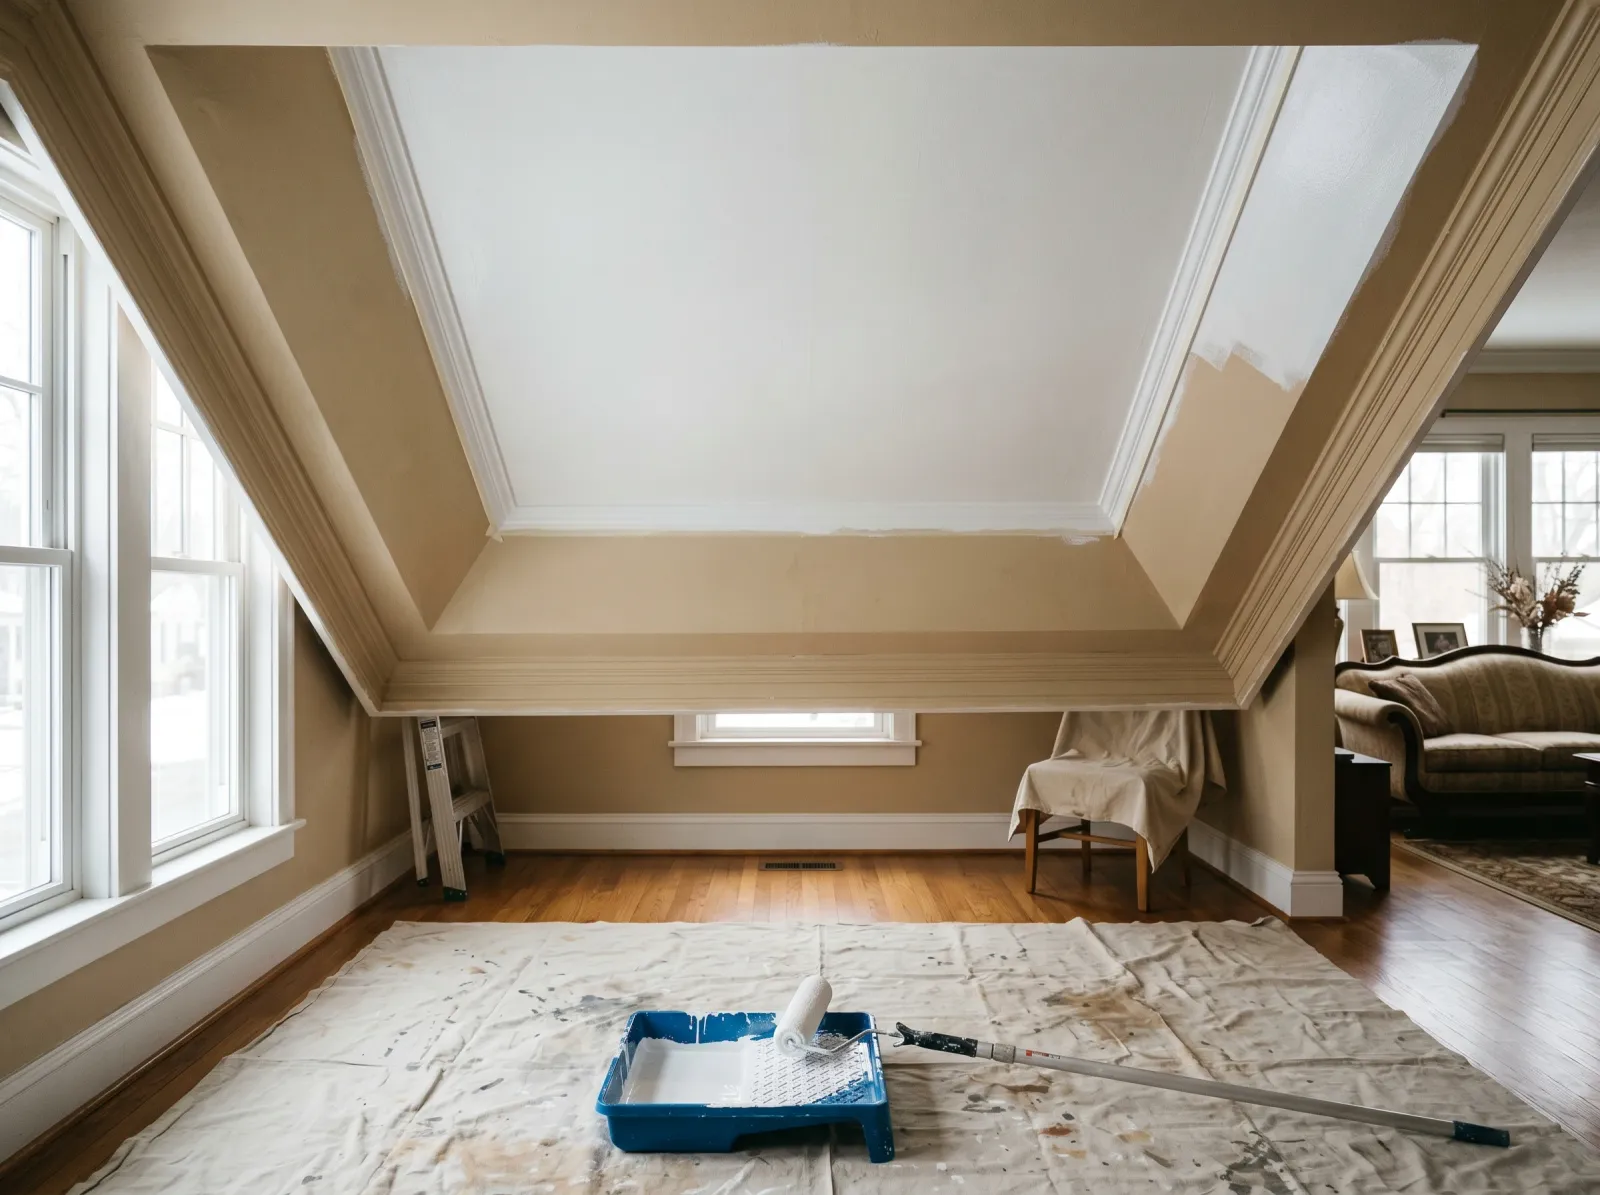
Step 5: Paint the Tray Sides (and the Corner Trick)
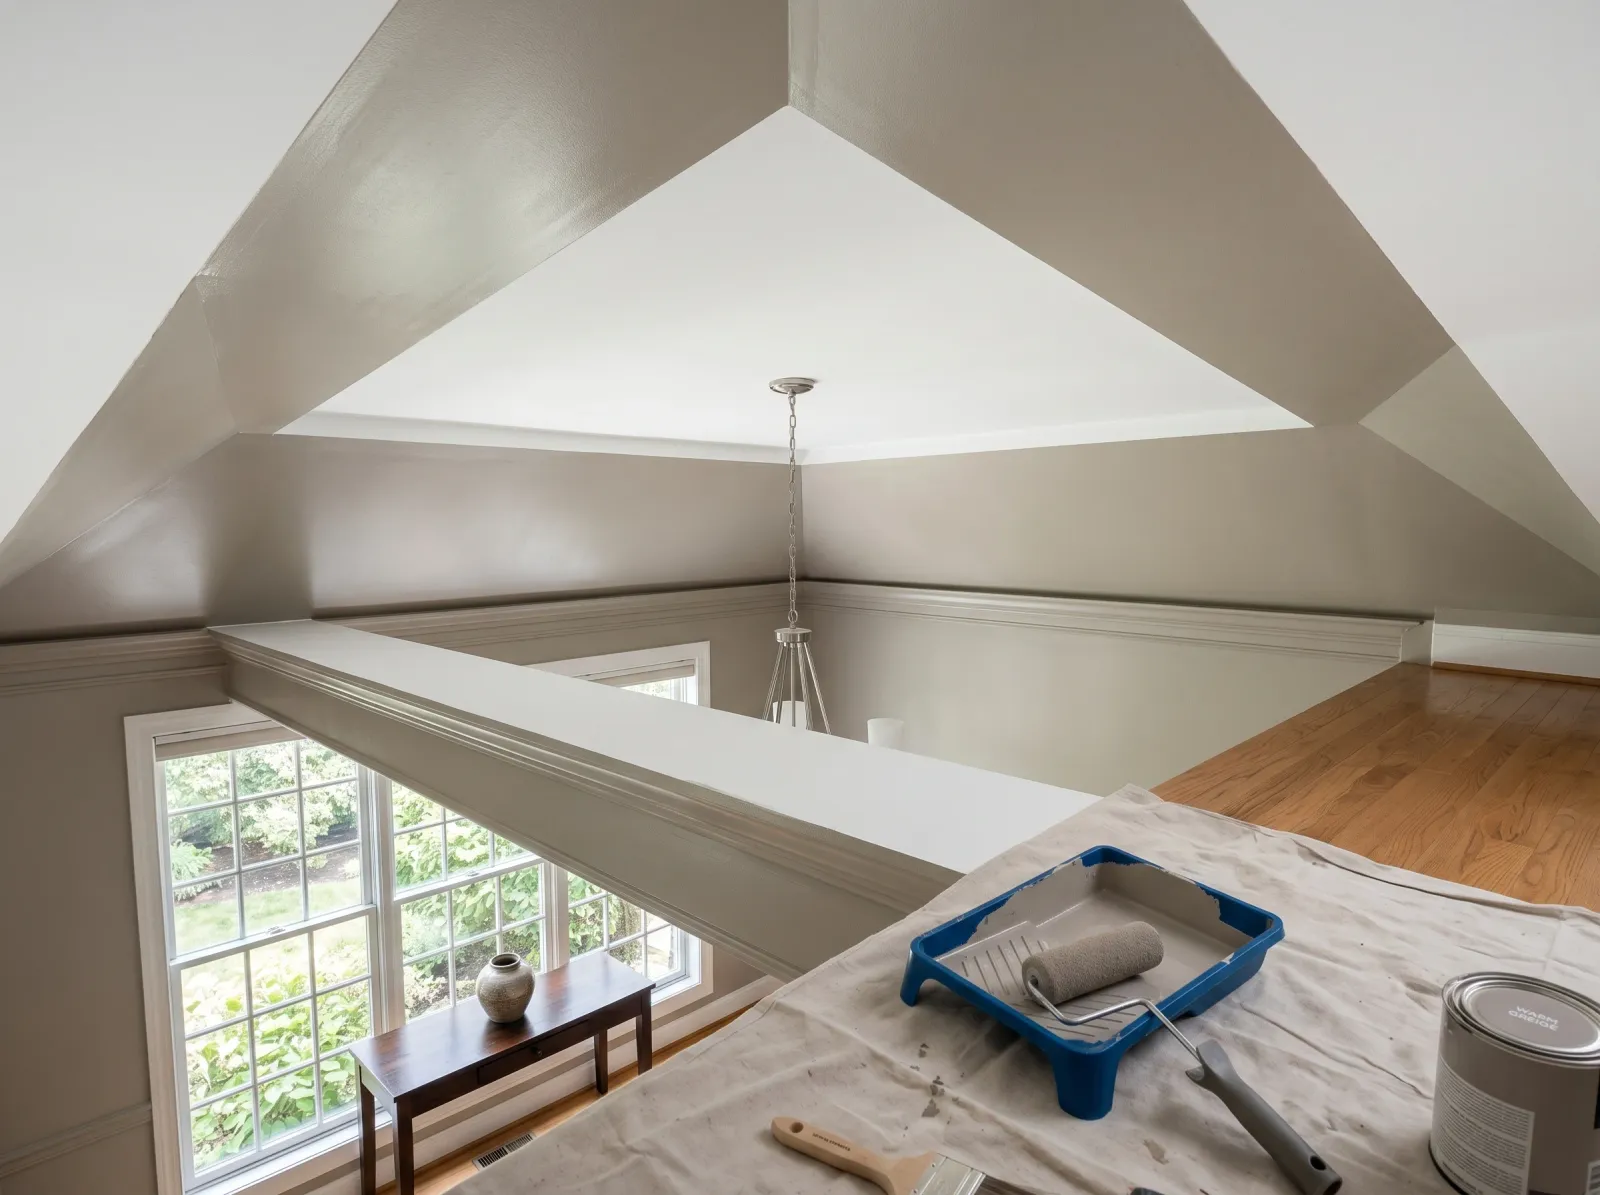
Sides last, with a seal coat at the tape edge so the line stays crisp.
The center is dry and taped at the corner. Now the sides, and here’s the trick that makes the line clean.
Before you brush the second color, do a seal coat. With your angled brush, run a thin pass of the first color (the white already on the center) right along the tape edge. Let it dry. Any paint that bleeds under the tape is now the white you can’t see, so it seals the gap. Paint the second color on top and the line comes out razor-sharp.
Now cut in the corner with the second color, then fill the sides with the 4-inch mini roller. The mini fits the narrow band; a big roller smears into the corner. Two thin coats.
When the second coat is just slightly tacky, not bone dry, pull the tape at a 45-degree angle, slow and steady. Pulling tape off fully cured paint can chip the edge.
Step 6: Reset the Room
Shake out the drop cloths outside. Wash brushes and roller sleeves under warm water until it runs clear. Furniture back in 24 hours.
Walk the room at different times of day before you call it done. A ceiling looks different under morning light than under a lamp at night, and a thin spot shows up when the light rakes across at the right angle. If you find one, it’s a 10-minute touch-up with the leftover paint.
Common Mistakes
- Skipping the seal coat on a two-color tray. You tape, you paint the second color straight onto the tape edge, and paint creeps under. The line comes out fuzzy. Brush the first color along the tape edge first, let it dry, then the second color. The bleed becomes invisible.
- Using shiny paint on the recessed center. Satin or semi-gloss overhead magnifies every drywall seam and roller mark. Flat or matte on the center, no exceptions.
- Painting over the corner crack instead of patching it. Tray ceilings crack at the inside seam as the house moves. Fresh paint won’t hide it for long. Spackle and sand the crack before you paint.
- Running a full 9-inch roller on the narrow sides. It smears into the corner and slaps paint onto the center you just finished. Use a 4-inch mini roller on the side band.
- Overreaching off the ladder. A tray sits high, the temptation to stretch is strong, and that’s how people fall or drag a wet sleeve across dry paint. Move the ladder every few feet. It’s slower and it’s the right call.
- No raking light. You roll, it looks fine wet, it dries patchy because you couldn’t see the thin spots. A headlamp aimed across the surface shows them while you can still fix them.
Cure Schedule
| Time after the final coat | What’s safe |
|---|---|
| 1 hour | Pull the tape (slightly tacky is ideal) |
| 4 hours | Touch dry, don’t bump it |
| 24 hours | Furniture back, normal room use |
| 7 days | Wipe a smudge with a damp cloth |
| 30 days | Full cure, fully washable |
Maintenance and Touch-Ups
A tray ceiling holds up for 8 to 12 years before it wants a refresh, longer than walls because nobody touches a ceiling. The eggshell sides hold up about the same.
For a touch-up, dab the leftover paint on with a small piece of roller, not a brush. A brush leaves a different texture than a rolled surface and the patch shows. Keep a labeled quart of each color in the basement.
Get a water stain up there from a leak? Fix the leak first, then spot-prime the stain with Zinsser BIN before you repaint, or it bleeds right back through. The water-stains-on-ceiling fix walks through it.
Cost Breakdown
| Item | $ |
|---|---|
| Ceiling paint, 1 gallon flat | $30 |
| Side color, 1 quart eggshell | $20 |
| Brush, rollers, mini roller, tray | $35 |
| Tape, drop cloth, spackle | $25 |
| Total | $110 |
Mid-tier paint, standard 12-by-14-foot tray. One-color trays run cheaper (no second quart, less tape). Top-shelf paint pushes it toward $140.