How to Paint Two-Tone Walls
How to paint two-tone walls with a crisp dividing line: where to split the wall, which color goes on top, taping for a clean edge, and a two-coat plan.

A two-tone wall lives or dies on one line. Everything else is just painting, the same cutting in and rolling you’d do on any wall. But that horizontal seam where the two colors meet is the thing your eye goes to the second you walk in. Get it dead straight and the room looks designed. Let it wobble and the whole wall reads like a mistake you didn’t quite finish.
So this guide is really about the line. Where to put it, which color sits below it, and the one taping move that keeps it crisp.
What You’ll Get
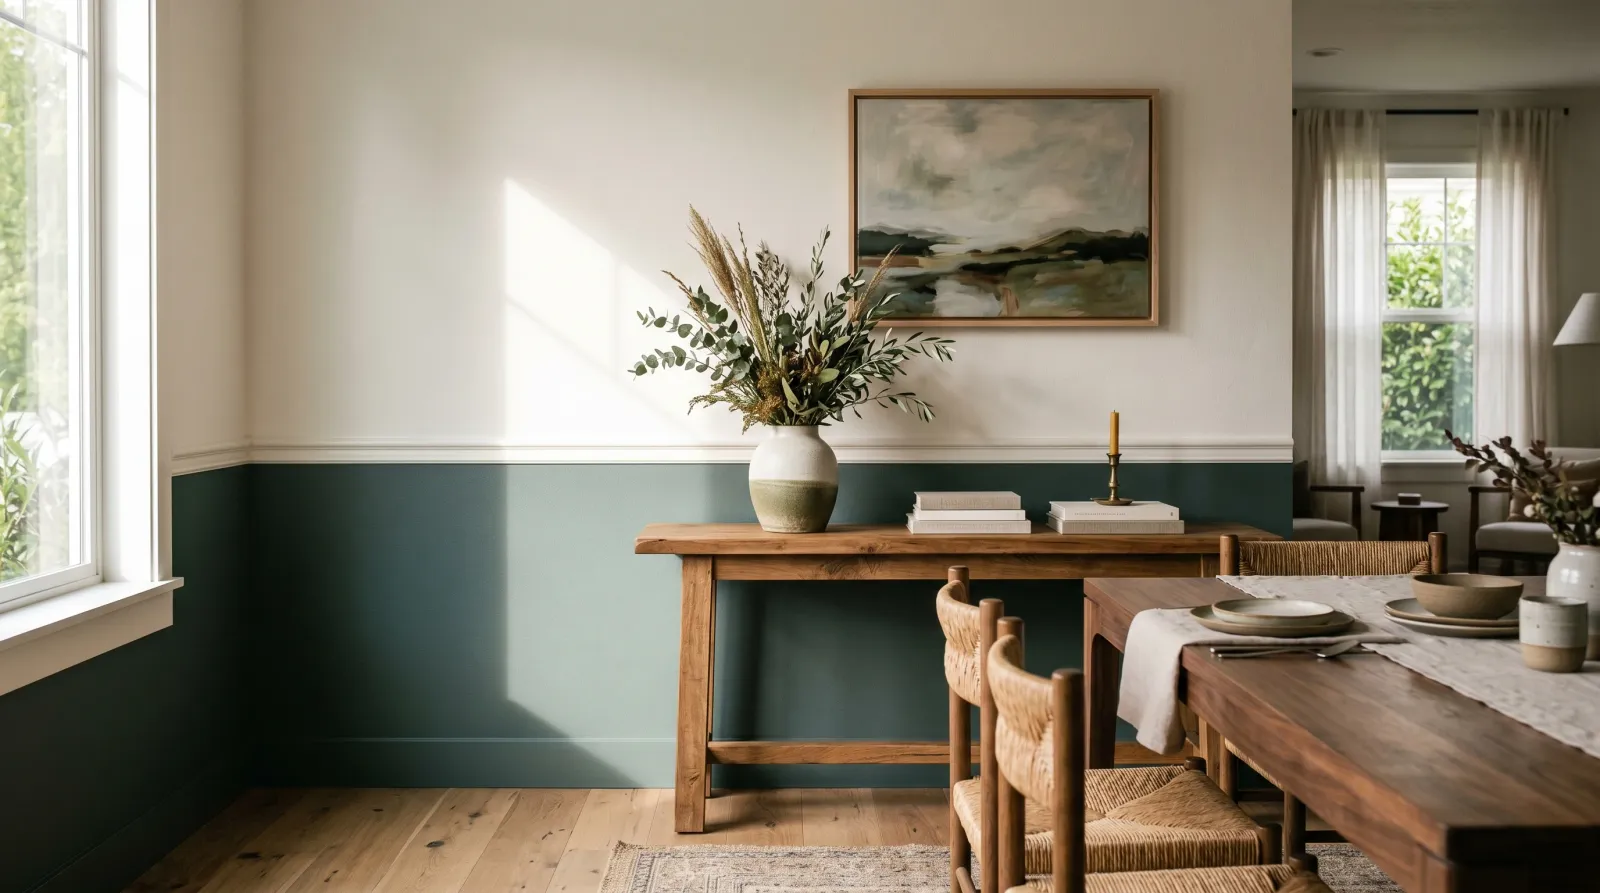
One wall, or a whole room, split into two colors by a clean horizontal line. The deeper color grounds the bottom of the room and the lighter color opens up the top.
Honest Take on Difficulty and Time
The painting is easy. The measuring and taping is where the patience goes.
A single accent wall split at chair-rail height is a Saturday afternoon, maybe four hours with dry time between coats. A full room with the line running unbroken around every wall, including over doors and around windows, is a weekend. The extra time isn’t paint. It’s getting the line level all the way around a room that isn’t actually square, because almost no room is.
If you’ve never cut a straight line freehand, don’t try to start here. Tape it.
What You’ll Need
Paint and Sheen
Two colors. The classic pairing is a deep, slightly muted color below and a soft warm neutral above. Think a green-blue like BM Hale Navy or SW Naval below, with a warm white like BM White Dove above. The deeper color does the grounding; the lighter one keeps the room from feeling closed in.
Keep both colors in the same sheen. Eggshell is the safe choice for a living or dining room, satin if you want a touch more wipeability. Mixing sheens makes the dividing line show up even where the colors are similar, which you don’t want on a first try. The sheen guide walks through why.
Before you commit to the deep color, check its LRV, the number that tells you how much light it bounces back. A bottom color under about 15 will read almost black in a north-facing room and lose its color entirely after dark. The LRV explainer covers how to read that number so your “navy” doesn’t go flat and lightless by evening.
Tools
A 2.5-inch angled brush for cutting in. A 9-inch roller frame with two sleeves, one per color, so the deep color never muddies the light one. Two trays. A level, a tape measure, a pencil, and painter’s tape. A chalk line helps on a long wall.
The level matters more than the brush here. A $14 brush and a borrowed level beat a great brush and a guessed-at line every time.
Step 1 — Mark the Line and Get It Level
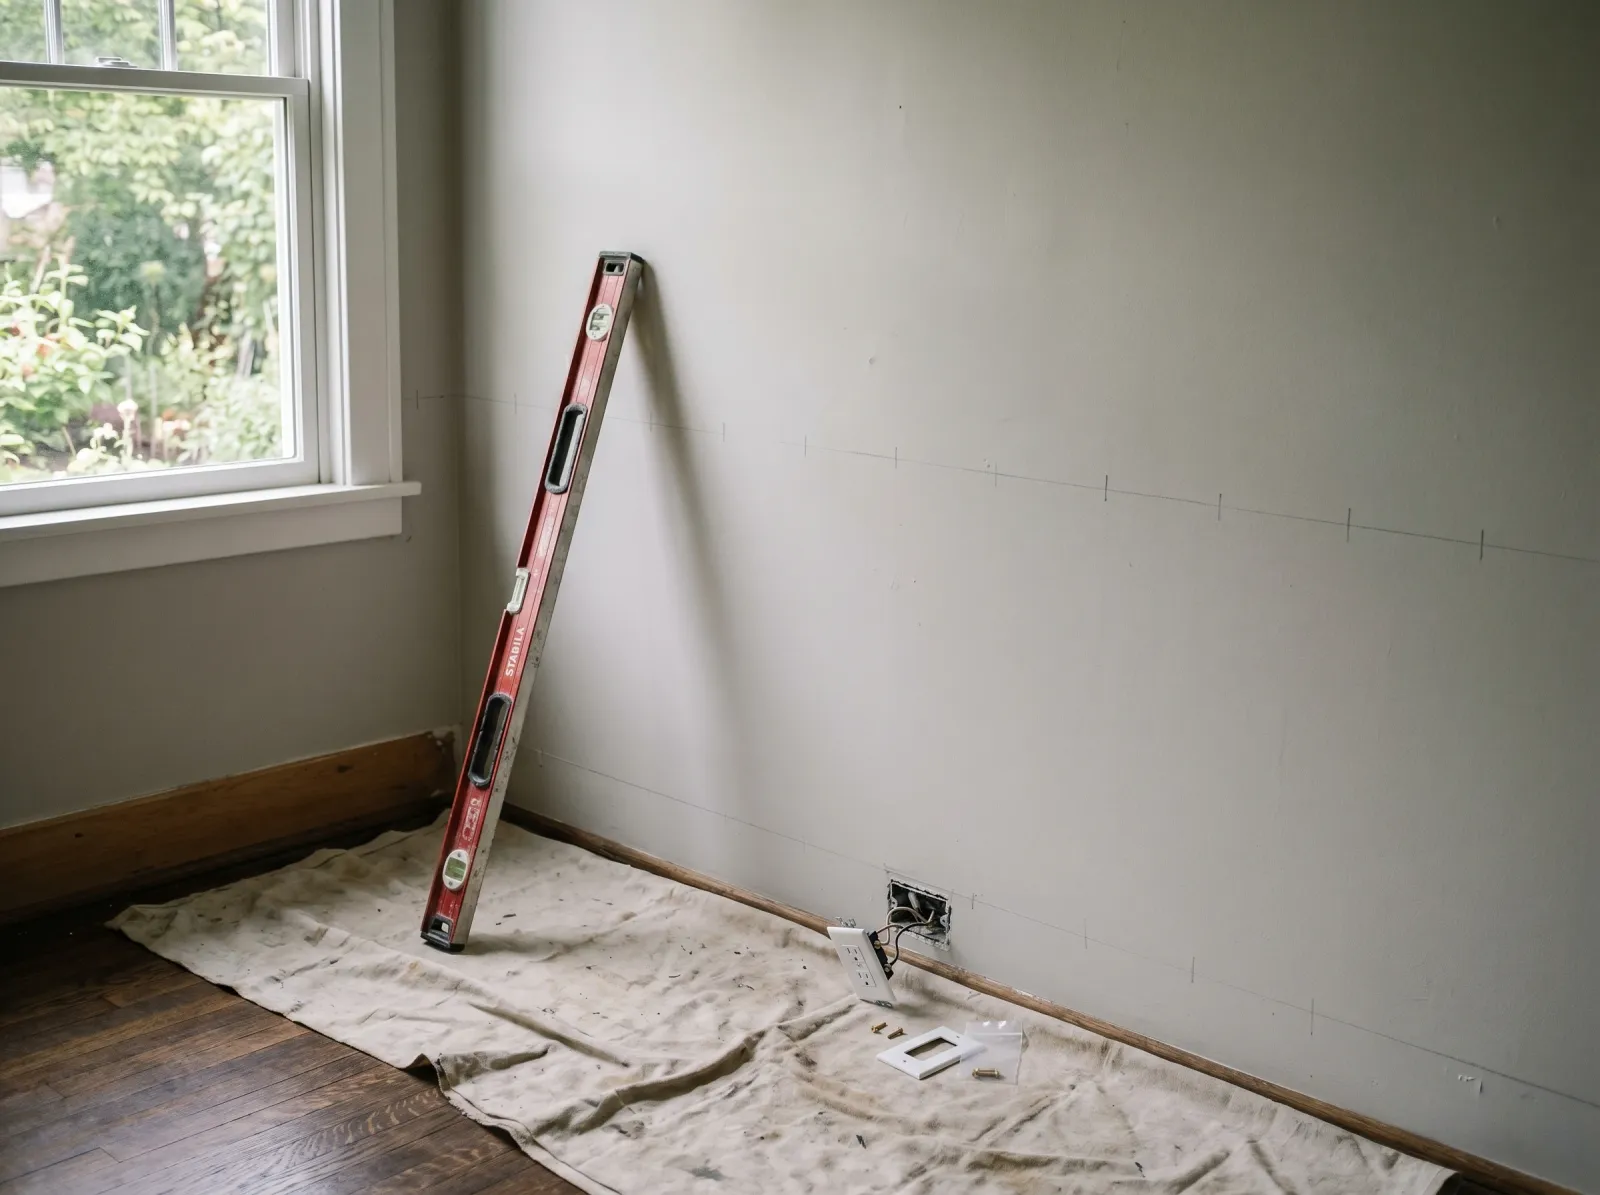
Pencil ticks at the chosen height, leveled all the way around, drop cloth down and outlet plates off.
Decide your height first. Chair-rail height (32 to 36 inches) makes a room feel grounded and traditional. The two-thirds line (around 60 to 66 inches on an 8-foot wall) reads modern and stretches a low ceiling taller. Don’t split the wall at the exact midpoint. A line at dead center looks like you couldn’t decide.
Measure up from the floor and make a pencil tick. Then walk the level along the wall, marking ticks every couple of feet, and connect them. Measure up from the floor at each tick, not down from the ceiling. Ceilings are rarely level, floors usually are, and your furniture sits on the floor, so the line should relate to the floor.
Watch out for the floor itself sloping in an old house. If it does, split the difference between a floor-parallel line and a true-level line so the eye reads it as straight.
Step 2 — Paint the Upper Color First
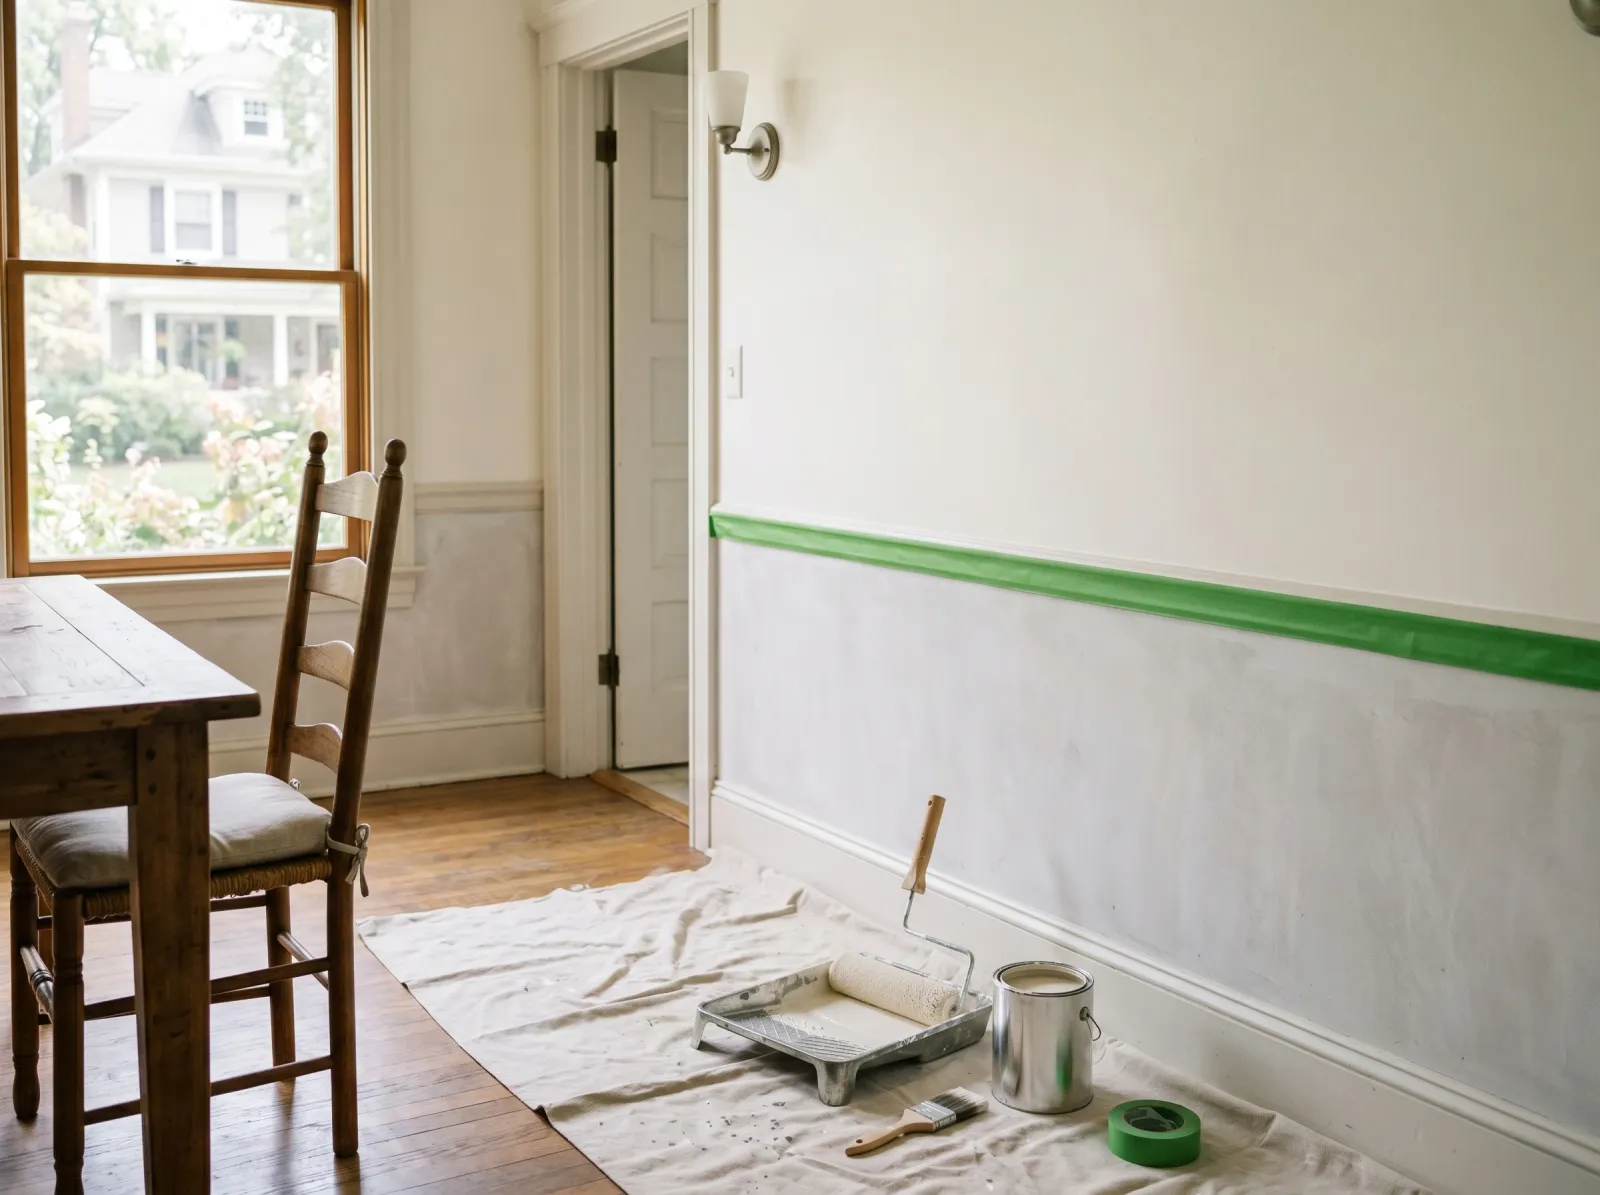
The lighter top color goes on, then the tape sits just below the dry edge with caulk sealing it.
Paint the lighter top color first, and let it run a couple of inches past your pencil line into the area that’ll become the bottom color. You want the top color fully covering the seam zone. Two coats, with the dry time on the can between them, usually four hours.
Why top color first? When you tape later, the tape sits on dry top-color paint, and any bleed under the tape will be top color bleeding into top color. Invisible. If you painted the bottom color first and taped over it, every bleed would show.
Let the top color dry overnight if you can. Tape pulls cleaner off fully cured paint than off paint that went on this morning.
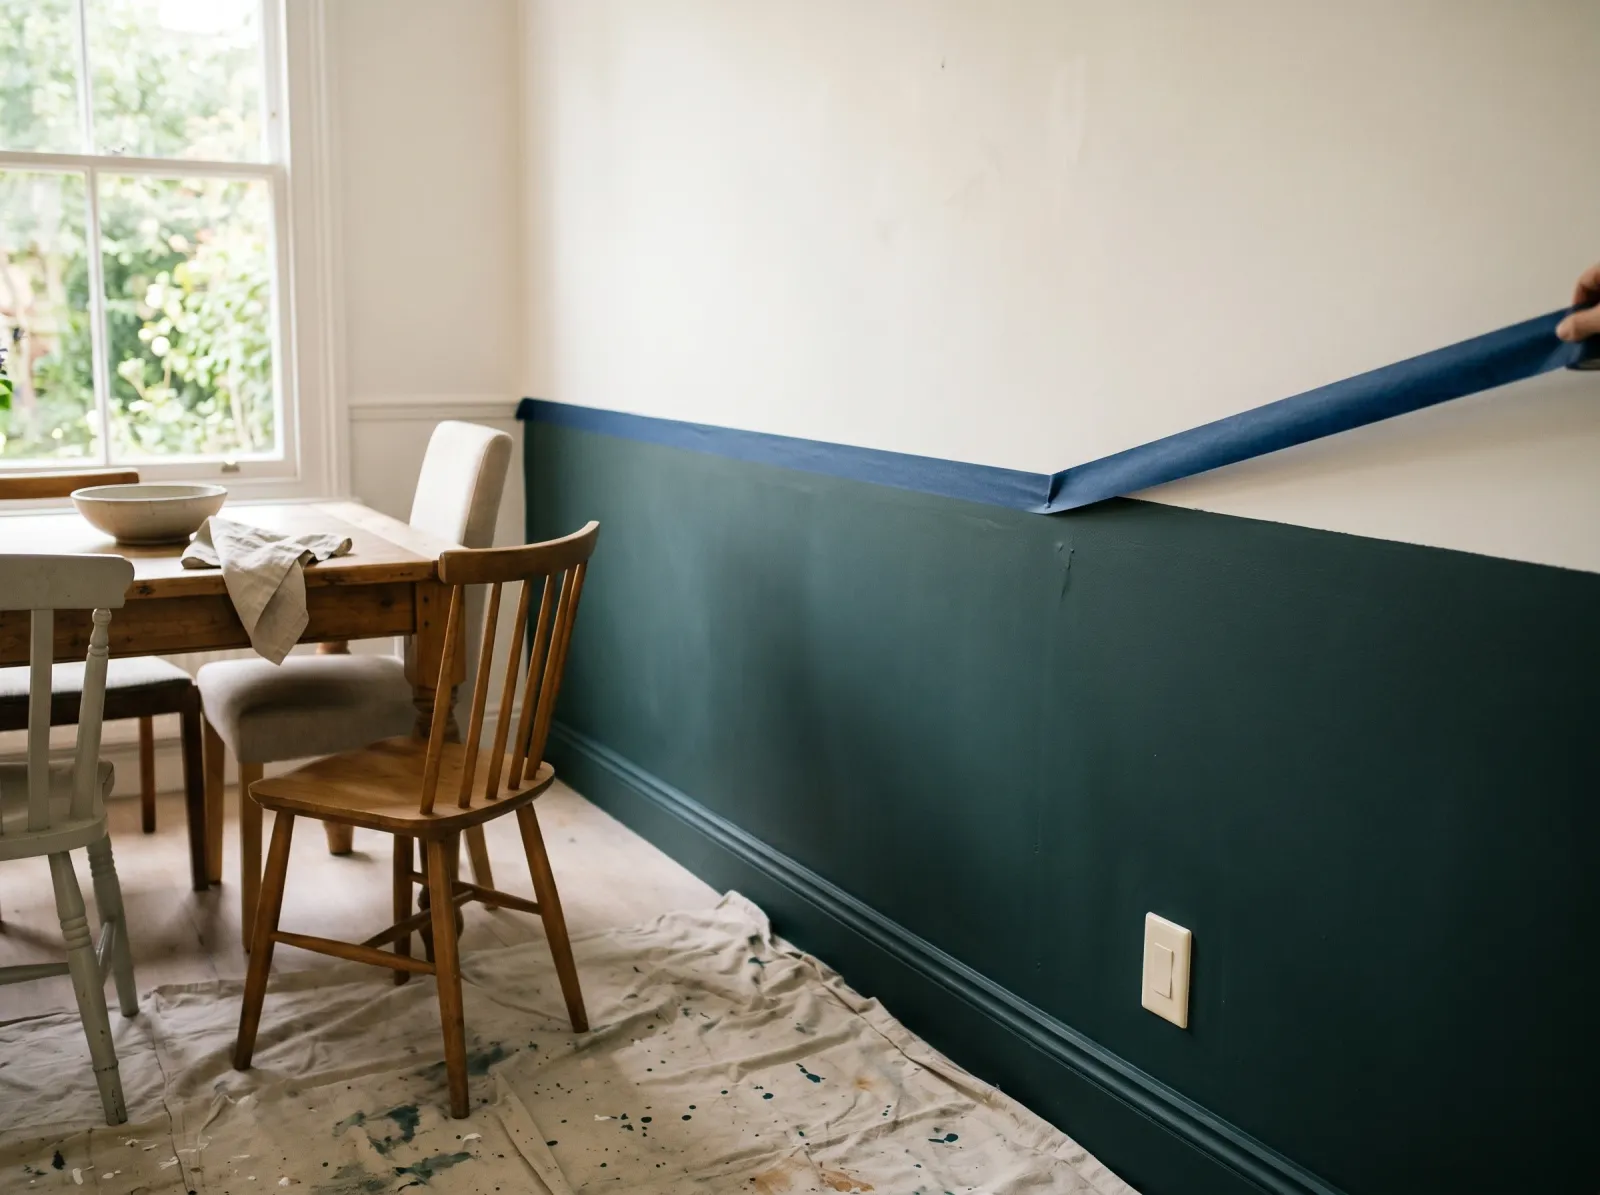
Step 3 — Tape the Line and Seal It
Run your painter’s tape along the line, with the tape above the line, covering the top color, and the clean edge of the tape sitting right on your pencil mark. Press the edge down hard with a putty knife or your thumbnail. The press is what seals it.
Now the move that makes the line crisp. Run a thin pass of the top color along the tape edge, over the seam, and let it dry. Any paint that sneaks under the tape is top color, so it disappears into the top color already there. When you roll the bottom color next, the tape edge is already sealed and the bottom color can’t bleed through. A bead of clear painter’s caulk wiped along the edge does the same job. This is the single trick that separates a sharp two-tone line from a fuzzy one.
Watch out for textured walls. Orange-peel and knockdown leave gaps the tape bridges over. The seal-the-edge pass isn’t optional on texture; it’s the only thing that gives you a clean line.
Step 4 — Roll the Lower Color Up to the Line
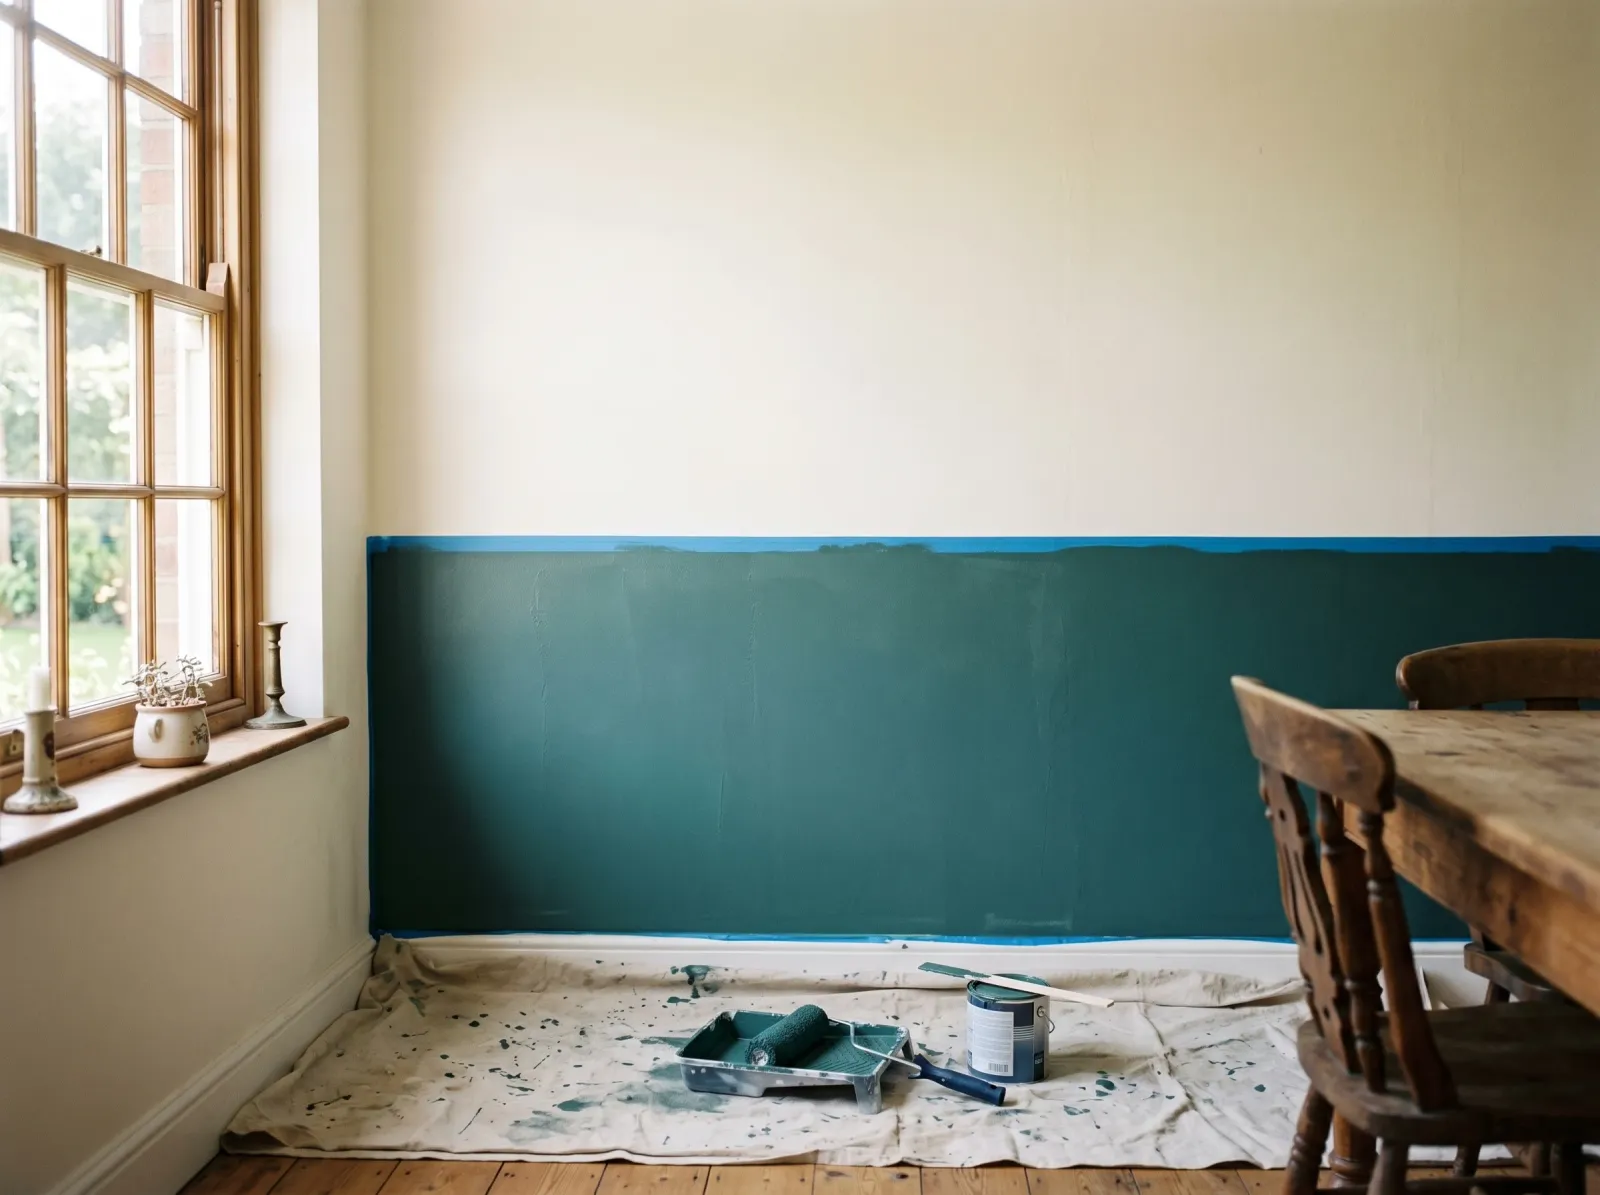
Deep color brushed along the tape edge first, then rolled to fill the band below.
Cut in the bottom color along the tape edge with the angled brush, then along the baseboard and into the corners. Switch to the clean second roller sleeve and roll the band, working in W-shapes and keeping a wet edge so you don’t get lap marks where one section dries before the next.
Two coats. Deep colors especially need the second pass; one coat of a saturated color almost always dries blotchy. Let the first coat dry the full recoat window before the second.
Watch out for loading the roller too heavy near the tape. A dripping roller pushes a wave of paint against the tape edge and forces it under. Roll it out on the tray ramp first.
Step 5 — Pull the Tape and Reset the Room
Second coat still tacky, tape peeled at a 45-degree angle, the two colors meet in one clean edge.
Pull the tape while the second coat is still slightly tacky, not bone dry. Bone-dry paint can crack along the tape edge as you pull and chip off in a ragged line. Pull slow, at a 45-degree angle, in one continuous strip.
If a spot did bleed, wait for it to dry, then touch it with a small artist’s brush and the matching color. From across the room nobody finds the repair.
Outlet plates back on, furniture back in 24 hours, art on the walls in 48.
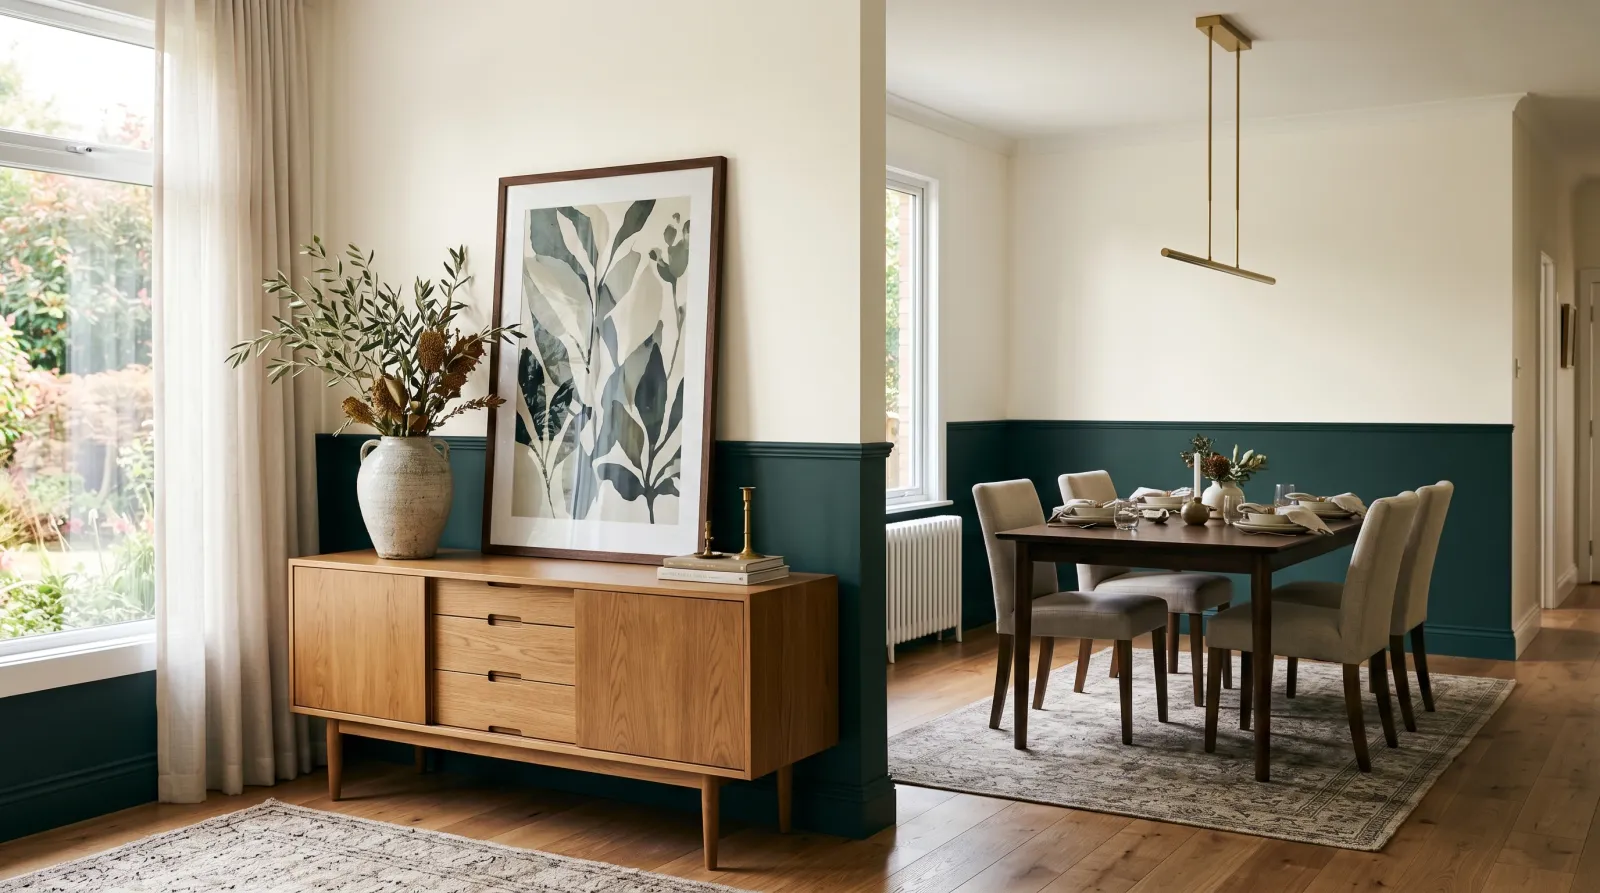
Furniture back, the two colors settled, the dividing line grounding the room.
Common Mistakes
- Splitting the wall at dead center. A line at exactly half the wall height looks unplanned. Drop it to chair-rail height or push it up to the two-thirds line so it reads as a decision.
- Putting the dark color on top. Dark up high pulls the ceiling down and makes the room feel shorter. Deep color grounds a room from the bottom. Light above, dark below, unless you have a specific reason.
- Skipping the seal-the-edge pass. Taping alone doesn’t stop bleed, especially on texture. Paint the top color over the tape edge first so any bleed is invisible, then roll the second color.
- Measuring down from the ceiling. Ceilings aren’t level. Your furniture sits on the floor. Mark the line up from the floor so it relates to what the eye compares it against.
- Mixing sheens by accident. A matte top against a satin bottom shows the line in raking light even before the color does. Pick one sheen for both unless you mean to contrast them.
- Pulling tape too late. Cured paint cracks where the tape edge sits. Pull while the second coat is still tacky, about 30 to 60 minutes after rolling.
Cure Schedule
| Time after the second coat | What’s safe |
|---|---|
| 30-60 min | Pull the painter’s tape |
| 4 hours | Touch dry, don’t bump the line |
| 24 hours | Furniture back against the wall |
| 48 hours | Hang art and a real chair rail if you’re adding one |
| 7 days | Wipe scuffs with a damp cloth |
| 30 days | Full cure, washable |
Maintenance and Touch-Ups
Two-tone walls hold up like any eggshell or satin wall, 7 to 10 years before they want a refresh. The vulnerable spot is the line itself, where a scuff or a chip shows against the contrast.
For a touch-up, keep a small jar of each color labeled with the room name and the sheen. Dab a chipped line with a small artist’s brush, following the existing edge. Don’t roll a patch across the line; you’ll blur it. Walls below chair-rail height take more knocks from chairs and feet, which is another argument for the deeper, more forgiving color living down there.
If you ever want to change just one band, you can repaint the bottom without touching the top, as long as you re-tape and seal the edge the same way. That’s the quiet advantage of a two-tone wall. Half the room is a half-day project.
Cost Breakdown
| Item | $ |
|---|---|
| Top color, 1 gallon eggshell | $45 |
| Bottom color, 1 quart eggshell | $22 |
| Tape and clear caulk | $14 |
| Roller frame, 2 sleeves, 2 trays | $30 |
| Drop cloth and sundries | $20 |
| Total | $131 |
A single accent wall runs less, around $90 with two quarts. A full room in top-shelf paint (BM Aura, SW Emerald) climbs toward $170.