How to Paint Crown Molding
First-timer's crown molding guide — tape ceiling AND wall, caulk both seams, brush in long even passes, pull tape before the paint cures. No drip on the ceiling.


Okay, so you’re standing in the middle of the room with your head tilted back, and the fear is the ceiling. That you’ll smear semi-gloss white paint across your nice flat ceiling and the smear will be the first thing you see every time you walk in for the next decade. That fear is reasonable. The fix is taping both seams, not just one.
Here’s the thing about crown molding paint. The molding itself is easy. It’s a strip of profiled wood you’re going to brush with semi-gloss enamel. The hard parts are the two seams (molding-to-ceiling, molding-to-wall) and a wobbly ladder. We fix both before the brush touches paint.
What You’ll Get
A crisp white semi-gloss crown molding line where the wall meets the ceiling, with a clean knife-edge on both sides, no smear on the ceiling, no bleed onto the wall. Two coats, one Saturday, one quart of paint.
Honest Take on Difficulty and Time
One notch harder than baseboards. The brush technique is the same. What’s harder is working off a ladder with your head back (which fatigues your neck inside an hour) and managing two tape lines instead of one.
| Method | Active time | Total elapsed | Skill |
|---|---|---|---|
| Single room, 8-ft ceiling | 4–5 hrs | One Saturday | Medium |
| Single room, 9-10 ft ceiling | 5–6 hrs | One long Saturday | Medium |
| Whole floor (3–4 rooms) | 10–14 hrs | One long weekend | Medium |
Do one short wall first to get your ladder rhythm and brush angle figured out. The second wall is twice as fast.
What You’ll Need
Paint
- 1 quart of semi-gloss trim paint. Covers crown in a typical 12x12 room, two coats. BM Advance and SW Emerald Urethane Trim are the two waterborne alkyds first-timers should reach for — they level brush marks better than a standard latex semi-gloss and cure to a hard finish that doesn’t yellow. See our crown molding paint picks.
- White or off-white. Match existing trim color if you have it. Otherwise pick a white that reads slightly warmer than your ceiling, so the molding has its own identity instead of melting in.
Tools
- 2-inch angled sash brush. The Wooster Shortcut is short-handled and easier to control near your face on a ladder.
- A sturdy step ladder. Not the one that wobbles. Both your hands are busy and your head is back, so ladder stability isn’t optional. Don’t stand on the top step. Don’t stand on a chair.
- 1.41-inch tape for the ceiling and 1.88-inch for the wall. FrogTape Multi-Surface (yellow) or ScotchBlue Original (blue). Two widths because the ceiling line sits tighter to the molding.
- One tube of paintable acrylic-latex caulk and a caulk gun.
- Canvas drop cloth.
- A headlamp or clip-on work light. You’re looking up into shadow, and a light propped on a shelf changes everything.
The brush picks live in the trim brush round-up. A worn chip brush leaves streaks across semi-gloss enamel that you’ll see from the doorway.
Step 1 — Wipe Down, Inspect, Set the Ladder
Crown wiped down, the gap between molding and wall and the gap between molding and ceiling each run with a thin bead of paintable caulk, both seams masked with painter’s tape.
Wipe every foot of crown with a damp microfiber rag. Years of furnace dust collect on the top edge where you can’t see it. Let it dry while you walk the room with the headlamp.
You’re looking for three things: hairline gaps at the ceiling seam, gaps at the wall seam, and joint gaps where two pieces meet at corners. All three get caulk. Then position your ladder so the molding is at chest-to-eye height when you stand on the second or third step. If you’re stretching your arm up, your line will wobble.
Watch out for: old glossy oil-based trim. If the surface feels like glass under a fingernail, scuff with the 220-grit foam block. Waterborne paint over old oil without scuff-sanding peels in sheets inside a year.
Step 2 — Caulk Both Seams
Cut the caulk-tube tip at a 45-degree angle, smallest opening you can manage. Load the gun.
Run a thin bead along the top seam in two-foot sections. Drag a wet fingertip along it immediately to smooth the bead into the seam. Wipe your finger on the damp rag, move down to the bottom seam, and do the same. Then hit any corner joints between molding pieces.
The bead should be barely visible. If it looks like a thick worm, you cut the tip too wide; wipe it off and start over. Let the caulk dry 30 minutes before you tape.
Watch out for: dripping caulk on the wall paint below. Damp rag stays in your free hand.
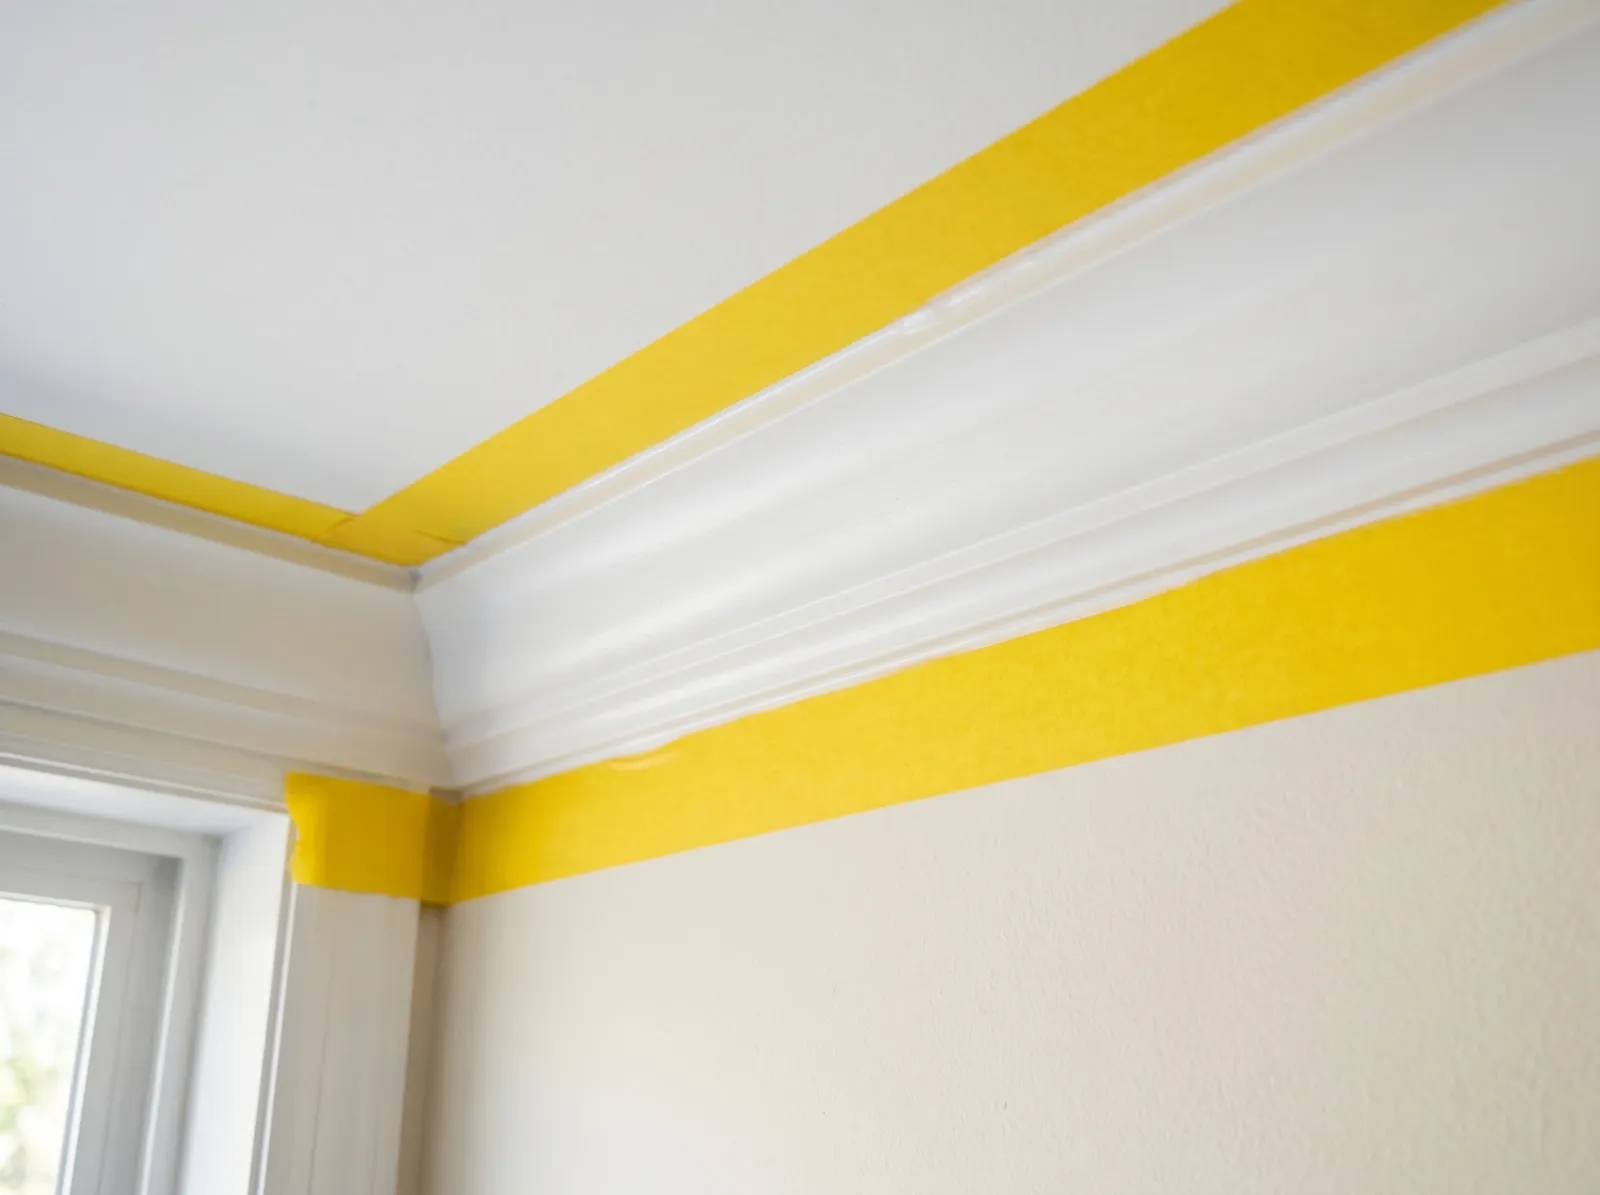
Step 3 — Tape Both Seams
Run the 1.41-inch tape along the ceiling, top edge pressed tight against the top of the molding. Use your thumbnail or the corner of the putty knife to seal the press. Then run the 1.88-inch tape along the wall, top edge pressed against the bottom of the molding.
Work three to four feet at a time. The press is what seals it. Tape laid on but not pressed bleeds.
Don’t tape the molding itself. Tape the neighbors (the ceiling and the wall).
Step 4 — Brush on the First Coat
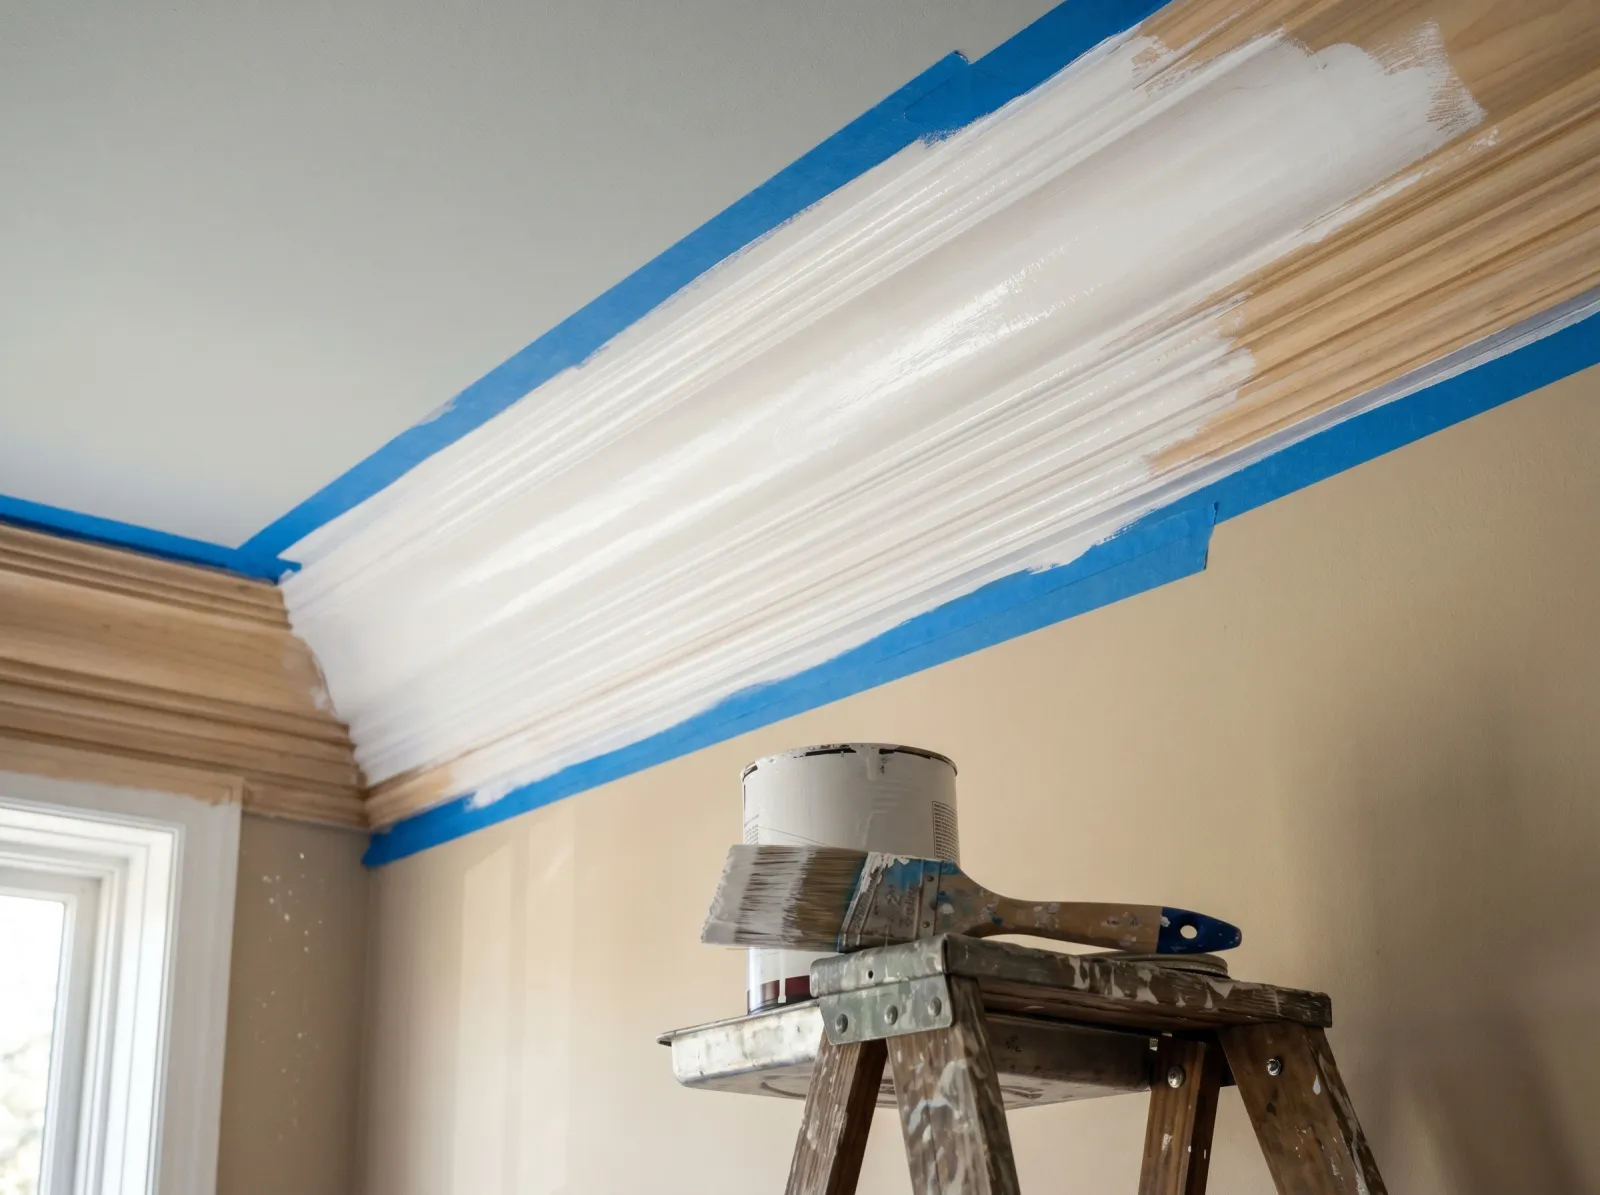
Two-inch angled brush, one even pass along the top, one along the profile, one along the bottom.
Load the angled brush by dipping a third of the way in and tapping (not wiping) the inside of the can to knock off drips. Drip control matters more on crown than on baseboards because gravity is working against you.
Brush in long even passes along the length of the molding, not short stabs. Three passes per section: top tape line, profile face, bottom tape line to feather thick spots. Work in two- to three-foot sections so the wet edges blend.
The first coat will look streaky in raking light. It always does. The second coat does the cosmetic work.
Watch out for: brush overload near the ceiling tape. Too much paint on the brush leaves a fat bead that bleeds under the tape. Unload more than you think you need.
Step 5 — Light Sand, Then the Second Coat
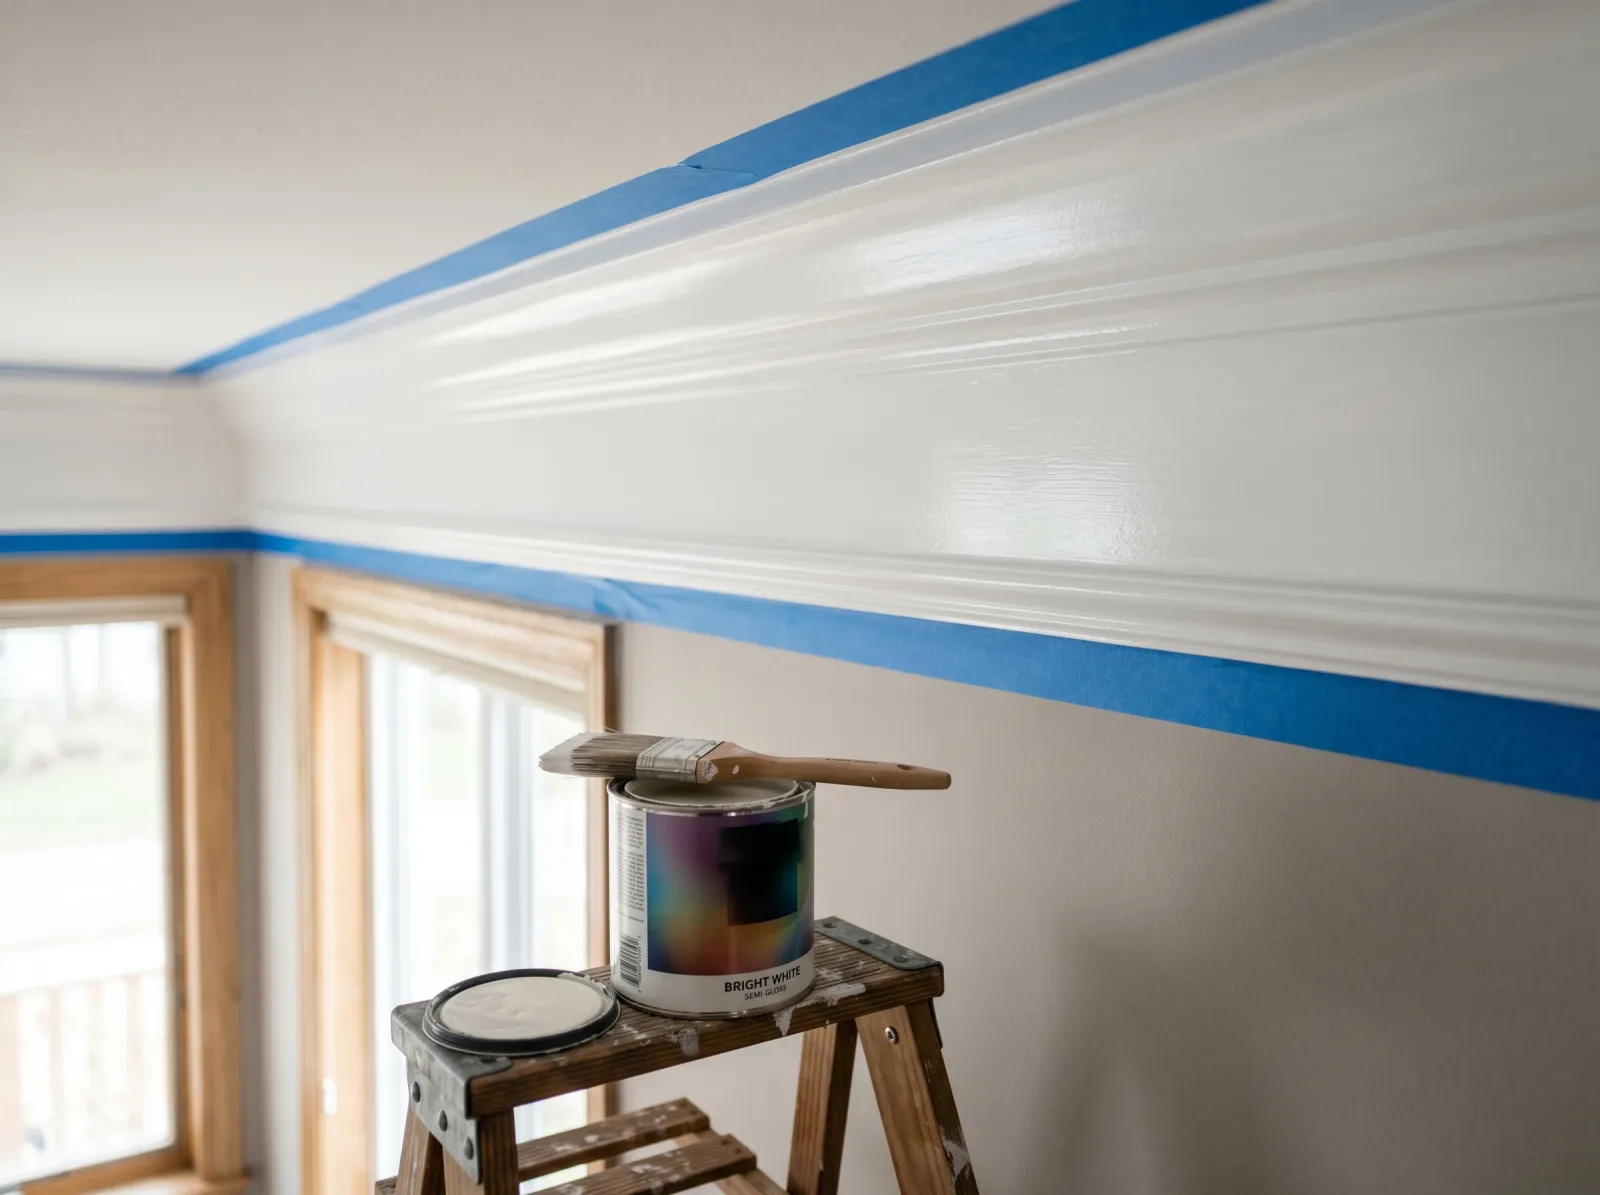
Light sand after coat one, wipe with a tack cloth, lay the second coat in long even strokes.
Wait the recoat time on the can (usually 2 to 4 hours; BM Advance wants 16 hours between coats, so plan a long lunch). When the first coat is dry to the touch and not tacky, give every length a feather-light pass with the 220-grit foam block. You’re knocking off dust nubs, not sanding paint off.
Wipe with a tack cloth. Lay the second coat the same way as the first: long even strokes. Don’t go back over a stroke that’s started to skin.
Step 6 — Pull the Tape While It’s Still Tacky
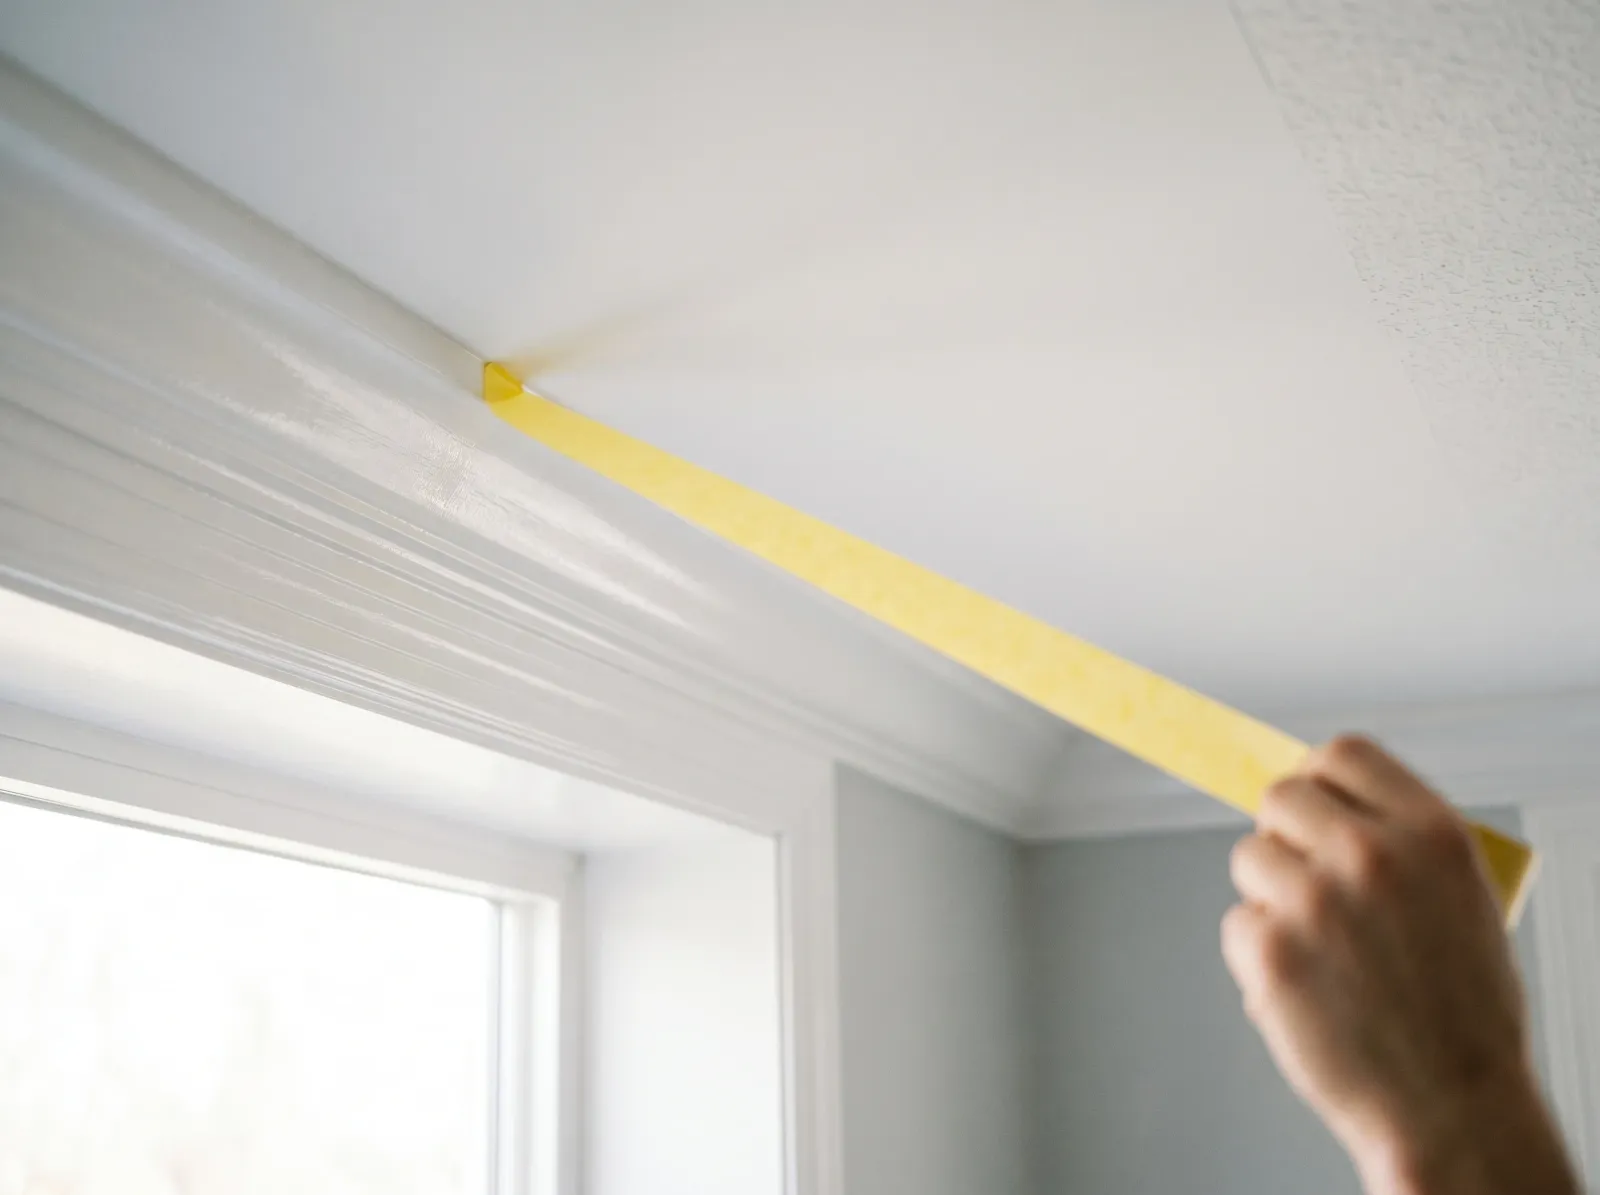
Pull each strip at a 45-degree angle while the second coat is still slightly tacky.
This is the step almost everyone gets wrong. The tape comes off while the second coat is slightly tacky, not after it dries. About 30 to 60 minutes after you finish brushing is the window — touch dry to a fingertip, film still soft.
Pull slowly, at a 45-degree angle, away from the molding, in one continuous strip per section. Ceiling tape first, then wall tape. If the tape resists, score the paint edge with the corner of the putty knife.
The line will be sharp enough that you’ll grin a little. You’ll know it when you see it.
Step 7 — Finished, Ladder Rolled Out

Crisp white crown molding along a clean ceiling line, the room reads finished from the doorway.
Wait 4 hours before you move furniture into the corners under the crown. Paint is dry to the touch but not cured. Walk the room with the headlamp once more, looking for spots where the tape lifted a hair of paint with it. Touch them up with a small artist’s brush.
Common Mistakes
- Taping only the ceiling, not the wall. Half the bleed problem disappears when you mask both sides. The wall paint below is just as likely to catch a drip as the ceiling above.
- Skipping the caulk at the joint corners. Two pieces of crown meeting at an outside corner almost always have a hairline gap. Paint won’t fill it. Caulk first, then paint.
- Painting over old oil without a scuff-sand. Glossy old oil-based trim rejects new waterborne paint inside a year. A light pass with 220-grit prevents the peel.
- One coat to save time. Semi-gloss is unforgiving in raking light from a window. Brush ridges and patchy coverage are visible from across the room. Two coats. Always two coats.
- Wobbly ladder. Half the spilled-paint stories I hear started here. Borrow a sturdy one if yours moves under your weight.
Cure Schedule
| Time after final coat | What’s safe |
|---|---|
| 30–60 min | Pull the painter’s tape |
| 4 hrs | Move furniture back under the molding |
| 24 hrs | Vacuum near the molding normally |
| 7 days | Wipe with a damp cloth |
| 30 days | Full cure |
Maintenance
A waterborne semi-gloss crown in a normal room stays looking new for 10 to 15 years. Crown takes less abuse than baseboards because nothing scuffs it. Save the leftover quart with an inch in the bottom and label the lid with the room and date. For longer damage, sand and recoat the whole length of that piece, not just the spot.
If It Goes Wrong
Bleed on the ceiling wipes off with a damp microfiber while it’s wet. If it’s dry, scrape carefully with a plastic putty knife and touch up with a dab of ceiling paint.
If the line is wavy in spots, wait until everything cures, tape again over the bad section only, and brush a third thin coat with the tape a hair tighter to the molding. The eye reads the cleanest sections of the line, not the worst, and most of what looks wrong from the ladder is invisible from the couch.