How to Paint a Tongue-and-Groove Wood Ceiling
Painting a tongue-and-groove ceiling the right way: how to prime knotty boards, get into the grooves, and stop sap from bleeding through your white in a year.

A plank ceiling is the one ceiling that fights back. Drywall you roll in an afternoon and forget. Tongue-and-groove gives you a dozen ways to look bad: drips that hang off the bottom edge of every board, grooves you swore you hit and didn’t, and knots that wait a year and then bleed amber sap straight through your fresh white. Get the order right and none of that happens. Get it wrong and you’re looking at a yellow polka-dot ceiling next summer.
Prime first. Always prime first on bare or knotty wood. Skip it and the sap wins.
TL;DR
- Prime bare or knotty wood with a stain-blocking primer first. Shellac (Zinsser BIN) for knotty pine, oil-based (Cover Stain) for clear boards.
- Use flat or matte ceiling paint. It hides the grain and the warps; satin lights up every flaw.
- Brush the grooves first, then roll the flat board faces. Every coat, every time.
- Roll the boards in one direction, along their length, so the sheen reads even under side light.
- Primer plus two finish coats on raw wood. One coat always dries blotchy.
- A 200-square-foot ceiling runs about $90 to $180 in materials and one weekend of work.
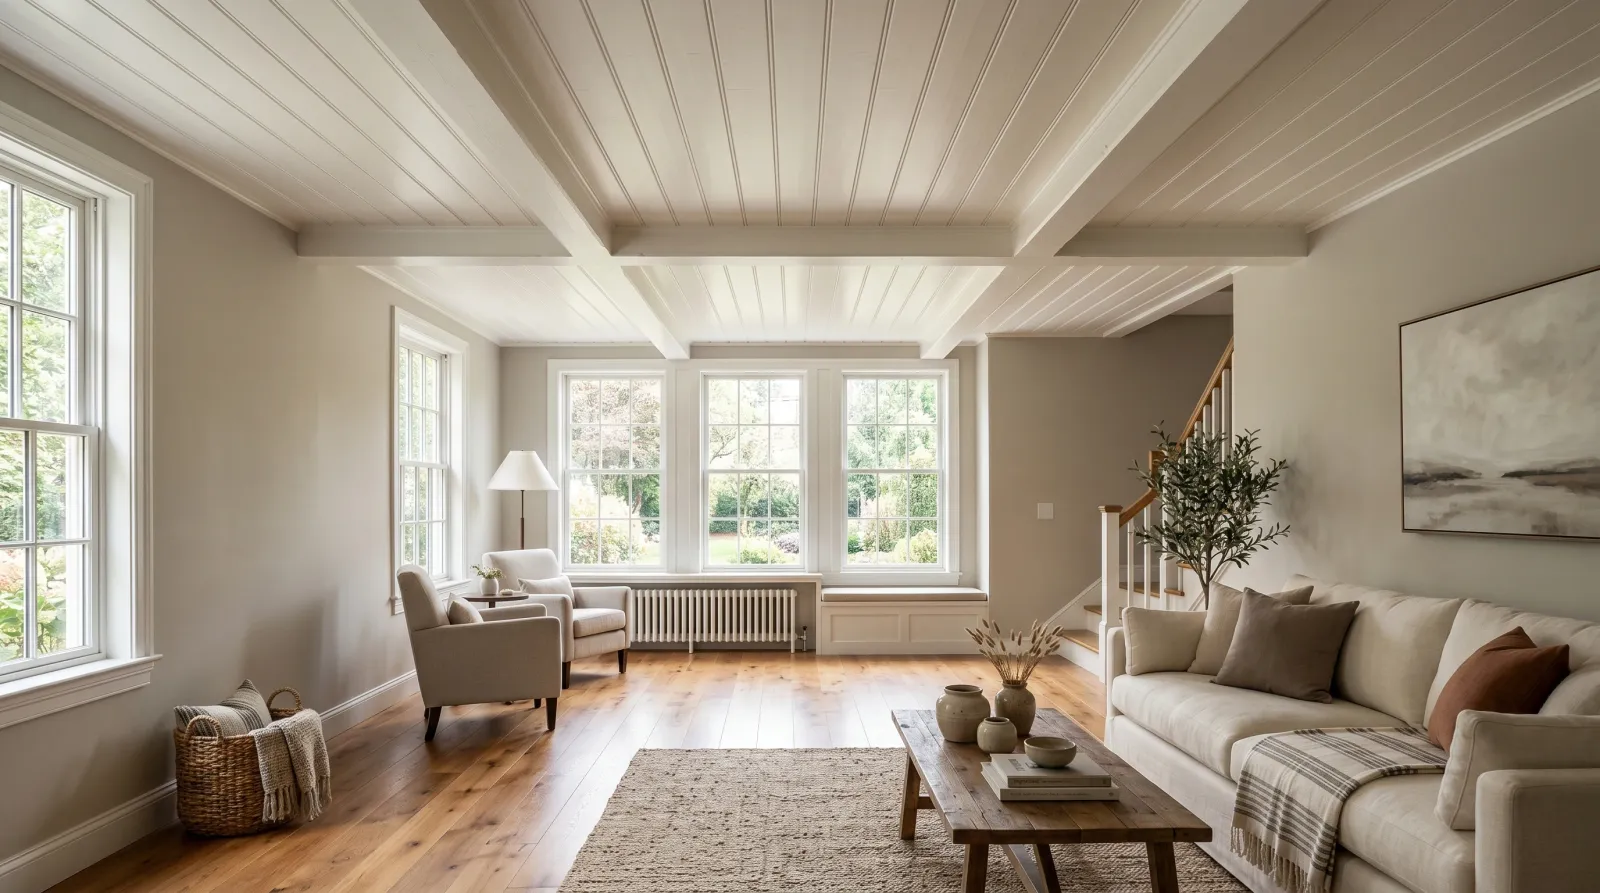
What You’ll Get
A clean, painted plank ceiling that still reads as planks. The grooves throw a shadow line, so you keep the cottage texture and lose the heavy wood tone. One weekend, plus dry time before you call it done.
Honest Take on Difficulty and Time
Harder than a flat ceiling, easier than cabinets. The work isn’t tricky. It’s slow and it’s overhead, and your neck will tell you about it Sunday night.
A 200-square-foot ceiling runs about 10 working hours over two days. Day one: clear the room, clean the boards, fill gaps, prime. Day two: two finish coats with dry time between. If you have a sprayer, knock a few hours off the painting and add them back in masking.
Anyone who tells you a wood ceiling paints as fast as a wall has never crawled a brush down forty feet of groove. The grooves are the job. Budget for them.
What You’ll Need
Paint and Primer
The primer matters more here than the finish. On knotty pine, use a shellac-based stain blocker (Zinsser BIN). Shellac locks down sap and tannin better than anything else, and knots are where wood ceilings fail. On clear, knot-free boards or already-painted wood, an oil-based stain blocker (Cover Stain or KILZ Original) is enough. Don’t use a plain water-based wall primer over raw knotty pine. It won’t hold the sap back, and you’ll see the knots ghost through inside a year.
For the finish, flat or matte. A 200-square-foot ceiling drinks about 1.5 gallons over two coats. Flat hides the grain and the warps every board ceiling has. The deep version of why flat wins overhead lives in the best ceiling paint round-up. For the primer logic, see what shellac primer does.
If the ceiling is knotty pine, read how to paint knotty wood before you buy anything. That’s where the bleed-through fight is won or lost.
Tools
A 2.5-inch angled brush for the grooves and board ends. A 9-inch roller with a 1/2-inch nap to push paint into the joints. An extension pole so you’re not on the ladder all day. Canvas drop cloths for everything below, because a plank ceiling drips more than drywall does.
A sprayer is optional and worth it. The grooves slow you down, and a sprayer floods them in seconds. Picks live in the best paint sprayers round-up. If you spray, you still back-roll.
Method: Brush-and-Roll or Spray
Two valid paths. Pick before you start.
Brush and roll is the no-extra-gear option. Slower, almost no masking, and you control every groove. Right for one room and a tight budget.
Spray is faster and floods the grooves cleaner than a brush ever will. The cost is masking time. You tent the whole room, then back-roll the flats while the paint’s still wet to work it into the wood. Spray-only on raw boards sits on the surface; the back-roll is what makes it bond.
For one ceiling, brush and roll. For a whole house of plank ceilings, spray. Either way, the prep below is identical.
Step 1 — Clear the Room and Clean the Boards
Pull the furniture out or push it to the center and tent it. Cover the whole floor in canvas. A plank ceiling drips off every board edge, and you won’t catch them all overhead.
Now clean the boards. Dust and cobwebs first with a dry brush or a vacuum. If the ceiling is over a kitchen or a wood stove, wash it with a TSP substitute. There’s a grease film up there you can’t see, and paint won’t stick to it.
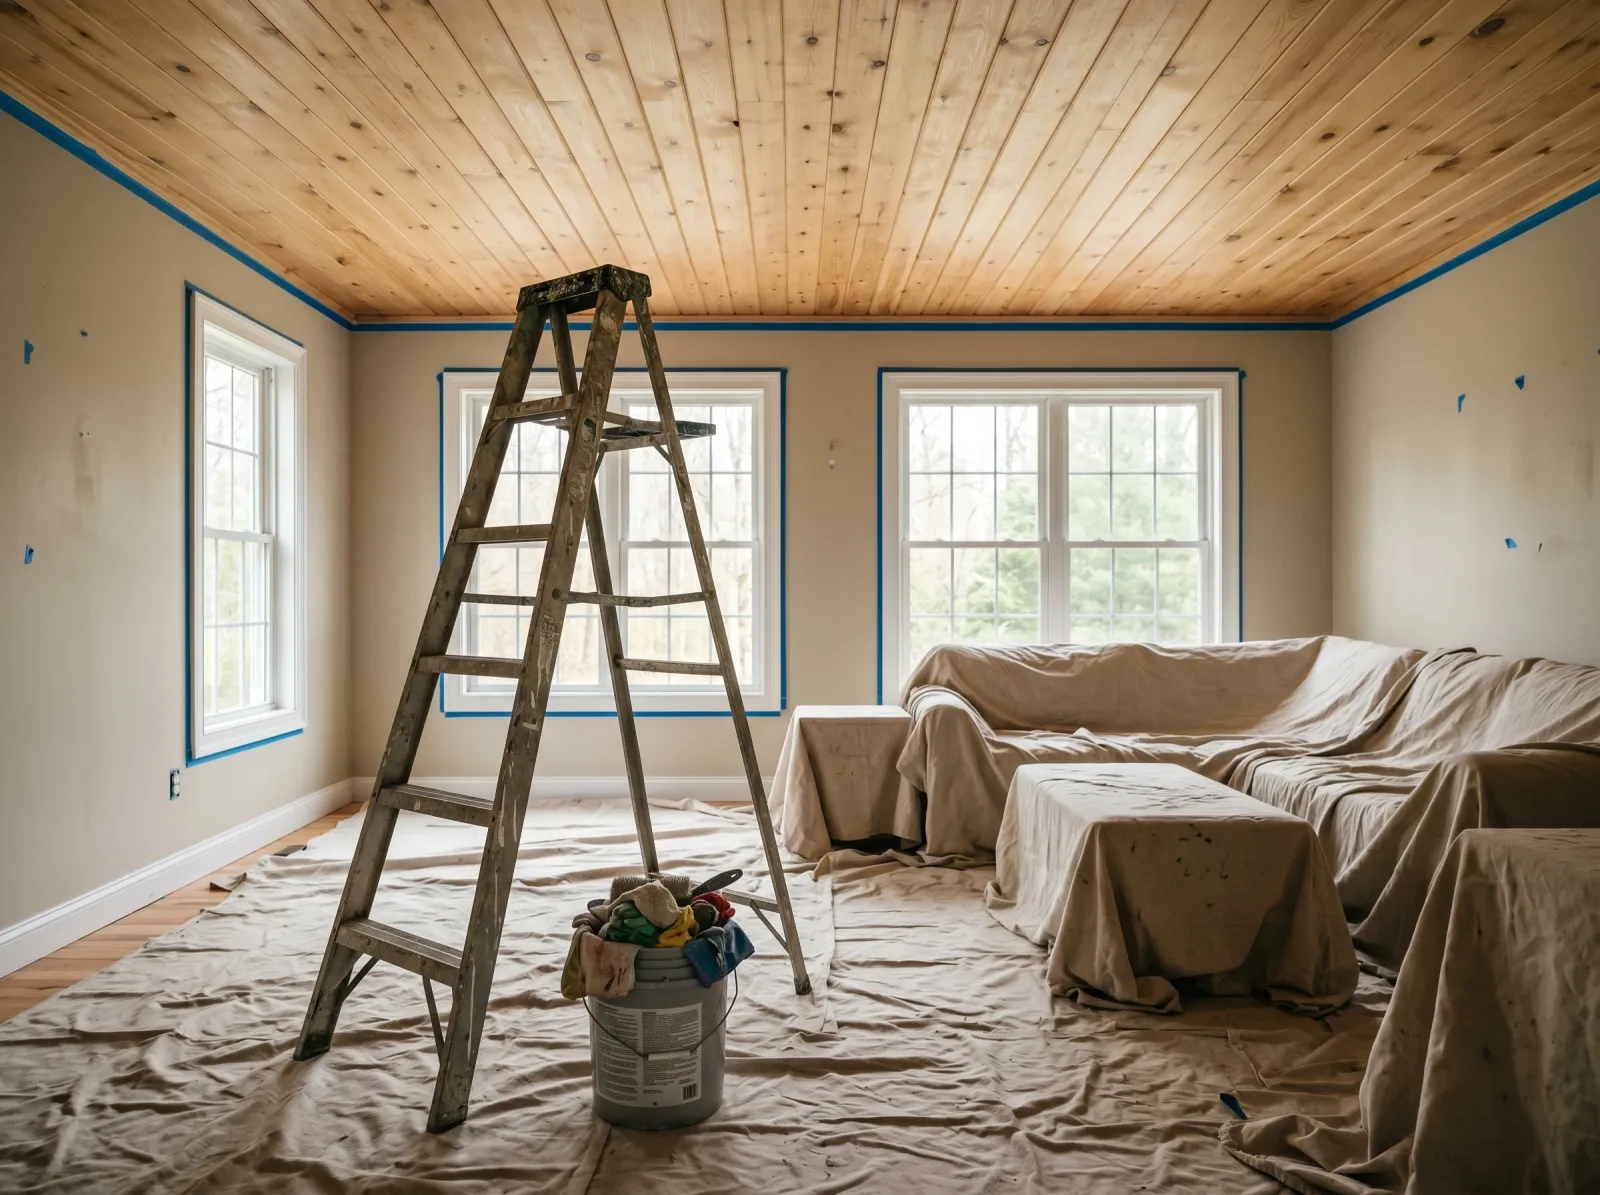 Floor and furniture under canvas, boards wiped clean, bad gaps caulked.
Watch out for old varnish or a glossy clear coat on the boards. Run a fingernail across. If it’s slick and shiny, scuff it with a 150-grit sponge so the primer has something to bite. Primer over glossy varnish peels.
Step 2 — Fill the Gaps and Holes
Old plank ceilings move. You’ll find nail holes, a few sprung joints, and gaps where boards shrank. Fill the nail holes with spackle. For the bigger gaps and the wall line, run a bead of paintable acrylic caulk and tool it smooth with a wet finger.
Don’t caulk every groove. The grooves are supposed to be there. You only fill the gaps that read as damage, not the designed V-joints between boards.
Let the filler dry, knock the patches flat with a 220 sponge, and wipe with a tack cloth.
Step 3 — Prime the Whole Ceiling
One full coat of stain-blocking primer. Brush the grooves and the board ends first, then roll the flats. Grooves first, flats second. That order matters, and it’s the same order you’ll use for the finish coats.
Shellac primer like BIN dries fast, sometimes in under an hour, and it stinks. Open windows and run a fan. Oil-based stain blockers dry slower, give yourself overnight. Either one turns the boards a flat white-grey and makes the knots vanish.
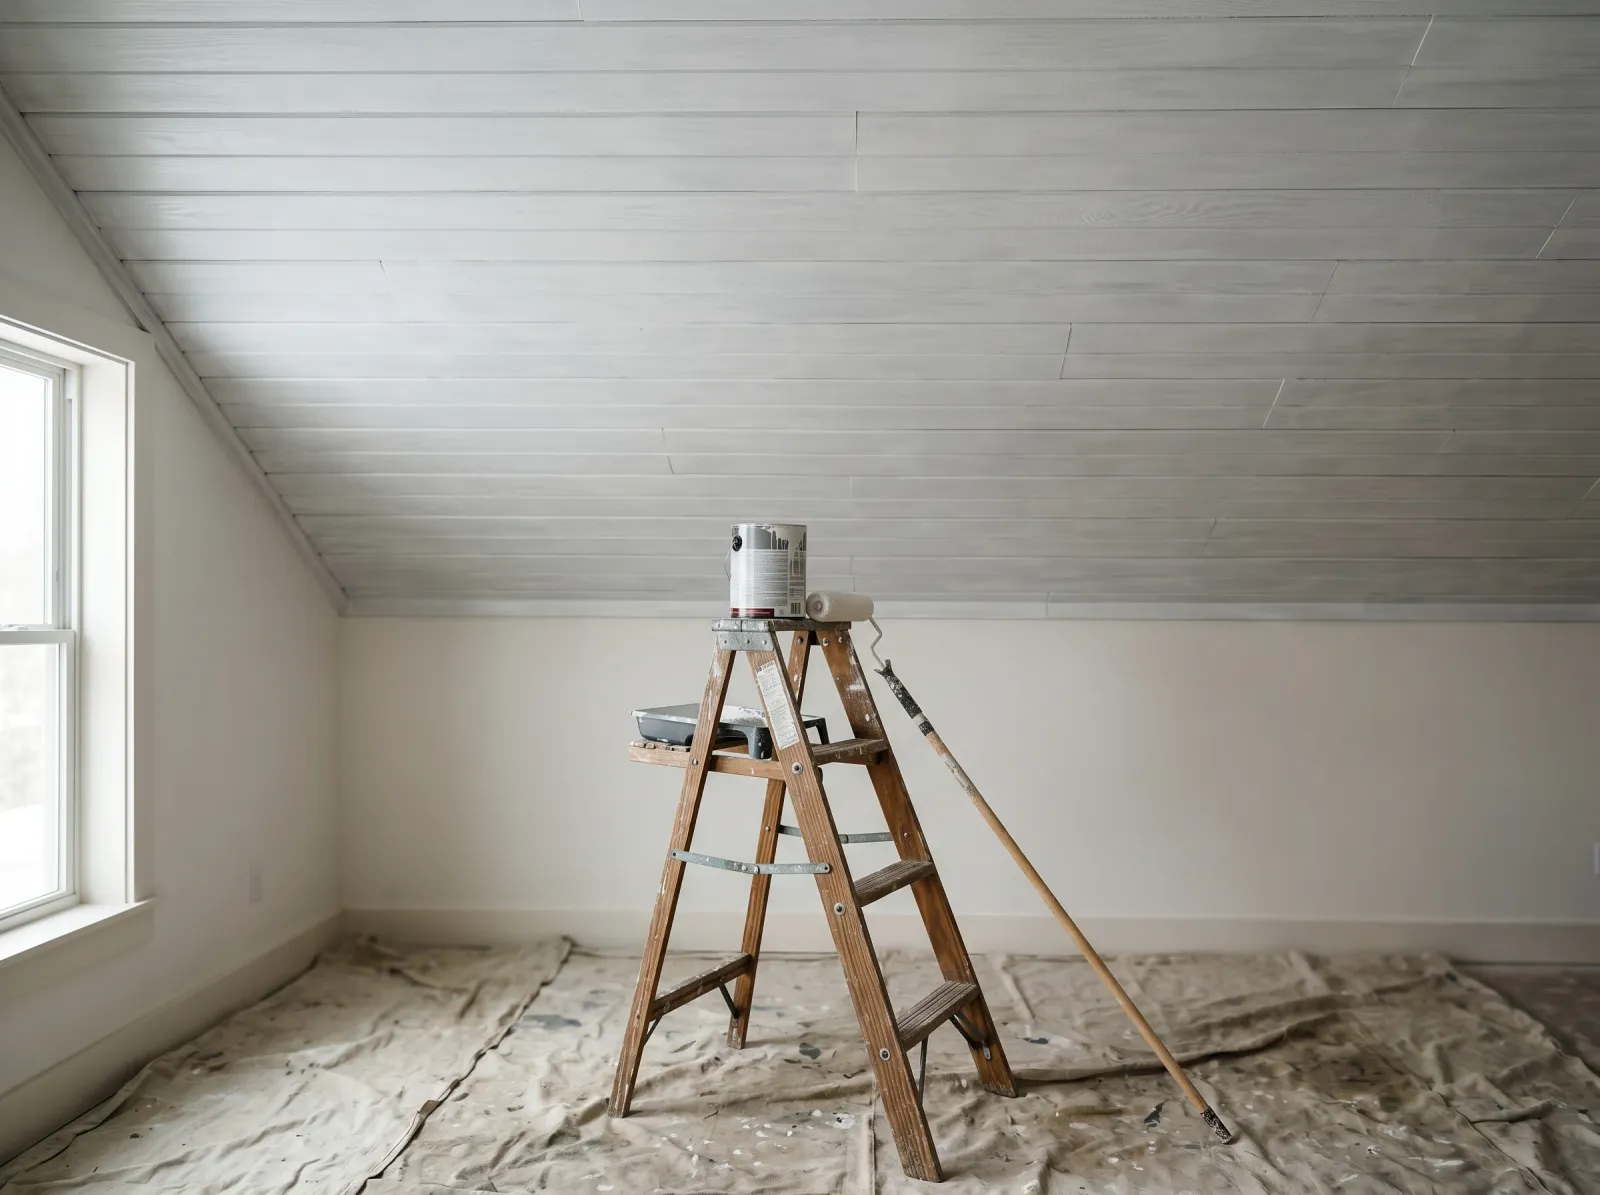 One coat of stain-blocking primer. The knots disappear under it.
Watch out for lap marks even on primer. Keep a wet edge and don’t stop in the middle of a board run. Prime a whole board end-to-end before you set the roller down.
Step 4 — First Finish Coat
Cut the wall line with tape if you’re keeping the walls a different color. Then brush every groove with the angled brush, working the tip into the bottom of each V. After the grooves, roll the flat board faces with the 1/2-inch nap.
Roll the boards in one direction, along their length. A flat ceiling rolled every which way still looks fine. A plank ceiling rolled in mixed directions catches side light and the sheen reads uneven board to board.
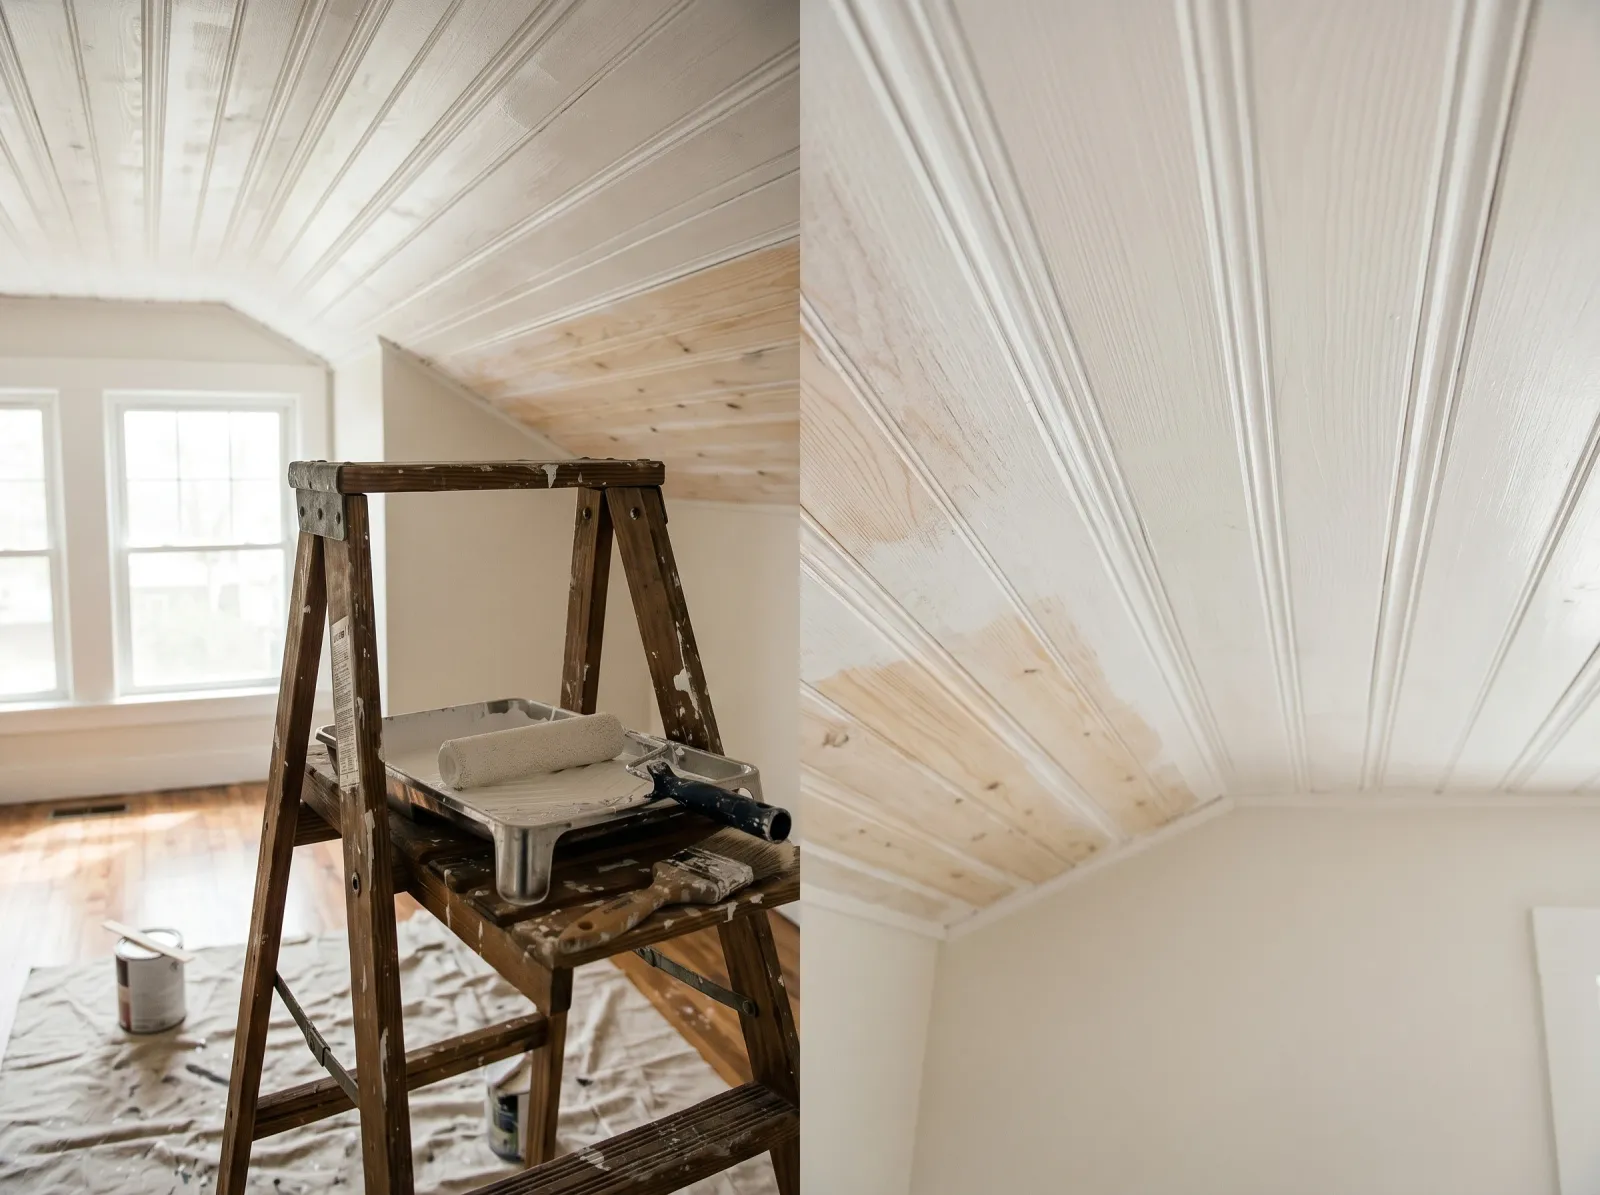 Grooves brushed first, then the flats rolled along the length of each board.
This coat looks thin and patchy in spots. Primed wood still drinks paint unevenly. Don’t chase it. The second coat fixes it.
Step 5 — Second Finish Coat
Wait the recoat time on the can, usually 2 to 4 hours for water-based ceiling paint. Then run the whole thing again. Grooves first, flats second, same direction as before.
The second coat buries the last of the wood tone and evens the flash from coat one. If you’re spraying, back-roll this coat hardest so the building film works into the boards instead of sitting on top.
 Second coat evens the flash and buries the wood tone.
Two coats over primer is the standard. If you can still see wood ghosting through after two, you primed too thin. Spot-prime the bleed and recoat just that area.
Step 6 — Pull the Tape and Reset
Pull the wall-line tape while the last coat is still slightly tacky, at a 45-degree angle, slow. Bone-dry paint chips off with the tape and leaves a ragged line you’ll have to touch up.
Fold the drop cloths and shake them outside. Wash the brush and roller under warm water until it runs clear. Furniture back in 24 hours.
 Tape off, room reset. The grooves still throw a shadow, so it reads as planks.
Common Mistakes
- Skipping the stain-blocking primer on knotty pine. This is the one that bites in a year. The knots bleed amber sap through the white, always in the middle of the ceiling where you’d need to set up a ladder all over again. Shellac primer up front kills it. There’s no shortcut.
- Rolling before you brush the grooves. The roller drags wet paint out of the grooves onto the board faces and leaves ridges along every joint. Brush grooves first, every coat.
- Rolling boards in mixed directions. Side light from the windows turns mixed-direction sheen into a patchwork. Roll along the length of the boards, same way every time.
- One finish coat over raw wood. The wood drinks the first pass unevenly and it dries blotchy. Two coats over primer, no exceptions on bare boards.
- Caulking the design grooves. Some folks fill the V-joints trying to get a smooth ceiling. Now it’s not a plank ceiling, it’s a ridged drywall imitation. Fill the damage gaps only. Leave the designed grooves alone.
Cure Schedule
| Time after final coat | What’s safe |
|---|---|
| 1 hour | Pull the tape |
| 4 hours | Touch dry, don’t bump the boards |
| 24 hours | Furniture back in the room |
| 7 days | Wipe a smudge with a damp cloth |
| 30 days | Full cure, washable |
Maintenance and Touch-Ups
A flat-painted plank ceiling holds up 10 to 15 years in a normal room. Less over a stove or a shower, where the grease and steam work on it.
For a smudge, wipe with a damp microfiber cloth first. Most marks are dirt. For a real scuff or a chip, dab leftover ceiling paint on with a small brush. Don’t feather across a whole board, the touch-up reads brighter than the cured paint and you’ll see the seam.
Keep a labeled quart in the basement. Plank ceilings take more touch-ups than walls, since the board edges catch knocks when you move furniture.
Cost Breakdown
| Item | $ |
|---|---|
| Stain-blocking primer, 1 gallon | $45 |
| Ceiling paint, 1.5 gallons flat | $55 |
| Brush, roller, sleeves, tray | $35 |
| Tape, drop cloths, caulk, sponges | $30 |
| Total | $165 |
Numbers are mid-tier paint over knotty pine, the worst-case prep. Already-painted boards skip the shellac primer and drop closer to $100.
A Specific Recommendation
Knotty pine ceiling, going white: a gallon of Zinsser BIN, a gallon and a half of BM Waterborne Ceiling 508 in flat, a 2.5-inch Wooster, and a 1/2-inch nap roller. Prime Saturday, two coats Sunday with a couple hours between. If you own a sprayer, spray the primer and back-roll, then brush-and-roll the finish so you’re not masking twice.
Whatever you do, don’t talk yourself out of the shellac primer to save forty bucks. The sap doesn’t care about your budget, and it shows up right where you can’t reach.