How to Paint an Ombre Wall
How to paint an ombre wall that fades smooth, not stripey. Picking two colors that blend, the wet-blend window, and the dry-brush trick that hides the seam.

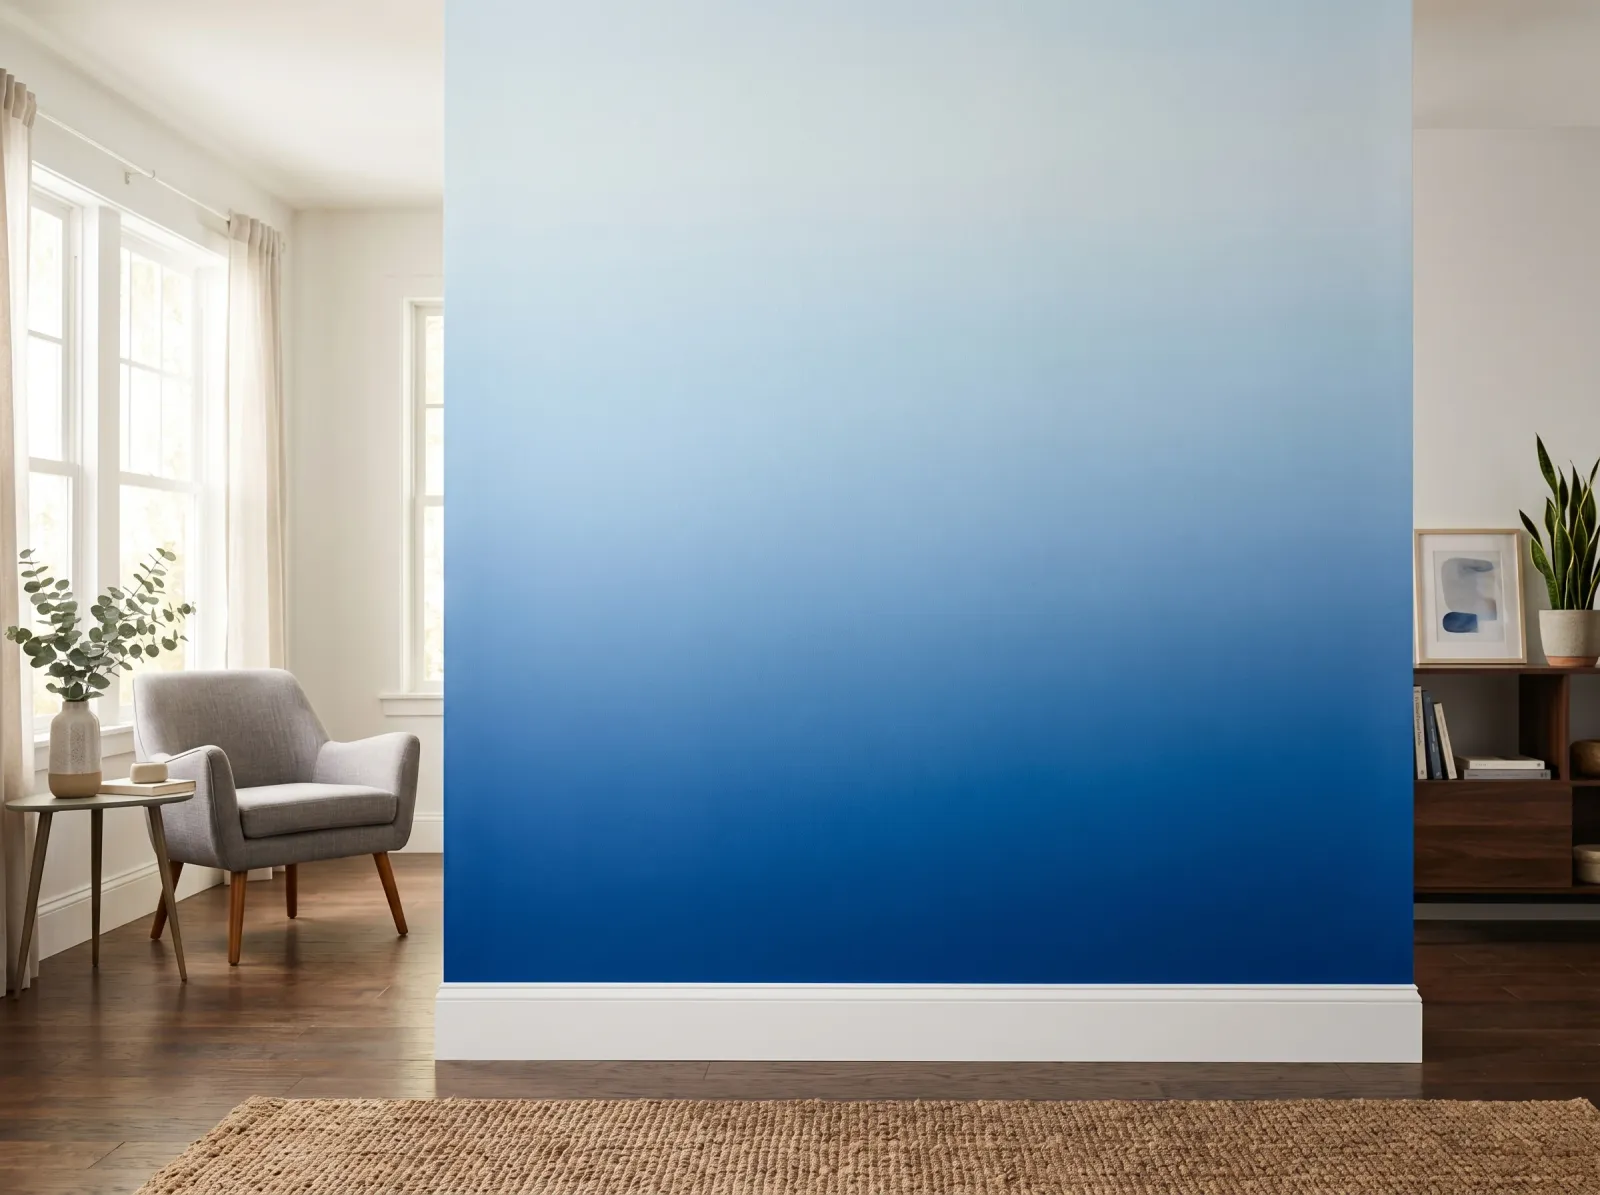
An ombre wall is two colors melting into each other so smoothly you can’t find the line where one becomes the other. Done right, it reads as a single color quietly shifting from floor to ceiling, the way the sky does at dusk. Done wrong, it reads as stripes, and there is no in-between.
Here’s the part nobody tells you up front. The whole project happens in about ten minutes, while the paint is still wet. Everything before is prep, everything after is dry time, and the part that decides whether you’ve made art or a mess is a short, slightly frantic window of dragging a dry brush across wet paint. Once you understand that the wet window is the project, the rest falls into place.
What You’ll Get
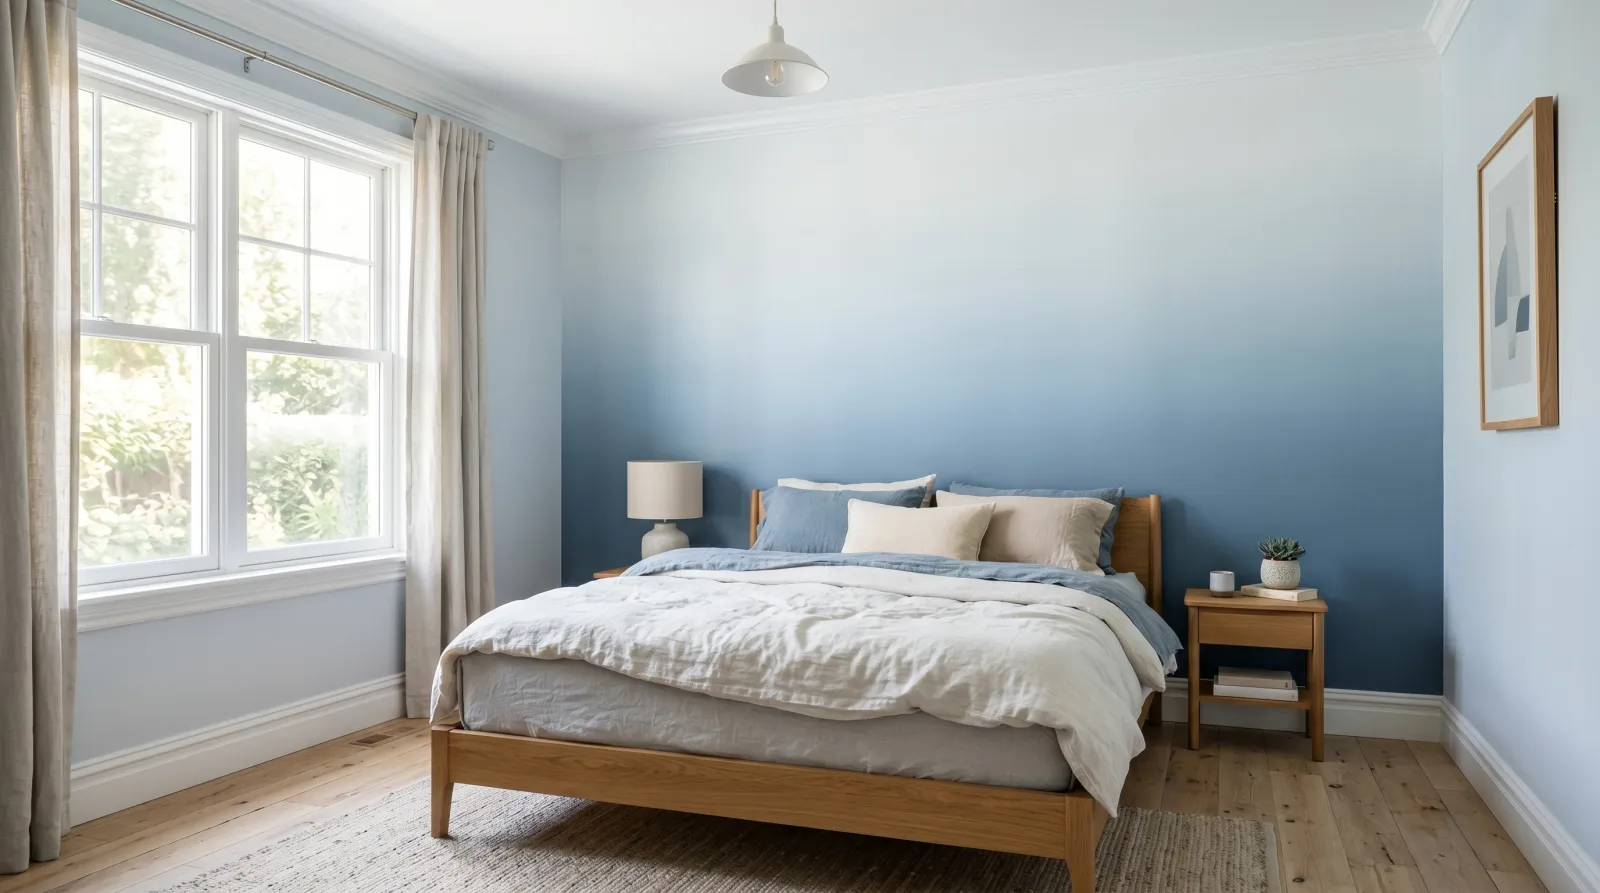
One accent wall that fades from a deep color at the bottom to a pale one at the top, with no visible seam between them. It looks like a custom hotel wall and costs about $80.
Honest Take on Difficulty and Time
Medium difficulty, and the reason isn’t skill. It’s tempo. The painting goes fast on purpose, and if you slow down to be careful you lose the wet edge and the colors won’t blend. The hard part is the opposite of most paint projects: you have to commit and move.
Plan on a full day. About an hour of prep, then 30 to 40 minutes of blocking and blending the first coat, a break while it sets up, a second blend coat, and overnight dry before you judge it. The actual blending is the short part. The patience is in the prep and the waiting.
If you’ve never blended wet paint before, do one practice pass on a piece of cardboard. Ten minutes teaches your hand the dry-brush motion before the clock is running on the real wall.
Choosing Two Colors That Actually Blend
This is where most ombre walls are won or lost, before a roller touches the wall.
Pick two values of the same hue, not two different colors. The lightest and darkest swatch on a single paint chip strip share the same base pigment, which is why they fade into each other instead of fighting. A pale blue melting into a deep blue blends like silk. A blue melting into a pink turns gray-brown and muddy where they meet, because the two undertones cancel each other out.
Soft blues, sages, warm terracottas, and dusty roses all ombre beautifully because they hold their undertone all the way down the value scale. If you’re unsure what your color does as it darkens, the undertones explainer is the short version of why a “gray” can go green on you halfway down the fade.
Think about light, too. A north-facing wall reads cool and a little flat, so a pale top band catches what warm light there is and keeps the room from going clinical. The lighter the top, the taller the room feels, which is why most ombre walls put the dark at the floor and the pale at the ceiling. For how light a color reads, the LRV explainer is worth a glance.
| Bands | Colors to buy | How the middle is made | Best for |
|---|---|---|---|
| Two-band fade | 1 light, 1 dark | Mix them 50/50 in a cup | First-timers; short walls |
| Three-band fade | 1 light, 1 mid, 1 dark | Store-bought mid-tone | Taller walls; smoother result |
| One-color fade | 1 saturated color + white | Cut the color with more white per band | The most forgiving version |
What You’ll Need
Paint and Primer
A quart each of your light and dark colors, in the same sheen and the same product line. Matching the line matters more than people think: two paints from the same line dry at the same rate, and an ombre fails when one band skins over before the other. Eggshell or matte both work; matte hides slight texture differences in the blend, eggshell wipes cleaner.
Add Floetrol to the latex. It’s a paint extender that slows the dry and keeps the surface workable longer. In an ombre that open time is the difference between feathering and smearing. Stir it in at the ratio on the bottle.
You rarely need primer for an ombre over an existing painted wall, unless you’re going from a dark wall to pale colors. If the wall is bare drywall or you’re covering a strong old color, see the best primer round-up for the right stain-blocker.
Tools
Two roller frames, one per color, so you never stop to rinse mid-blend. A wide dry blending brush, 4 inches, is the tool that erases the seam, and a cheap natural-bristle one is fine because you keep it dry. A 2.5-inch angled brush for cutting in the corners, two trays, a clean cup for the mid-tone, and several dry rags. If you’ve shopped the paint brush guide, you already own something that works.
Step 1: Prep the Wall and Stage Both Colors
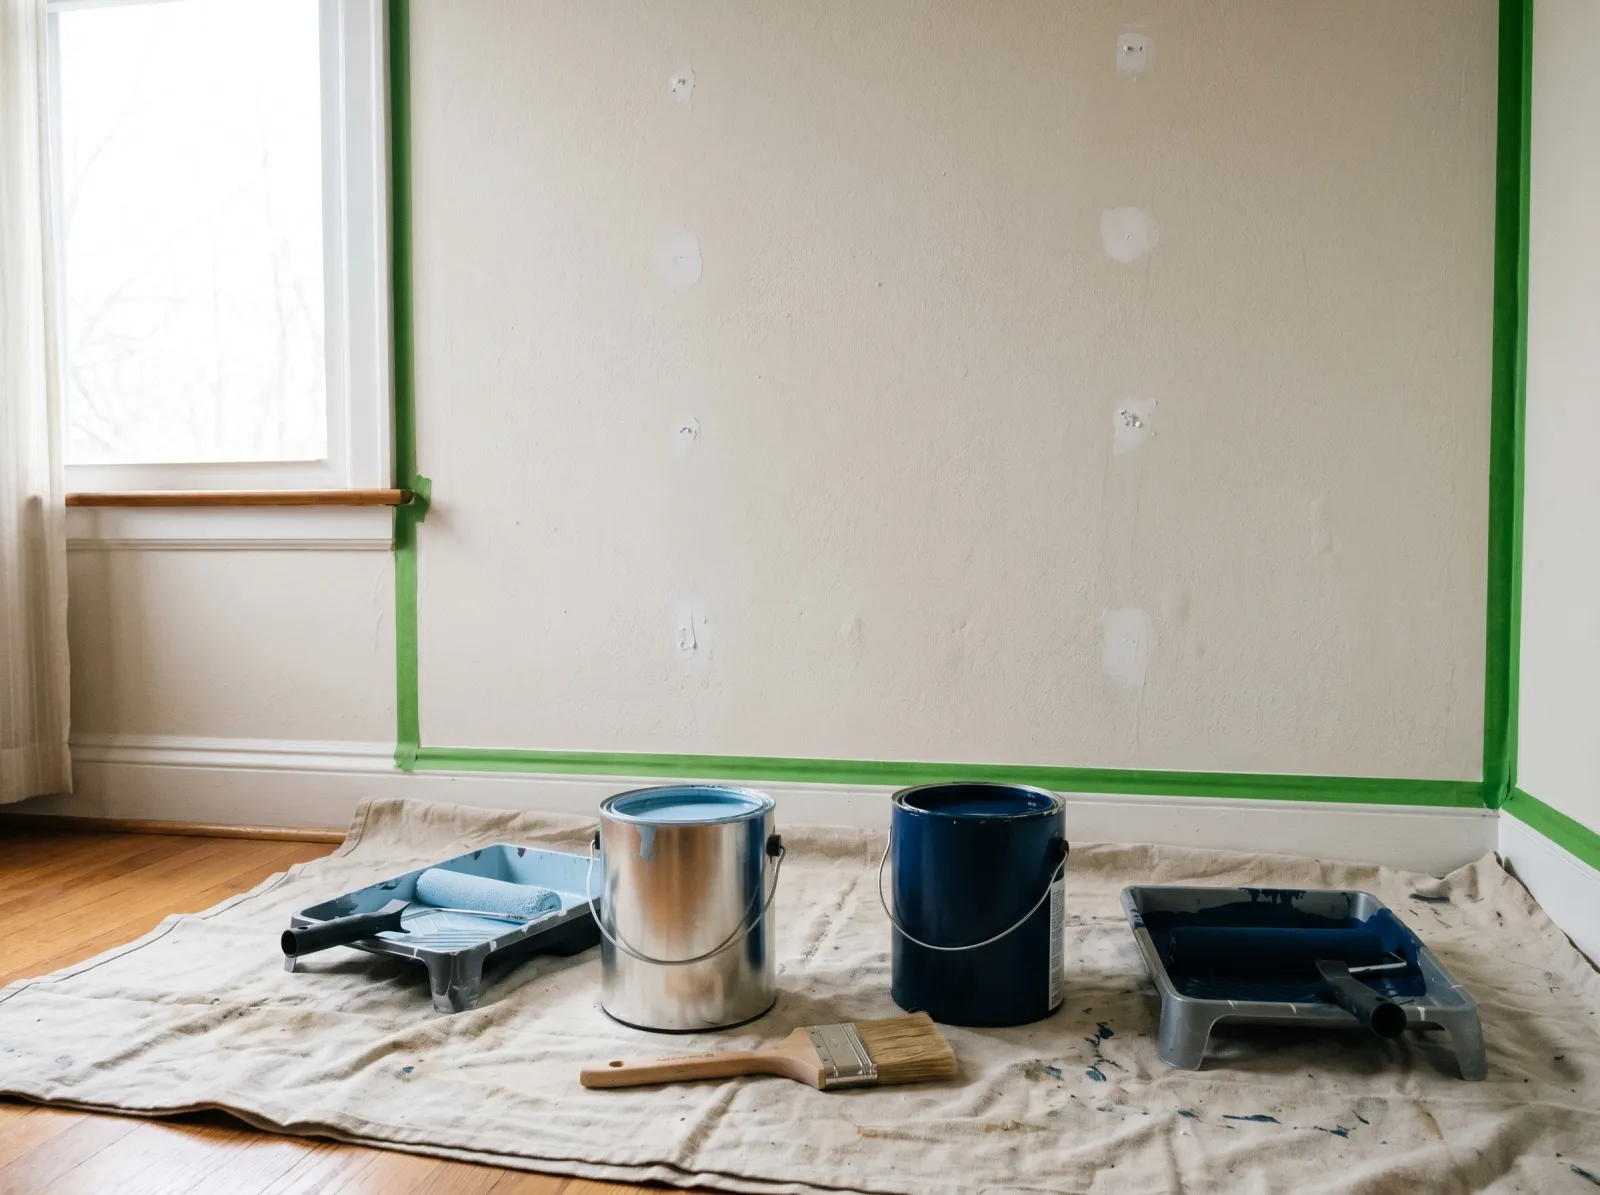 Holes filled, tape on the edges only, both colors open and ready before you start.
Patch nail holes with spackle, let them dry, sand smooth with the 220 sponge. Tape the baseboard and the two side corners only. Never tape across the fade itself; tape lines are the enemy of a seamless blend.
Now stage everything before you start. Pour the light into one tray, the dark into the other. Mixing your own middle? Combine light and dark roughly 50/50 in the cup now and pour it into a third tray. Stir Floetrol into all of them. Lay the blending brush down dry and clean within arm’s reach.
Watch out for starting before you’ve mixed the mid-tone. Mixing while the wall is wet is how bands dry before you reach them.
Step 2: Block In the Bands Fast
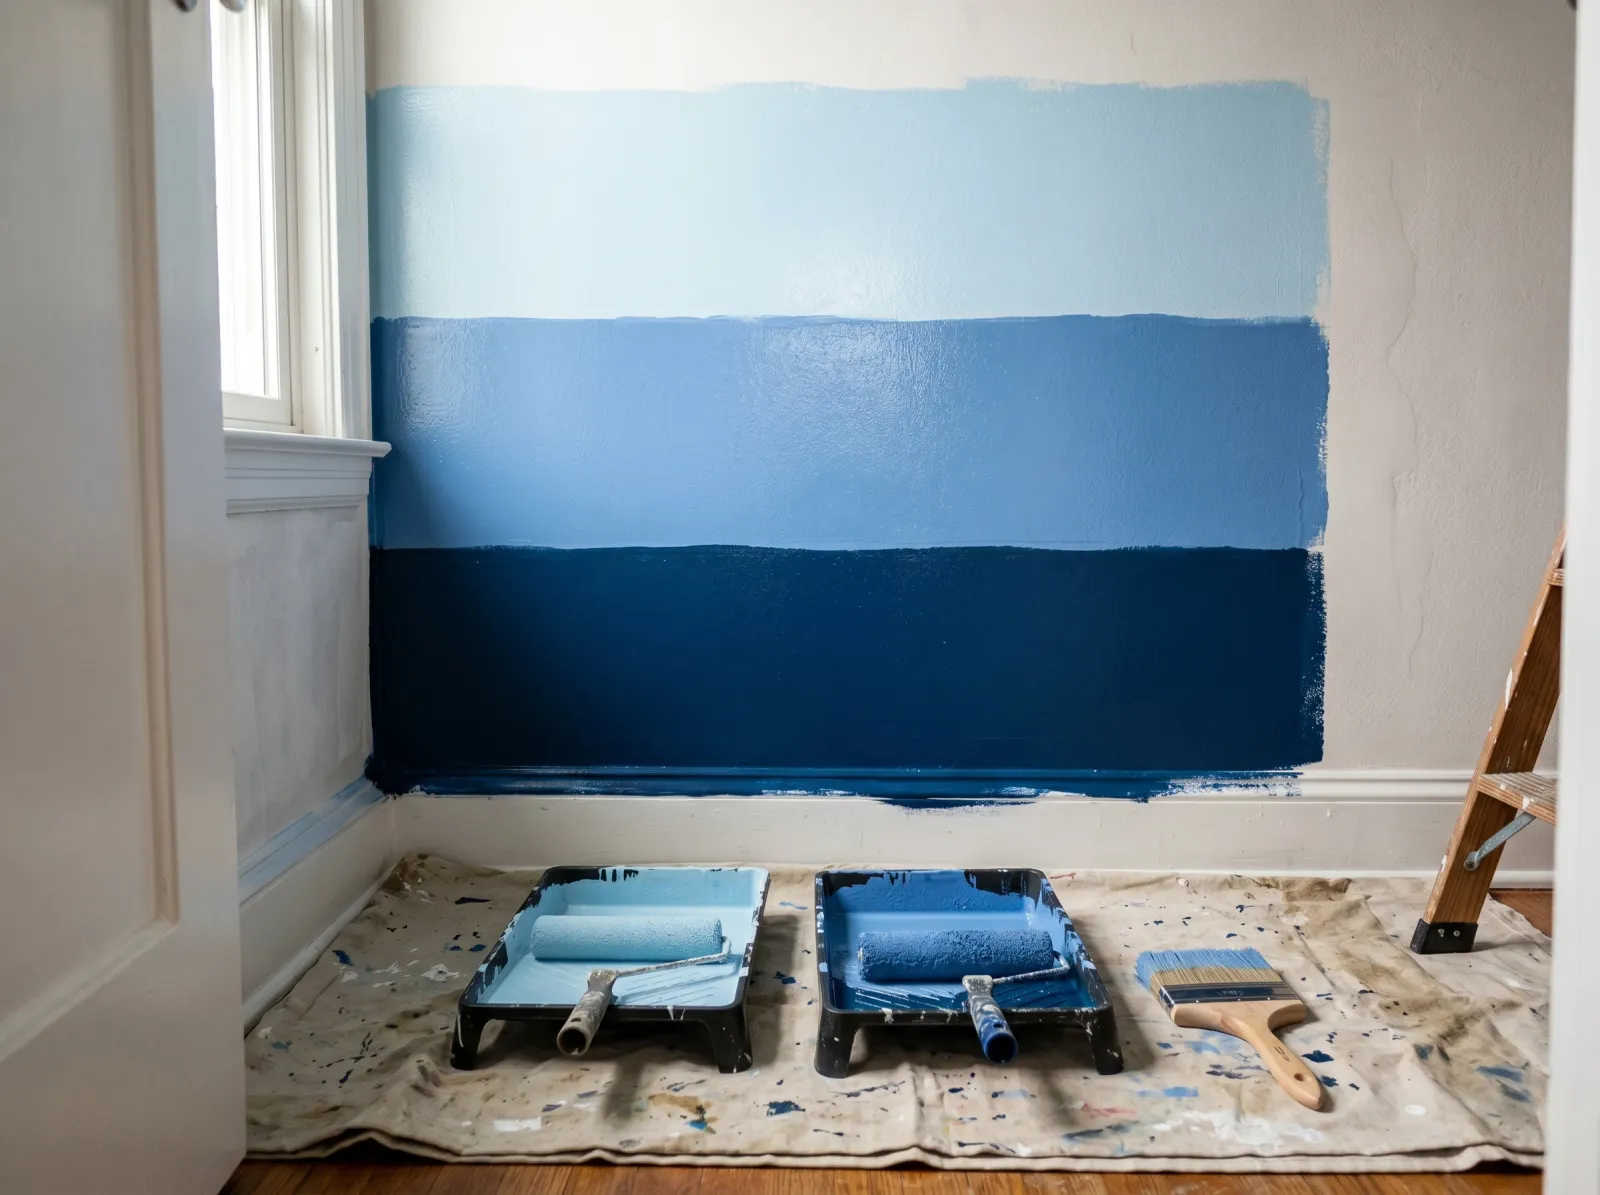 Light at the top, dark at the bottom, the mid-tone through the middle. Hard edges are fine right now.
Cut in the corners and ceiling line first with the angled brush, using whichever color belongs at that height. Then roll the bands in fast and don’t fuss over neatness.
Roll the light color across the top third, the mid-tone across the middle, the dark across the bottom. Leave a few inches of bare wall between each band; you’ll fill that gap during the blend, and the gap is where the colors mingle. The borders will look hard and stripey at this stage. That’s correct. You’re not blending yet, just getting all the wet paint up before any of it sets.
Work the whole wall, or a 3-foot-wide vertical section if the wall is large. The rule is simple: every band has to be wet at the same time.
Step 3: Feather the Seams With a Dry Brush
 Long horizontal strokes with a dry brush, dragging one color up into the next.
This is the ten minutes that matter. Take the dry blending brush and sweep it back and forth horizontally across the border where two bands meet, light touch, dragging a little of the lower color up and the upper color down. Wipe the brush on a dry rag every few passes so it doesn’t load up and start depositing instead of feathering.
Keep your strokes long and your pressure light. You’re coaxing the colors into each other, not scrubbing. Work both borders until the hard lines soften into gradual transitions. If a spot is drying too fast, a single light mist from the spray bottle reopens it.
Watch out for a brush that’s gotten wet and heavy. The moment it stops feathering and starts leaving streaks, it’s holding too much paint. Wipe it bone dry on the rag and keep going.
Step 4: Second Blend Coat, Then Dry
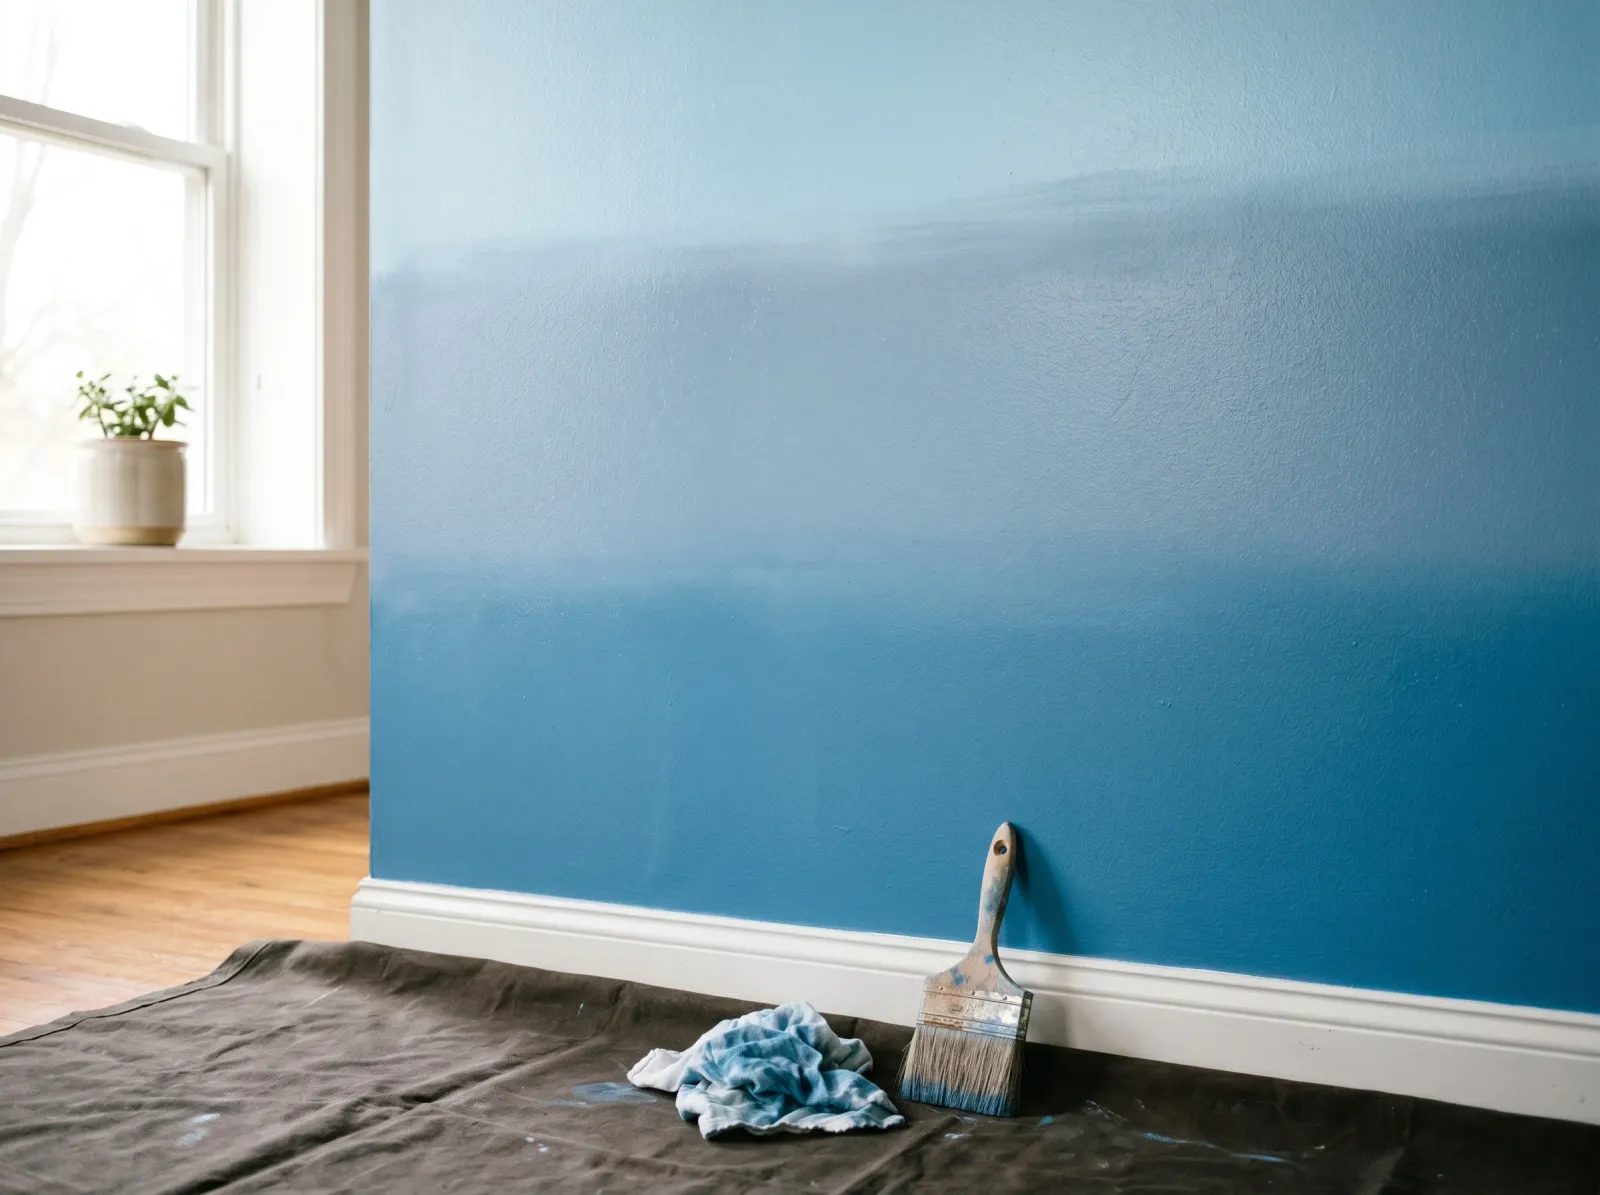
 One light second pass, an overnight dry, and the line between colors is gone.
Let the first coat set until it’s no longer wet to a light touch, usually 30 to 60 minutes. Then do a second, lighter blend pass over the same borders. It evens out thin spots and softens any line the first pass left behind. Most ombre walls need this second coat; one pass almost always shows a faint band in side light.
Then leave it alone overnight. Colors shift slightly as they cure, and a fade that looks a touch stripey while wet often settles into smooth once dry. Judge it in the morning, in the actual light you live in.
Step 5: Pull the Tape and Reset
 Tape off, furniture back, the fade reading as one quiet color shift.
Pull the edge tape while the paint is still slightly tacky, at a 45-degree angle, slow and even. Touch up the corners with the angled brush if any line bled. Put the furniture back after 24 hours.
Stand across the room and look at the wall in morning light and again in the evening. An ombre that reads perfect at noon can show a faint band at 7pm when the light rakes across it sideways. If you catch one, a quick damp-brush feather over that spot, with a dab of each neighboring color, blends it out in two minutes.
Common Mistakes
- Letting a band dry before you blend it. This is the only mistake that actually ruins the wall. Once the edge skins over, the dry brush smears instead of feathers and you get stripes. Work fast, keep every band wet at once, and use Floetrol to buy time.
- Choosing two colors that don’t share a base. A blue and a pink, a green and an orange: they go gray-brown and muddy where they meet. Stay on one chip strip, light swatch and dark swatch, same card.
- Taping across the fade. A tape line is a hard edge, and a hard edge is the opposite of ombre. Tape the corners and baseboard only.
- Scrubbing with the brush. Heavy pressure pushes paint around and leaves brush marks instead of a soft transition. Light strokes, brush kept dry, let the bristle tips do the work.
- Judging it while it’s wet. Wet ombre always looks streakier than it will dry. Don’t chase a line at hour one and overwork the wall. Let it cure overnight, then decide.
Cure Schedule
| Time after the final blend | What’s safe |
|---|---|
| 1 hour | Pull the edge tape |
| 4 hours | Touch dry; don’t lean anything on it |
| 24 hours | Furniture back against the wall |
| 48 hours | Hang art and shelves |
| 7 days | Wipe a scuff with a damp cloth |
| 30 days | Full cure |
Maintenance and Touch-Ups
An ombre wall holds up as long as any eggshell or matte accent wall, 7 to 10 years before it wants a refresh. The catch with touch-ups is the gradient: you can’t dab one color over a scuff in the blend zone because the wall is a different shade at every height.
For a scuff, mix a little of both colors to match that exact spot, feather it on with a small brush the way you blended originally, and stop while it’s wet. Keep both labeled quarts in the basement. On an ombre, the leftover paint isn’t only for matching, it’s for re-blending.
Cost Breakdown
| Item | $ |
|---|---|
| Light color, 1 quart | $22 |
| Dark color, 1 quart | $22 |
| Floetrol extender | $10 |
| Blending brush + angled brush | $25 |
| Roller frames, sleeves, trays, tape | $25 |
| Total | $104 |
Skip the third store-bought color and mix your own mid-tone and it drops closer to $80. A single saturated color cut with white you already own runs cheapest of all.
A Specific Recommendation
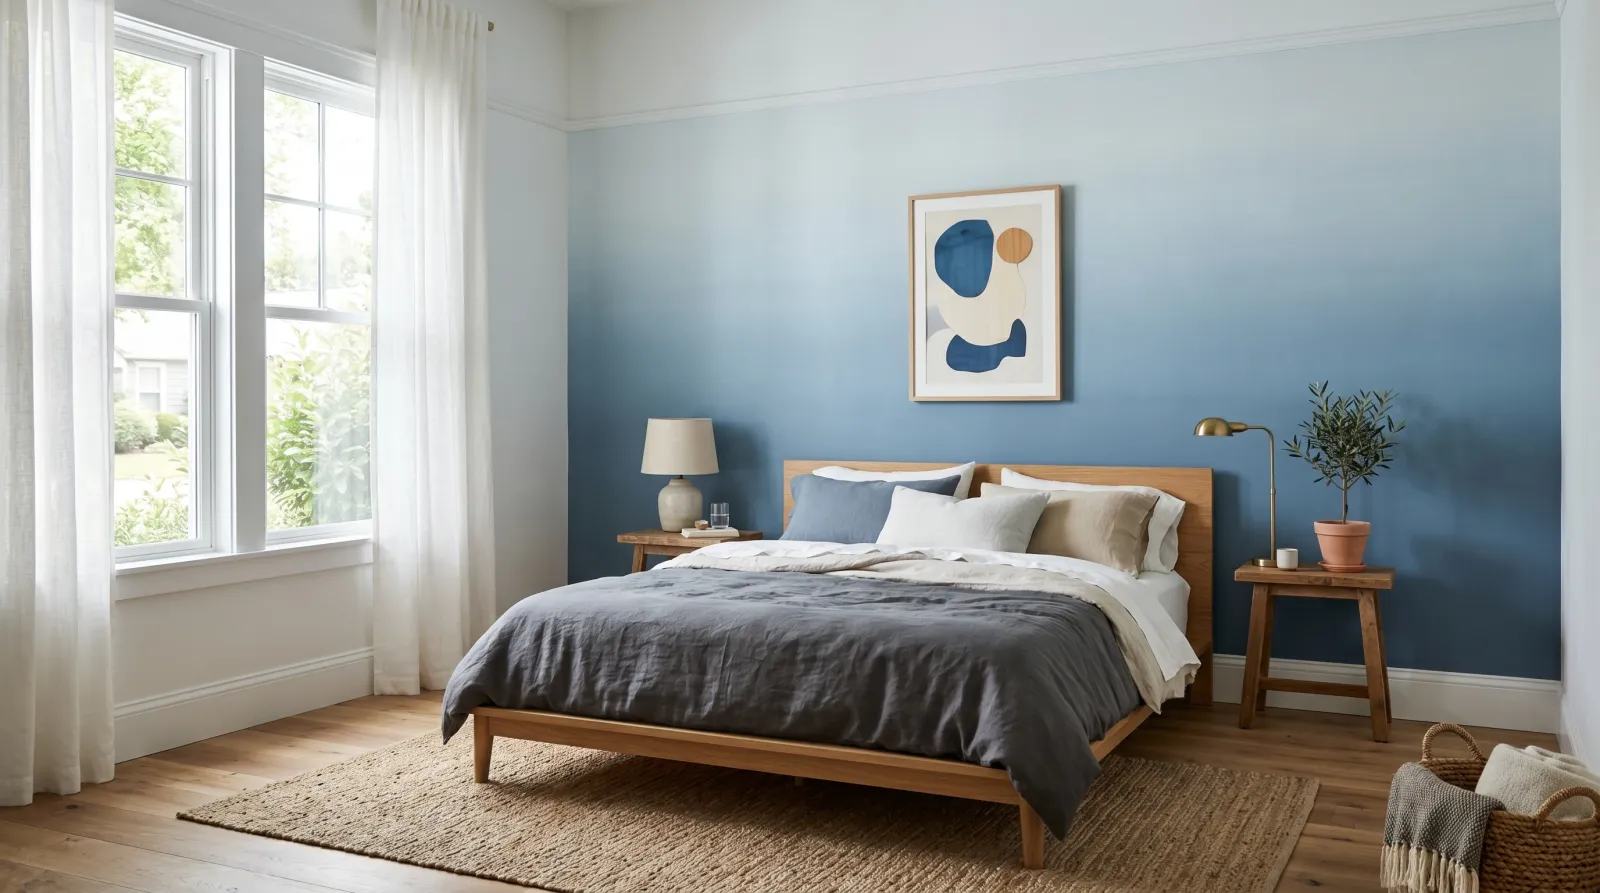
First ombre, standard bedroom accent wall behind the bed: buy the lightest and darkest swatch off one blue chip strip in BM Regal Select matte, mix your own middle in a cup, and add Floetrol to all three. Dark at the floor, pale at the ceiling. Block in fast, feather with a dry 4-inch brush, second pass after it sets, and let it dry overnight before you touch it again. The wall reads like dusk by the next morning.
If a full wall feels like a lot, do the fade on a smaller accent wall you see from the doorway, or step up to the cleaner-edged look of two-tone walls instead. A soft fade is also one of the calmest things you can put behind a crib; the nursery guide covers the low-VOC paint to use there.