How to Paint a Nightstand
Painting a nightstand the right way: how to test the old finish, when to prime, chalk paint vs cabinet enamel, and the drawer trick that stops drips.


Okay, so there’s a tired little nightstand by your bed. Maybe it came with the set, maybe it was a $15 thrift find, maybe it’s the one piece of furniture you’ve owned since college. It’s small, it’s in plain view every morning, and you’re pretty sure you can make it look like something. You can. A nightstand is the friendliest paint project there is. It’s small enough to finish in a weekend, light enough to flip and move, and low-stakes enough that if you mess up, you’ve ruined a nightstand, not a kitchen.
The one question nobody answers first is what’s already on it. That decides everything else. So we start there.
What You’ll Get
A nightstand that looks like you bought it that way instead of inheriting it. A weekend of work, a week of waiting before you load it back up, and a piece that pulls the whole side of the bed together. The math is good too: a thrifted nightstand at $15 plus maybe $40 in materials, against $120 or more for a new one that’s usually particleboard anyway.
Honest Take on Difficulty and Time
This is the easiest furniture project on the site. No ladder, no ceiling, nothing heavy. One drawer, four legs, a top, two sides. The work is maybe three or four hours spread across two days. The rest is waiting for coats to dry, and that’s the part first-timers rush. Don’t.
| Path | Active time | Total elapsed | Skill |
|---|---|---|---|
| Chalk paint, real wood, sealed with polycrylic | 2-3 hrs | 1 weekend + 1 week cure | Easy |
| Cabinet enamel, real wood, scuff-sanded | 3-4 hrs | 1 weekend + 30 days cure | Easy |
| Cabinet enamel, laminate, primed first | 4-5 hrs | 1-2 weekends + 30 days cure | Easy-medium |
The only thing that turns this from easy into medium is a slick laminate surface, because that adds a priming step and a stricter no-skip rule. More on that below.
What You’ll Need
Paint and Primer
A 1-quart can of paint is plenty for a nightstand, with leftovers. Two real choices:
Chalk paint (Annie Sloan, Country Chic, Behr Chalk Paint) for a soft matte look on a piece that won’t take daily abuse. Goes on thick, hides a lot, and forgives a sloppy hand. It needs a top coat to be wipeable, which a lot of tutorials skip telling you.
Cabinet enamel (BM Advance, SW ProClassic, INSL-X Cabinet Coat) for a nightstand that actually gets used. This is the same hard-curing waterborne paint people put on kitchen cabinets, and it’s the right call for a surface that gets a water glass, a phone, and a paperback every night. It self-levels, so brush marks mostly vanish. No top coat needed. For the full SKU comparison, see the best furniture paint round-up.
If your nightstand is laminate or melamine (slick, shiny, no real wood grain), you also need a bonding primer: INSL-X Stix or Zinsser Bulls Eye 1-2-3 Plus. This is non-negotiable on slick surfaces. Skip it and the paint peels off in sheets. Our laminate furniture guide goes deep on why.
Tools
A 2-inch angled brush for the legs, edges, and routed details. A 4-inch foam-mini roller for the flat top and drawer front, which gives a smoother finish than a brush on flat areas. A 220-grit sanding sponge, a tack cloth, painter’s tape, a small drop cloth, and a screwdriver for the knob.
The brush is the one thing not to cheap out on. A $3 brush sheds bristles into your wet paint and leaves a streaky line. A $12 Wooster or Purdy holds a clean edge for years. Picks are in the paint brushes round-up.
Step 1 - Pull the Knob and Test the Finish
Before you sand or buy anything, figure out what’s on the nightstand. Take the knob off, drop it and its screws in a baggie, and write what it’s from on the bag with a Sharpie. You will lose those screws otherwise.
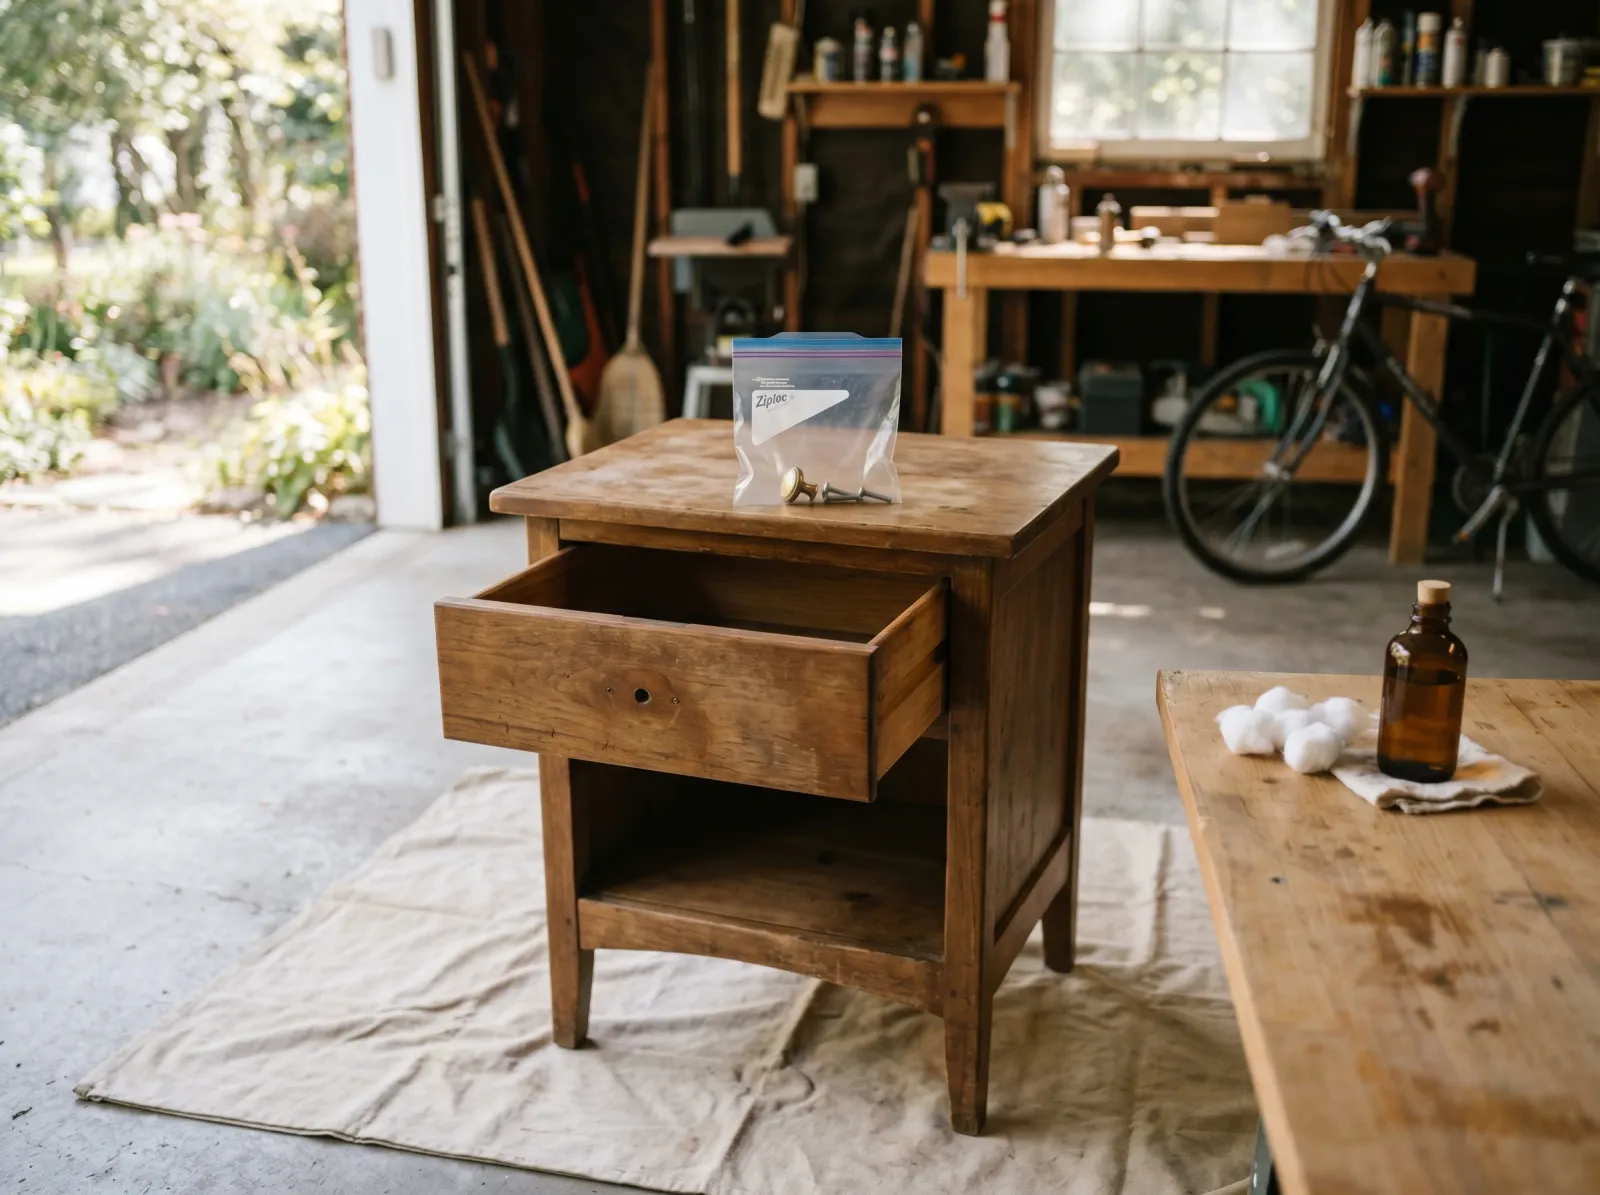 Knob and screws go in a labeled baggie. A cotton ball with denatured alcohol on a hidden spot tells you what you’re dealing with.
Now the finish test. Wet a cotton ball with denatured alcohol and rub a hidden spot (inside the drawer opening, the underside of the top) for about 30 seconds.
If the finish gets sticky and dissolves, it’s shellac (common on older pieces). If it softens but doesn’t dissolve, it’s old varnish. If nothing happens, it’s lacquer, polyurethane, or laminate. Then look closely: lacquer and poly show real wood grain, while laminate looks slick and uniform with no grain catching under your fingernail.
Watch out for assuming a shiny piece is real wood. A lot of “wood” nightstands from the last 30 years are laminate over particleboard. The fingernail-and-grain check settles it. It matters because laminate forces the priming step.
Step 2 - Scuff and Clean
Light scuff with the 220-grit sponge over every face you’ll paint. You’re dulling the gloss so paint can grab, not sanding down to bare wood. A dull, hazy surface is what you want. You’ll know it when you see it: the shine goes flat.
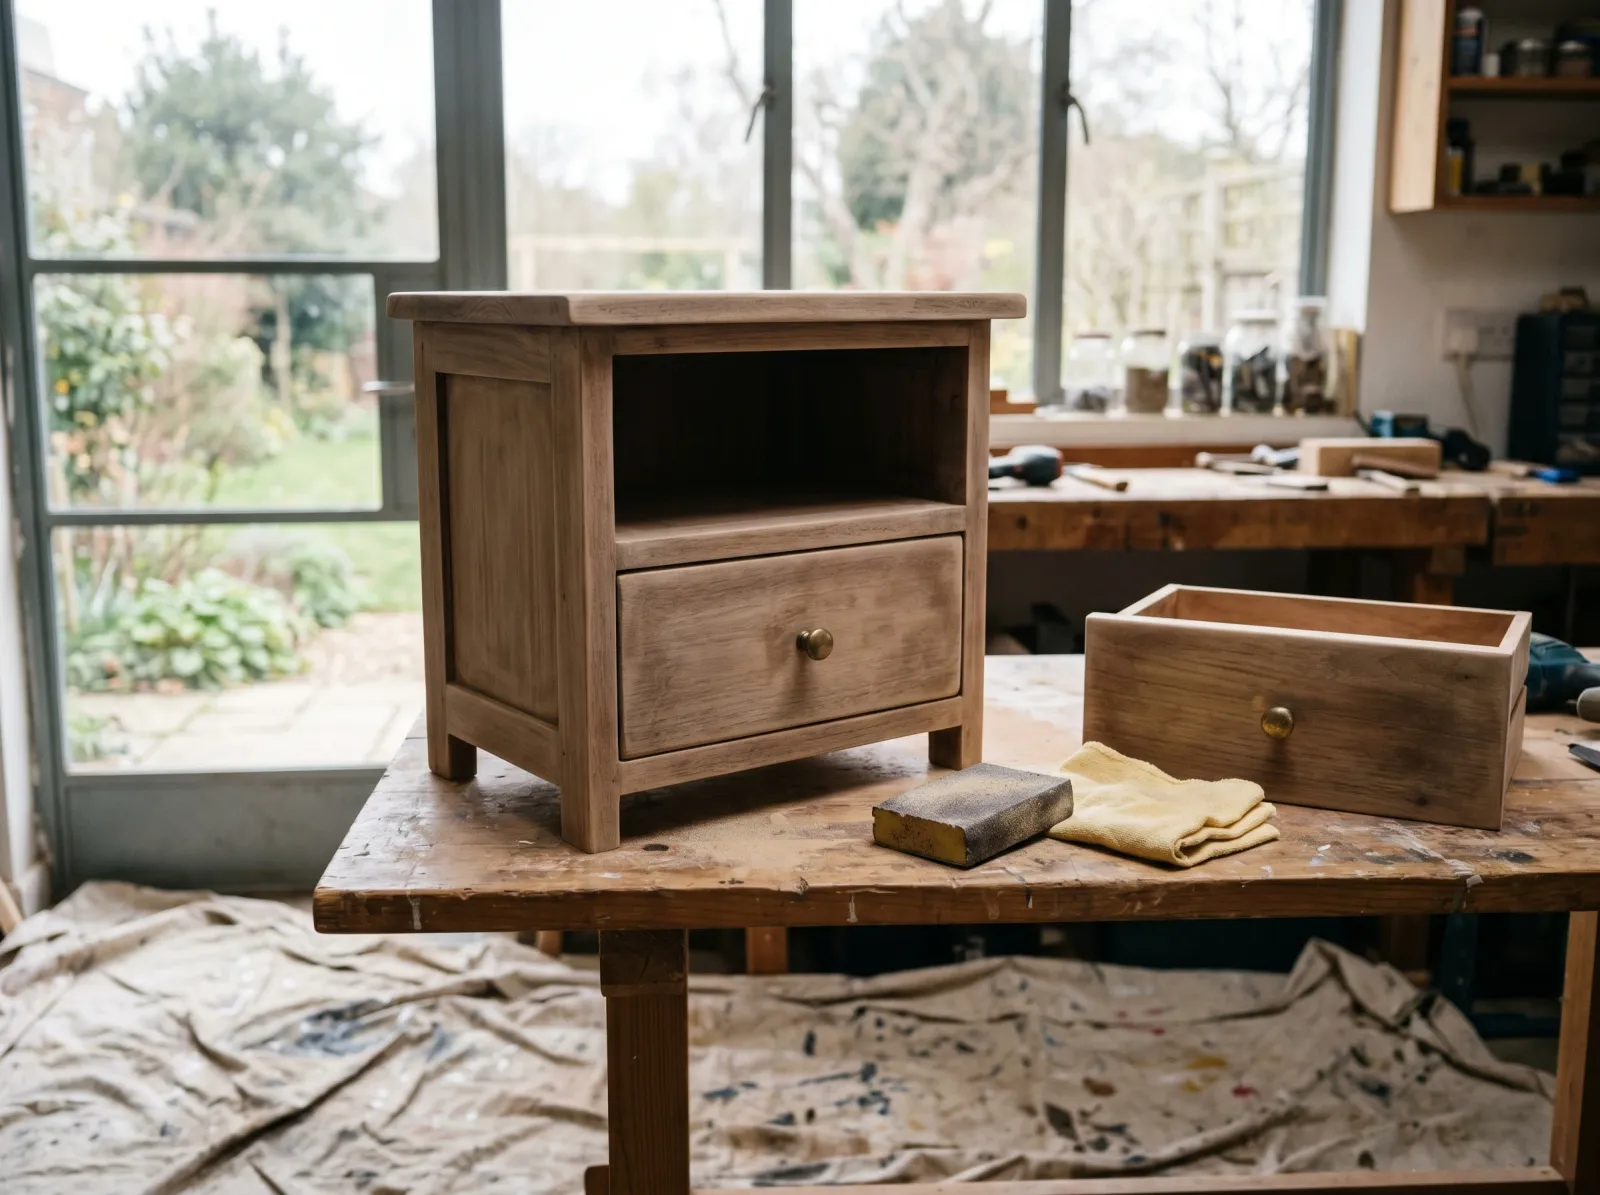 A light 220-grit scuff is all you need. The surface should look hazy, not stripped.
Wipe the dust off with a tack cloth (a slightly sticky cheesecloth that lifts fine dust a dry rag just pushes around). If the nightstand lived in a bedroom, give it a wipe with a little soapy water first and let it dry, because skin oils and dust on the surface keep paint from sticking.
Watch out for skipping the wipe-down. Dust trapped under the first coat shows up as little bumps you can’t sand out without going back to bare surface.
Step 3 - Prime, but Only If You Need To
Skip this step entirely if you’re chalk-painting real wood with a sound matte finish. That’s the one case where chalk paint bonds on its own.
For everything else, prime. Laminate and melamine get one full coat of INSL-X Stix or Zinsser 1-2-3 Plus. Glossy real wood gets the same. Old shellac or oil-based paint underneath gets Zinsser BIN, two thin coats, to lock the old finish so it can’t bleed through and yellow your color.
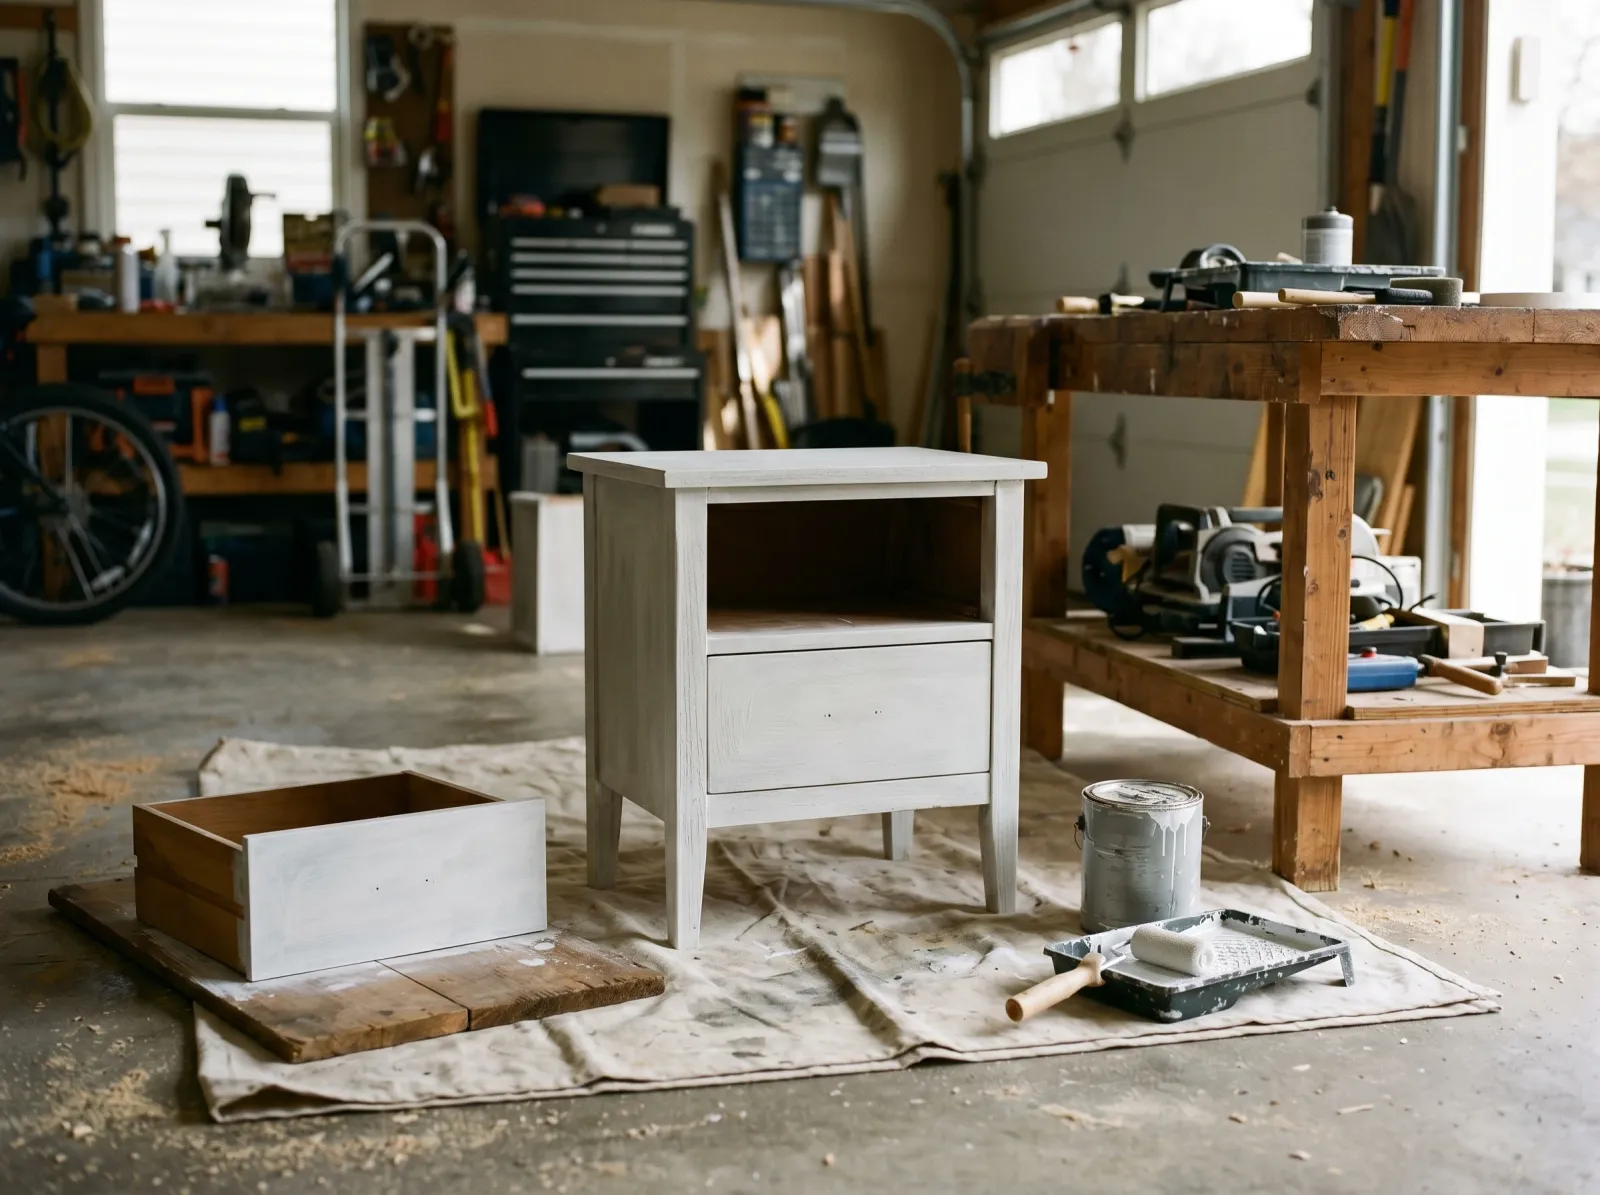 Slick surfaces get one thin coat of bonding primer. Roll the top, brush the legs and edges.
Roll the flat top and drawer front with the foam-mini, brush the legs and edges. Let it dry overnight, then knock down any nibs with a light 220 scuff and tack it clean. One coat of Stix is enough. BIN wants two.
Step 4 - Paint the Body and the Drawer
Pull the drawer out and paint its front laid flat on a board or a couple of cans. Flat means gravity can’t pull a drip down the face. This one trick saves more nightstand paint jobs than anything else.
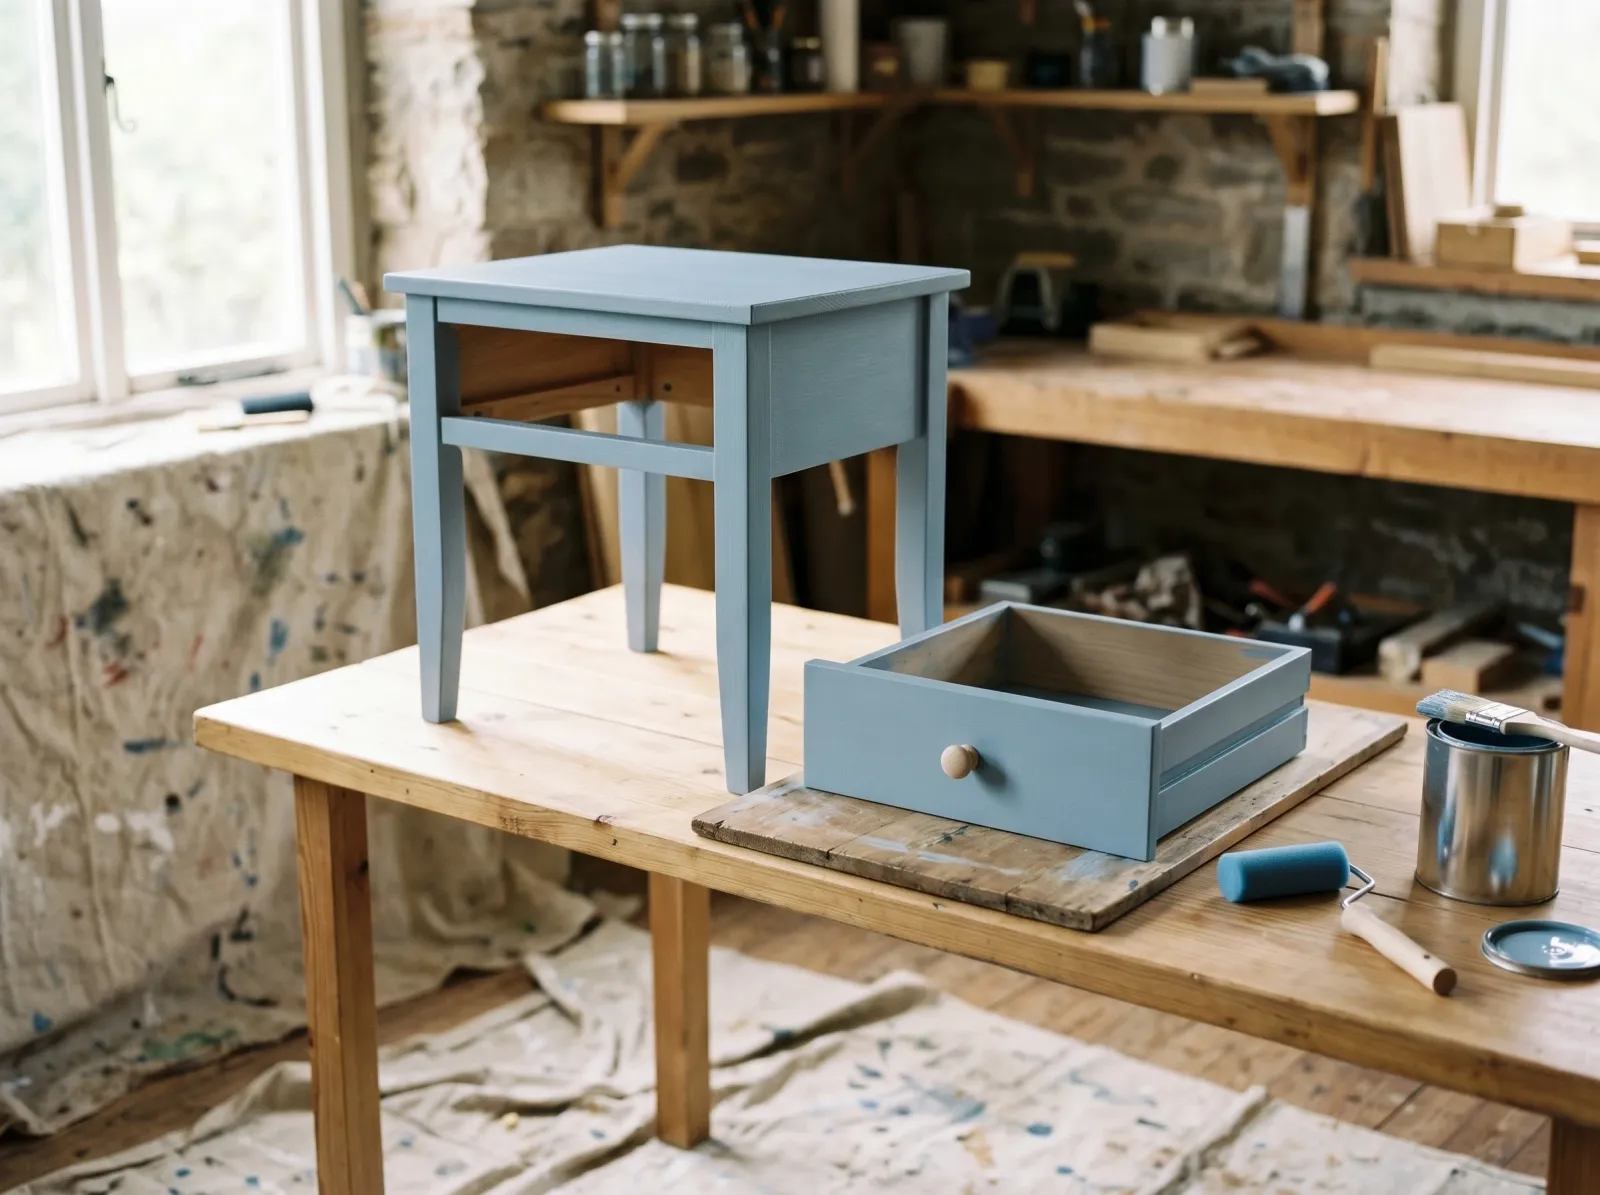 Drawer out and painted flat so it can’t drip. The body goes top, then sides, then legs.
On the body, work top-down: the top surface first, then the sides, then the legs and any toe-kick. Roll the flats with the foam-mini, brush the legs and tight spots. Dip the brush only a third of the way in and tap once on the side of the can. Overloaded brushes drip.
Two thin coats, always. Chalk paint recoats in about 2 hours, BM Advance wants 16, so read your can. If you’re using cabinet enamel and want to erase the last brush marks, add Floetrol (a latex extender that slows drying) at about 5%, which keeps the wet edge open longer.
Watch out for painting the inside of the drawer or the runners. Paint on the runners makes the drawer stick and grind. Leave the inside and the slides bare.
Step 5 - Top Coat and Reassemble
If you used cabinet enamel, you’re basically done. The cure is the seal. Let it harden and put the knob back.
 Chalk paint sealed with matte polycrylic, cabinet enamel left as-is. Knob goes back on last.
If you used chalk paint, it needs a top coat or it isn’t wipeable. Spill water on bare chalk paint and it lifts right off on the towel. Brush on two thin coats of Minwax Polycrylic in matte. It dries water-clear and won’t shift your color. For a chalk-painted piece, skip the soft wax on anything white or pale, because most clear furniture waxes carry a faint amber tint that yellows light colors within a few months. Save wax for dark chalk paint where the tint disappears.
Reinstall the knob last, once the paint is dry to the touch. If you want to upgrade the look, a single new knob is the cheapest swap there is.
Common Mistakes
- Skipping bonding primer on a laminate nightstand. The topcoat peels off in sheets within a couple of months. No paint, not even chalk paint, sticks to slick factory laminate without a bonding primer underneath.
- Painting the drawer while it’s in the nightstand. You get drips on the body and brush marks where the brush can’t reach cleanly. Pull the drawer, paint the front flat.
- One thick coat instead of two thin ones. Thick paint sags, dries with ridges, and stays soft for weeks. Thin coats level out and cure hard.
- Loading the lamp back on after a day. The paint is dry to the touch in hours but not cured for weeks. A lamp base left on soft paint leaves a permanent ring. Wait a week before anything heavy goes back on top.
- Top-coating white chalk paint with clear wax. The wax’s amber tint turns the paint yellow over a few months. Use matte polycrylic on whites and pale colors instead.
Cure Schedule
| Time after final coat | What’s safe |
|---|---|
| 4 hours | Touch dry; don’t set anything on it |
| 24 hours | Re-handle gently, move it back to the bedroom |
| 7 days | Put the lamp and light items back on top |
| 30 days | Full cure; wipe down with mild soap, set a damp glass on it |
Chalk paint sealed with wax keeps curing past 30 days. Don’t leave a heavy book sitting on a freshly waxed top in the first couple of weeks or you’ll find its imprint when you lift it.
Maintenance and Touch-Ups
A cabinet-enamel nightstand holds up for 8 to 12 years before it wants a refresh. Chalk paint sealed with polycrylic runs 5 to 8 years. The drawer front and the top edge are where wear shows first, since that’s what hands and the alarm clock hit.
For a chip, dab the original paint on with a small artist’s brush right on the chip. Don’t feather it across the whole panel, or the touch-up reads brighter than the cured paint around it and you’ll see the seam. Keep the leftover quart, labeled, in a closet. A nightstand only uses a fraction of it, so you’ve got years of touch-ups in that can.
Cost Breakdown
| Item | $ |
|---|---|
| Chalk paint or cabinet enamel (1 quart) | $20-$40 |
| Bonding primer (1 quart, only if laminate) | $15 |
| Top coat (polycrylic, only if chalk paint) | $15 |
| 2-inch angled brush | $12 |
| Foam-mini roller + sleeves | $10 |
| Sponge, tack cloth | $8 |
| Total | $30-$70 |
A thrifted nightstand at $15 plus $45 in materials lands at $60. A new one of the same size runs $120 and up, usually in particleboard with a printed wood-look film on top.
A Specific Recommendation
First nightstand, real wood, you want soft and matte: a quart of Country Chic chalk paint, a 2-inch Wooster, a 220 sponge, and a quart of Minwax Polycrylic in matte. Test Friday night, scuff and prime-if-needed Saturday morning, two coats Saturday and Sunday, top coat Monday. Back by the bed next weekend.
Nightstand that gets a water glass every night, or a laminate one: skip the chalk paint. Use Benjamin Moore Advance in satin over a coat of INSL-X Stix. The cure is harder, the top coat is built in, and it wipes clean for a decade. That’s the version I’d put next to my own bed.