How to Paint or Whitewash Exposed Wood Beams
Painting exposed beams the right way: prep for old stained timber, brush vs sprayer, the whitewash recipe, and how to keep tannin from bleeding through up high.

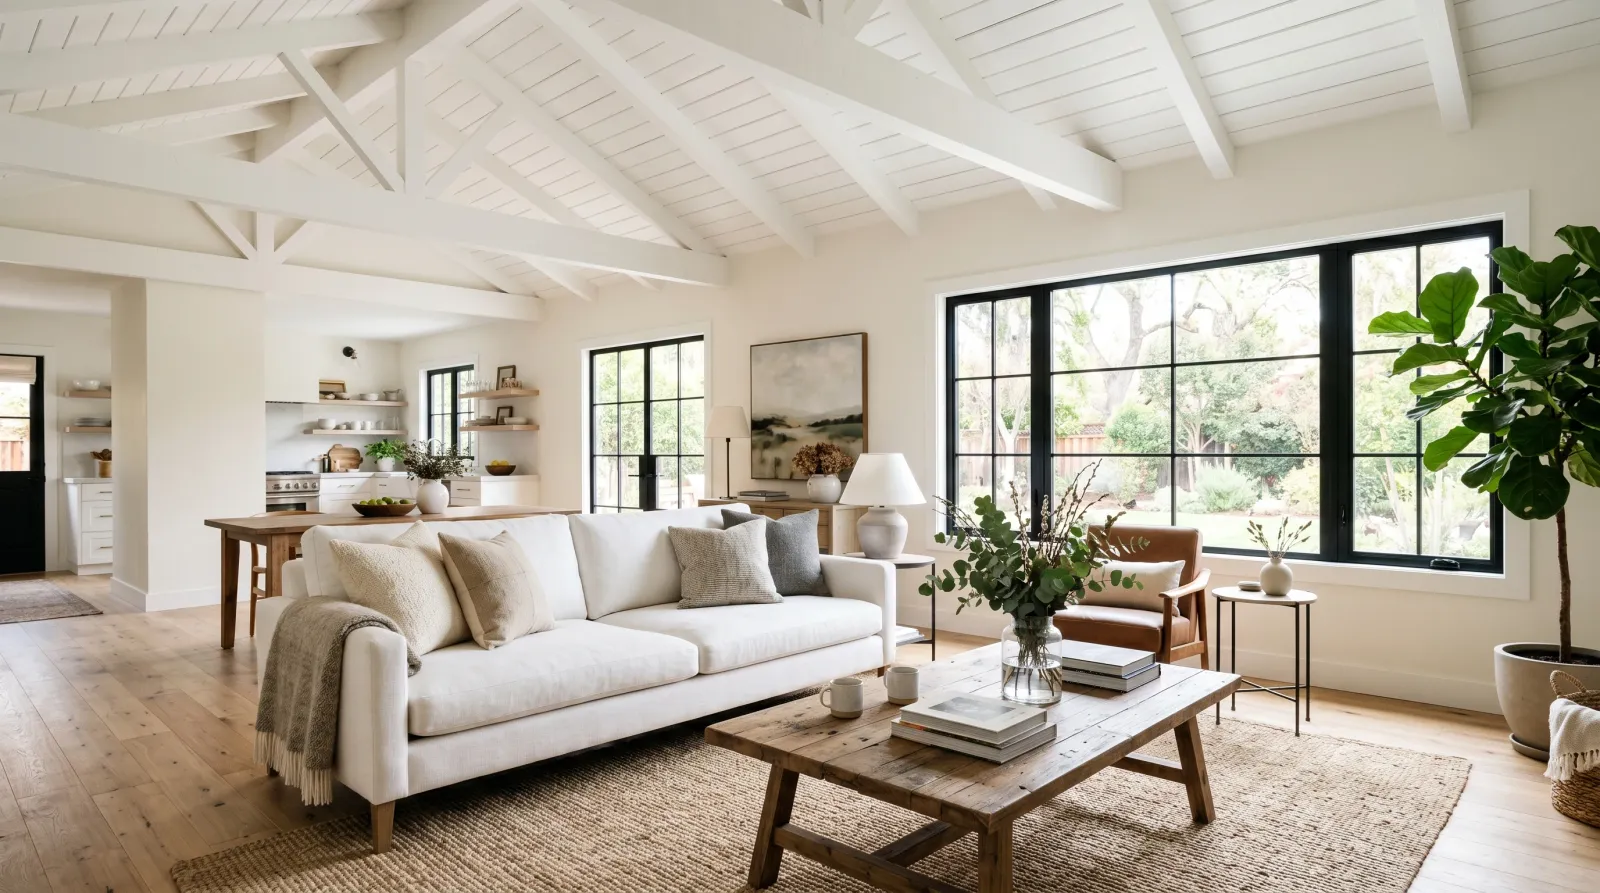
So you’ve got dark exposed beams overhead making the whole room feel like a 1978 ski lodge. You want them white. Maybe whitewashed, maybe painted solid. Either way the job is the same in spirit: cover a lot of awkward overhead wood without redecorating your floor with drips.
Here’s the rule before anything else. Old beams bleed. The stain and tannin in that wood push up through white latex and leave you brown blotches, worst right over the knots. Prime first or you’ll do this job twice.
TL;DR
- Prime old beams with a stain blocker (Zinsser Cover Stain, or BIN for bad knots) before any paint, or tannin bleeds brown through your white.
- Paint for a solid, reversible finish; whitewash for lighter wood with the grain still showing. Whitewash soaks in and is hard to undo.
- Matte or eggshell trim paint, not flat wall paint. Sheen up high shows every brush mark and dust nib.
- Cover the whole floor, work in two thin coats, load the brush light so it doesn’t rain on you.
- Drop the ladder act over stairwells. Beam runs over vaults or stairs need real scaffold.
What You’ll Get
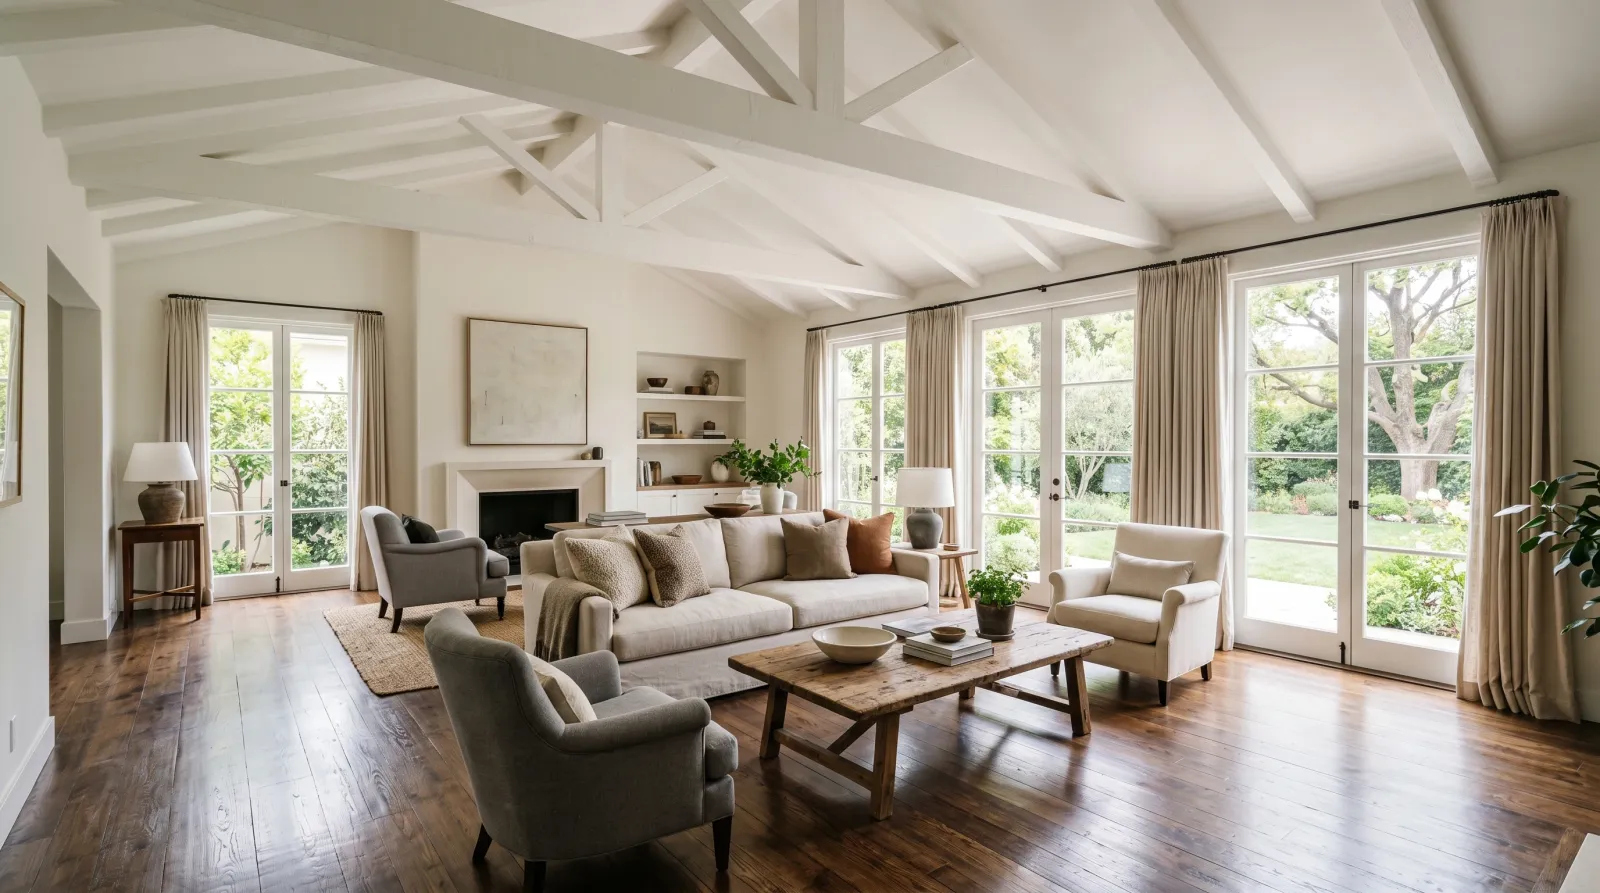
Beams that read as part of a bright ceiling instead of a dark grid over your head. White-painted, the wood disappears. Whitewashed, it lightens but keeps its grain. One weekend of work plus dry time.
Honest Take on Difficulty and Time
Medium job, and the difficulty isn’t the painting. It’s the angle. Everything is overhead, on a ladder, with paint running back down the brush toward your wrist. Your neck quits before your arm does.
Realistic time on a great room with four to six beams: two days if you spray and mask well, three if you brush. Most of day one is prep. Add 24 hours between coats and you’re not pulling tape until the third day.
A run over a stairwell or two-story vault adds a day and means renting scaffold. Standing on the top step of a ladder over a stairwell is how people end up in the ER. Don’t.
Paint or Whitewash: Decide First
Two paths, and the prep splits early.
| Solid paint | Whitewash | |
|---|---|---|
| Look | Wood gone, clean color | Wood lighter, grain still shows |
| Coverage | Full, opaque | Translucent, streaky on purpose |
| Reversible | Recoat any time | Hard; soaks into the wood |
| Best on | Any beam, primed | Bare or lightly sealed wood |
| Prime first? | Yes, stain blocker | No — wash needs to soak in |
Paint is the forgiving path. Hate the result, you add a coat. Whitewash soaks into the grain, so changing your mind means sanding or stripping. Pick the direction before you buy. The cleaning and taping are the same either way; the point of no return isn’t.
For the difference between a real lime-based wash and thinned paint, read what limewash actually is.
What You’ll Need
Paint and Primer
For solid paint: a stain-blocking primer and a quart of interior trim paint in matte or eggshell. The primer is the part you don’t skip on old beams. Zinsser Cover Stain (oil) for normal stain bleed, Zinsser BIN (shellac) for heavy knots, smoke, or water stains. Then trim paint over it. BM Advance, SW ProClassic, and Behr Premium Plus all brush flat and dry hard. Picks live in the best interior trim paint round-up.
Don’t use flat wall paint up there. It burnishes if anything touches it and holds dust you can’t wipe off cleanly.
For whitewash: white latex paint cut one part to one part water, adjusted by how much grain you want showing. Or a pre-mixed limewash for the chalky mineral look. No primer on this path. The wash has to soak into the wood to work.
Tools
A 2.5-inch angled brush for the edges, a 3-inch flat brush or a small foam roller for the faces. A sprayer if you’ve got a lot of beams and the patience to mask around them. Canvas drop cloths covering the entire floor under the run, not just a strip. A solid ladder or a scaffold plank. Safety glasses and a respirator, because the mist comes back down at your face.
The brush counts on beams. A cheap one sheds bristles into the paint and you can’t reach up to pick them out cleanly. Spend the $14. See the best paint brushes round-up.
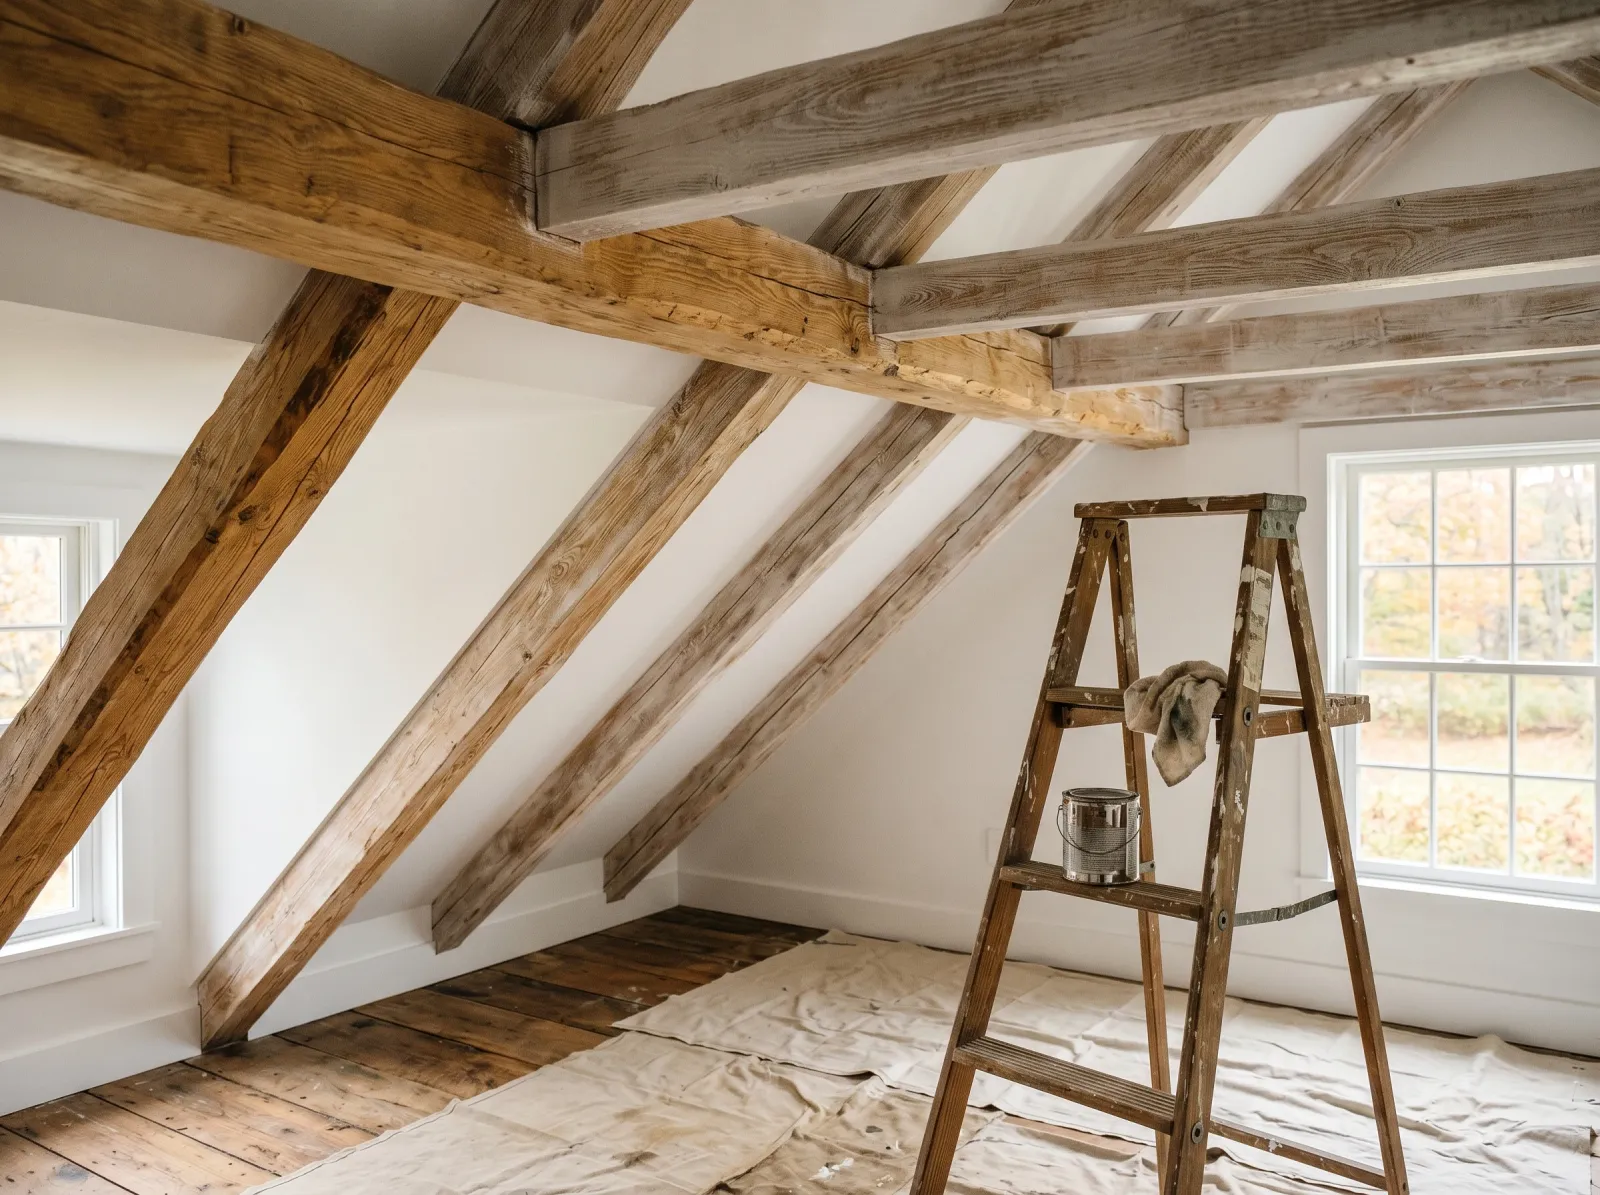
Step 1: Cover the Floor and Clean the Beams
Drop the whole floor under the run, wall to wall. Paint falls straight down from up there and travels farther than you think. Canvas, not plastic. Plastic slides and drips never dry on it.
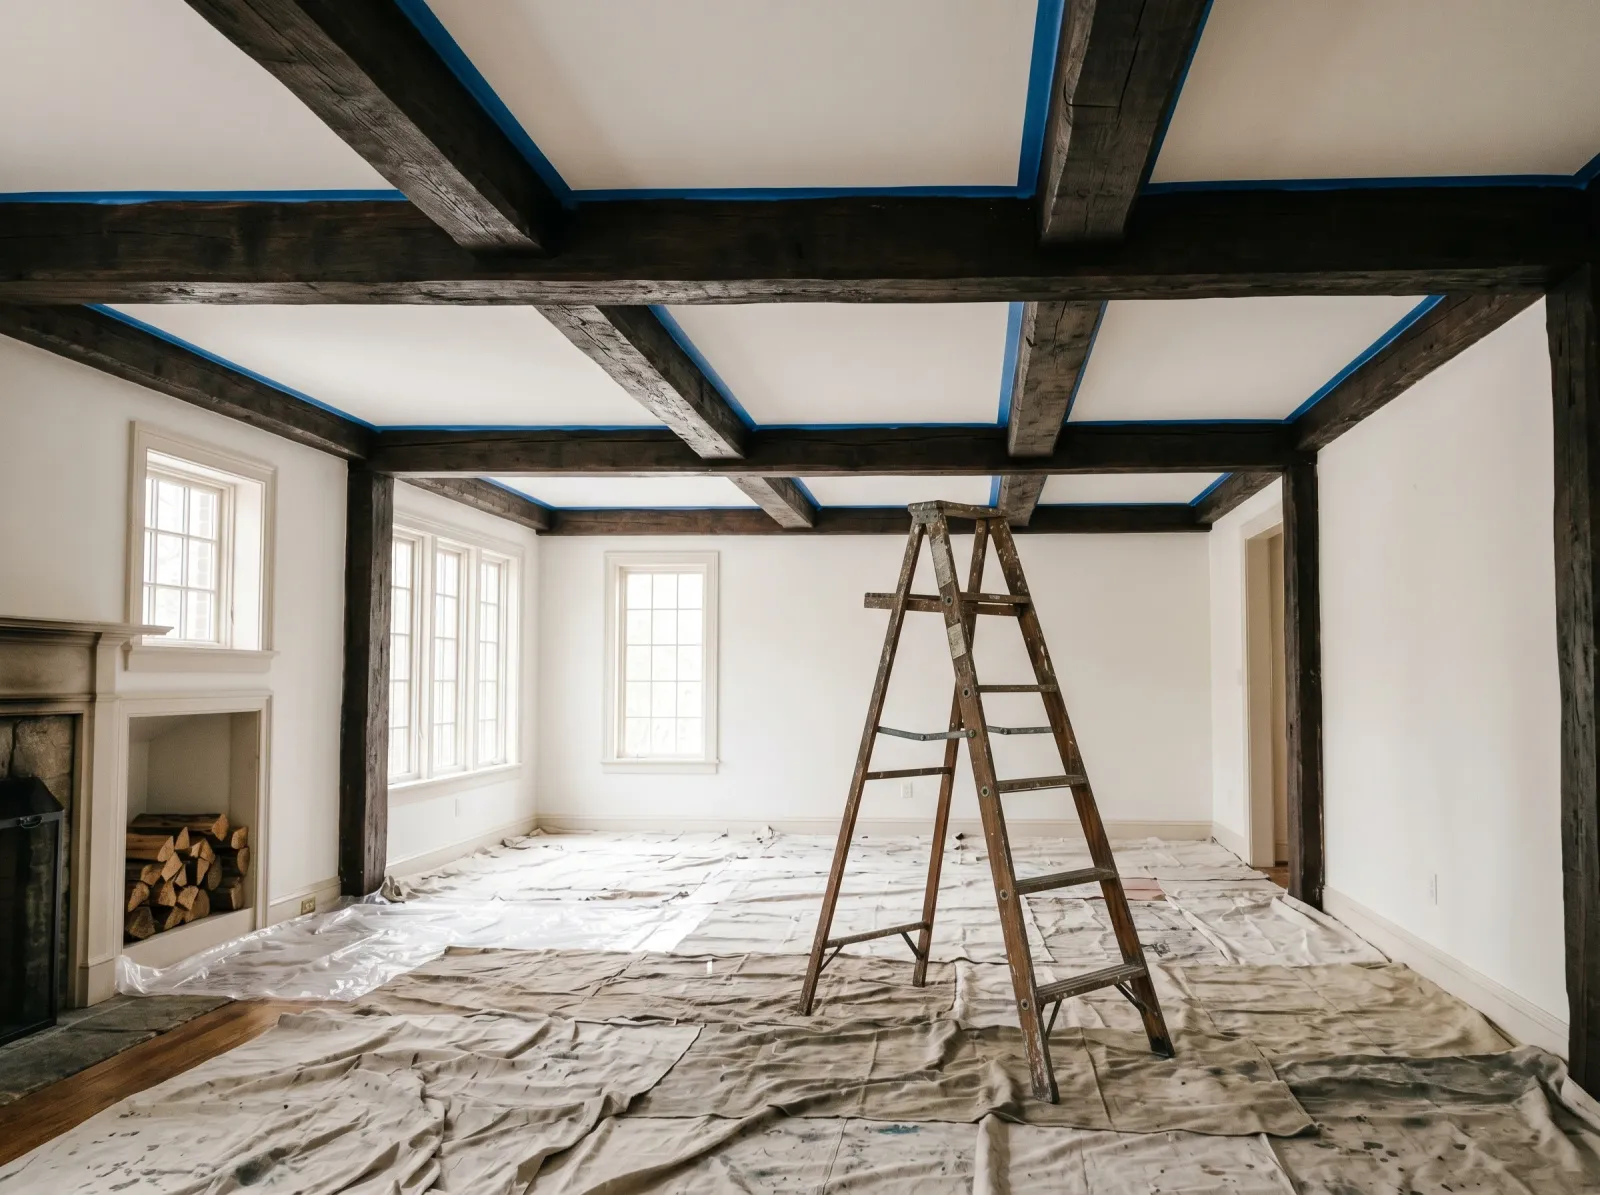 Floor fully covered, beams wiped down, tape run along the ceiling line before anything wet goes up.
Wipe every beam down. Years of dust, cobwebs, and in a kitchen a film of cooking grease. Greasy beams reject primer in patches. Degreaser or TSP substitute on kitchen beams; plain beams need a damp rag and a dry one after.
Watch out for the tops of the beams where they meet the ceiling. Dust collects there and you can’t see it from the floor. Run a rag along the top edge by feel.
Step 2: Sand and Tape
Scuff any glossy beams with 120-grit so the primer grabs. Primer slides off slick varnished wood. You’re knocking the shine down, not stripping to bare. Tack cloth after.
Tape the line where the beam meets the ceiling, on the ceiling side, so your brush has a hard edge to run against. Press the edge down hard so paint doesn’t bleed under it. If the ceiling is also getting painted, skip the tape and cut both freehand.
Watch out for rough-sawn beams. Tape won’t seal flat against a rough surface and paint creeps under it. On rough beams, skip the tape and cut the line carefully by hand with a steady brush.
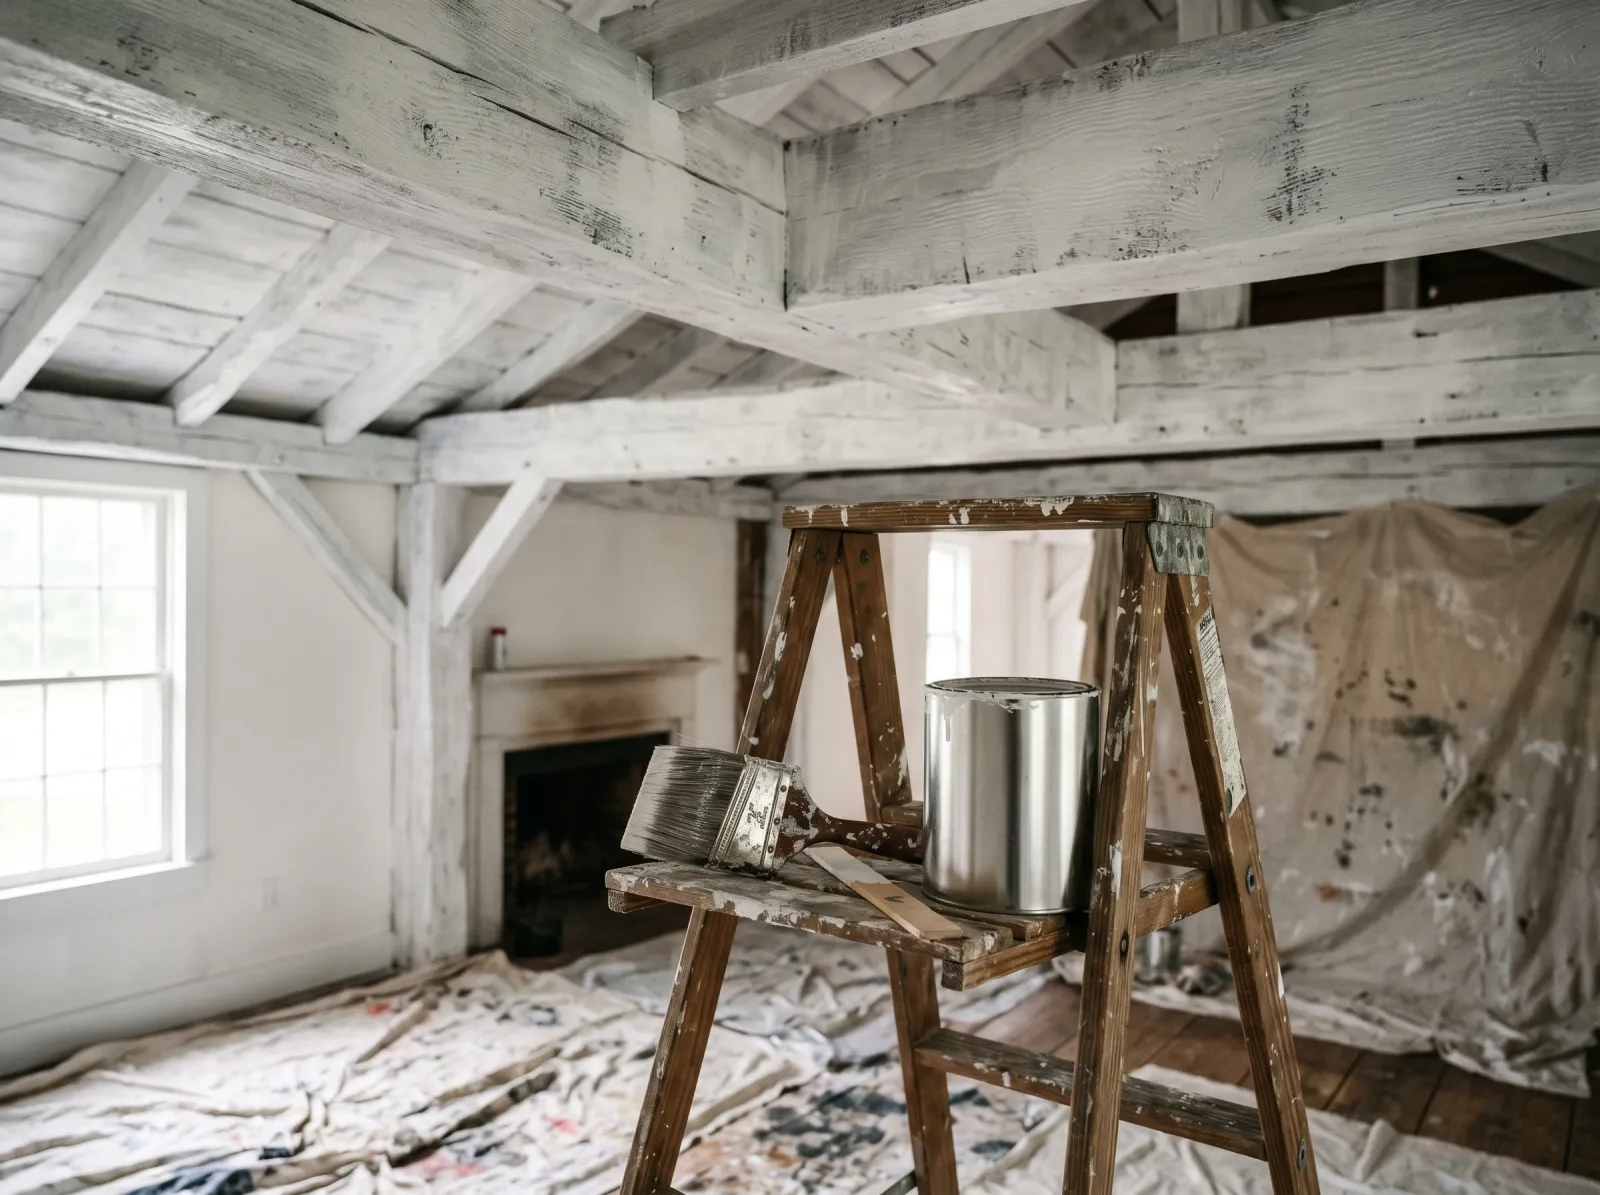
Step 3: Prime (Solid Paint Path Only)
Skip this entirely if you’re whitewashing. The wash needs raw wood.
For paint, one coat of stain blocker over the whole beam. Cut the edges with the angled brush, fill the faces with the flat brush or roller, all along the grain. The beams go dull grey-white and the wood tone vanishes. That vanishing is the point. If you can still see warm wood at the knots, hit those spots a second time.
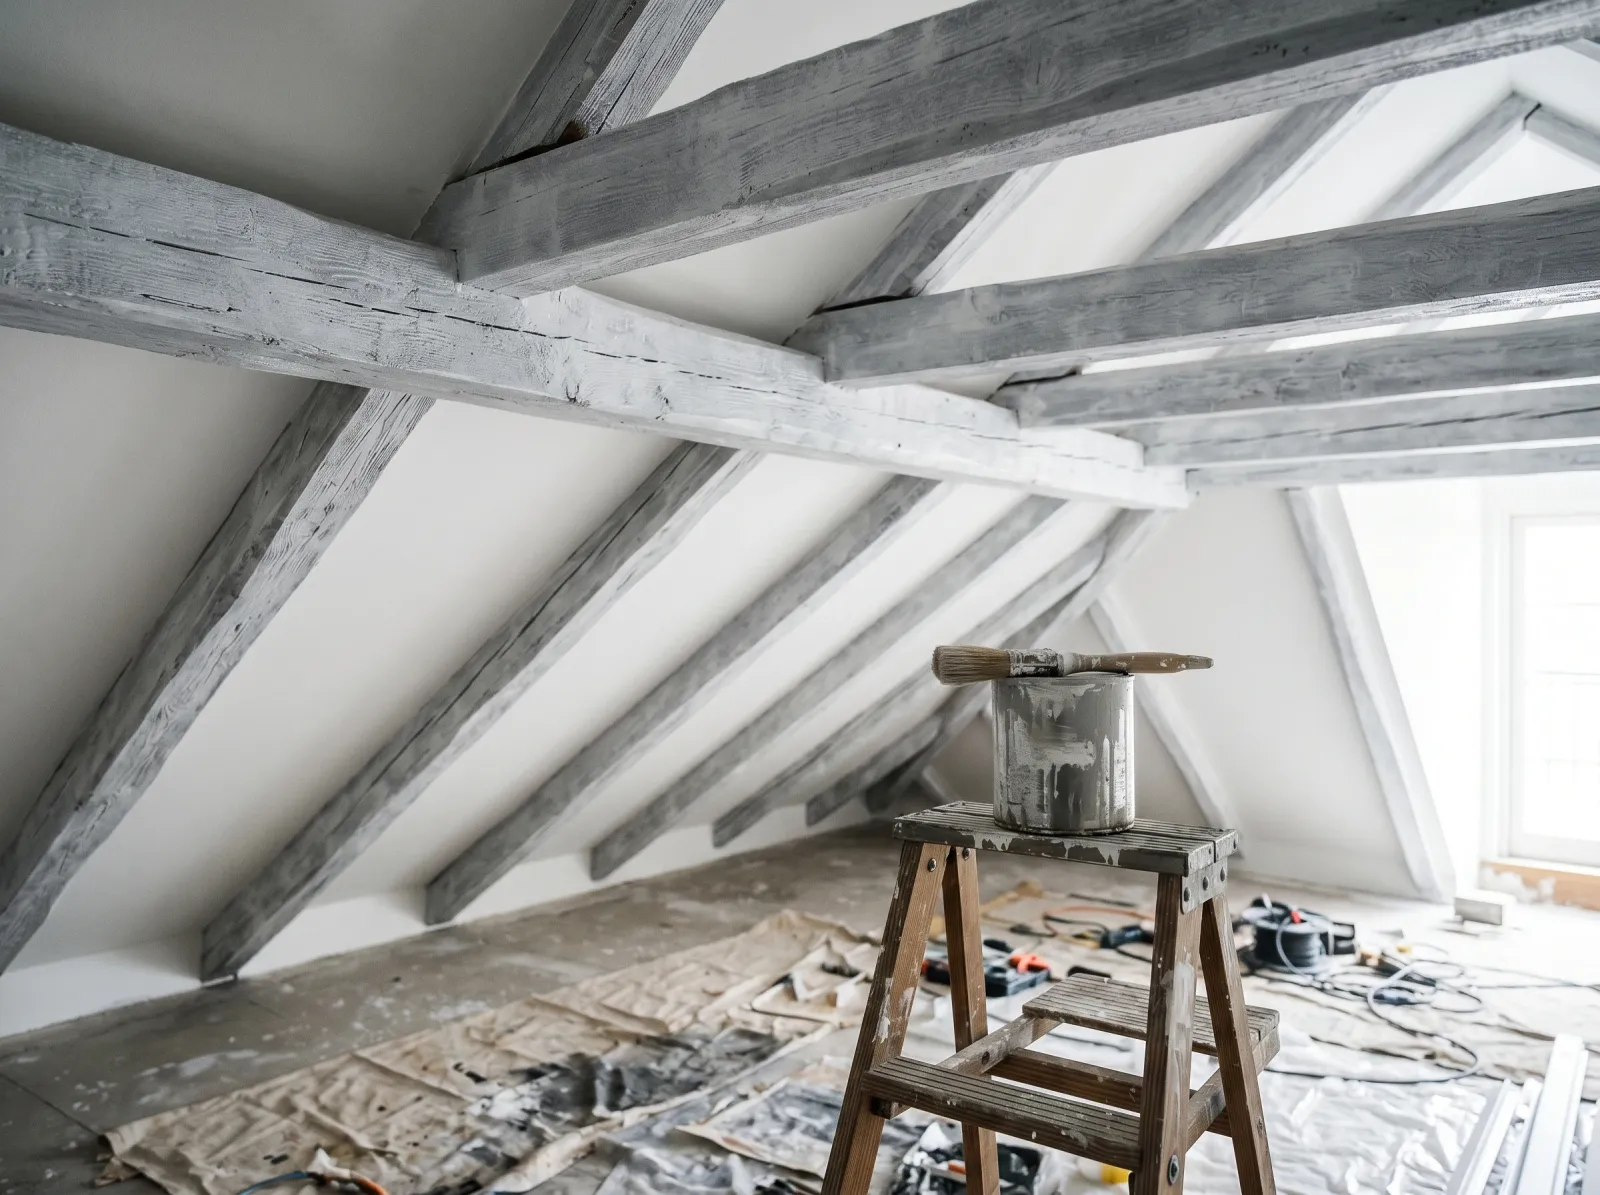 One coat of stain-blocking primer. The dark wood tone is gone, which is exactly what should happen.
Cover Stain is oil, so it smells and wants mineral spirits to clean up. Open windows, run a fan. BIN is shellac, dries in 45 minutes, and stinks worse; it’s the right call only for bad knots, smoke, or water staining. For the full breakdown, see the guide on painting over stained wood.
Let oil primer dry overnight. Scuff any raised grain with 220, tack it.
Step 4: Paint or Wash the Beams
Solid paint: cut the edges first, then fill the faces along the grain. Load the brush light. A heavy brush rains paint down your arm and drips off the beam corners. Two thin coats, every time. The first coat looks thin and streaky and you’ll second-guess yourself. Leave it. It always looks like that.
 First finish coat. Thin and patchy is correct at this stage. The second coat fills it.
Let the first coat dry the time on the can, usually 4 hours for waterborne, longer for Advance. Then the second. Check the bottom corners of each beam for the first half hour. That’s where drips form and harden into little stalactites you’ll be sanding off later.
Whitewash: mix one part white paint to one part water and test on a hidden stretch first. Brush it on a couple feet of beam, wait a minute, then wipe back with a rag to the look you want. More wipe, more grain. Work one section at a time so the wash doesn’t dry before you wipe it. It dries fast and uneven, and once it’s in the grain it’s in.
 Whitewash variant: thinned, wiped back, grain still reading through. This look soaks in, so commit before you start.
Watch out for lap marks on whitewash. Stop at a natural break (the end of a beam, a joint), never in the middle of a long run. A dried wet edge mid-beam shows as a stripe forever.
Step 5: Pull Tape and Reset
Pull the tape while the last coat is still slightly tacky, not bone dry, at a 45-degree angle. Dry paint can lift off with the tape and chip your clean line. Uncover the floor, shake the drop cloths outside, wash your brushes until the water runs clear.
 Tape pulled, floor uncovered, beams reading crisp against the ceiling.
Common Mistakes
- Skipping primer on old beams. Tannin and stain bleed up through white latex and brown blotches show within weeks, worst over the knots. A stain-blocking primer is the whole job. For knot-heavy beams, see why knots bleed through paint and what stops them.
- Using flat wall paint instead of trim paint. It burnishes where anything touches it and holds dust you can’t wipe off cleanly. Matte or eggshell trim paint up there, not leftover wall paint.
- Whitewashing over sealed or glossy beams. The wash sits on top and wipes right off because it can’t soak in. Sand the seal off first, or accept you’re doing a thinned-paint glaze instead of a real wash.
- Loading the brush heavy. Overhead, a full brush drips down your wrist and runs off the beam corners. Dip a third of the way, tap once, work light.
- Standing on the top step over a stairwell. Beam runs over vaults and stairs need scaffold, not a ladder stretched to its limit. Falls from overhead work are the real risk on this job.
Cure Schedule
| Time after final coat | What’s safe |
|---|---|
| 1 hour | Pull the tape |
| 4 hours | Touch dry, don’t bump it |
| 24 hours | Walk under it without worrying |
| 7 days | Dust lightly with a dry cloth |
| 30 days | Full cure, wipe with a damp cloth |
Maintenance and Touch-Ups
Painted beams outlast almost everything else in the room because nothing touches them. Fifteen to twenty years before you’d think about redoing them, and even then it’s a style change, not failure.
For a chip or a scuff, dab leftover paint on with a small artist’s brush. Don’t repaint a whole beam face for one mark or the touch-up reads brighter than the cured paint around it. Keep a labeled quart in the basement.
Whitewashed beams fade and lighten with sun. A fresh thin wash every several years brings it back, and with no primer underneath it soaks in like the first time.
Cost Breakdown
| Item | $ |
|---|---|
| Stain-blocking primer, 1 quart | $20 |
| Trim paint, 1 quart | $25 |
| Brushes (angled + flat) | $30 |
| Tape, drop cloths, sanding sponges | $35 |
| Total | $110 |
That’s a brushed solid-paint job on a great room. Whitewash runs cheaper: no primer, and you stretch wall paint with water. A big vaulted run with a rented sprayer and scaffold pushes toward $180 plus rental.
What’ll Bite You in Two Years
The brown spots. Skip the primer or go thin on it and the tannin pushes up through that white for months. You’ll be back on the ladder over the same knots you thought you finished. Prime it right the first time. Beams are a twenty-year paint job if you do, a four-week one if you don’t.