How to Paint a Dresser
Painting a dresser the right way: pull the drawers, prime the slick spots, and roll two thin coats of enamel so it wipes clean and does not peel.


Okay, so you have a dresser. Maybe it followed you from three apartments ago, maybe you grabbed it off a curb, maybe it is the brown box-store one that came in a flat pack. You want it painted, and you are a little worried you are going to end up with a sticky, streaky mess that peels in a month. Don’t worry. A dresser is the easiest big-feeling project there is, because the whole thing comes apart. Pull the drawers out, and suddenly you are painting flat panels on a table, not wrestling a cabinet on a ladder.
Here’s the thing most tutorials skip: the paint almost never fails because of the paint. It fails because the surface was slick or greasy and nobody told you. So this guide spends its time on the part that actually matters, which is what your dresser is made of and how you get paint to stick to it.
What You’ll Get
A dresser that looks like you bought it that way, not like you painted it in a hurry. A weekend of work, plus about a week of cure before you load it back up with clothes. A $30 thrift dresser and $60 of materials gets you something that reads like a $300 piece, and it is solid wood instead of particleboard.
Honest Take on Difficulty and Time
This is one of the easier projects on the site. No cutting in along a ceiling, no taping off a whole room. The hard part is patience. You wait between coats, and you wait a full week before the drawers go back to heavy use.
| What you have | Active time | Total elapsed | Skill |
|---|---|---|---|
| Real wood, sound finish, cabinet enamel | 3-4 hrs | 1 weekend + 1 week cure | Easy |
| Laminate or melamine, primed first | 4-6 hrs | 2 weekends + cure | Easy-medium |
| Real wood, chalk paint + top coat | 4-5 hrs | 1 weekend + 1 week cure | Easy |
If anyone tells you it is a two-hour job, they painted over a dirty slick surface and their finish is going to peel. The cleaning and the prep are most of the work, and they are the difference between a dresser that lasts a decade and one that chips by Christmas.
What You’ll Need
Paint and Primer
The big question is how the dresser gets used. A kid’s dresser or a primary-bedroom dresser you open every day wants cabinet enamel (a waterborne paint that cures hard and wipes clean, like BM Advance or INSL-X Cabinet Coat). A guest-room or entryway dresser nobody touches can take chalk paint for that soft matte look, but chalk paint needs a top coat to be wipeable.
For SKU-by-SKU picks, see the best furniture paint round-up.
You need primer only sometimes. If the dresser is laminate, melamine, or glossy, you need a bonding primer (a special primer that grips slick surfaces, like INSL-X Stix). If you are not sure whether your dresser needs it, the bonding primer explainer walks through when it earns its place. Real wood with a sound matte finish can skip primer if you are using chalk paint.
Tools
A 2.5-inch angled brush for the corners and routed details, and a 4-inch foam-mini roller for the flat panels. The foam roller is what gives drawer fronts that smooth, sprayed look without buying a sprayer. Add painter’s tape, a canvas drop cloth, a 220-grit sanding sponge, and a baggie for the screws. Brush picks live in the furniture brush round-up.
The brush is where you do not cheap out. A $4 brush sheds bristles into your wet drawer fronts and leaves a streaky line. A $14 Wooster holds its edge for years.
Method: Cabinet Enamel vs. Chalk Paint
Two valid paths, picked by how the dresser lives.
Cabinet enamel goes on thinner, self-levels into a smooth skin, and cures rock-hard. No top coat needed. This is the path for any dresser that gets opened daily. The trade-off is it wants a clean, scuffed or primed surface to bond, and it takes 30 days to fully cure.
Chalk paint goes on thick and matte, hides a lot, and bonds to most real wood without primer. The catch is it is not wipeable until you seal it with a top coat, and it dents under a fingernail for the first few weeks. Use it on low-touch pieces.
If you are choosing between brands of either type, the furniture paint round-up has the head-to-head.
Step 1 — Pull the Drawers and Take Off the Hardware
Pull every drawer all the way out and set them somewhere you can paint them flat, like a folding table covered with a drop cloth. Unscrew the knobs and pulls, drop the screws into a baggie, and write which drawer they came from on the bag. Vintage hardware spacing is rarely standard, so you want the originals back in their own holes.
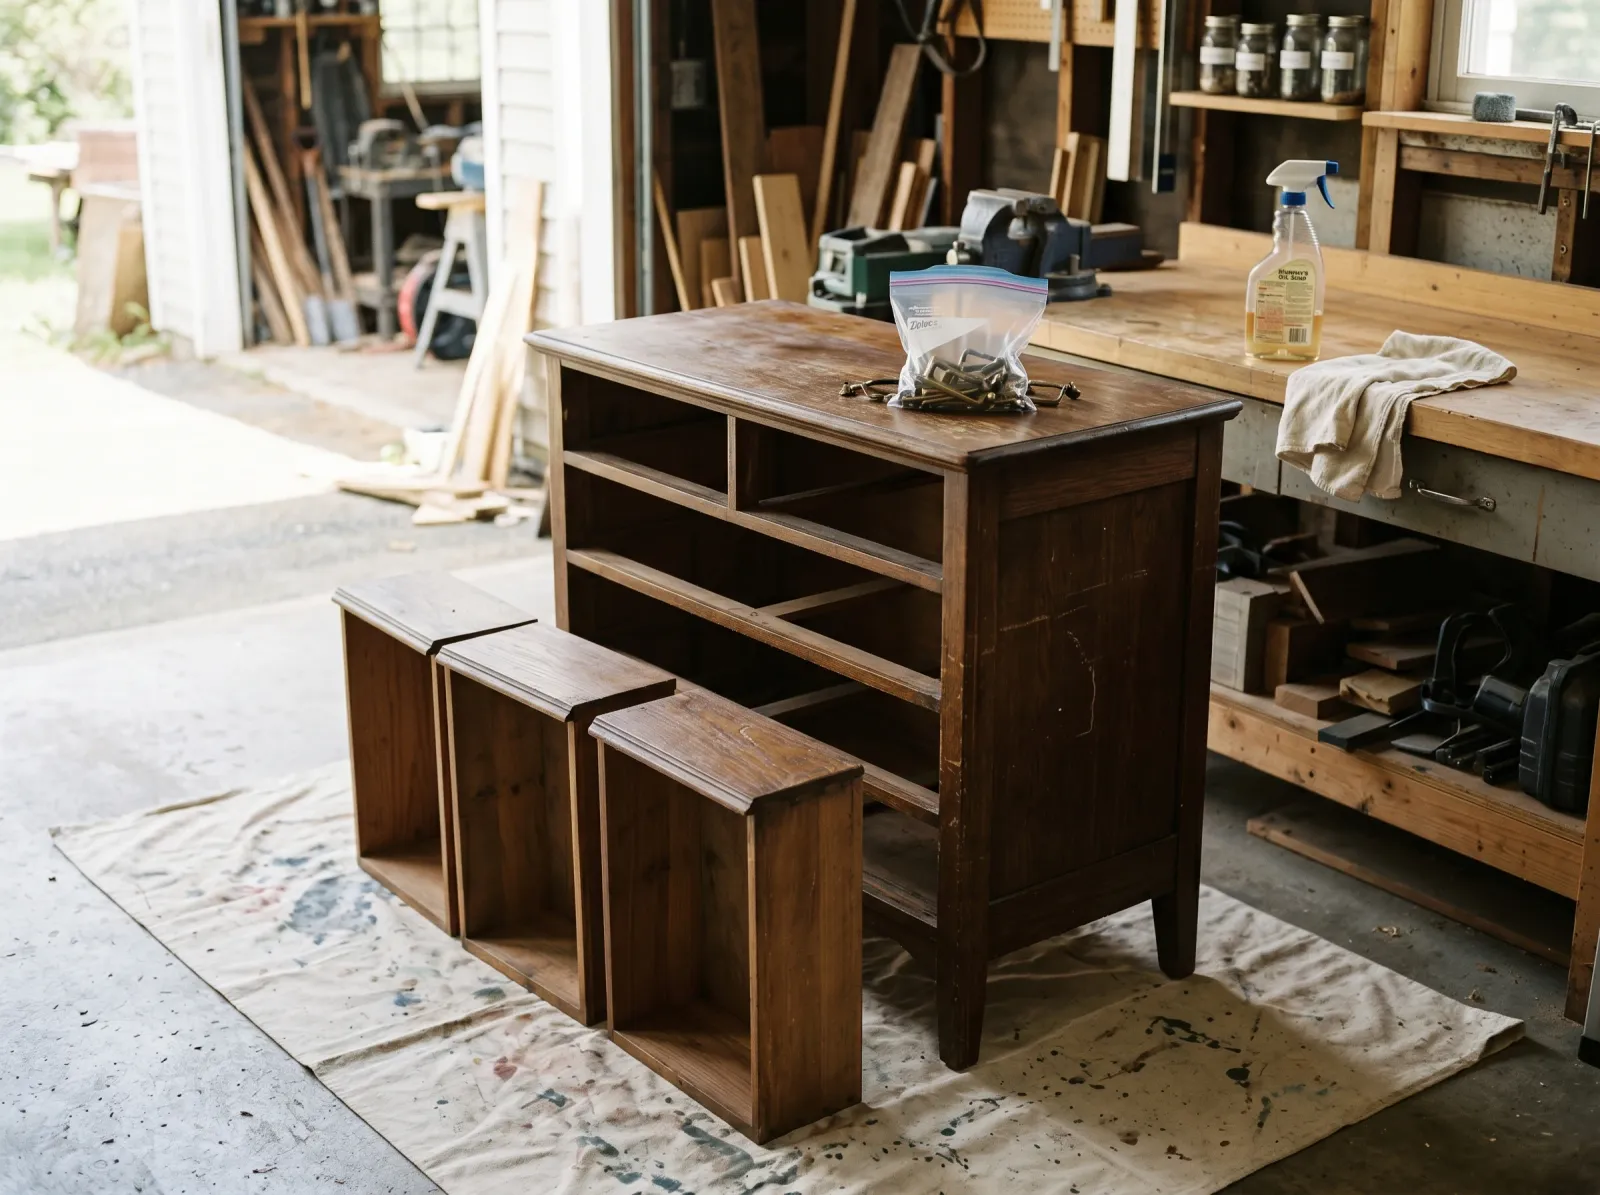 Drawers out, hardware bagged. Now you are painting flat panels, not a cabinet.
Watch out for drawers that look identical but are not quite. Number them on the back with a pencil so they slide back into the right slot. A drawer in the wrong slot sticks.
Step 2 — Clean It, Then Decide on Sanding
This is the step that decides whether your paint lasts. Wipe the whole frame and the drawer fronts down with a degreasing cleaner (a TSP substitute works). Dressers collect skin oil and furniture polish, and paint will not bond over either one. Let it dry.
Now look at what you are dealing with. Real wood with a sound finish gets a light scuff with a 220-grit sponge, just enough to kill the shine. Glossy laminate or melamine gets bonding primer instead, because sanding barely touches that slick factory film. Not sure which you have? The laminate furniture guide shows how to tell wood from a printed plastic skin, and if the dresser is an old piece with a mystery finish, the old wood furniture guide has the denatured-alcohol test that names it in two minutes.
 A 220-grit scuff dulls the gloss so paint can grab. Wipe the dust off with a tack cloth before you go further.
Watch out for skipping the scuff because the can says “no sanding needed.” On a glossy dresser, dulling the shine is cheap insurance. The trick is you are not sanding it smooth, you are sanding it dull.
Step 3 — Prime, but Only If You Need To
If your dresser is laminate, melamine, or known oil-based gloss, prime it. One coat of bonding primer (INSL-X Stix or Zinsser Bulls Eye 1-2-3 Plus), rolled on the flats and brushed into the corners. Let it dry overnight, then knock down any nibs with the 220 sponge and wipe with a tack cloth.
If your dresser is real wood with a sound finish and you are using chalk paint, you can skip this step. That is the one case where you get to.
Step 4 — Paint the Frame and the Drawer Fronts Flat
Paint the frame first. Roll the flat sides and top with the foam-mini, then brush the corners and any routed trim with the angled brush. Then do the drawer fronts, laid flat on the table. Flat is the whole trick: paint on a horizontal surface self-levels and cannot run, so your drawer fronts come out glass-smooth.
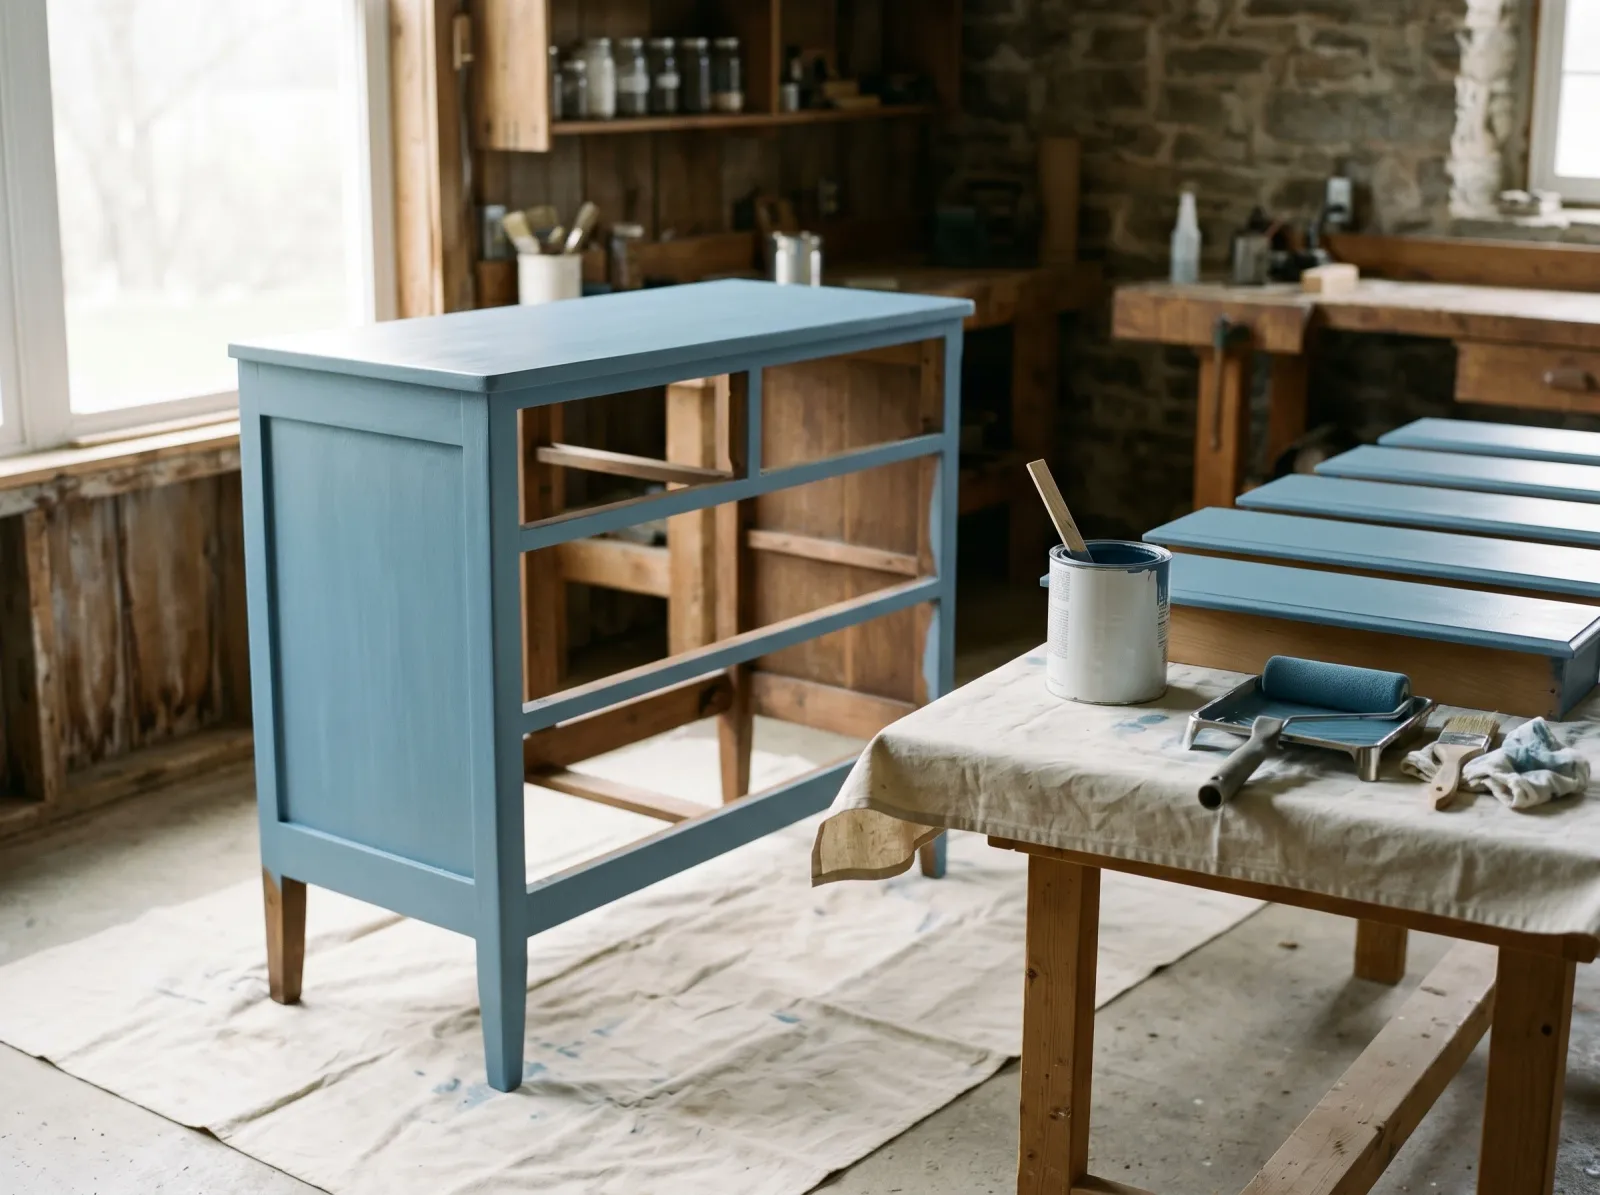 Frame rolled thin, drawer fronts painted flat so they cannot drip. This is where the smooth finish comes from.
Two thin coats, always. One thick coat sags, dries uneven, and never cures as hard. If you are using cabinet enamel, stir in a little Floetrol (about 5%, roughly 6 ounces per gallon) to keep the wet edge open and erase brush marks.
Watch out for the over-loaded brush. Dip a third of the way in and tap once on the inside of the can. A loaded brush drips, and a drip on a horizontal drawer front dries into a bump you cannot sand out without going back to primer.
Step 5 — Second Coat, Then Let It Cure
Wait the time on the can before the second coat. Cabinet enamel usually wants 16 hours, chalk paint about 2. Recoating too early drags the first coat up into wrinkles, and the fix is sanding back to primer, so set a timer and walk away.
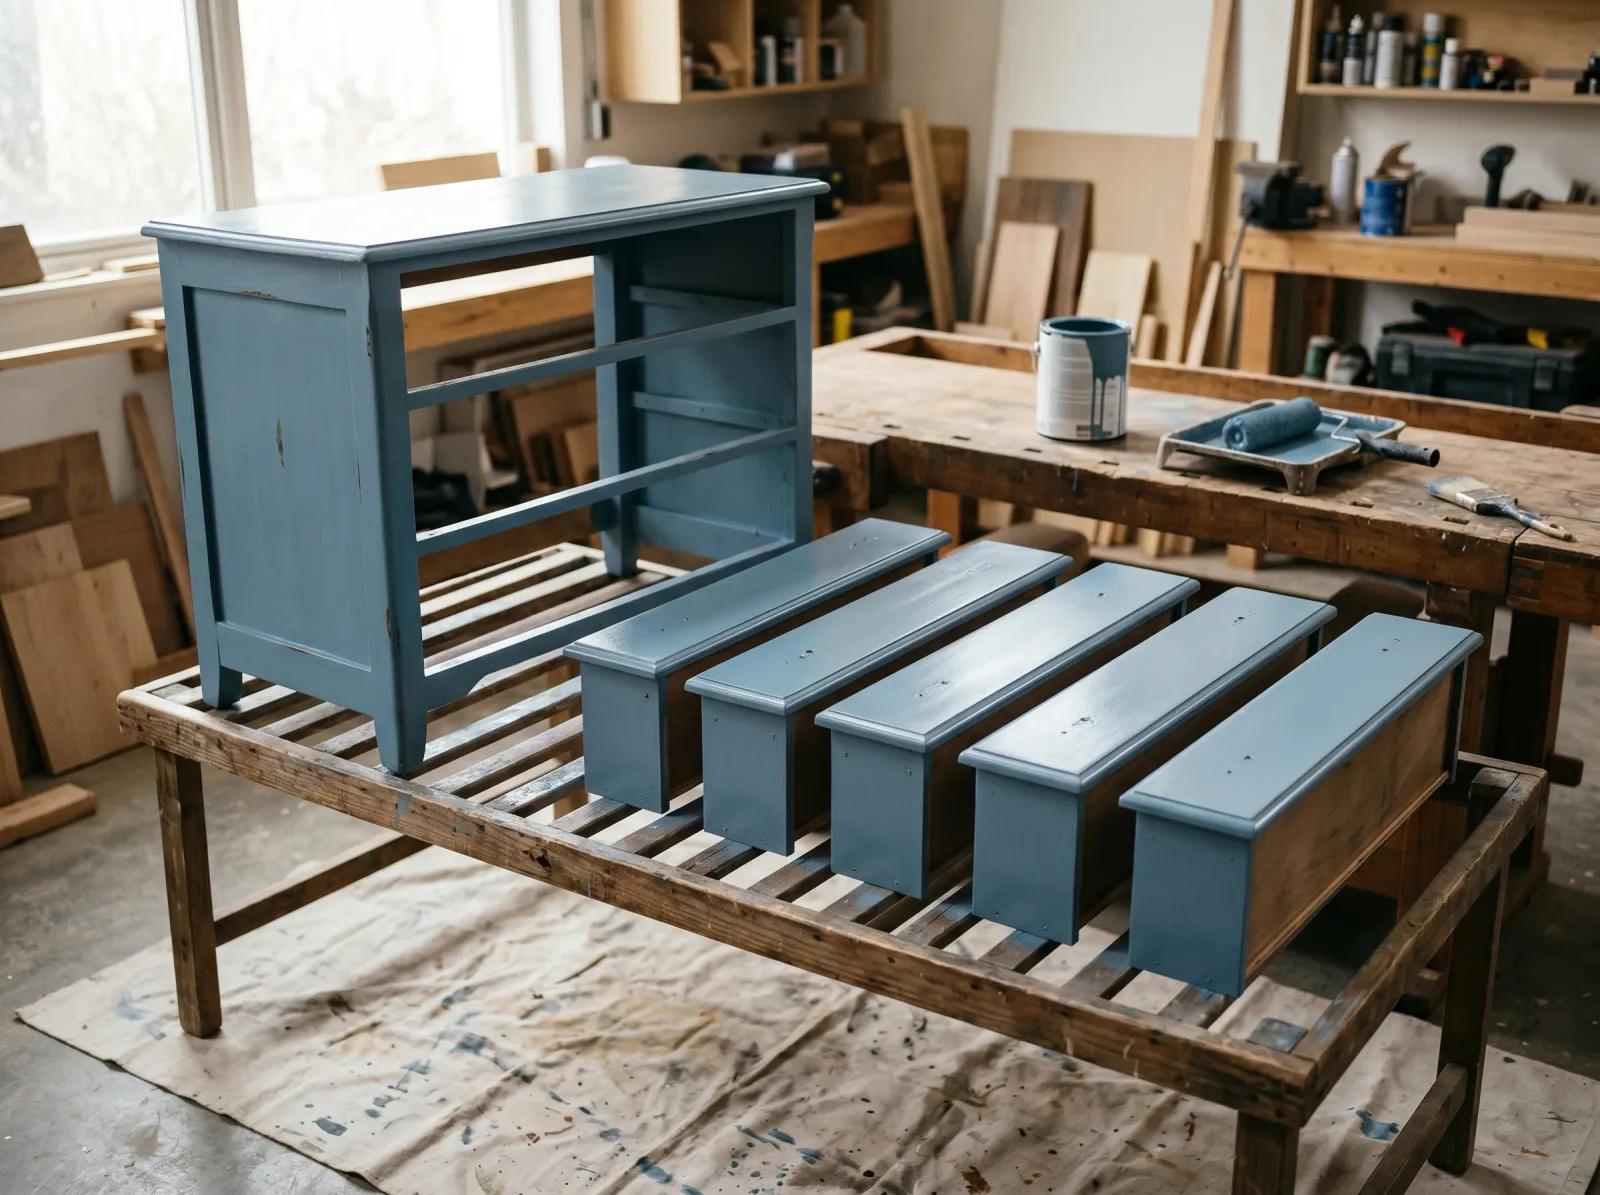 Second coat down. The patchy spots from coat one have filled in. Now it cures.
If you used chalk paint, seal it now. Two thin coats of Minwax Polycrylic in matte, brushed on with a soft synthetic brush. For whites and pale colors, use polycrylic and not wax, because clear furniture wax has an amber tint that yellows pale chalk paint within a few months. Cabinet enamel needs no top coat. The cure is the seal.
Step 6 — Reinstall the Hardware and Reassemble
Give the paint a full day before you put anything back. Screw the pulls back into their original holes, slide the drawers into their numbered slots, and you are done.
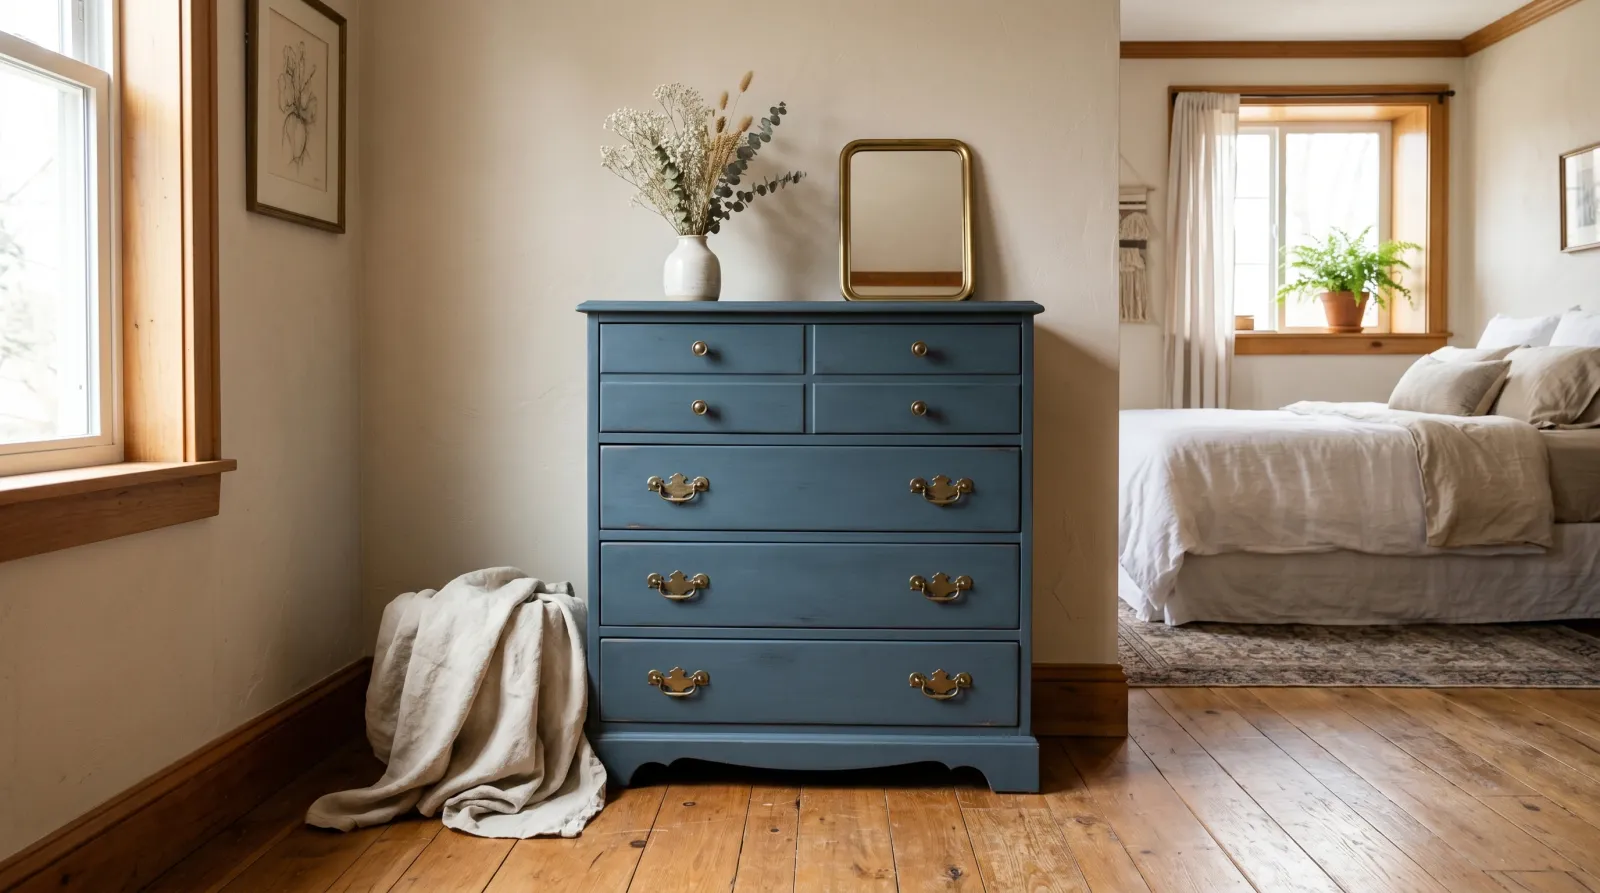 Hardware back on, drawers in their slots. A day of firming up before this, a week before it is loaded with clothes.
If the original brass is dull, Bar Keeper’s Friend brings it back, and the originals almost always look better than big-box replacements. If you want a different look, matte black spray paint on the old hardware is having a moment, though painted hardware chips at the screw heads within a year or two.
Common Mistakes
- Painting over a dirty dresser. Skin oil and old furniture polish block paint, and the finish peels in sheets. Clean with a degreaser first, every time.
- Skipping bonding primer on laminate or melamine. Your topcoat lifts off within months. No chalk paint or enamel grips slick factory plastic without a bonding primer underneath.
- Painting the drawer fronts while they are still in the dresser. You get drips on the frame and brush marks on the fronts. Pull them out and paint them flat on a table.
- Recoating before the first coat is dry. The brush drags, the second coat lifts the first, and you get wrinkles like rumpled fabric. Read the recoat time on the can and wait.
- One thick coat instead of two thin ones. Thick coats sag, dry uneven, and never cure hard enough to wipe clean. Thin and patient wins.
Cure Schedule
| Time after the final coat | What’s safe |
|---|---|
| 4 hours | Touch dry; do not touch |
| 24 hours | Reinstall drawers and hardware |
| 7 days | Put clothes back; normal daily use |
| 30 days | Full cure; wipe down with mild soap |
Chalk paint sealed with wax keeps curing for weeks past the 30-day mark, so do not stack heavy items on the top in week two or you will see the imprint when you lift them.
Maintenance and Touch-Ups
A cabinet-enamel dresser holds up 8 to 12 years before it wants a refresh. Chalk paint sealed with polycrylic runs 5 to 8 years, less if it is handled hard. For a chip, dab the original paint on with a small artist’s brush and stop there. Do not feather across a whole drawer front, because the touch-up reads brighter than the cured paint and you will see the seam. Keep the leftover quart labeled with the color name and code so a future touch-up matches.
Cost Breakdown
| Item | $ |
|---|---|
| Cabinet enamel or chalk paint, 1 quart | $25-$45 |
| Bonding primer, 1 quart (if needed) | $15 |
| Top coat, polycrylic (chalk paint only) | $15 |
| Foam-mini roller, sleeves, angled brush | $25 |
| Sponge, tack cloth, tape, Floetrol | $15 |
| Total | $45-$100 |
A $30 thrift dresser plus $65 in materials lands under $100. A new mid-range dresser the same size runs $300 to $700, and it is almost always particleboard with a printed wood skin.
A Specific Recommendation
First dresser, real wood, sound finish, lives in a bedroom you use every day: a quart of BM Advance in satin, a foam-mini roller, a Wooster Silver Tip, and a 220 sponge. Clean it Friday night, scuff and prime nothing Saturday morning, two coats over the weekend, hardware back on Monday. Clothes go back in next weekend.
Guest-room dresser nobody opens, and you want the soft matte look: a quart of chalk paint over a 220 scuff, sealed with Minwax Polycrylic in matte. Softer finish, one more step, no primer needed on real wood.