How to Paint a Basement Concrete Floor
Basement floor paint fails when moisture pushes it off cold concrete. Test for damp, etch the slab, prime, then two coats of epoxy or floor paint that holds.

A basement slab will throw paint right back off if you get the prep wrong. That’s the whole story. People pick a color, roll it on a Saturday, and by spring it’s peeling in sheets near the water heater. The paint didn’t fail. The floor was damp, or slick, or dusty, and nobody checked.
Lead with the test. Before you buy a single can, find out whether your slab is pushing moisture up from the ground. If it is, paint is the wrong move until you fix the source. If it’s dry, the job is straightforward: clean, etch, prime, two coats.
What You’ll Get
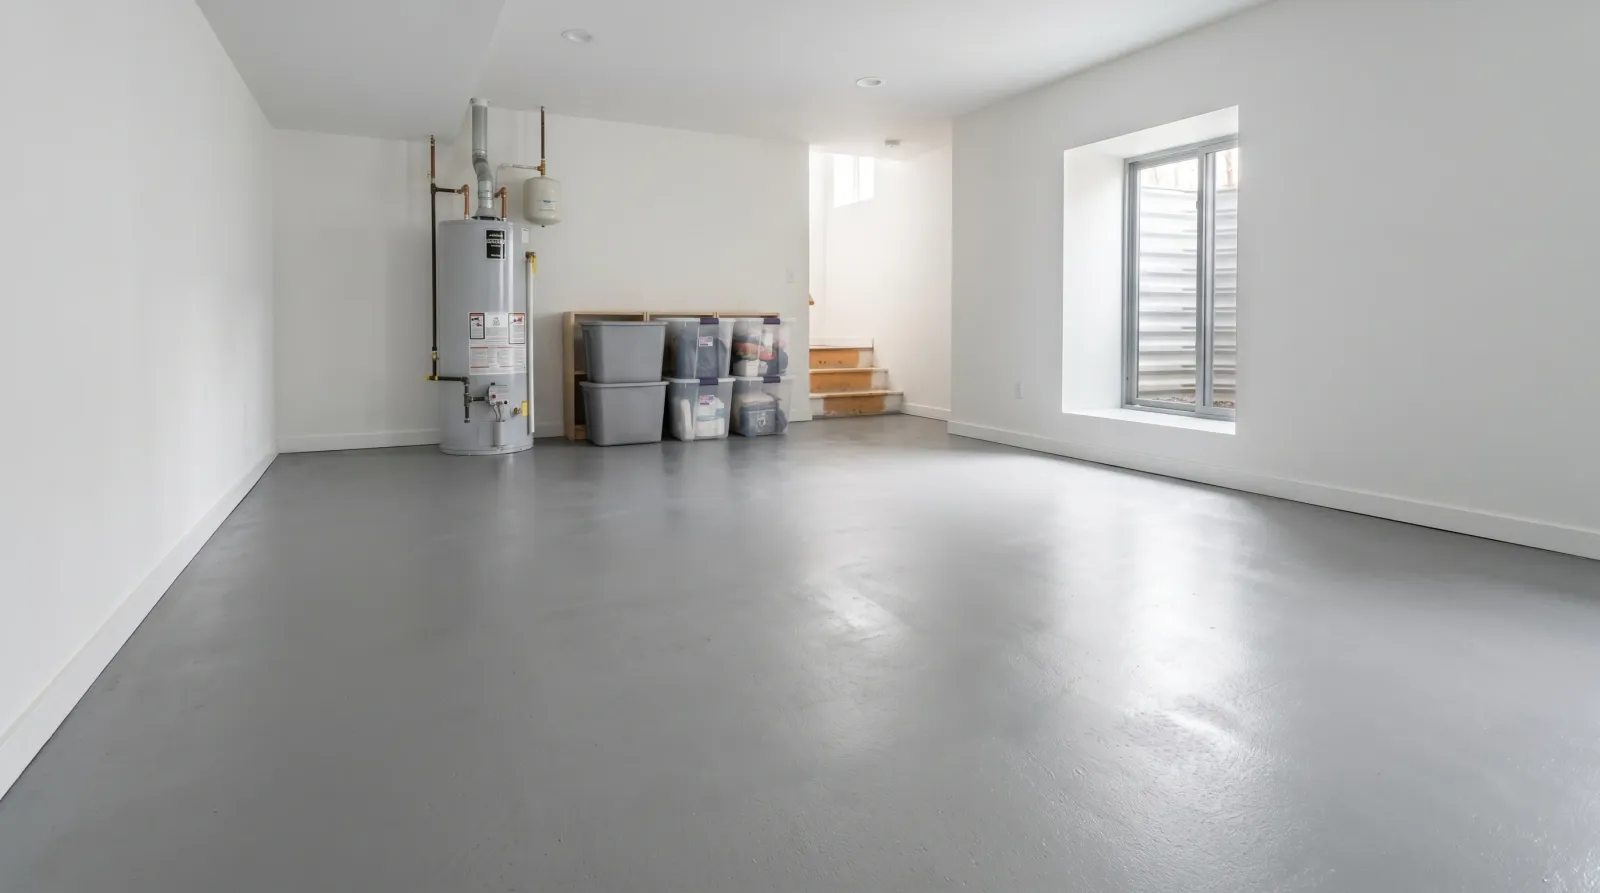
A sealed, easy-to-sweep basement floor that resists dust and spills for five to ten years. A bare slab sheds concrete dust forever. A painted one stops.
Honest Take on Difficulty and Time
This is a medium job, not a hard one. The painting is easy. The prep is where the weekend goes, and the prep is the part that decides whether it lasts.
Plan two days of work and a week of waiting. Day one: clear the slab, run the moisture test the night before, then etch and rinse. Let it dry overnight. Day two: fill cracks, prime, and lay the first coat. Second coat the next morning. Then leave it alone for a week before the chest freezer goes back.
If a video tells you a basement floor is a four-hour job, they’re painting a slab that was already prepped and dry. That never counts the prep, and prep is the job.
What You’ll Need
Paint and Primer
For a basement that sees foot traffic and storage, a 1-part concrete floor paint or a water-based epoxy is the right call. INSL-X Tuff Crete, Behr Premium 1-Part Epoxy, and KILZ Concrete & Garage Floor Paint all roll on like thick wall paint and dry to a hard film. A 400 square foot slab takes about a gallon per coat, so buy two.
Save the full 2-part epoxy kit for a garage that parks cars. A basement doesn’t need that chemistry, and the working time on 2-part is short enough to stress a first-timer. For the full breakdown on coatings, see the best concrete floor paint round-up, and if you’ve got a garage attached to this project, the garage floor paint and epoxy picks cover the harder-wearing options.
Primer goes on bare or chalky concrete. A masonry-rated bonding primer or a waterproofing primer like Zinsser Watertite seals the pores so your color coat builds a film instead of soaking in. Slab already has sound paint? Skip the primer, scuff-sand, and go. If you want the full case on when a separate primer earns its place, the primer-versus-paint-and-primer breakdown lays it out.
Tools
A 9-inch roller frame with 3/8-inch nap sleeves, an extension pole so you’re not crawling, a 2.5-inch angled brush for cutting in at the walls, and a stiff deck brush for the etch. A shop vac, a push broom, and a garden sprayer for the rinse. Picks live in the roller round-up.
The acid step needs rubber gloves, safety glasses, and a respirator. Etcher fumes are no joke in a closed basement. Crack a window and run a fan.
Step 1 — Clear the Slab and Run the Moisture Test
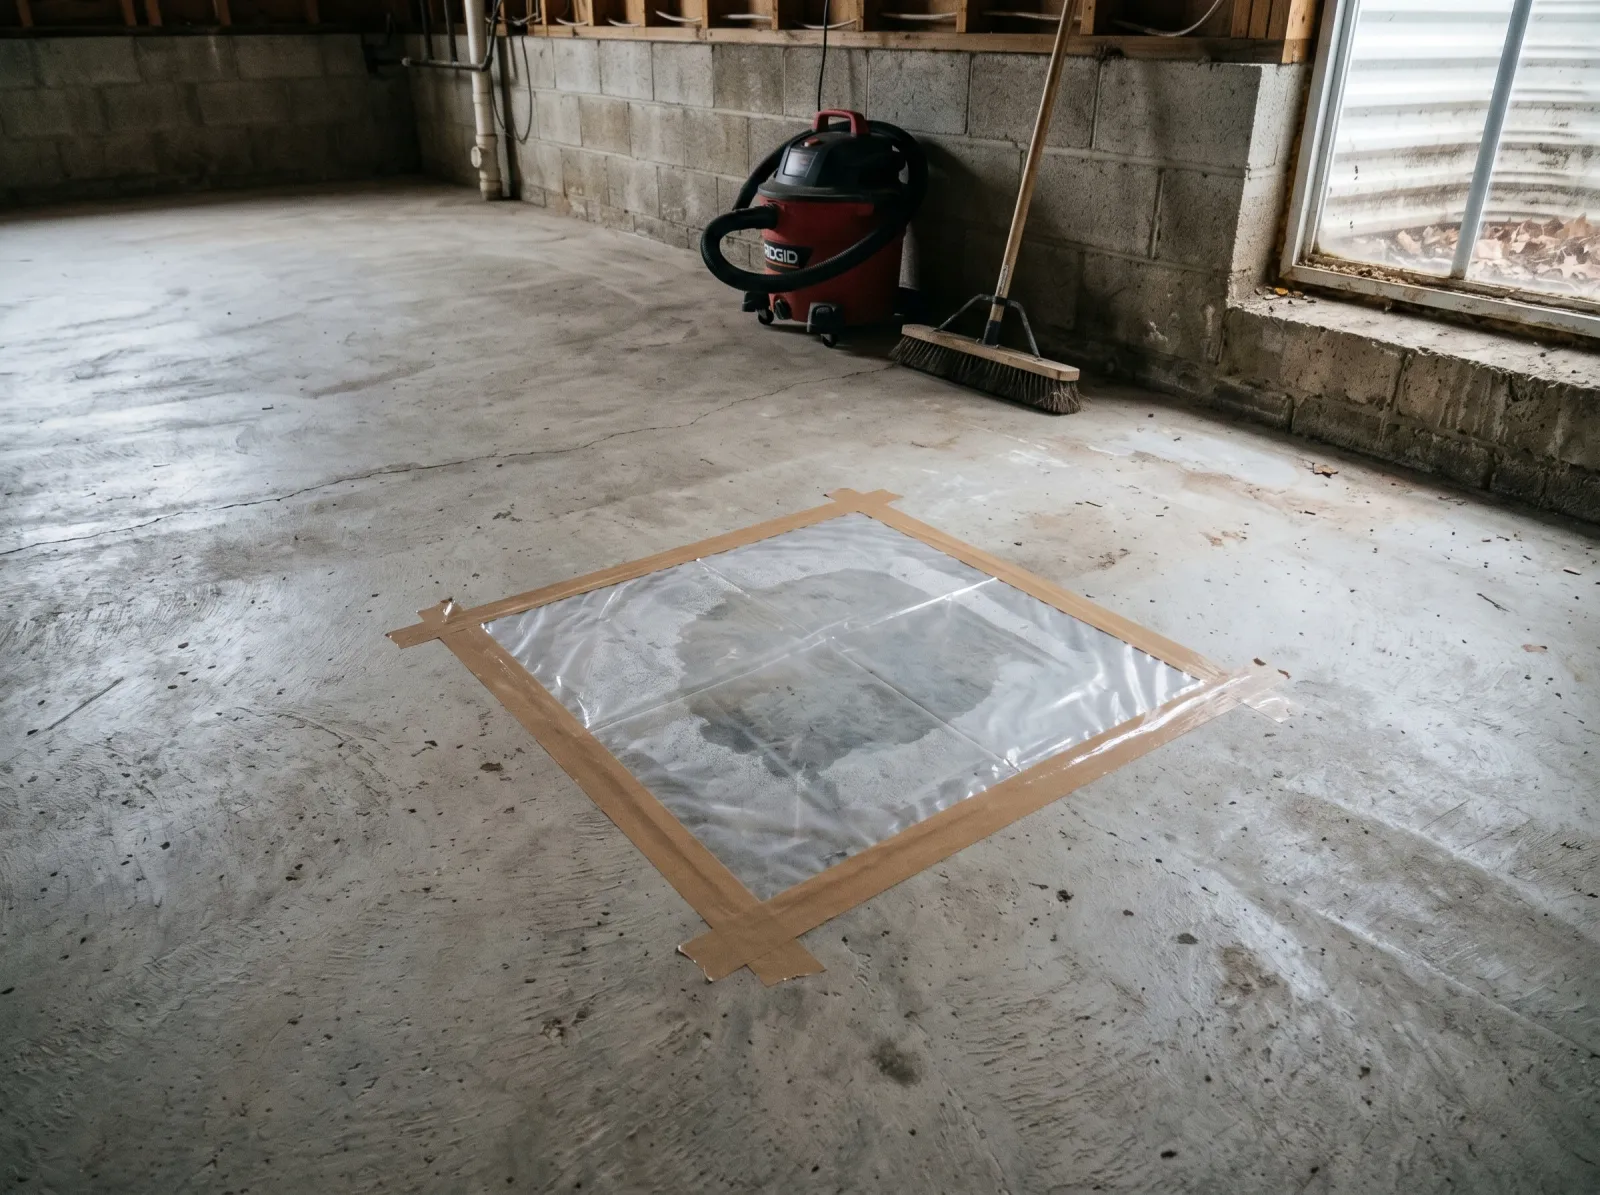
Floor swept and vacuumed, a square of plastic taped to the slab overnight to check for damp pushing up from below.
Get everything off the floor. Shelving, bins, the freezer, the spare fridge. Sweep, then vacuum with the shop vac. Basement slabs hold a layer of fine grit you won’t see until the roller drags it.
Now the test that saves the whole job. Tape a two-foot square of plastic sheeting flat to the slab, all four edges sealed, and leave it overnight. Lift it the next day. Water beads on the underside, or a dark damp patch on the concrete, means the slab is pushing moisture up from the ground. Paint will peel off that no matter how good your prep is.
Watch out for a slab that fails the test. Don’t paint it. Find the source first, whether that’s grading outside, a gutter dumping at the foundation, or a slab with no vapor barrier under it. A white crusty bloom on the concrete is efflorescence, which is salt left behind by moving water. The fix for that is the same as the masonry efflorescence fix: stop the water, then clean the salt off before anything goes on top.
Step 2 — Etch the Concrete So Paint Can Bite
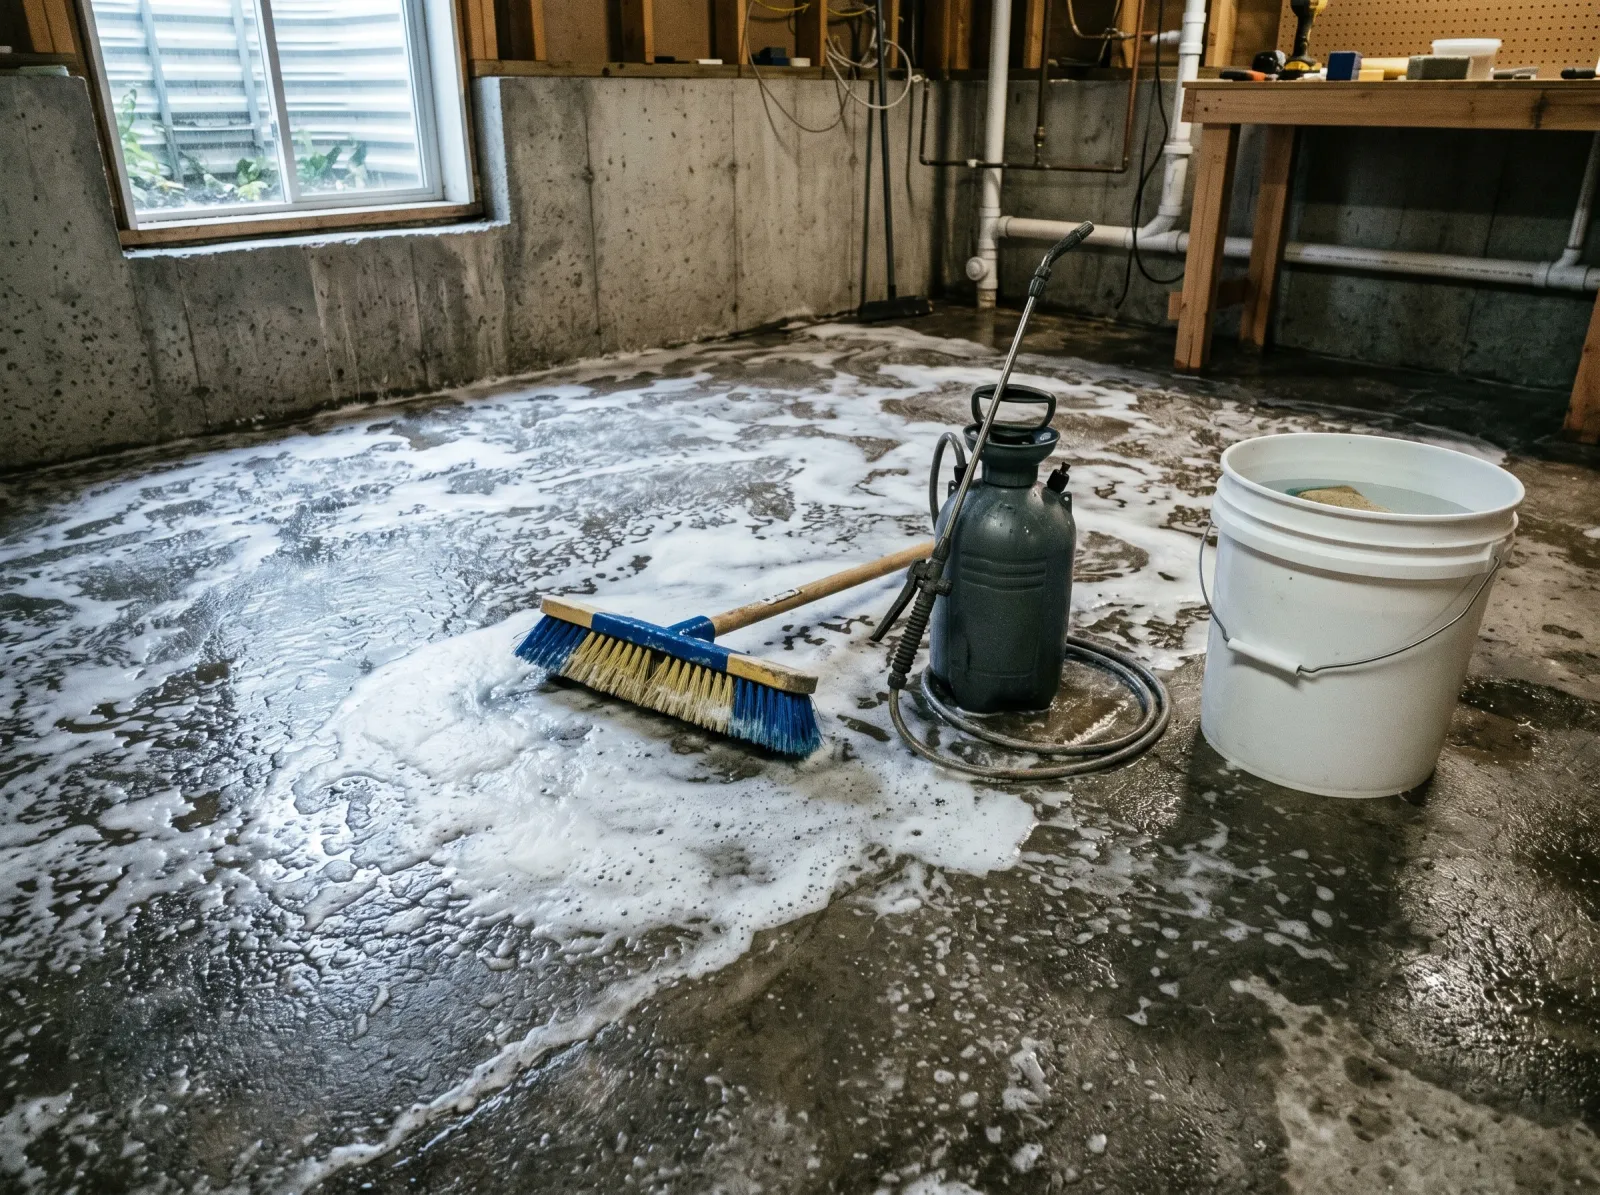
Slab etched with concrete cleaner, scrubbed, then rinsed and left to dry. The surface goes from slick to grippy.
Run a little water on the slab. If it beads instead of soaking in, the floor is too slick and the paint won’t grab. You etch.
Mix the etcher per the label. It opens the surface to a texture like fine sandpaper. Gloves, glasses, and respirator on first. Pour it on in sections, scrub it in with the stiff deck brush, and keep it wet the whole time it works. Then rinse hard with the garden sprayer and pull the water out with the shop vac.
The slab should feel like 120-grit sandpaper when it’s dry, not like polished stone. If it still feels slick in spots, etch those again. The residential concrete floor guide covers the substrate side in detail.
Watch out for rushing the dry. Etched concrete looks dry on top while it’s still damp inside. Give it a full 24 hours, longer in a cool basement, before primer touches it.
Step 3 — Fill Cracks and Prime
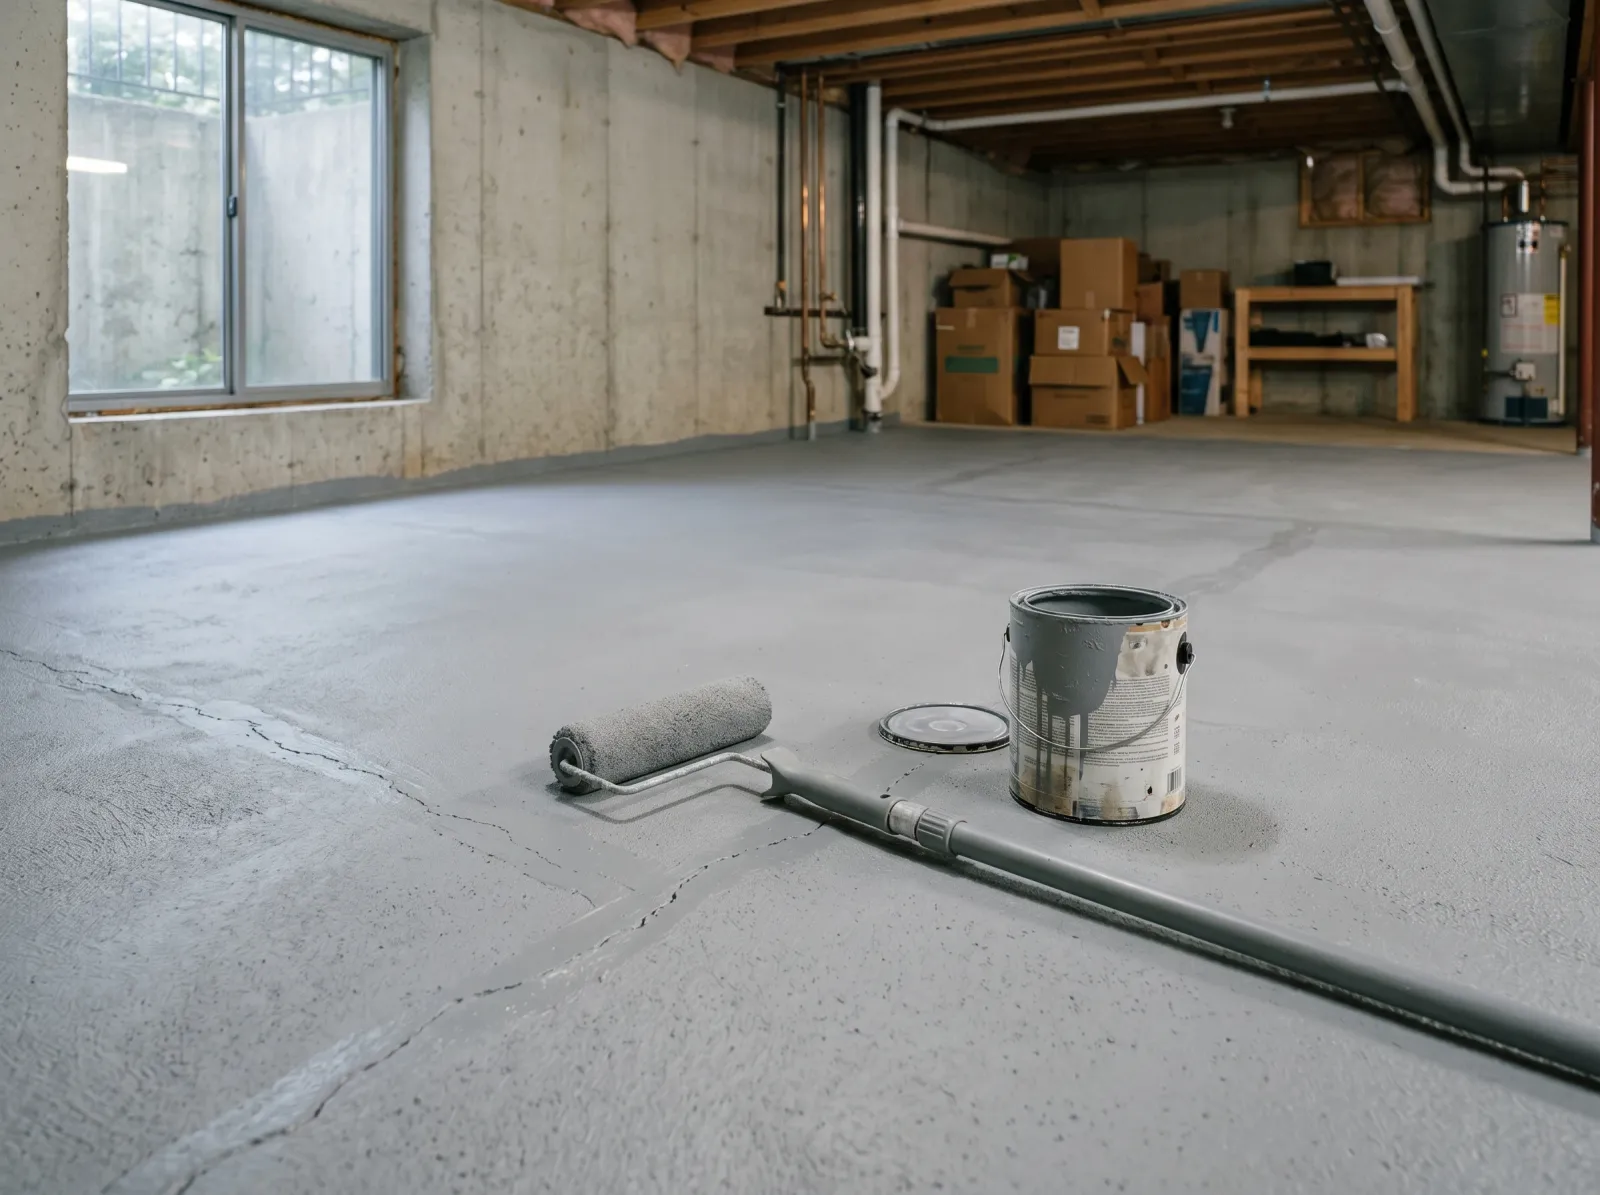
Cracks filled flush, a single coat of masonry primer rolled onto the bare slab. The dusty look is gone.
Fill any crack wider than a credit card with a concrete patch or a self-leveling sealant. Trowel it flush and let it cure the time on the tube. Hairline cracks you can leave; they’ll fill with the coating.
Cut in at the walls with the brush, then roll one even coat of masonry primer across the field on the extension pole. The primer seals the porous slab so your color coat builds a real film. One coat does it on most floors.
Watch out for skipping primer on a chalky slab. Rub the bare concrete with your hand. White powder on your palm means the surface is breaking down, and paint laid straight on it peels with the dust. Prime it.
Step 4 — Roll the First Coat
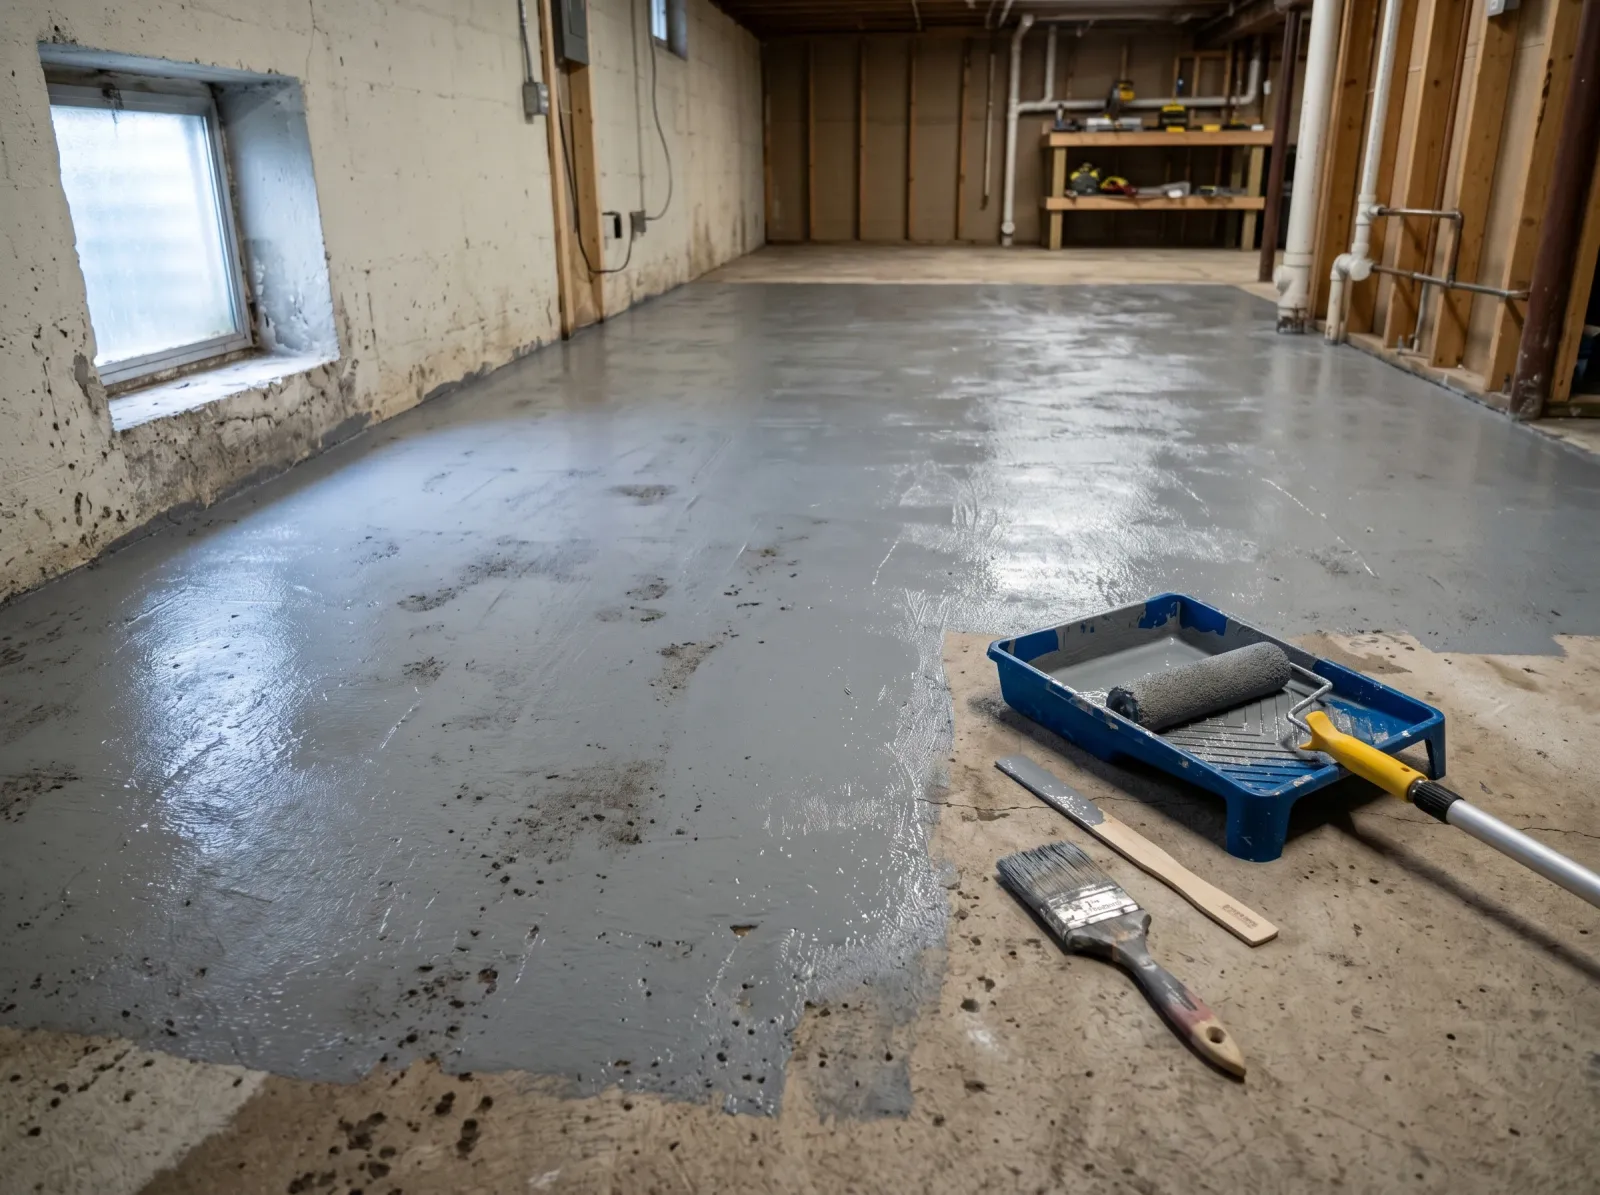
Cut in at the walls, rolled the field in sections toward the stairs. First coat looks thin. It always does.
Tape the bottom of the walls and tuck plastic against the base. Cut in a 3-inch band along every wall with the angled brush. Then load the roller, roll off the excess, and work the field in sections.
Roll toward your exit, the stairs or the door. Paint yourself into a corner on a floor and you’re standing on wet coating for an hour. Keep a wet edge, overlap each pass a few inches, and don’t stop in the middle of the floor. Stopping mid-floor is how you get lap marks, and lap marks show the second a side light hits the slab.
The first coat looks thin and patchy. That’s normal on concrete. Don’t fight it by going back over half-dry areas; you’ll drag the film and leave roller marks. Let it dry the recoat time on the can.
Watch out for thick puddles in low spots of the slab. Concrete is never dead level. Roll those areas out thin or they stay tacky for days and dent under the first thing you set down.
Step 5 — Second Coat, Then Leave It Alone
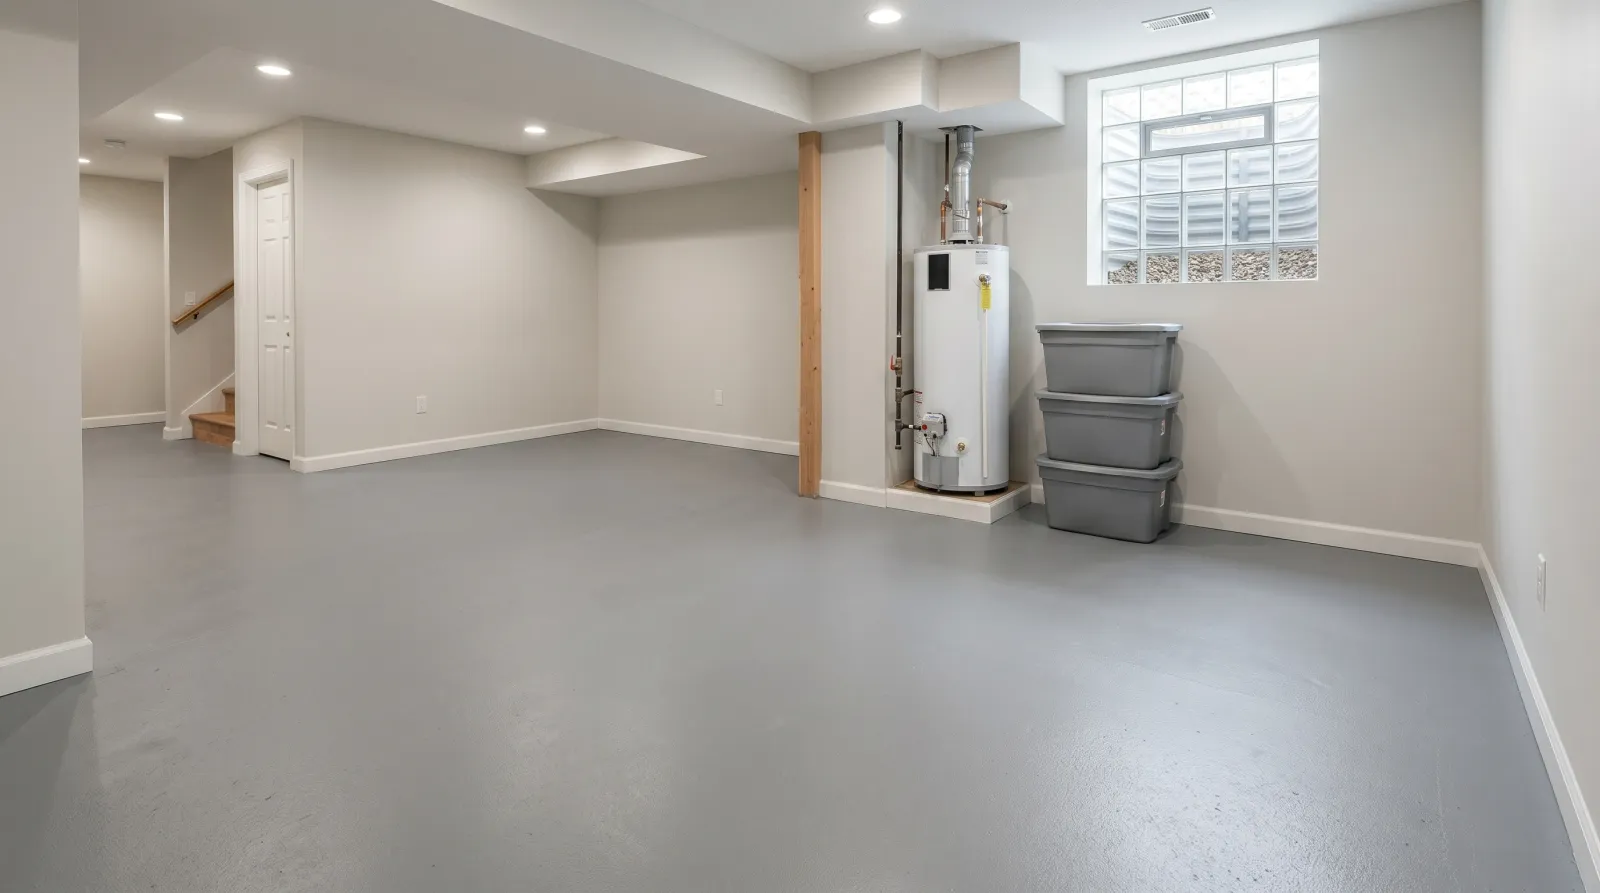
Second coat down, fully cured, storage bins and the water heater back where they belong.
Second coat the next morning. Two coats. Always two coats. One coat on concrete reads thin and wears through at the traffic lanes inside a year. The second coat is what gives you the film thickness that takes the abuse.
Same routine: cut in, roll the field, work toward the door. The second coat covers even and the patchiness from coat one disappears.
Then the hard part for most people, which is waiting. Walk on it gently at 24 hours. Light bins back at 3 to 4 days. The freezer and the shelving wait a full 7 days. Floor coatings cure slower than wall paint because the film is thick and the basement runs cool.
Common Mistakes
- Skipping the moisture test. This is the number-one reason basement floor paint peels. A slab pushing damp from below will reject any coating on earth. Tape the plastic square down, wait a day, and read it before you buy paint.
- Painting a slick or sealed slab without etching. Paint needs tooth to grab. A troweled or previously sealed floor is too smooth, and the coating peels in sheets at the first scuff. Etch until water soaks in instead of beading.
- Rolling over dust and grease. Basement floors collect oil from the water heater, the furnace, and whatever leaked off the lawn mower. Paint won’t stick to grease. Degrease the spots, then vacuum the whole slab.
- One coat to save a day. Concrete drinks the first coat. One coat wears through at the stair landing and the workbench by next winter. Two coats, every time.
- Heavy items back too soon. The film is touch-dry in a day but soft for a week. Set a steel shelf leg on it at day two and you’ll pull a divot when you move it. Wait the full seven days for anything with weight.
Cure Schedule
| Time after the second coat | What’s safe |
|---|---|
| 4 hours | Touch dry, don’t walk on it |
| 24 hours | Light foot traffic, sock feet |
| 3–4 days | Light bins and boxes back |
| 7 days | Heavy storage, shelving, freezer |
| 30 days | Full cure, scrub and wet-mop |
Maintenance and Touch-Ups
A two-coat floor paint or water-based epoxy holds five to ten years in a basement before the traffic lanes start to dull. Garage-grade epoxy goes longer but you don’t need it down here.
Sweep regularly and wet-mop once it’s past 30 days cure. For a wear spot, scuff-sand with 120-grit, wipe clean, and dab leftover paint with a small roller, not a brush. A brush leaves a different texture than the rolled floor and the patch shows.
Keep a quart of the color in the basement with the date on the lid. Floor paint settles hard, so stir it well before any touch-up.
Cost Breakdown
| Item | $ |
|---|---|
| Floor paint or water-based epoxy, 2 gallons | $80–$180 |
| Concrete etcher / masonry cleaner | $15–$30 |
| Masonry primer, 1 gallon | $25–$45 |
| Crack filler / patch | $10–$20 |
| Roller, sleeves, brush, tray | $30 |
| Tape and plastic sheeting | $15 |
| Total | $175–$320 |
Lower end is 1-part floor paint on a small dry slab that skips the separate primer. Upper end is a water-based epoxy kit on a 600 square foot floor that needs the full prep.