How to Paint Built-In Shelves
Painting built-ins the right way: how to prep stained or MDF shelves, why the back panel goes first, and the cure time that keeps books from sticking.

Okay, so you’ve got a wall of built-in shelves, and you’ve wanted to paint them for about two years. The reason you haven’t is the same reason everybody hasn’t: it looks like a nightmare. Inside corners everywhere. A back panel you can barely reach. Shelves that, in your mind’s eye, stay tacky forever and glue your favorite hardcovers to the wood.
None of that has to happen. Built-ins are fiddlier than a flat wall, but they’re not hard. The whole job comes down to two things most guides skip: using paint that cures hard, and giving it time to do it.
Here’s the thing about painting built-ins. The order matters more than on almost any other project, because you’re working in a box. Back panel first, frames last, shelves out and flat. Do it in the wrong order and you’ll be cutting in around a color you already painted.
What You’ll Get
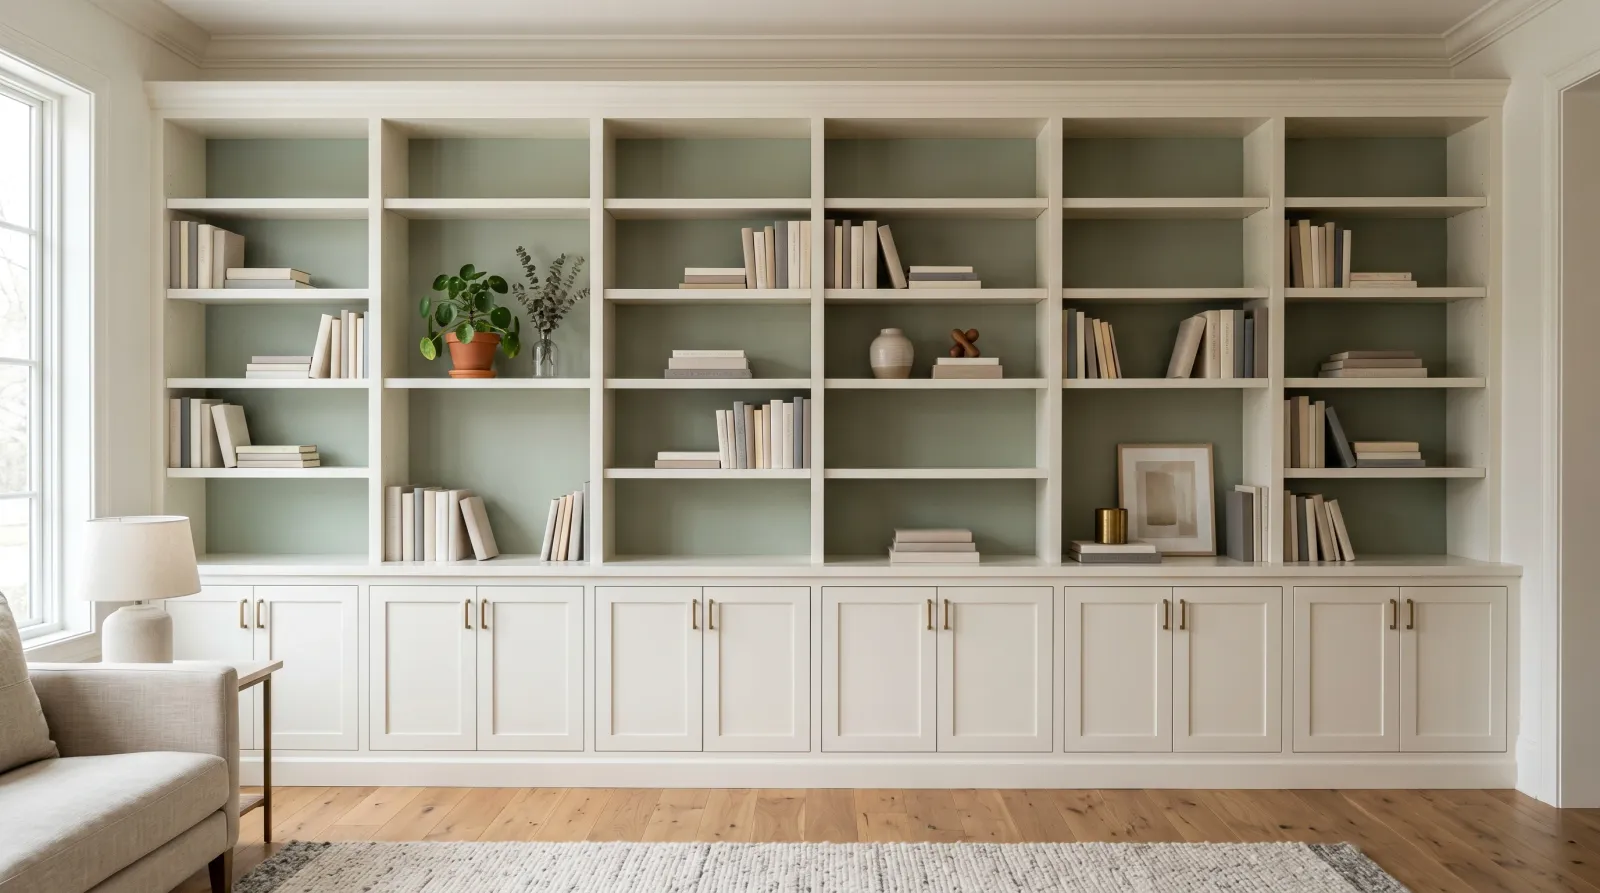
A wall of built-in shelves that looks like custom millwork instead of a tired oak relic from 1995. Painting the recessed back a contrast color turns it into a feature.
Honest Take on Difficulty and Time
This sits one notch above painting a room. The painting is easy. The prep and the awkward geometry stretch it out.
Realistic time for a standard floor-to-ceiling wall unit: a full weekend of active work, then a week of cure before you reload it. Saturday is empty-clean-fill-sand-prime. Sunday is two coats of enamel. The following weekend, shelves and books go back.
If your shelves are stained or varnished (most older built-ins are), the prep is the time sink. A slick finish has to be scuffed and primed or your paint won’t hold. Raw MDF or bare wood is faster. For material-specific prep, the MDF painting guide and the guide to painting over stained wood go deeper.
What You’ll Need
Paint and Primer
The most important choice on this whole project: use cabinet enamel, not wall paint. Cabinet enamel (BM Advance, SW ProClassic, INSL-X Cabinet Coat) is a waterborne alkyd that cures rock-hard. Wall paint stays soft, and soft paint on a horizontal shelf means book spines stick and dent. This is the mistake that ruins built-ins, and it’s invisible until a month later.
Sheen: satin or semi-gloss. Both wipe clean and resist scuffs. Flat shows every fingerprint and won’t clean up. Torn between sheens? The sheen guide lays out the trade-offs.
You’ll also want a bonding primer (INSL-X Stix or Zinsser Bulls Eye 1-2-3 Plus) for any slick old finish, and a shellac-based stain blocker (Zinsser BIN) only if the wood is knotty pine or a dark stain that might bleed through. Bonding primer grips the glossy surface so your topcoat has something to hold onto; see what bonding primer is for. For SKU-level picks, the best trim and built-in paint round-up covers it.
Tools
A 2-inch angled brush for frames, edges, and corners. A 4-inch foam mini-roller for the flat faces and the back panel. A small artist’s brush for the inside corners a roller can’t fit into. A work light, because built-ins are dark inside and you’ll miss spots without one.
The foam roller is where the smooth finish comes from. A regular nap roller leaves stipple; foam lays the enamel down flat. Picks live in the best foam rollers round-up.
Step 1 — Empty, Clean, and Pull the Shelves
Take everything off and out. Pull every adjustable shelf you can. Painting a shelf flat on a drop cloth is faster, smoother, and dripless compared to painting it wedged inside the unit. Label each shelf and its slot with painter’s tape (LEFT-3, RIGHT-2). Shelves are rarely cut identical, and one that fit perfectly may not slide into a different slot.
Now clean. Built-ins near a kitchen or fireplace carry a grease and dust film you can’t see. Wipe everything with a TSP substitute, rinse with clean water, let it dry. Watch out for skipping this on a unit that’s been up for years. Paint over a greasy film and it peels no matter how good your primer is.
Fill old shelf-pin holes you won’t reuse and any dents with wood filler, scrape flush, let it dry, then sand smooth with 220.
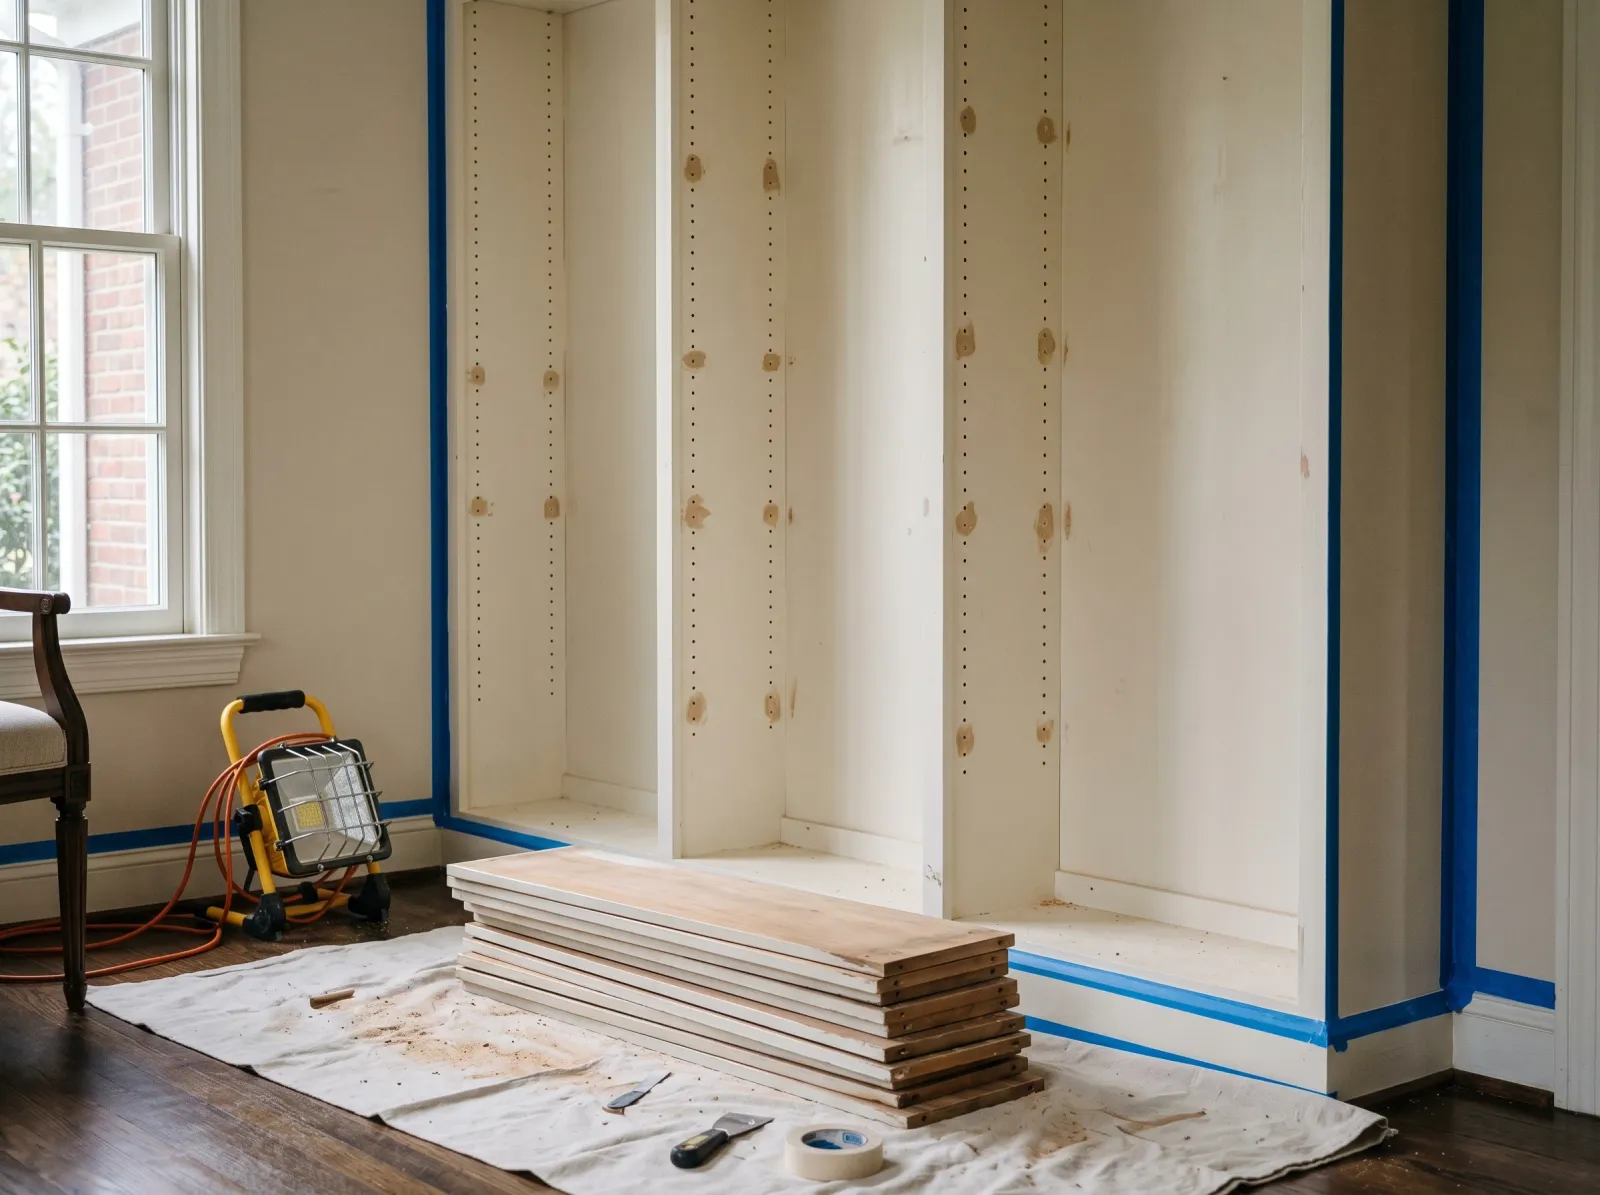 Shelves out and labeled, holes filled, everything taped off before a drop of paint.
Step 2 — Scuff-Sand and Tape Off
Scuff every surface with a 220-grit sanding sponge until the sheen goes dull. You’re not stripping anything, just roughing the gloss so primer can bite. On flat shelf edges, keep the sponge on a block so you don’t round the corners. Vacuum the dust, wipe with a tack cloth.
Tape the wall around the unit and the floor line. Press the edge down hard with your fingernail so paint can’t bleed under it onto the wall.
Watch out for raw MDF edges. The cut edges drink paint and swell. Hit them with a thin pass of primer and a light 220 sanding before the next coat, or they’ll stay fuzzy.
Step 3 — Prime
One coat of bonding primer on the carcass and the removed shelves laid flat. Roll the big flats with the foam mini-roller, brush the corners and routed details with the angled brush. INSL-X Stix and Zinsser 1-2-3 Plus both want one solid coat.
If you’ve got knotty pine or a dark stain that could bleed, use Zinsser BIN instead, two thin coats. BIN locks tannins and pigment so they don’t ghost up through your white. Raw knots will bleed a brown halo through latex months later if you don’t block them first (the bleeding-knots fix explains why).
Let the primer dry per the can (a couple of hours for Stix, overnight is safer). Knock down any nibs with a light 220 pass and tack-cloth again.
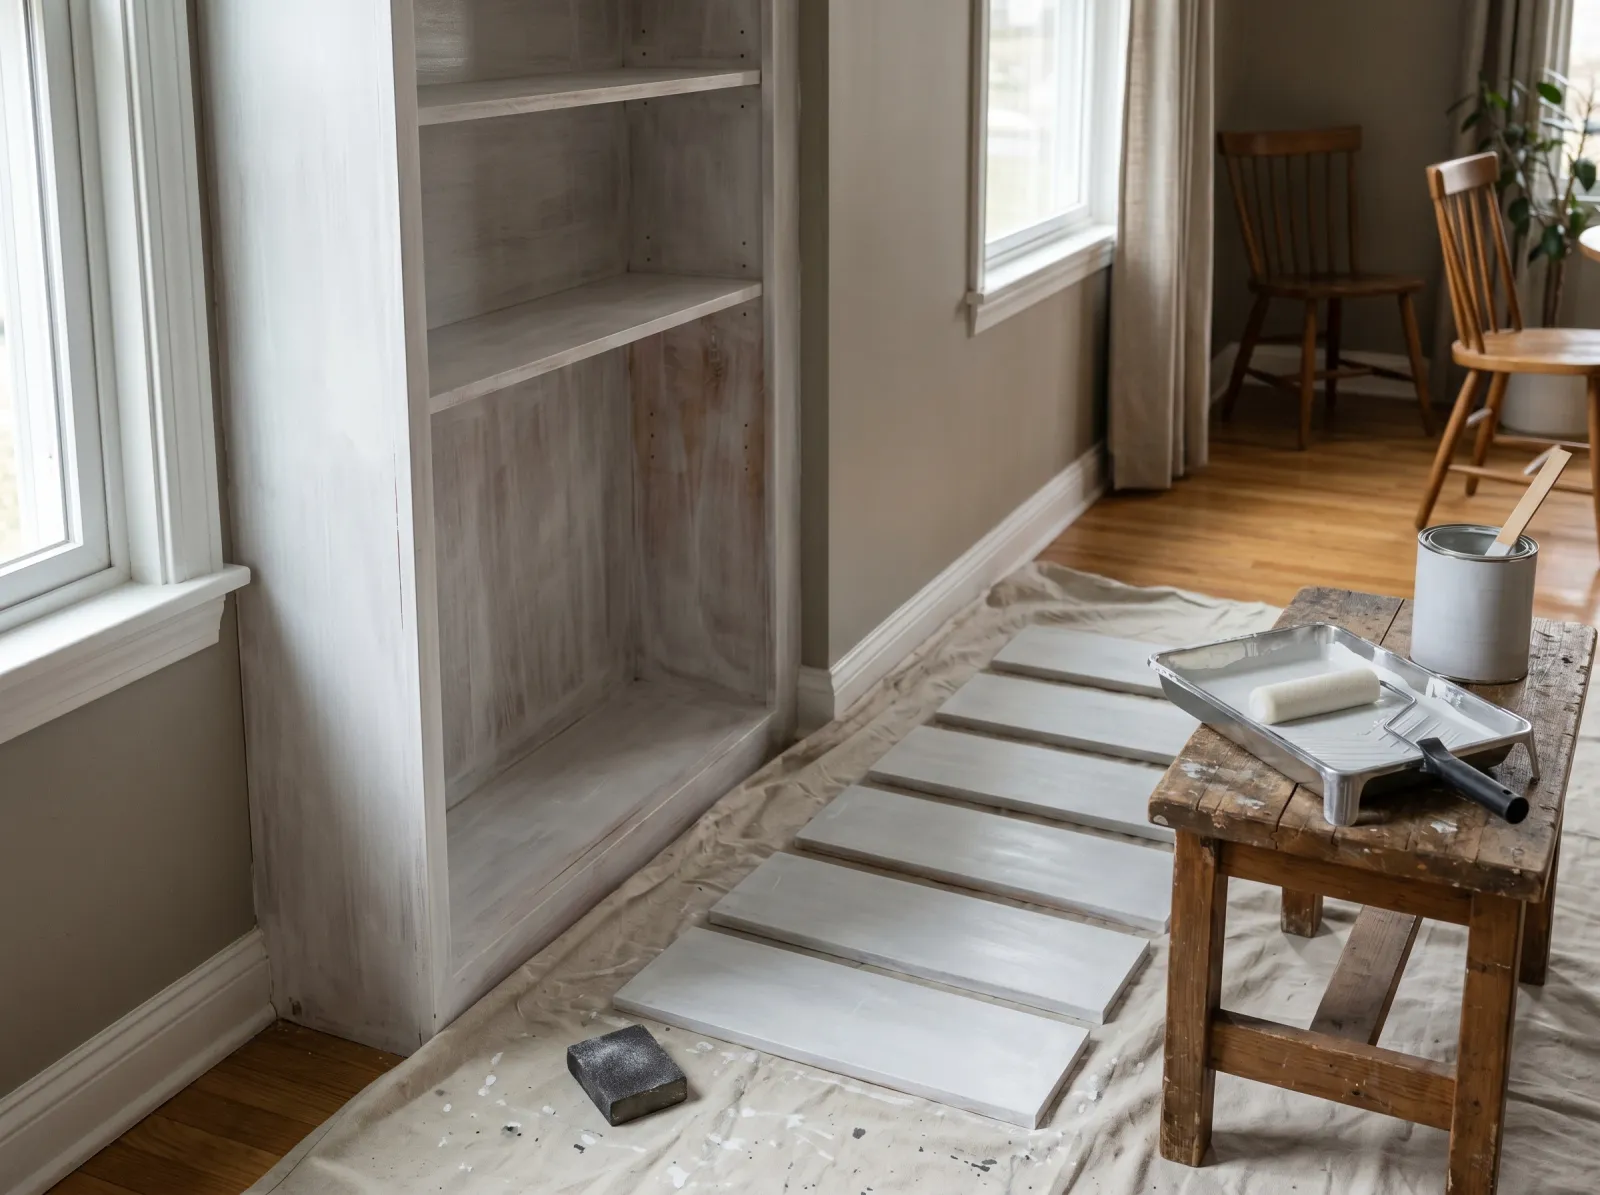 One coat of bonding primer on the carcass and the shelves drying flat alongside.
Step 4 — Paint the Back Panel First
This is the order step everyone gets backward. If you’re doing a contrast color on the recessed back panel (sage, navy, soft clay are the popular ones), paint it now, before the frames. Cut it in and roll it. When you paint the frame color afterward, it covers any back-panel overspill at the inside edge. Do it the other way and you’ll be cutting a clean line around a finished frame, which is miserable.
Going one color throughout? Still paint the back first. It’s the hardest surface to reach, and you want your steady hand on it while it’s fresh. Use the artist’s brush for the tight seam where the back panel meets each cubby side, the foam roller for the open surface.
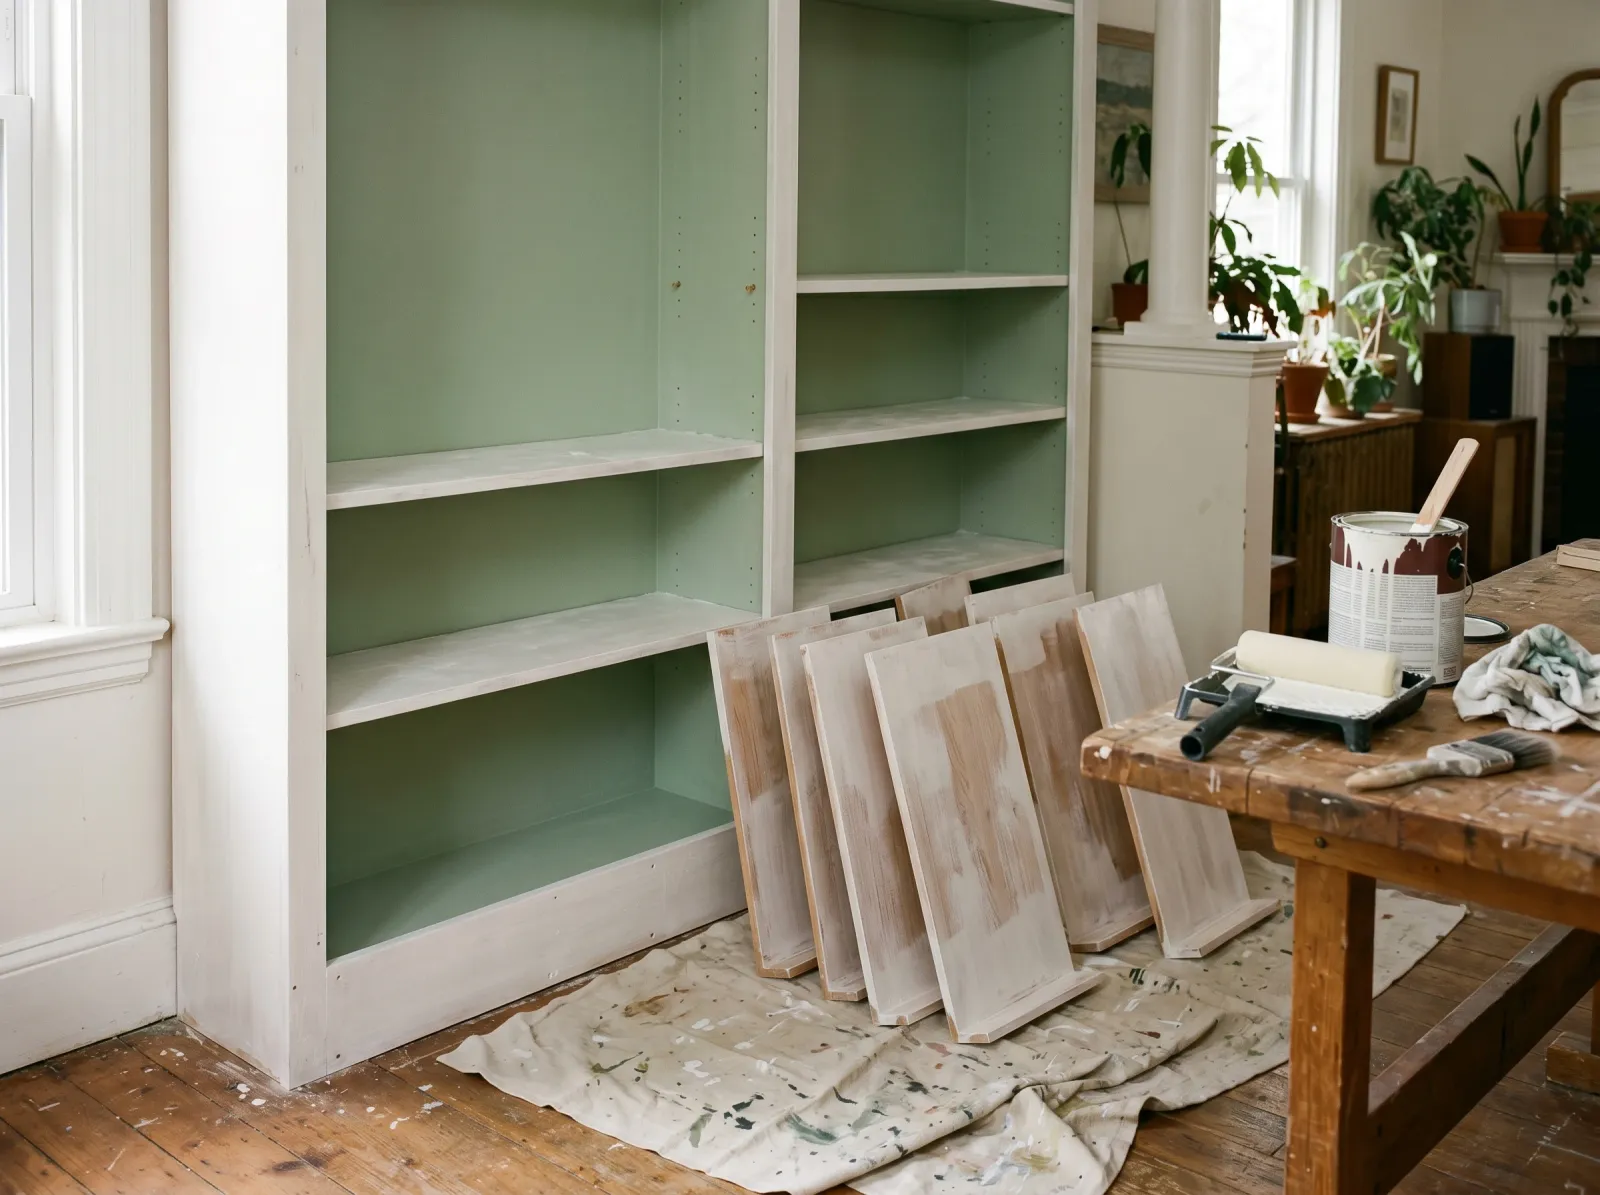 Back panel goes on first, then the first coat of enamel on the frame and sides.
Step 5 — First Coat on the Frame and Shelves
Now the carcass frame, the face frames, the sides, and the shelves laid flat. Add Floetrol to the enamel at about 5% (a glug per quart) so brush marks self-level out instead of drying as ridges.
Two thin coats beat one thick one. A thick coat sags on the vertical frame faces and never cures as hard. Dip the brush a third of the way, tap once, brush with the grain. Roll the flat faces with the foam roller.
Watch out for drips pooling at the inside corners and along the bottom edge of each shelf slot. Built-ins have dozens of inside corners and they all collect paint. Check them with your work light a few minutes after coating and brush out any sag before it skins over.
Step 6 — Second Coat, Then Cure Flat
Let the first coat dry the full recoat time on the can (BM Advance wants about 16 hours; read it). Light scuff with 220 if it feels rough, tack-cloth, then the second coat the same way.
Leave the shelves drying flat, faces up, not stacked. Stacked shelves stick together and you’ll peel the finish separating them.
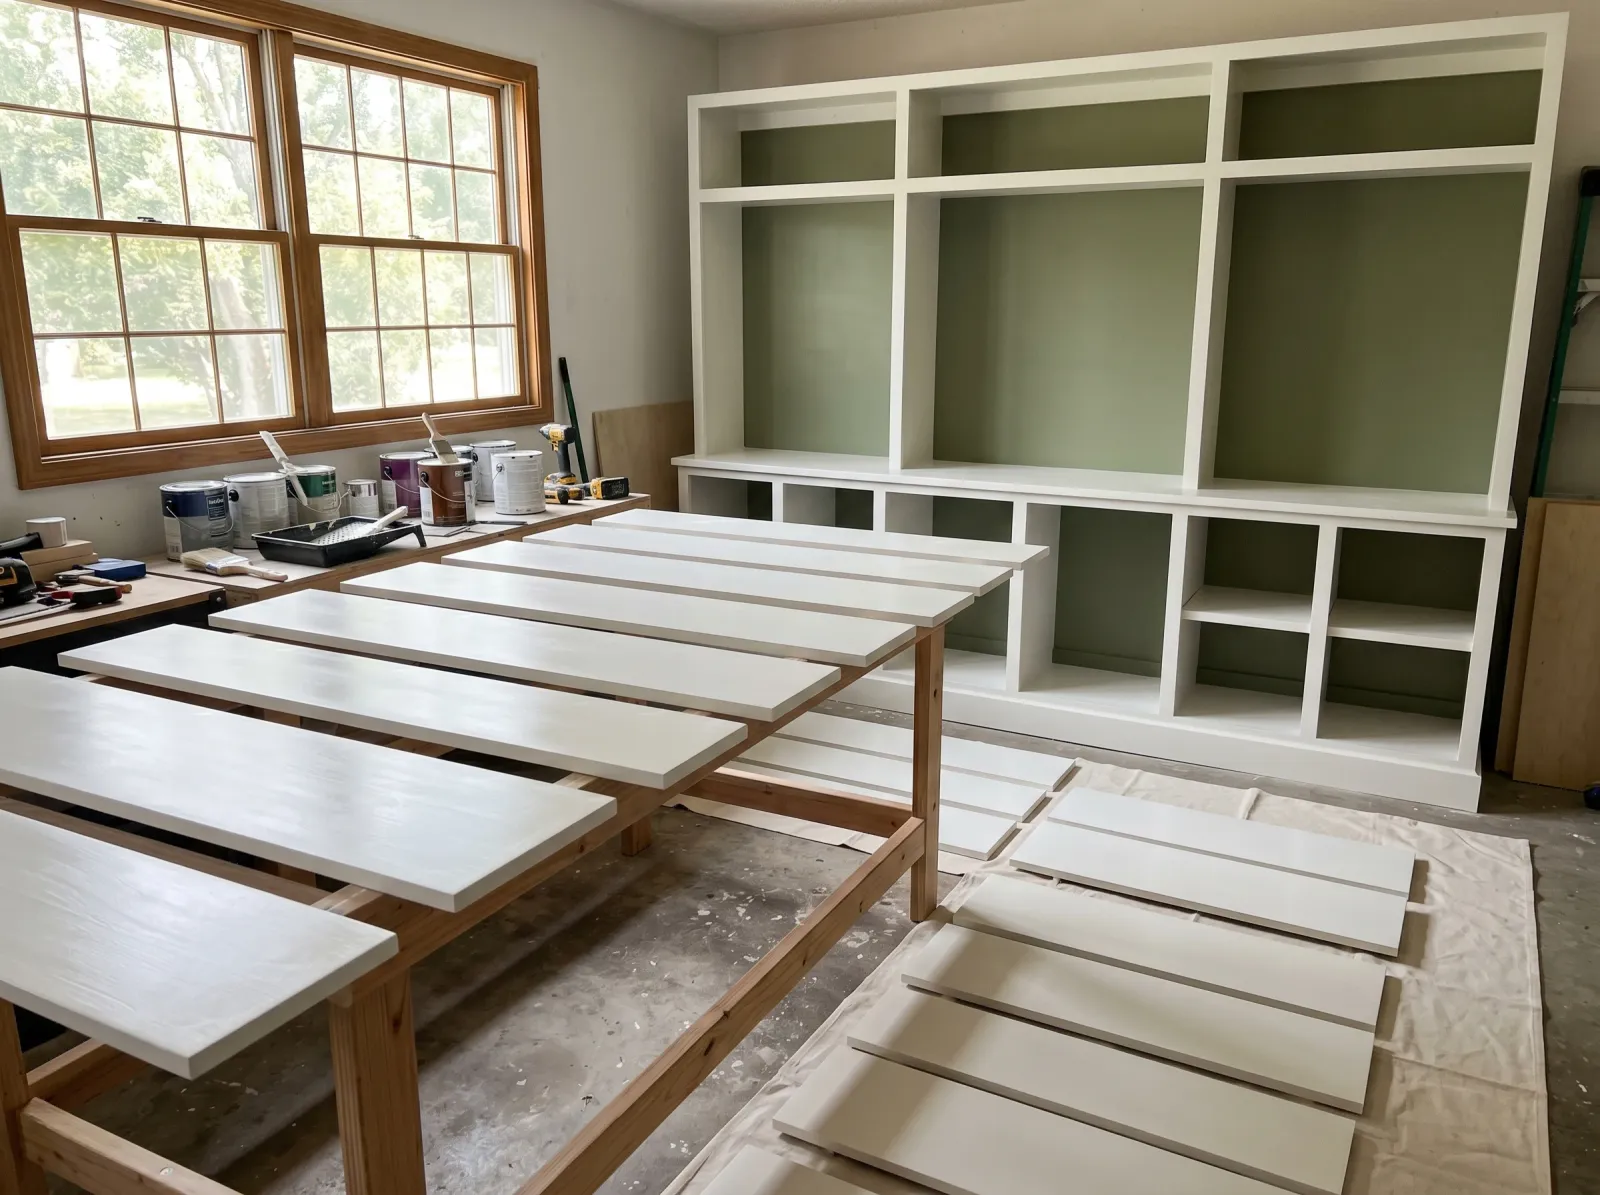 Second coat on everything. Shelves cure flat and separate, never stacked.
Then wait. Cabinet enamel is touch-dry in hours but soft for days. Reinstall the shelves after a day, then give it a full week before the books go back.
Common Mistakes
- Using wall paint instead of cabinet enamel. Wall paint never fully hardens on a flat shelf. Books stick, spines leave dents, and there’s no fix but a scuff and a recoat with real enamel. This is the number-one built-in failure.
- Loading books back too soon. Touch-dry is not cured. Put a heavy book on a two-day-old shelf and you’ll lift it in a month with a paint chip stuck to the cover. Wait the full week.
- Skipping the degrease. A greasy film on an old unit (especially near a kitchen) makes paint peel no matter how good the primer is. Wipe with a TSP substitute first.
- Painting the frames before the back panel. You’ll spend an hour cutting a clean line around finished frames instead of letting the frame color cover the back-panel edge. Back first, always.
- Stacking shelves while they cure. They fuse together and you tear the finish prying them apart. Dry them flat and separate, faces up.
- Not blocking knots on pine built-ins. Latex over a raw knot bleeds a brown halo within months. Spot-prime knots with shellac-based BIN before anything else.
Cure Schedule
| Time after final coat | What’s safe |
|---|---|
| 1 hour | Pull the tape at a 45-degree angle |
| 4 hours | Touch dry; don’t set anything on it |
| 24 hours | Reinstall the shelves, gently |
| 7 days | Load books and objects back on |
| 30 days | Full cure; wipe clean with mild soap |
Maintenance and Touch-Ups
Cabinet enamel on built-ins holds up 8 to 12 years before a refresh. The high-wear spots are the front shelf edges and the frame at hand height.
For a chip or scratch, dab the original color on with a small artist’s brush. Don’t feather across a whole shelf face; the patch reads brighter than the cured paint and you’ll see the seam in side light. Keep the leftover quart labeled with the color and code from the lid. A scuff from a book spine usually wipes off with a damp microfiber cloth.
Cost Breakdown
| Item | $ |
|---|---|
| Cabinet enamel, 1 quart | $30 |
| Bonding primer, 1 quart | $18 |
| Foam roller, sleeves, angled brush | $30 |
| Wood filler, sanding sponges, tack cloth | $15 |
| Tape, drop cloth, Floetrol | $20 |
| Total | $113 |
That’s mid-tier (BM Advance, INSL-X). Budget enamel and a basic kit runs closer to $70. Raw MDF or bare wood that skips bonding primer knocks $18 off.
A Specific Recommendation
Standard older wall unit with a stained or varnished finish: a quart of Benjamin Moore Advance in satin, a quart of INSL-X Stix to prime, a Wooster Silver Tip brush, and a foam mini-roller. Degrease and scuff Saturday morning, prime that afternoon, two coats of Advance Sunday. Reinstall shelves the next weekend, books a few days after. The unit that looked dated for years now looks built-in on purpose.