How to Paint Over Varnished or Shellacked Trim
How to paint over varnished wood trim so it actually sticks: the de-gloss step, the bonding primer that holds, and the shellac trap that peels in a year.

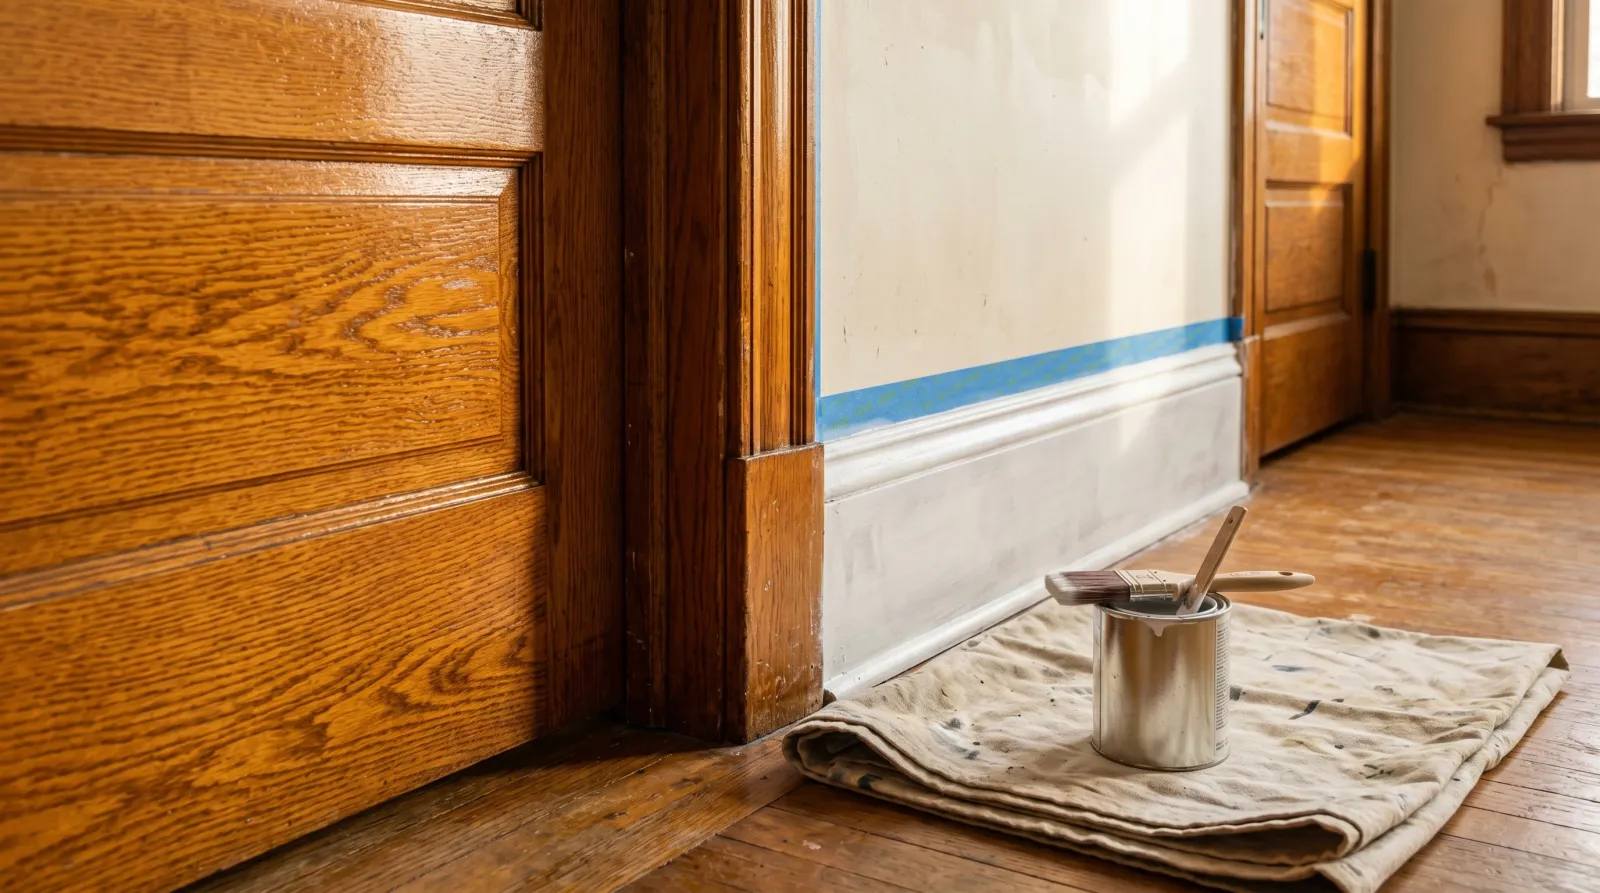
Varnished trim is built to repel things. That’s the whole job of varnish. So when you brush paint straight onto it and watch it peel off in a sheet six months later, the can didn’t lie. You skipped the two steps that make paint bite a slick surface, and the trim did exactly what it was sealed to do.
TL;DR
- Clean first: degrease with TSP substitute or Krud Kutter. Old trim holds furniture polish and hand grease
- De-gloss: scuff-sand with 150-grit until the shine is gone everywhere. Liquid deglosser for carved profiles you can’t reach
- Primer: a bonding primer, not wall primer. INSL-X Stix or Bulls Eye 1-2-3. BIN shellac if there’s tannin or dark stain to block
- Paint: waterborne alkyd or acrylic-urethane trim enamel, two coats
- Cure: 7-14 days before you scrub or lean things against it
- Skill: medium. The prep is the whole job
What Varnished and Shellacked Trim Actually Is
Varnish, polyurethane, and shellac are all clear sealing films laid over wood to protect it and show off the grain. Varnish and poly are oil- or water-based resins that cure into a hard, glossy, chemical-resistant shell. Shellac is older: a resin dissolved in alcohol, brushed on thin, common on trim and woodwork in homes built before the 1950s.
All three share one trait that matters here. They’re slick on purpose. The surface is sealed tight so water, dirt, and stains slide off instead of soaking in. Paint slides off the same way unless you give it something to grab.
That’s the entire problem this guide solves. Not the paint. The grip.
Why Varnish Fights Paint
Drywall is porous. Bare wood is porous. Paint sinks a little way in and locks on. A cured varnish or shellac film has no porosity left. It’s a closed glossy plane, and fresh paint sitting on top of it has nothing but surface tension holding it down.
There’s a second problem on older trim. Decades of furniture polish, hand oils around door handles, and kitchen grease near the stove all sit on that slick surface. Paint over that and you’re bonding to the grease, not the wood. It lets go at the first knock.
And if the varnish has gone amber and the wood under it is oak or another tannin-heavy species, going white means a third issue: bleed. The old stain and the wood’s natural tannin can ghost up through a water-based primer as a yellow halo. That one’s solved at the primer step.
Three things to beat. The gloss, the grease, and on dark trim, the bleed.
Step 1: Clean Before You Touch Sandpaper
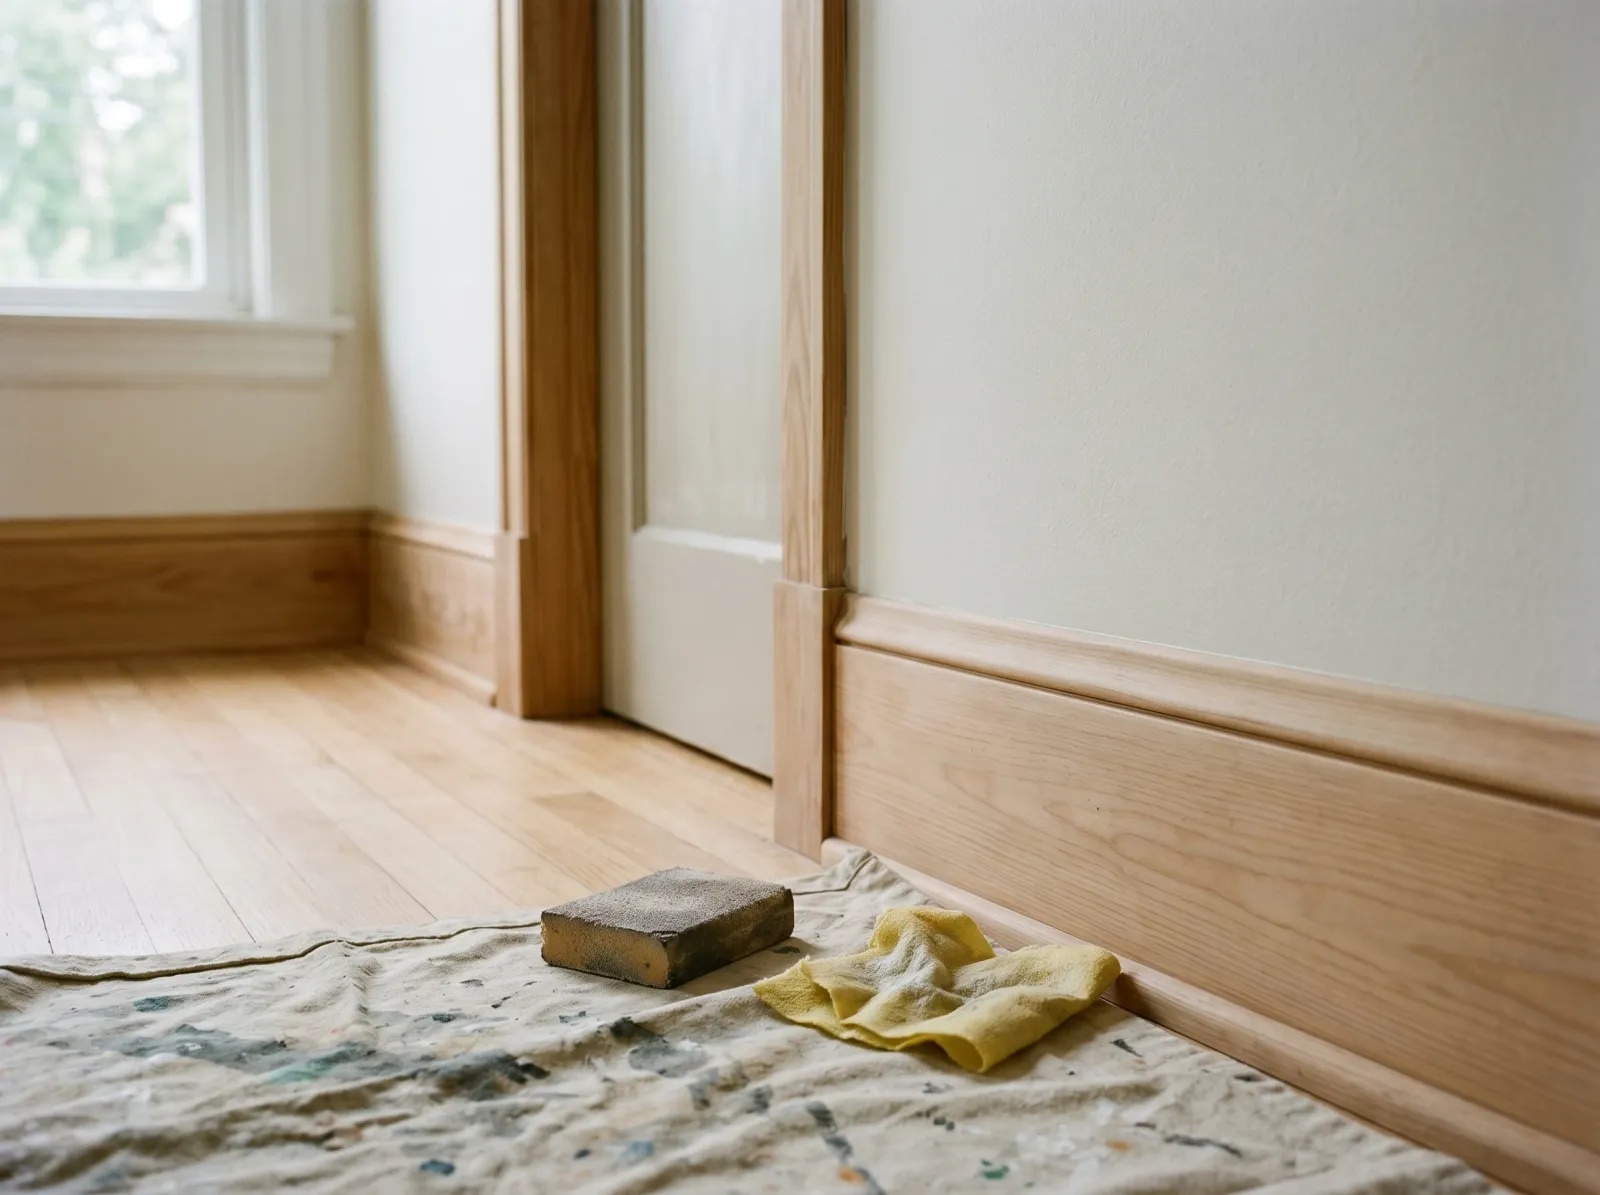
Degreased first, then 150-grit until the whole surface reads dull. No shine left anywhere.
Clean comes before sand. If you sand greasy trim first, you grind the grease and polish down into the scratches you just made, and now it’s locked in deeper than before.
Wipe every surface with a TSP substitute solution or Krud Kutter on a damp rag. Work the spots that get touched: the door casing edges, the top of the baseboard where dust and polish collect, anywhere near a stove or a light switch. Let it dry an hour.
This step is invisible and people skip it constantly. Then they wonder why the paint let go in a perfect rectangle right where the cabinet sat against the trim. That was furniture polish.
Step 2: De-Gloss the Surface
Now kill the shine. This is the step that makes everything after it work.
Scuff-sand the whole surface with 150-grit. You’re not stripping the varnish back to wood. You’re cutting the gloss to a uniform dull haze so the primer has tooth to bite. Sand with the grain, not across it. When you’re done, every surface should look flat and matte, no glossy patches hiding in the corners. Glossy patches are where the paint will fail first.
Then tack-cloth every speck of dust. Sanding dust under primer is a bond-breaker just like grease.
Carved trim, fluted casings, dentil molding, and bead profiles are the catch. You can’t get sandpaper into a tight bead cleanly. For those, use a liquid deglosser like Klean-Strip Easy or M-1. Wipe it on with a rag, let it flash off, and it chemically softens and dulls the gloss without sanding. I use it on the profile and sand the flats. Belt and suspenders on detailed Victorian trim.
If you want the full reasoning on grit choice and why direction matters, the sandpaper guide breaks it down.
Step 3: Fill, Caulk, and Spot-Check
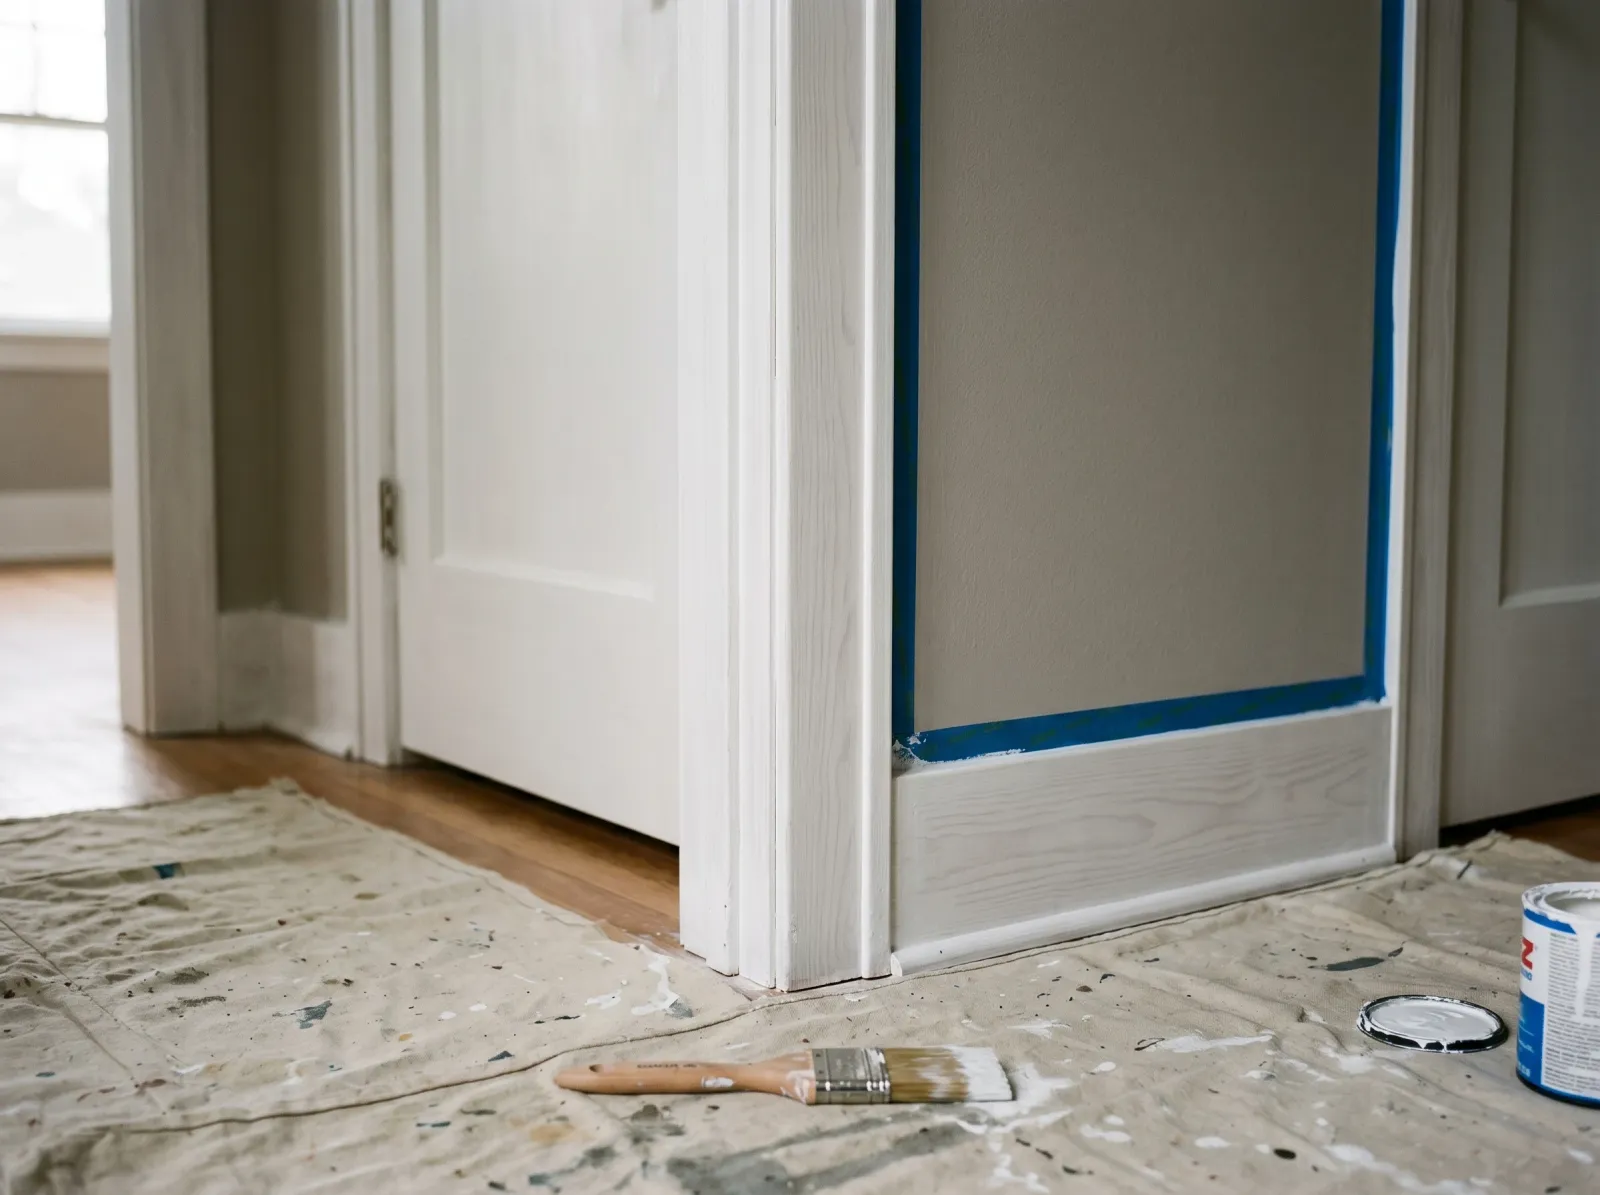
One thin coat of bonding primer. It bites the slick old finish so the paint has something to hold.
Before primer, deal with the damage. Dents, gouges, and old nail holes get paintable wood filler pressed in with a 1.5-inch flex putty knife, slightly overfilled, sanded flush once dry. Two-part filler for anything deep; latex filler shrinks and you’ll see the dimple later.
Caulk the gaps where casing meets the wall and where two pieces of trim meet at a miter. Paintable acrylic caulk, tooled flat with a wet finger. A clean caulk line is what separates a repaint that looks like a pro did it from one that looks patched.
Test for lead first if the home was built before 1978. Old varnished trim is exactly the kind of surface that holds lead paint underneath. A $15 test kit settles it. If it’s positive, RRP rules apply: wet-sand only, contain the dust, P100 respirator, HEPA cleanup. Don’t dry-sand lead.
Step 4: Prime With a Bonding Primer
This is the second half of the grip problem, and the place people reach for the wrong can.
A standard PVA wall primer is built to seal porous drywall. It will not grip a slick scuffed varnish surface any better than the paint would. You need a bonding primer, the kind formulated to stick to glossy, hard-to-coat surfaces.
- INSL-X Stix is my default. Urethane-acrylic, bonds to glossy trim, tile, and even glass. Recoats in a few hours.
- Zinsser Bulls Eye 1-2-3 is the cheaper, easier-leveling option. Fine on most scuffed varnish.
- Zinsser BIN (shellac-based) when there’s tannin or dark stain to block. Going white over old amber-varnished oak, BIN seals and bonds in one step and dries in 45 minutes. It blocks the bleed that walks through water-based primers. The trade-off is the alcohol smell and fast flash time, so work in sections.
One thin even coat. Don’t lay it on heavy. A thick primer coat skins over on top while staying soft underneath, and a soft primer takes the topcoat down with it later. Let it dry per the can, then a quick 220-grit scuff knocks down any raised grain before paint. Tack again.
For the difference between a true primer and the paint-and-primer-in-one cans, the primer vs paint-and-primer breakdown is worth a read. On varnished trim, the in-one products are the wrong call. You want a dedicated bonding primer.
If you’re chasing knot resin specifically, separate from field tannin, see the fix for knots bleeding through paint.
Step 5: Paint With a Trim Enamel
Brush the profile, lay off in long strokes with the grain. Don’t overwork waterborne enamel.
Trim takes abuse. Hands, vacuum cleaners, dog tails, furniture. So the topcoat needs to cure hard. Wall paint on trim stays soft, marks up, and never wipes clean.
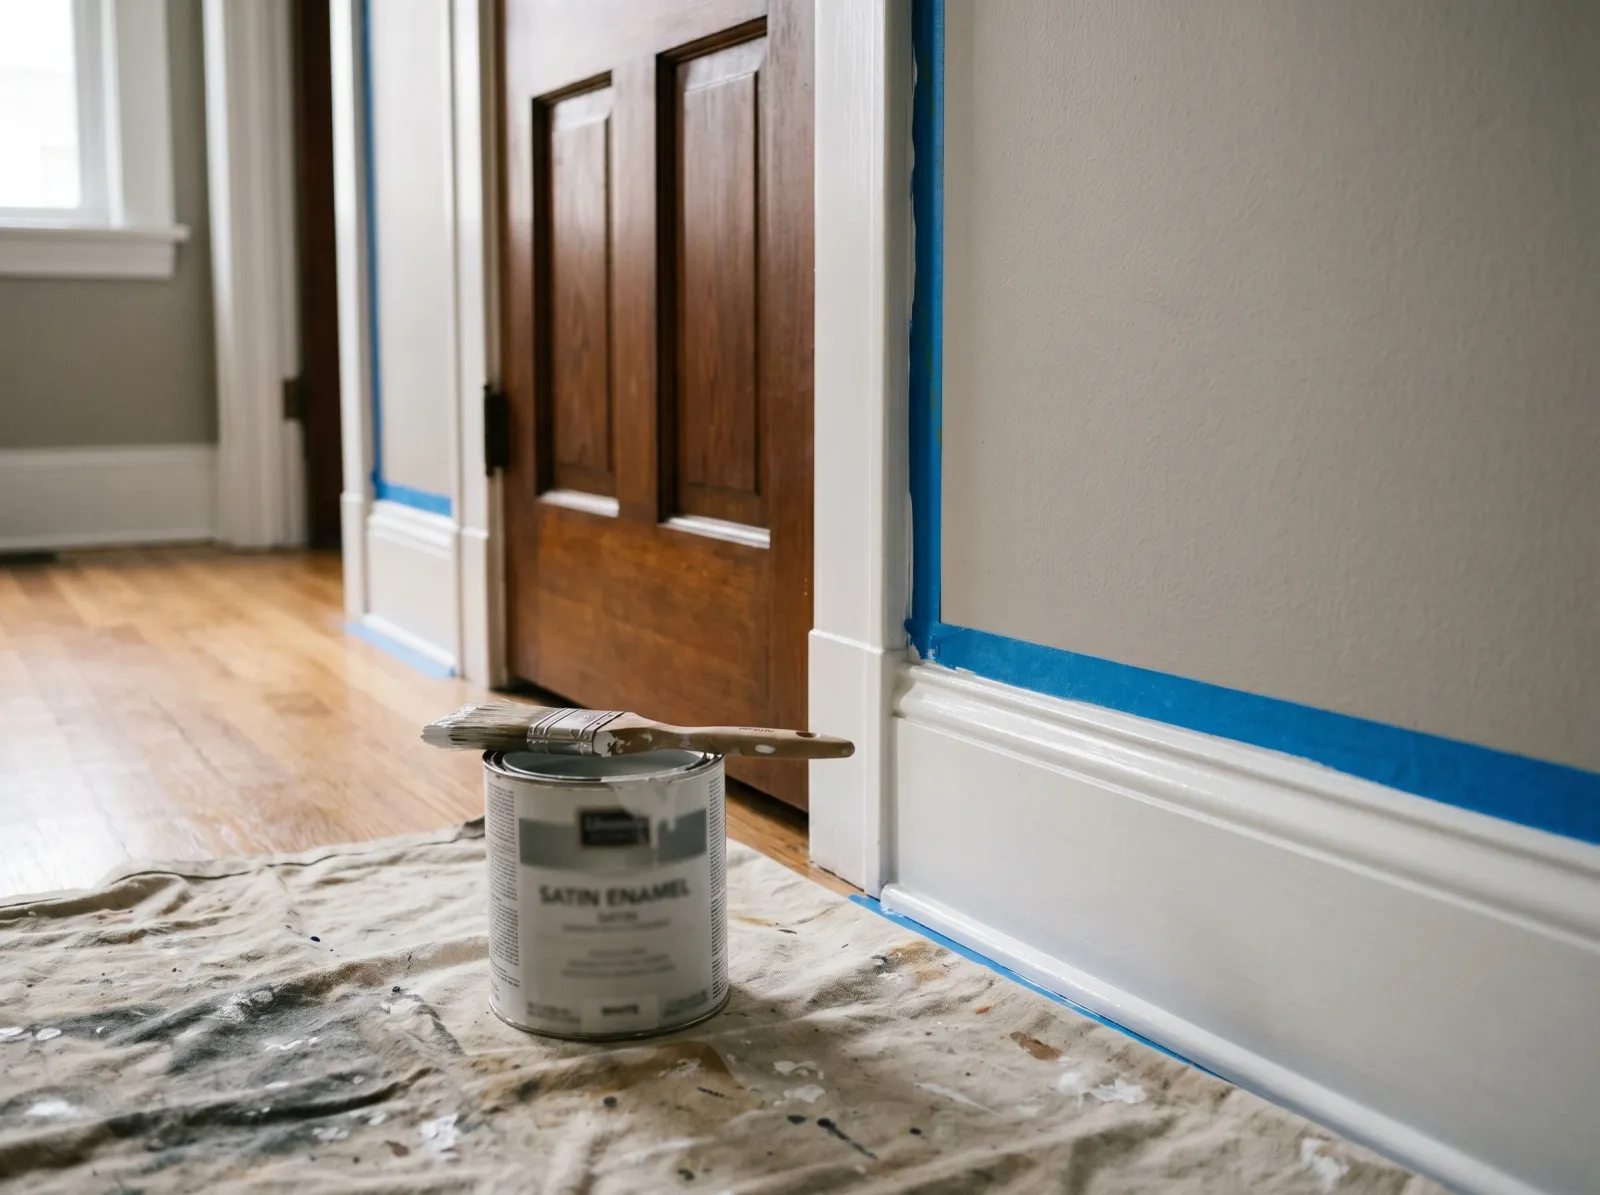
Use a waterborne alkyd or acrylic-urethane trim enamel. Benjamin Moore Advance, Sherwin-Williams Emerald Urethane Trim Enamel, or PPG Breakthrough all level out close to old oil-based enamel and cure to a hard, washable shell. They flow well enough to soften brush marks on their own. For the full SKU shortlist, see the best interior trim paint round-up.
Sheen is a durability and look call. Satin and semi-gloss are the trim standard: they wipe clean and show off the profile. The glossier you go, the more every dent and filler dimple shows, so satin is the forgiving middle. The sheen guide lays out the trade-offs if you’re undecided.
One note on whether to go waterborne or stick with old-school oil enamel. Oil cures harder and flows glass-smooth, but it yellows over time and the cleanup is mineral spirits. Modern waterborne alkyds get most of the way there without the yellowing. The oil vs water-based comparison covers it. For trim today, I reach for the waterborne alkyd.
Brush technique on trim: 2-inch angled sash, load light, work the profile and the detail first, then lay off the flats in long strokes with the grain. Don’t overwork waterborne enamel. It starts to set as you brush it, and going back over a tacky stroke drags it into ridges. One pass, lay off, move on.
Two coats. Always two. The first coat over primer always looks thin and patchy on trim. That’s normal. The second builds the film and evens the sheen.
Step 6: Dry, Recoat, and Cure
Two coats. Pull the tape while the second is still soft so the line stays crisp.
Recoat times vary by product. Advance wants 16 hours between coats. Emerald Urethane recoats in about 4. Read the can and respect it, because recoating a waterborne alkyd too soon lifts the first coat into a wrinkled mess.
Touch-dry is fast, often an hour or two. Full cure is the number that matters, and it’s slower than people expect. A waterborne alkyd trim enamel needs 7 to 14 days to reach full hardness, sometimes longer in a cold or humid room. During that window the film feels dry but is still soft underneath. Don’t lean furniture against fresh baseboard, don’t scrub it, and don’t stack books on a freshly painted shelf edge. They’ll print into the finish and the mark stays.
Pull your painter’s tape while the second coat is still slightly soft, not after it’s bone dry. A cured film tears at the tape line. Soft film releases clean.
Common Mistakes
- Painting over the gloss without sanding. The single most common failure. Paint peels off the slick varnish in sheets within months. Fix: scuff-sand to a dull haze everywhere, then re-prime and repaint.
- Skipping the degrease step. Furniture polish and hand oil break the bond invisibly. Paint lets go right where the grease was. Fix: clean with TSP substitute or Krud Kutter before any sanding.
- Using wall primer instead of a bonding primer. PVA primer seals drywall, it doesn’t grip slick trim. Whole topcoat fails together. Fix: INSL-X Stix, Bulls Eye 1-2-3, or BIN.
- Wall paint on trim. Stays soft, scuffs, won’t wipe clean. Fix: a trim enamel that cures hard.
- Recoating too soon. Waterborne alkyd lifts and wrinkles if you hit the second coat before the first is ready. Fix: wait the full recoat time on the can, not your guess.
- Going white over old oak without blocking bleed. Tannin ghosts up as a yellow halo through latex primer. Fix: BIN shellac primer first, it blocks the bleed and bonds in one step.
Maintenance and Longevity
Painted over a proper bonding primer, trim enamel holds 8 to 12 years before it needs a refresh, longer on low-traffic runs like crown molding and shorter on baseboards and door casings that take daily knocks. Clean it with a damp cloth and mild soap, never an abrasive pad. The hard enamel wipes clean once it’s fully cured.
Watch the edges that get touched: the bottom of door casings, the top of baseboards behind furniture, the strike side of doorways. That’s where wear shows first. A small artist’s brush and a leftover sample of the same can handles touch-ups for years. Keep a labeled quart.
If you’re working through a whole room, the baseboard project walkthrough and the crown molding guide cover the room-by-room sequence.
FAQ
Can you paint directly over varnished wood? Not directly. Varnish is a slick sealed film made to repel things, paint included. Scuff-sand the gloss off with 150-grit until the surface reads dull everywhere, wipe it clean, then prime with a bonding primer. Paint over bare varnish without that and the topcoat peels off in sheets the first time someone bumps the casing.
Do I need to sand varnished trim before painting? Yes. Sanding is the step that makes everything after it work. You’re not stripping the varnish, just dulling the shine so primer can grip. 150-grit, then a tack cloth. On carved profiles you can’t sand cleanly, a liquid deglosser knocks the gloss down chemically. Skip this and no primer holds.
What primer should I use over varnish or shellac? A bonding primer. INSL-X Stix or Zinsser Bulls Eye 1-2-3 grip slick finished surfaces that regular primer slides off. If the trim is old oak with tannin, or you’re going white over dark stain, Zinsser BIN shellac primer blocks the bleed and bonds in one step. Standard PVA wall primer is the wrong tool.
How do I know if it’s varnish or shellac? Rub a hidden spot with a rag dipped in denatured alcohol. Shellac softens and gets gummy fast, because alcohol is its solvent. Varnish and polyurethane shrug it off. The distinction matters for stripping, but for painting it changes little. Both get scuff-sand, bonding primer, enamel topcoat.
Why is my paint peeling off the trim? Almost always a prep failure. Either the gloss wasn’t sanded off, grease wasn’t cleaned off first, or a wall primer was used where a bonding primer was needed. Adhesion failure on old trim is a slick-surface problem, not a paint-quality problem. Fix is to scuff-sand, degrease, and re-prime with a bonding primer.