Epoxy Refinish Kit vs Tile Paint for Bathtubs
Epoxy vs tile paint for a tub: durability, fumes, cost, and prep tested side by side. A reviewer's verdict on which kit lasts and which one peels by year two.

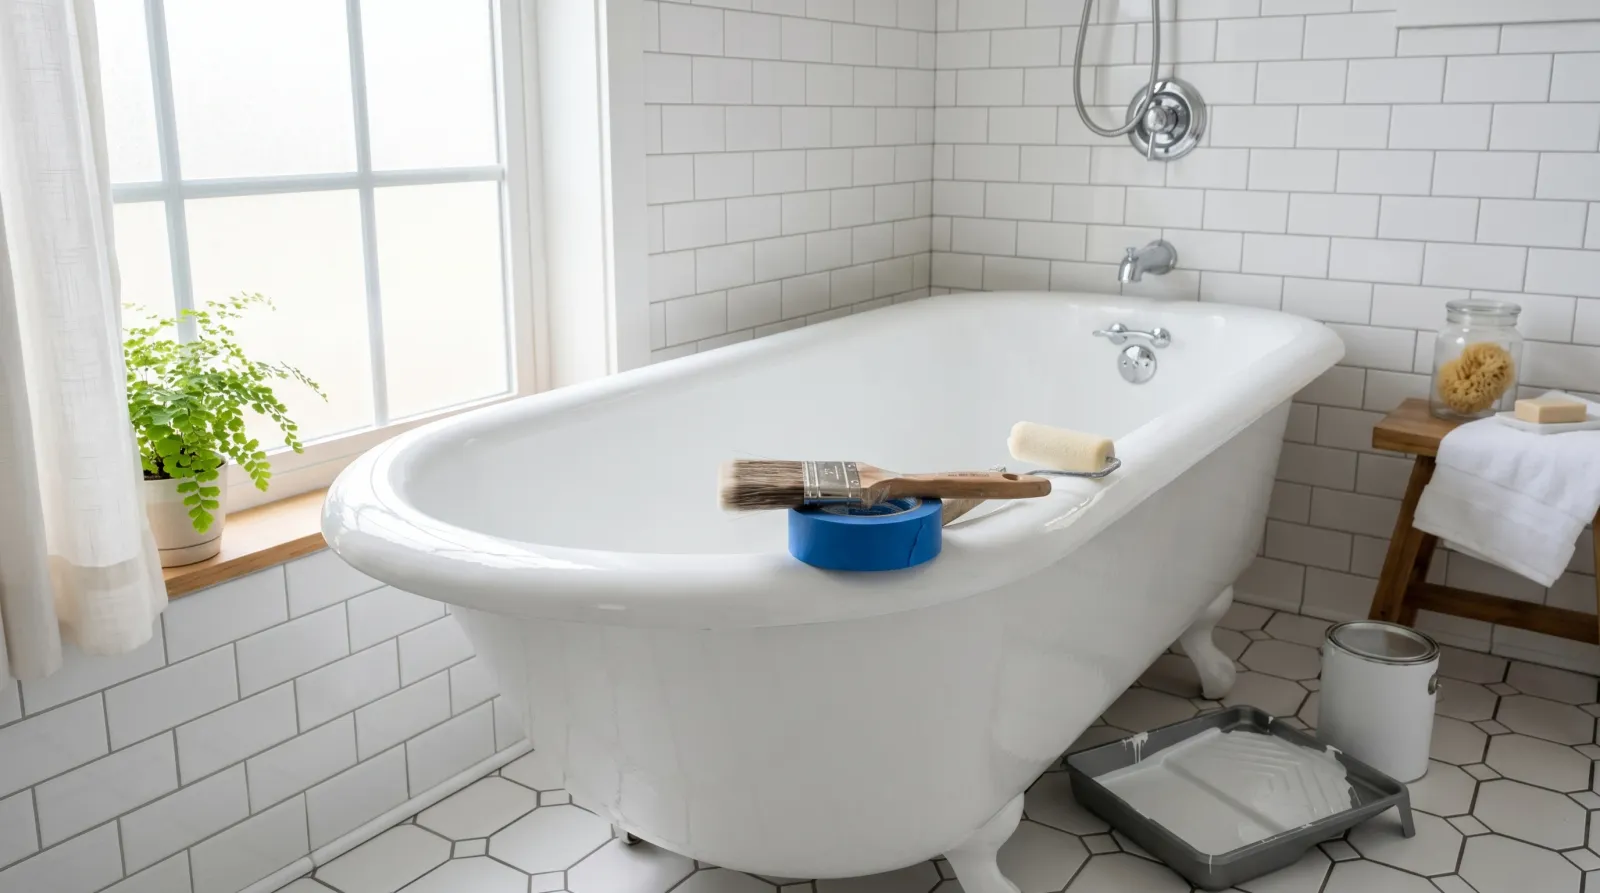
The 30-Second Answer
For the tub you actually bathe in, use a two-part epoxy kit. It cures into a hard, glossy film that survives daily water, hot soaks, and a dropped shampoo bottle, and a well-prepped job lasts 3 to 5 years. Tile paint is the easier weekend: less odor, simpler cleanup, no respirator. The trade-off is lifespan. Brush-on tile paint dulls and chips at the drain inside 1 to 2 years on a working tub. Use epoxy on your main bathroom. Save tile paint for a guest bath, a rental, or the tile surround around the tub rather than the basin itself.
If you just want the buying answer: one 32-ounce two-part kit covers a standard tub in two coats. A solvent brush-on kit is $25 to $40 and needs three days before you bathe. An odorless pour-on is $120 to $200 and has you back in the tub in 24 hours. Which kit to buy is broken out below.
At a Glance
| Two-Part Epoxy Kit | Tile / Tub Paint | |
|---|---|---|
| Lifespan (daily-use tub) | 3-5 years | 1-2 years |
| Film hardness | Hard, chip-resistant | Softer, scuffs sooner |
| Gloss | High, glassy | Satin to semi-gloss |
| Standing-water tolerance | Strong | Marginal in the basin |
| Prep demand | Heavy (sand + etch) | Heavy (sand + etch) |
| Pot life once mixed | 60-90 min smooth window | N/A (single-part) or hours |
| Coverage per kit | 110 sq ft (32 oz kit) | 40-60 sq ft per quart |
| Wait before bathing | 3 days (solvent kits), 24 hr (pour-on) | 1-3 days |
| Fumes | Strong on solvent kits; pour-on hybrids are odorless | Milder, fan needed |
| Cleanup | Solvent | Water (most) |
| Cost (kit) | $25-40 brush-on, $120-200 pour-on | $25-45 |
| Beginner-friendly | Moderate | Easier |
How to Tell Which Coating Is Already on Your Tub
Before you buy, figure out what you’re covering. A factory tub is porcelain enamel over cast iron or steel, or molded fiberglass with a gelcoat. Tap the side: cast iron sounds dead and dull, steel rings thin and tinny, fiberglass sounds hollow and flexes under hand pressure. That matters because fiberglass moves, and a brittle coating cracks where it flexes.
If the tub was refinished before, the giveaway is the lip. Run a fingernail along the top edge where the coating meets bare metal or stops at the overflow plate. Refinished coatings leave a faint ridge a factory enamel never has. Spray jobs show a slight orange-peel texture under raking light. Brush jobs show fine lines in the gloss. Find either, and you’re recoating over an old finish. Test its adhesion before you commit.
Durability and Adhesion
This is the whole ballgame for a tub, and epoxy wins it.
A two-part epoxy cures by chemical reaction, not by drying. The resin and the hardener cross-link into a dense film that resists abrasion, hot water, and the constant wet-dry cycle a tub lives through. Kits like Rust-Oleum Tub & Tile (a solvent-borne two-part epoxy acrylic) and Ekopel 2K (a thicker pour-on hybrid) hold a glossy, intact surface for years on a daily-use tub when the prep is right. The film shrugs off a dropped bottle that would chip a softer coating.
About the lifespan numbers you’ll see quoted: they scatter widely. Manufacturers claim big. Ekopel markets its pour-on at up to 20 years, and some round-ups put brush-on kits at 5 to 10 with textbook prep. I hold the editorial line at 3 to 5 years for a tub a family bathes in every day, because that’s what real bathrooms deliver once you account for the drain area, the cleaner someone inevitably uses, and prep that was good but not laboratory-good. Treat the long claims as the ceiling under perfect conditions, not the number to plan around.
Tile paint is built for a different job. Most brush-on tile paints are single-part or lighter two-part formulas aimed at wall tile and backsplashes, surfaces that get splashed but never hold standing water. On a tub floor, where you stand, kneel, and leave water pooling at the drain, that softer film burnishes and chips faster. You’ll see dull traffic patches where your feet land and chips at the drain ring inside a year or two.
The catch for both is the same: adhesion. Neither one bonds to a slick factory tub raw. You wet-sand to 400-600 grit, etch with the kit’s acid solution, rinse, dry, and tack off the dust. Skip that and even the best epoxy peels in sheets. I’ve seen a perfect-looking epoxy job lift at the corner six months in because someone wiped the etch off with a linty paper towel. The coating was fine. The bond wasn’t. The peeling-paint breakdown is the same physics on a different surface.
Winner: Epoxy. It’s harder, it’s chip-resistant, and it tolerates standing water the tile paint doesn’t.
Finish and Gloss
Epoxy dries glassy. A poured kit like Ekopel self-levels into a near-seamless high-gloss surface that reads close to factory porcelain, no brush marks if you roll and tip it correctly. That high gloss is also unforgiving. Every speck of dust, every bug that lands in the wet film, every brush hair shows. You work clean or you live with the freckles.
Tile paint lands lower on the sheen scale, usually satin to semi-gloss, and shows brush lines more readily because the film is thinner. On wall tile that’s fine. In a tub basin, the lower gloss reads flatter than the original porcelain and picks up soap film that’s harder to wipe off a satin surface than a glassy one.
Color holds about even on both for white. Push into a tint and epoxy’s harder film resists yellowing better over hot-water years. If sheen terms trip you up, the sheen guide sorts matte through gloss plainly.
Winner: Epoxy. The glassy self-leveling finish is closer to a real tub surface.
Cost and Coverage
Epoxy is really two price tiers, and lumping them together is how people get surprised at checkout. Brush-on two-part kits from the home centers run $25 to $40 for a 32-ounce kit. Pour-on hybrids are a different animal: Ekopel 2K sells direct at $199.95, and the thinner roll-on version, Tub Cast, at $119.95. Add $15 to $30 for the consumables a tub job needs either way: respirator cartridges for the solvent kits, sanding pads, tack cloths, a 2-inch synthetic brush, and a fine foam roller.
Now the coverage question, which is really “will one kit be enough.” A standard 60 by 30 by 14-inch alcove tub works out to roughly 40 to 50 square feet of paintable surface per coat once you include the apron. A 32-ounce two-part kit rated at 110 square feet covers that tub in two thin coats with margin. Add the tile surround and you’re past what one kit can do honestly, so buy two. A starved second coat is exactly where gloss goes patchy and durability falls off, and nobody has ever been glad they stretched a kit.
Tile paint runs $25-45 for a tub or a surround, and water cleanup on most formulas skips the solvent line item. The catch is the recoat cycle. If tile paint lasts two years and epoxy lasts five, you repaint the tile-paint tub two or three times over the same span. The cheap kit stops being cheap once you count the second and third weekend.
Run the math on a main tub. A brush-on epoxy kit lands near $55 all-in, once, good for four years. Tile paint is roughly $50 all-in, every other year, so $100-plus over four years plus three weekends of prep instead of one. The pour-on path costs three to four times the brush-on kit up front and buys you a thicker film, no respirator, and a tub back in service the next day.
Winner: Tile paint on the sticker, narrowly, and only against the pour-on tier. Epoxy on cost-per-year for a tub you keep.
Ease of Use and Fumes
Tile paint is the friendlier weekend, and it’s not close.
Two-part epoxy has a pot life. Once you mix resin and hardener, the clock starts. A mixed Rust-Oleum kit is technically usable for around six hours, but the window where it still lays down smooth is more like 60 to 90 minutes. That pressure leads first-timers to rush the second coat or work the film after it’s set, which leaves drag marks and uneven gloss.
Fumes are where you have to stop treating all epoxy as one product. The solvent kits (Rust-Oleum’s brush-on and aerosol, Homax) off-gas solvents and amine hardeners that sting eyes and lungs in a small closed bathroom. Those need a window open, an exhaust fan running, and an organic-vapor respirator, not the paper dust mask. In a windowless bath you rig a box fan in the doorway blowing out. The pour-on hybrids are the opposite case: Ekopel 2K is marketed odorless and zero-VOC, and that’s the whole reason to pay four times the price for it. In an interior bathroom with no window, the odorless pour-on isn’t a luxury, it’s the only comfortable option. Water-based tub paints like DWIL sit in between, low odor but still worth a fan.
Tile paint, especially water-based brush-on, has no pot-life clock if it’s single-part, milder odor, and tolerates a slightly less perfect prep. You still want ventilation and you still sand and etch, but the margin for a beginner mistake is wider. There’s no 90-minute countdown ruining the job if the phone rings.
Both demand the same heavy prep. The difference is what happens after you open the can.
Winner: Tile paint. No pot life, milder fumes, more forgiving of a slow worker.
Cleanup and Recoat
Most water-based tile paints clean up with soap and water, brushes included, a real convenience on a job already full of chemistry. Solvent-based and some two-part epoxies need a solvent wash for tools, and the mixed leftover has to cure in the can before disposal. You can’t pour epoxy down a drain.
Recoat windows split too. Tile paint recoats in a few hours and takes a later touch-up patch without the whole surface fighting you. Epoxy wants its full cure before water touches it, and a later spot repair needs scuff-sanding to bite because the cured film is too hard to grip raw.
The cure wait is the hidden cost of epoxy, and again it splits by kit. Solvent two-part kits want three full days before water, Rust-Oleum’s own number, and I’d stretch it to a week in a cool bathroom if the household can stand it. Homax’s one-part brush-on cures to service in about 48 hours. The odorless pour-ons cut it hardest: Ekopel is usable after 24 hours at 72°F. So “epoxy takes a week” is only true of the cheap solvent kits, which happen to be the ones most people buy. Whichever you use, don’t let an impatient household run a bath early and stamp footprints into a soft film.
Winner: Tile paint. Water cleanup, faster recoat, easier touch-ups. The gap narrows to almost nothing against a 24-hour pour-on.
Which Epoxy Kit for Your Tub
“Epoxy” on a tub covers several different products with different prices, cure times, and odor levels. Here’s what’s on the shelf and which job each one is actually for. All of these refinish a tub; the split is budget, smell, and how fast you need to bathe again.
Rust-Oleum Tub & Tile Refinishing Kit. The default. A 32-ounce two-part kit rated at 110 square feet, recoat in 1 to 2 hours, three days before water. Roughly $25 to $30 at the home centers, and it comes in gloss (#384165) and satin (#385279) white. It’s the cheapest way to get a genuine cross-linked film on a tub, and the reason most DIY tub jobs use it. The trade is the solvent load: real ventilation and a respirator, no exceptions. Specs on the Rust-Oleum product page; it sits in stock at Home Depot. Our longer take is the Rust-Oleum Tub & Tile review.
Rust-Oleum Tub & Tile aerosol. Same chemistry, 12-ounce can, about 15 square feet, touch-dry in 15 minutes, same three-day cure. This is not a tub product. It’s for a sink, a tile band, a small repair, or a color test before you commit a whole kit. Two cans on a full tub is a false economy and it wears through at the drain first. Product page.
Homax Tough As Tile brush-on. Covers 44 to 52 square feet and cures to service in about 48 hours, a day faster than the two-part kits. One part, so there’s no mixing ratio and no pot-life clock, which is the right answer for a slow, careful first-timer. The film is air-dry rather than cross-linked, so it’s a step softer than a true two-part epoxy. Spec sheet, or on Amazon.
DWIL water-based tub paint. The low-odor middle ground. The 16.5-ounce size covers 25 to 30 square feet, the 33-ounce kit 50 to 55, walkable at 24 hours with full cure at seven days. Worth knowing about if you have a windowless bathroom and can’t run a solvent kit but don’t want to spend pour-on money. Search Amazon.
Ekopel 2K pour-on. $199.95 direct, one thick self-leveling coat instead of two thin ones, tub usable after 24 hours at 72°F, and it’s marketed odorless and zero-VOC. That last part is the real selling point: it’s the only path here that a person can run in a closed interior bathroom without a respirator. The maker claims up to 20 years. Pour-on also means it self-levels past pinholes and light pitting that a brush telegraphs. Refinished Bath Solutions sells it direct, and it’s on Amazon.
Ekopel Tub Cast roll-on. $119.95 for the primer plus top coat, ready in 24 hours. The cheaper way into the odorless pour-on family when you don’t need full pour thickness. Direct from Refinished Bath Solutions.
We put all five two-part and one-part kits through crosshatch adhesion, a 30-day hot-water soak, and a year in a working bathroom in the tub and tile refinishing kit round-up. That’s the page to read if you want the test data behind the shortlist.
How to Apply Tub Epoxy, Step by Step
The product barely matters next to the prep. Here’s the full sequence, including the steps people skip.
- Strip the tub bare. Cut out the old caulk with a razor and pull the drain and overflow hardware. Coating over caulk means the coating fails at the caulk line; coating around a drain flange leaves a visible ridge and a water path under the film.
- Clean in three passes. Wash with a 10% bleach solution to kill mildew, follow with an abrasive cleanser to break the soap film, then wipe the whole tub with acetone to degrease. Skipping the degrease is the single most common reason a good epoxy peels.
- Fill the damage. Chips and deep scratches get epoxy putty, sanded flush once it hardens. A coating will not bridge a chip; it will show every one of them under high gloss.
- Wet-sand 400, then 600. Wet-sand the entire surface with 400 grit, then 600. You are dulling the factory gloss so the coating has something to grip. Every square inch, including the vertical walls.
- Etch, rinse, dry, tack. Use the etching solution the kit supplies, rinse fully, let the tub dry completely, and tack off dust with a lint-free cloth. Not a paper towel. I’ve watched a perfect job lift at the corner six months later because of paper-towel lint.
- Mix a full two minutes, minimum. Scrape the sides and bottom of the cup as you go. Under-mixed two-part epoxy cures soft in patches, and you won’t see it until it’s wearing.
- Two thin coats, 1 to 2 hours apart. Thin. Thin coats level, thick coats sag on the tub walls. Mixed Rust-Oleum stays technically usable for around six hours, but your window for a smooth, drag-free lay-down is more like 60 to 90 minutes. Work fast and don’t go back into a film that’s started to set.
- Wait at least three days before water touches it. Solvent two-part kits want that full three days. The odorless pour-ons cut it to 24 hours at 72°F. Cooler bathroom, longer wait, both ways.
- Re-caulk last. New caulk goes on after full cure, never before. Caulk that’s under a coating traps solvent and stays soft.
Slip Resistance on a Refinished Tub
Nobody warns you about this and it’s the one safety item on the page. Cured epoxy is glassy, and glassy is slick when it’s wet and soapy. The pour-on self-leveling kits are the slickest of all because they cure dead-flat with zero texture, which is exactly what makes them look so good.
Three ways to handle it. Stir an anti-slip additive into the final coat, which is the cleanest solution because it’s built in and can’t be pulled off. Apply a dedicated non-slip clear coating after the tub cures; Ekopel sells a 2K non-slip tub and shower coating at $29.95. Or use a tub mat, with one warning: ordinary suction-cup mats can grip a young coating hard enough to lift it. Wait several weeks before you put one down, and look for a mat rated for refinished surfaces (Refinished Bath Solutions sells one for exactly this reason).
How to Clean a Refinished Tub
Mild soap, a soft cloth or sponge, and that’s the whole list. This is not fussiness. Abrasive powders, scrub pads, and harsh bleach-heavy or acidic cleaners measurably dull the gloss and shorten the coating’s life, and it’s the main reason the same kit lasts five years in one house and two in another. The coating didn’t change. The cleaning habits did.
Two more habits worth building. No suction-cup mats on a fresh coating. And wipe the tub dry after use, which slows the soap film that builds around the drain, the first spot on any refinished tub to wear through.
Showers and Shower Pans
Same products, one adjustment. The two-part tub epoxies coat shower walls and shower pans fine, and if you’re refinishing a tub-shower combo you’re doing both anyway.
The pan is the hardest surface in the bathroom on a coating. It takes standing water and constant flow, plus every bit of grit that comes off feet. Treat it like a tub floor, not like wall tile: full sand-and-etch prep, a tub-rated two-part product rather than a wall-tile paint, and an anti-slip additive in the last coat, because a glass-smooth shower pan is a genuine fall risk. If you only need the pan or a sink, Ekopel sells a half-size recasting kit (1300 g) at $109.95 rather than making you buy a full tub kit.
The vertical wall tile in a shower is the exception, and the same logic as the tub surround applies. Nobody stands on a wall, so a lighter tile paint holds up there.
Where Epoxy Actually Loses
Three honest places.
A rental flip you’re selling next year. The epoxy’s 5-year lifespan is wasted if you’re handing the keys over in twelve months. Tile paint’s cheaper, faster turnaround is the smarter spend.
A pure tile surround with no basin. If you’re only refreshing the wall tile around the tub, tile paint is built for that surface, costs less, and the durability gap barely shows because nobody stands on a wall. Same logic that makes brush-on coatings fine on a backsplash but risky on the counter itself, which the Formica laminate counter guide walks through.
A first-timer with no ventilation and no respirator. If you can’t run a fan and won’t buy the cartridges, don’t open a two-part epoxy in a closed bathroom. A milder water-based tile paint is the safer product for that setup.
When to Call a Pro Instead
Worth putting the whole ladder in front of you before you buy anything, because DIY epoxy is the bottom rung and it isn’t always the right one.
A DIY kit is $25 to $50 in materials plus another $15 to $30 in consumables, and it costs you a weekend. A professional reglaze, sprayed in a masked and ventilated bathroom, runs several hundred dollars and typically also lasts about five years, so you’re paying for a smoother finish, a warranty, and not doing it yourself. An acrylic tub liner starts around $300 for the shell before install labor, which is usually the larger half of the bill. A full replacement runs into the thousands once you count demo, plumbing, and rebuilding the surround.
Call the pro when the tub has rust-through at the drain or overflow, when the enamel is deeply chipped rather than just stained, or when a previous refinish is failing and would need stripping first. Those are the three cases where a DIY coat goes on over a problem and comes off with it. For a tub that’s ugly but sound, the $50 kit does the same visual job as the $400 spray, and that’s most tubs.
The Verdict by Use Case
- Pick the epoxy kit if: it’s your main tub, you bathe in it daily, you want 3 to 5 years out of the job, you can run real ventilation and wear a respirator, and you’re willing to do the full sand-etch-clean prep and give the tub a week to cure. This is the right call for a long-term home.
- Pick tile paint if: it’s a guest bath, a rental refresh, or a low-use second tub; you’re coating the tile surround rather than the basin floor; you want water cleanup and no respirator; or you’d rather repaint in two years than fight a 90-minute pot life today.
- It’s a tie when: you’re refreshing only the vertical wall tile around the tub. Both adhere fine to prepped wall tile, neither sees standing water there, and the durability gap mostly disappears. Pick on odor tolerance and budget.
Top Picks by Side
Going with epoxy? The five kits above are compared head to head, with adhesion and hot-soak test data, in the tub and tile refinishing kit round-up. Short version: the Rust-Oleum Tub & Tile kit at $25 to $30 from Home Depot if you can ventilate, Ekopel 2K at $199.95 if you can’t or you want the tub back in 24 hours. For the same chemistry on a metal appliance rather than a tub, the appliance epoxy paint round-up breaks down which films take the most punishment, and the surface refinishing kit round-up covers the counter side.
Going with tile paint? Match the product to the surface. For wall tile and the tub surround, a brush-on tile paint is the right tool, and the best tile paint round-up sorts them by wall, floor, and shower. For the basin itself, step up to a tub-rated kit from the refinishing kit round-up rather than a wall-tile paint pushed past its job.
FAQ
How long does an epoxy tub refinish actually last? Three to five years on a daily-use tub with proper prep. The film almost never fails on its own. Adhesion does. Skip the etch and degrease and even a good two-part epoxy peels inside a year. Do the full sand-etch-clean routine and it holds for years. Brush-on tile paint runs shorter, usually 1 to 2 years before it dulls and chips at the drain.
Can you use regular tile paint inside a bathtub? Only if the can rates it for tub interiors, and most don’t. Wall-tile and backsplash paints are built for vertical splash, not a basin holding standing water with daily abrasion. Use tile paint on the surround and wall tile. For the basin floor, use a two-part epoxy or a tub-rated kit.
Do I need to sand and etch before either one? Yes, for both. Porcelain and fiberglass are too slick for any coating to grip raw. Wet-sand to 400-600 grit, etch with the kit’s solution, rinse, dry fully, wipe with the supplied cleaner, and tack off the dust. Neither product bonds to a glossy untouched tub.
How much epoxy do I need for one bathtub? A standard 60-inch alcove tub is roughly 40 to 50 square feet of paintable surface per coat. One 32-ounce two-part kit rated around 110 square feet covers the tub in two thin coats. Coating the tile surround too? Buy a second kit rather than stretching one thin, because a starved second coat is where gloss and durability fail.
Will an epoxy-painted tub be slippery? Yes, cured epoxy is glassy and can be slick when wet, especially the pour-on self-leveling kits. Mix an anti-slip additive into the final coat, add a purpose-made non-slip clear coating after cure, or use a mat rated for refinished tubs. Skip ordinary suction-cup mats for the first weeks; they can pull at a young coating.
Is a DIY epoxy kit cheaper than professional reglazing? By a wide margin up front: a kit runs $25 to $80 plus about $20 of consumables, while a professional spray reglaze costs several hundred dollars and an acrylic liner starts around $300 before install. The pro job buys a smoother sprayed finish and usually a warranty. If the tub has rust-through, deep chips, or a previous failing refinish, the pro is the better spend.
How do you clean a refinished tub? Mild soap and a soft sponge only. Abrasive powders, scrub pads, and harsh bleach or acid cleaners dull the gloss and shorten the coating’s life, which is one reason identical kits last five years in one house and two in another. Wipe the tub dry after use to slow soap film at the drain, the first spot to wear.
Can you use bathtub epoxy in a shower or on a shower pan? Yes. The same two-part tub epoxies coat shower walls and pans, and the pan should be treated like a tub floor: full sand-and-etch prep, a tub-rated product rather than wall-tile paint, and an anti-slip additive because a glossy pan is a fall risk. Half-size kits sized for pans and sinks exist if you don’t need a full tub kit.
Related
- Best tub and tile refinishing kits: five kits, adhesion and hot-soak tested
- Best tile paint: the right paint for walls, floors, and showers
- Best surface refinishing kits: tub and counter kits sorted by durability
- Best appliance epoxy paint: the toughest epoxy films, tested
- How to paint Formica laminate counters: the same prep-and-bond logic on laminate
- Sheen guide: matte through gloss, explained
- Why paint peels: the adhesion failures behind a bad refinish job