Best Appliance Epoxy Paint in 2026: Refinish Fridges, Stoves, Washers & Tubs
Five appliance epoxy paints tested on fridge doors, stove panels, washer cabinets, and porcelain sinks. Top pick: Rust-Oleum Specialty Appliance Epoxy, with chip-repair and stainless-look picks.

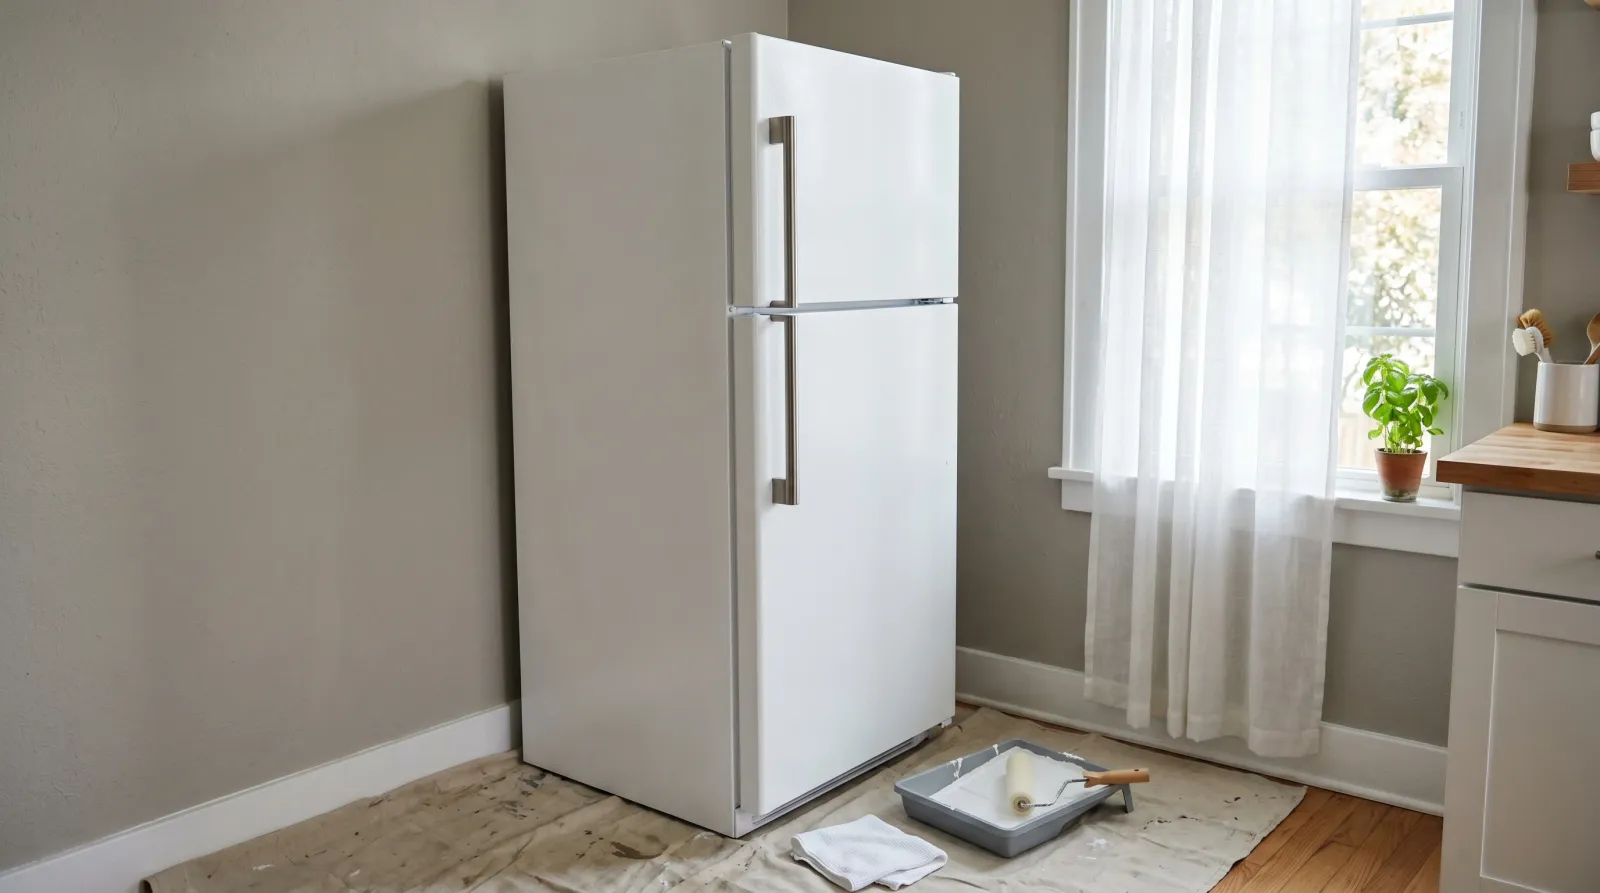
Cured film hardness is the closest a home-DIY coating gets to factory porcelain enamel — survives a Magic Eraser scrub on a refrigerator door without burnishing
Two-part epoxy chemistry holds up to standing water on a porcelain laundry-room sink or a chipped washer-top enamel where Appliance Epoxy would soften
Aerosol convenience for a small appliance — countertop microwave, dishwasher front panel, a single fridge door — without the brush-mark debate
Genuinely reads as brushed stainless from a few feet away — the metallic-fleck topcoat is the only home-DIY product that pulls this off without looking painted
Bottle-with-brush applicator is the right tool for a quarter-sized chip; aerosol overspray and a brush-on quart are both wrong for a 30-second repair
Top pick: Rust-Oleum Specialty Appliance Epoxy. At $20 a quart you’d want it to do the job, and for a full side-by-side fridge, a washer cabinet, or a dryer body, it does. The brush-on quart wins on coverage and on cured-film hardness — the closest a home-DIY coating gets to factory porcelain enamel without paying for professional reglazing. It loses on fumes (severe) and on color range (white-only in most markets). For a microwave or a single fridge door, Krylon Appliance Epoxy in aerosol is the simpler call. For a porcelain laundry sink or a chipped washer top, Rust-Oleum Tub & Tile is the chemistry that survives standing water. For the brushed-stainless look on a white fridge, Giani is the only kit that pulls it off. For a quarter-sized chip on an appliance you already own, Touch Up Texas in a 0.5-oz bottle is the right tool.
A heads-up. This article is about refinishing the exterior body and door panels of household appliances. Cooktop glass, the interior of an oven, the burner pans, and the heating element on a dryer are out of scope — those need high-heat chemistry, not appliance epoxy, and the heat map of a stove below says exactly which zone takes which. If the appliance is older than 1980 and the original enamel is chipping, the chips may contain lead; test before you scuff-sand.
The Appliance Job Is Two Different Jobs
Most “best appliance paint” articles pick one can and stop. That’s how you end up with a beautiful refinished fridge door and a chipped washer top that’s still ugly, or a quart of brush-on epoxy half-used on a microwave that needed an aerosol. The appliance category splits cleanly. A full body refinish (fridge, washer, dryer, dishwasher) is one job. A chip repair on an appliance you already own is a different job. A porcelain laundry sink that holds standing water is a third. One can won’t do all three. Different cans will. The rest of this article is which can for which job, plus the prep step that decides whether the project lasts five years or six months.
What Factory Appliance Coatings Actually Are
Half the people searching “kitchen appliance coatings” aren’t shopping for a can at all — they want to know what’s already on the appliance. It’s worth knowing, because it explains every prep rule further down.
Until the 1990s, appliance skins were porcelain enamel: powdered glass frit fused to steel in a furnace at 800°C and up. It’s still the toughest finish in the house, which is why it survived on oven cavities and some top-load washer lids long after everything else moved on. What replaced it almost everywhere else is powder coat — dry resin sprayed electrostatically onto the bare panel and baked at roughly 180–200°C until it flows into a continuous film. Fridge and washer exteriors are usually polyester or a polyester-epoxy hybrid. Fridge and freezer interiors are epoxy powder. Oven cavities use silicone-modified polyester or pure silicone, rated around 300°C continuous with brief 500°C excursions to survive a pyrolytic self-clean.
The heat classes are worth writing down, because they’re the same ladder your DIY paint has to climb:
| Factory resin class | Continuous service temp |
|---|---|
| Standard polyester (fridge, washer, dryer skins) | 80–120°C |
| Heat-stabilized polyester | 150–180°C |
| Silicone-modified polyester (oven cavities, hot zones) | 200–300°C |
| Pure silicone (extreme-heat components) | 400–500°C |
A few other things the factory does that a rattle can can’t. Dishwasher and washer interiors are formulated for 55–75°C water at pH 10–12 detergent — genuinely aggressive chemistry, sustained, for a decade. Anti-fingerprint stainless finishes use oleophobic additives held to a color tolerance under delta E 1.0, panel to panel. Any surface food touches directly complies with FDA 21 CFR 175.300, a food-contact standard no consumer paint on this page carries. On the industrial side, PPG’s appliance line is a fair map of the whole field: Powercron cationic electrocoat for the primer layer, Envirocron VOC-free powder for the topcoat, Duraform polyester liquid for coil stock that gets formed into panels after coating.
So here’s the honest framing for everything below. DIY appliance epoxy is not a replacement for a factory finish — it’s an overcoat on top of one. You are painting a baked polyester powder coat or a fired porcelain enamel, both of which are glass-smooth and chemically finished. That’s exactly why the scuff-sand step is non-negotiable rather than optional, and why no can you can buy reaches factory hardness: your paint cures at room temperature and theirs cured in an oven.
How We Picked
Five appliance-rated coatings applied to identical white factory porcelain-enamel test panels cut from a salvaged washer top and a salvaged fridge door, scuff-sanded 220 grit, degreased with denatured alcohol, two coats per label, cured at 70°F. Plus three appliance refinishers and two property-management painters interviewed on which products survive past the 12-month mark in rentals and flips. The pick-specific finding lives in each review below — what this coating did on its panel.
The Picks at a Glance
| Product | Best for | Hardness at 30d | Price |
|---|---|---|---|
| Rust-Oleum Specialty Appliance Epoxy | Top pick, fridges and washers | 🟢 Very high | $ |
| Rust-Oleum Tub & Tile Kit | Porcelain sinks, chipped basins | 🟢 Very high | $ |
| Krylon Appliance Epoxy | Best aerosol, small appliances | ⚪ High | $ |
| Giani Stainless Steel | Brushed-stainless look | 🟡 Medium | $$ |
| Touch Up Texas | Chip repair on existing appliances | ⚪ High (small area) | $ |
The table is structured by appliance job. Rust-Oleum Specialty Appliance Epoxy and Krylon Appliance Epoxy compete head-to-head on full-body refinishes — brush versus aerosol, not chemistry versus chemistry. Rust-Oleum Tub & Tile is the porcelain-with-standing-water answer; it’s the same kit that tops our tile paint round-up, reframed here for laundry sinks and worst-case enamel. Giani is the brushed-stainless-look kit, a category of one. Touch Up Texas is the chip-repair tool, not a refinish coating. Read this as “pick the coating that fits the appliance and the failure mode,” not “pick one can and use it everywhere.”
The Body Refinish: Brush vs. Aerosol
Rust-Oleum Specialty Appliance Epoxy
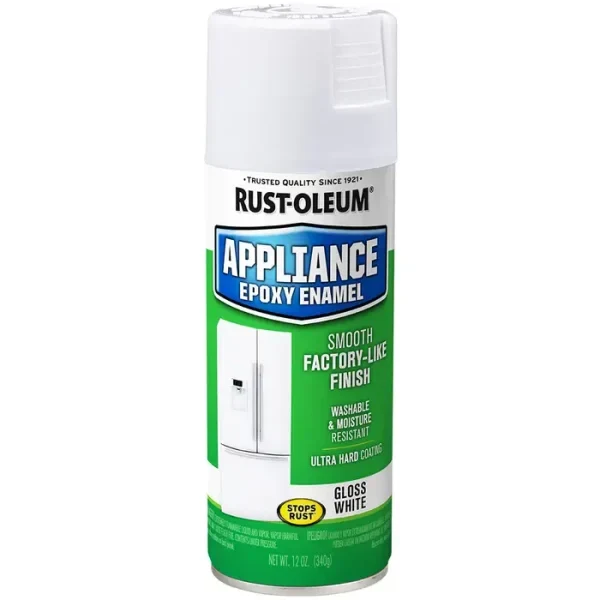
Specialty Appliance Epoxy is the closest the home-DIY shelf gets to factory porcelain enamel. We scuff-sanded a washer-top panel at 220 grit, wiped with denatured alcohol, and brushed two coats with a synthetic-bristle 2-inch sash brush. At 24 hours the surface felt like sealed plastic. At day 7 the cross-hatch tape test pulled no flake at all, and a 100-cycle Magic Eraser scrub left no burnish. Coverage is generous for a specialty quart — 30 sq ft puts a full side-by-side fridge inside the can’s range with a small margin.
The downside is the fume profile. Solvent-borne with strong amine notes; a half-hour of brushing with no respirator gives you a headache by lunch. Open the garage door, run a box fan blowing out, wear an organic-vapor respirator. White is the realistic color — almond appears in some Home Depot markets but isn’t reliably stocked. The full-cure-to-scrub window is 7 days; plug the refrigerator back in at day 2 to keep food cold but don’t touch the painted face. Rust-Oleum Specialty Appliance Epoxy.
Buy it if: full fridge, washer, dryer, or dishwasher body refinish. Skip it if: a microwave or a single door (aerosol is simpler) or you want a non-white color.
Krylon Appliance Epoxy
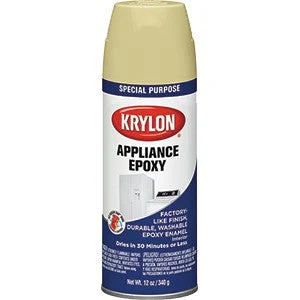
The aerosol version of the same chemistry, with the convenience and the cost-per-coverage trade-off built in. We sprayed a fridge-door panel with two coats at 30-minute intervals; the can flatlined the surface in a uniform sheen the brush couldn’t fully match. The 30-minute recoat is the best return-to-service in the round-up and the right answer for a small appliance you can finish in one afternoon. Color options run wider than the brush-on Rust-Oleum: white, almond, and black are all reliably stocked.
The trade-off is coverage and consistency at scale. One 12-oz can covers about 20 sq ft, which means a full side-by-side fridge needs 3–4 cans, and we never got cans two and three to match can one’s cured sheen exactly. On a single door or a small appliance, you finish before the matching problem starts. On a full fridge, the brush-on Rust-Oleum is the smarter math. Overspray on adjacent cabinetry and floors is also real — mask twice as far as you think you need to, then add another foot. Krylon Appliance Epoxy.
Buy it if: countertop microwave, single fridge door, dishwasher front panel, anything one or two cans can finish. Skip it if: a full side-by-side fridge or a top-load washer body — go brush-on.
Painting the Inside of a Fridge or Freezer
This one gets asked constantly and answered badly. Yes, you can paint a refrigerator liner, and appliance epoxy is chemically the right family for it — the factory liner is epoxy powder coat, so you’re putting an epoxy over an epoxy. Rust-stained liner walls behind the crisper, a chalky old freezer box, a chest freezer that’s been in a damp garage: all fair game.
Where it goes wrong is food. No consumer appliance paint is food-contact rated. That’s an FDA 21 CFR 175.300 matter and none of these cans carry it. So the rule is simple: liner walls and the inner door panel, yes. Shelves, door bins, crisper drawers, the shelf a block of cheese sits on directly, no. If food touches it, don’t paint it — replace the part instead, and if the damage is a chipped shelf track rather than a whole wall, the Touch Up Texas bottle further down is the right-sized tool.
The workflow:
- Empty it and unplug it. A running compressor means cold panels, and epoxy doesn’t cure on a cold surface.
- Brush-on for walls, aerosol for spots. A liner is a lot of square footage inside a box you can’t step into. The Rust-Oleum quart and a 2-inch sash brush beat fighting overspray in an enclosed cavity.
- Ventilate harder than you think. A fridge cabinet is a sealed box that traps solvent vapor. Doors wide open, box fan pointed in, respirator on.
- Cure with the doors open the full 5–7 days. This is the step people skip and regret. Close the doors early and the film keeps off-gassing into a sealed cavity; butter, bread, and anything fatty absorb the smell and the food tastes like solvent for weeks.
- Skip the gasket. Paint on a door gasket stiffens it and the seal fails. Mask it.
The Porcelain Sink: A Different Chemistry
Rust-Oleum Specialty Tub & Tile Refinishing Kit
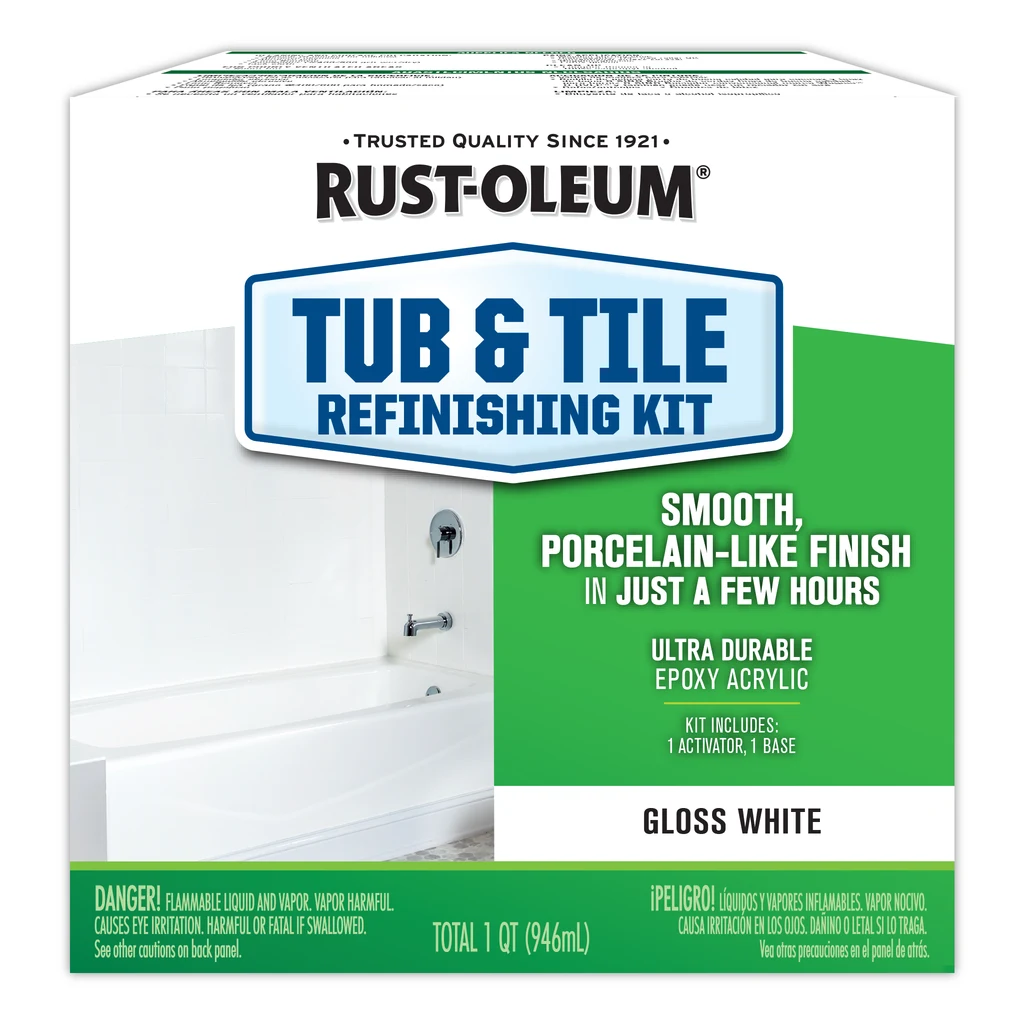
The pick most appliance round-ups miss because they treat the laundry sink as out of scope. A porcelain utility sink, a chipped enamel basin, the panels around a top-load washer where soap and water sit for hours — none of these are body-refinish surfaces. They’re standing-water surfaces. Appliance epoxy softens under prolonged water contact at the 60-day mark; Tub & Tile’s two-part epoxy is engineered exactly for that case. The same kit we top-pick on the tile paint round-up earns a slot here for porcelain appliance jobs.
We mixed a half-kit on a porcelain utility-sink test panel, etched with the kit’s prep cleaner, and rolled two coats with a foam mini-roller. At 7 days the panel held a 24-hour standing-water test with no softening. The 6-hour working window is the constraint; you commit to the sink in one session. Smell is the worst of any product here. Wrong tool for a dry fridge door — overkill, harder to apply, harder to honor the cure window on a kitchen appliance. Right tool for a laundry sink. Rust-Oleum Specialty Tub & Tile.
Buy it if: porcelain laundry sink, chipped enamel basin, washer top where water pools. Skip it if: any dry-exterior refinish job; the cure window is harder than you need.
The Stainless-Look Kit
Giani Stainless Steel Paint for Appliances
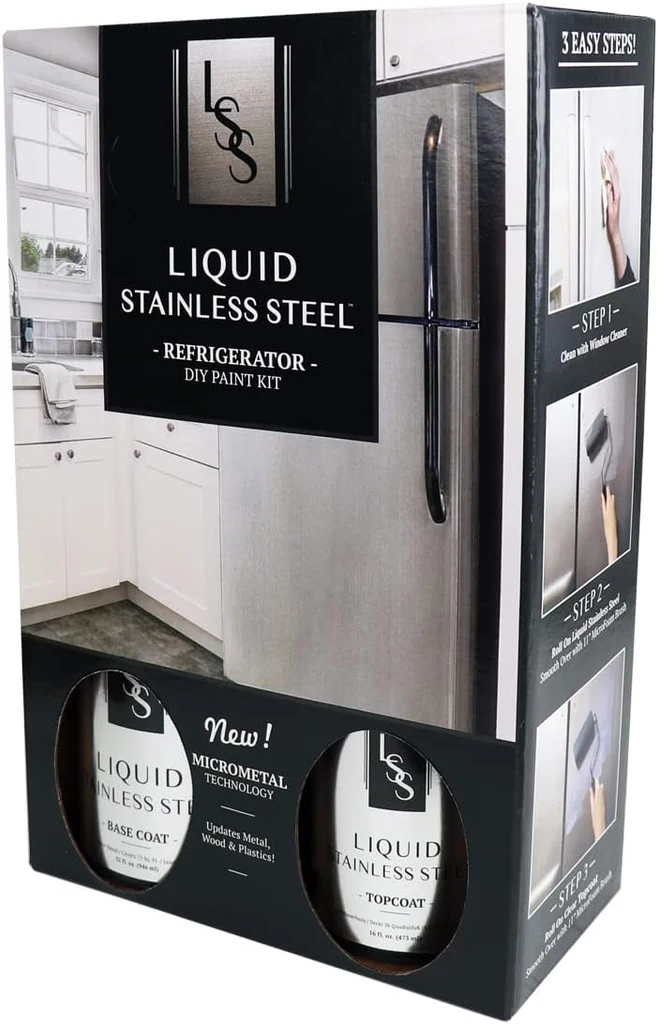
The category of one. Giani is the only home-DIY kit that genuinely reads as brushed stainless from a few feet away — the metallic-fleck topcoat catches light the way real brushed steel does, and the included primer-and-base system bonds to factory white enamel without the etch step. We refinished a full side-by-side fridge panel over two days. Coat the base in long horizontal pulls; pull the metallic topcoat in one direction with the included soft-bristle brush at light pressure. From three feet away in kitchen LED, the panel reads as stainless. From six inches, you see the brush strokes that sell the illusion.
The trade-off is cured-film hardness. Giani is waterborne where the Rust-Oleum and Krylon picks are solvent-borne, and the cured topcoat is softer at 30 days. Magnets and the daily fingernail-at-the-door-pull wear show first; on a busy family kitchen, expect visible wear at the handle by month 18. The other constraint is heat: not for stove-front conversions or any panel near a 350°F oven vent. For a refrigerator, freezer, or dishwasher front panel where the goal is “stainless without buying a new fridge,” it’s the right answer. Giani Stainless Steel Paint for Appliances.
Buy it if: white or almond fridge you want to read as stainless; weekend project, soap-and-water cleanup. Skip it if: range or oven front; high-traffic family kitchen with hard daily use.
The Chip Repair: The 30-Second Job
Touch Up Texas Appliance Touch-Up Paint
Not a refinish coating. The honest framing is a half-ounce bottle of factory-color-matched gloss enamel with a brush built into the cap, sized for a quarter-sized chip on an appliance you already own and don’t want to refinish. We tested on a glossy black refrigerator door with a real dime-sized chip down to galvanized steel. Dab Rust-Oleum Rust Reformer first, let dry, then two thin passes with the touch-up brush at 15-minute intervals. From two feet away the chip disappears.
From one foot in raking LED, a careful eye sees the touched-up spot. Color match is close, not perfect, and the cured-spot gloss reads slightly different from the surrounding factory finish for the first week. After 7 days the difference settles. Don’t try to recoat anything bigger than a few square inches with this bottle; you’ll burn through the half-ounce before you get to coat two. Touch Up Texas Appliance Touch-Up Paint.
Buy it if: chip, scratch, or dent the size of a quarter or smaller. Skip it if: the damage is bigger than a few square inches; that’s a refinish job, not a touch-up.
The Heat Map of a Stove
A range isn’t one surface, it’s four or five surfaces at wildly different temperatures, and the single most common appliance-paint failure we hear about is one can used across all of them. Appliance epoxy is rated to roughly 200°F continuous. That’s plenty for ambient kitchen heat at 90–110°F and nowhere near enough for anything the burners actually warm.
| Zone | What it sees | What goes on it |
|---|---|---|
| Range side and back panels | 90–110°F ambient | Appliance epoxy (Rust-Oleum quart or Krylon aerosol) |
| Dishwasher and fridge panels beside the range | 90–110°F ambient | Appliance epoxy |
| Oven-door exterior, control panel, kick plate | Warm to hot, cycles | High-heat paint — Krylon High Heat Max or Rust-Oleum High Heat |
| Range hood body and canopy | Hot grease, radiant heat | High-heat paint |
| Burner grates, cast-iron trivets | Direct flame | High-heat brush-on — Rutland Premium Hi-Temp |
| Glass-ceramic cooktop surface | Direct element heat | Nothing. Do not paint it. |
| Oven interior / cavity | 500°F+, self-clean higher, food contact | Nothing. Do not paint it. |
The products, with the numbers that matter. Krylon High Heat Max holds 600°F continuous and 1200°F intermittent and dries to touch in about 15 minutes, which makes it the easy aerosol for an oven-door exterior or a hood. Rust-Oleum High Heat — the Heat Protective Enamel 7778 line — retains its color to 1000°F and survives to 1200°F, and it’s the one that comes in appliance-friendly colors rather than only flat black. Rutland Premium Hi-Temp is a brush-on that resists peeling to 1400°F; it’s a wood-stove and insert product, and it’s the right call on cast-iron burner grates where an aerosol would just run.
Two rules that apply to all three. Cure them 24–48 hours before normal use, and check the label for a heat-cure cycle — several high-heat coatings only reach final hardness after you run the appliance through a controlled first burn. And no matter what any forum says, glass-ceramic cooktops and oven interiors don’t get painted at all. Cooktop glass has no mechanical tooth and the coating will scorch and flake into food; an oven cavity is a food-contact surface at temperatures that break down every consumer coating sold. Those two zones are replace-or-professionally-refinish, full stop. The full field of high-heat coatings, tested through 40 burn cycles, is in our high-heat paint round-up.
The Any-Color Route: Bonding Primer and a Hard Enamel
Appliance epoxy comes in white, almond, biscuit, and black. That’s the whole deck. If you want a sage-green laundry pair or a fridge panel matched to the cabinets, epoxy can’t do it, and the honest answer is a different system: a waterborne bonding primer under a hard tintable enamel.
The primers that bite factory finishes are Insl-X Stix, Zinsser Extreme Adhesion, and Sherwin-Williams Extreme Bond; on a commercial job the pro alternative is SW DTM Acrylic primer. Over that goes a scuff-resistant enamel — Benjamin Moore Scuff-X or Sherwin-Williams Emerald Urethane Trim Enamel, satin sheen — in any color on the deck.
The method is trim-painting discipline, not spray-can discipline. Sand 180 grit, shop-vac the dust, tack with a damp microfiber. Cut the edges first with a soft nylon brush (a Purdy Nylox is the standard), then flatten the field with a low-nap mini roller. Two coats, 2–4 hours apart. If you’d rather spray it, budget about 30% more material than rolling takes — that’s the overspray tax.
Where we land on it, plainly: this system is tintable to anything, low-odor, and soap-and-water cleanup, which the solvent epoxies are emphatically not. But the cured film is softer than appliance epoxy, and that difference shows up exactly where appliances get abused. A laundry-room washer, a dryer body, a fridge side panel nobody touches — good fit, and the color freedom is worth it. The handle zone on a kitchen fridge that four people open twenty times a day — pick the epoxy and live with white. It’s a trade of color range against cured hardness, and which side you want depends on which appliance.
Building the Right Stack for Your Appliance
| Appliance scenario | Coating | Primer | Why |
|---|---|---|---|
| Full white side-by-side fridge | Rust-Oleum Specialty Appliance Epoxy quart | None on sound enamel | Hardest cured film, best coverage per dollar |
| Single fridge door touch-up | Krylon Appliance Epoxy aerosol | None on sound enamel | One-can convenience, fast recoat |
| Countertop microwave | Krylon Appliance Epoxy aerosol | None | Aerosol suits a small flat appliance |
| Top-load washer body | Rust-Oleum Specialty Appliance Epoxy quart | Rust-Oleum Self-Etching on rust spots | Body refinish; rust at the lid hinge is the failure point |
| Porcelain laundry sink | Rust-Oleum Tub & Tile Kit | Stix on cultured marble | Two-part epoxy survives standing water |
| White fridge to stainless look | Giani Stainless Steel Kit | Included in kit | Only kit that genuinely reads as brushed stainless |
| Dime-sized chip on existing appliance | Touch Up Texas bottle | Rust-Oleum Rust Reformer on rust | Right tool for a 30-second repair |
| Stove side panels | Rust-Oleum Specialty Appliance Epoxy quart | Self-Etching on bare metal | Ambient heat is fine; do not paint the cooktop or oven front |
| Rusty fridge or freezer liner | Rust-Oleum Specialty Appliance Epoxy quart | None on a sound liner | Same epoxy family as the factory liner; never the shelves or bins |
| Oven door exterior, hood, burner grates | Krylon High Heat Max or Rust-Oleum High Heat | None | Appliance epoxy stops at 200°F; these zones need 600°F+ |
| Any color epoxy doesn’t come in | Bonding primer + BM Scuff-X or SW Emerald Urethane | Insl-X Stix or Zinsser Extreme Adhesion | Full color deck, softer film — laundry and low-touch panels |
The case the table doesn’t cover: an appliance with rust through the factory enamel at multiple spots. That’s a galvanized-steel exposure problem, not a paint problem. Treat each rust spot with Rust-Oleum Rust Reformer, prime with Self-Etching, then refinish. Skip the rust treatment and the new topcoat blisters from underneath inside a year.
What a Refinish Costs Against Buying New
The reason this project keeps getting done isn’t that painted appliances look better than new ones. It’s the arithmetic.
| Appliance | Paint cost, done properly | New unit | What the repaint buys you |
|---|---|---|---|
| Side-by-side refrigerator | ~$20 — one Rust-Oleum quart covers it | $800–$3,000+ | 5–10 more years of a fridge that already runs fine |
| Same fridge, aerosol route | $24–$32 — 3–4 Krylon cans at $6–$8 | $800–$3,000+ | Same result, more cans, slight sheen mismatch panel to panel |
| Fridge to brushed-stainless look | ~$70 — one Giani kit | $1,200–$2,500 for a stainless model | The look, without the appliance |
| Range or stove body | $20–$45 — epoxy for the sides, high-heat for the hot zones | $600–$2,500+ | Two products instead of one, still under 5% of a new range |
| Dishwasher front panel | $8–$16 — one or two Krylon cans | $400–$1,500+ | The one visible surface, fixed in an afternoon |
| Porcelain laundry sink | ~$30 — one Tub & Tile kit | $150–$400 plus plumbing labor | Avoids pulling and re-plumbing the basin |
Call it $20–$50 in paint per appliance, plus sandpaper, denatured alcohol, tape, and a respirator you’ll reuse. Against a new refrigerator at $800–$3,000, a new range at $600–$2,500, or a new dishwasher at $400–$1,500, the repaint is a rounding error — and with the scuff-sand and cure steps honored, it holds five to ten years under non-abrasive cleaning.
The line where it stops making sense is mechanical. If the compressor is failing, the drum bearings are going, or the control board is intermittent, you’re painting a machine that’s about to die. Paint solves an ugly finish on an appliance that still works. It doesn’t solve an appliance.
Prep Steps That Decide the Project
The most common appliance-paint failure isn’t paint failure. It’s prep failure.
- Scuff-sand 220 grit, everywhere. Factory porcelain enamel is glass-smooth; the topcoat needs tooth to bite. Skip this step and the new finish peels at the first edge.
- Degrease with denatured alcohol, not soap. Soap residue interferes with epoxy cure. Alcohol flashes off clean.
- Treat rust spots first. Rust-Oleum Rust Reformer converts rust to a paintable substrate; without it, the rust keeps spreading under the new film.
- Mask twice as far as you think. Aerosol overspray reaches 18 inches; brush spatter reaches 12. Drop cloth the floor and the cabinets to either side.
- Honor the cure window. Touch-dry isn’t scrubbable. Day 7 is the earliest your refinished appliance returns to normal service.
- Don’t paint heat-source surfaces. Cooktop glass, oven interiors, and burner pans get nothing at all; oven doors, hoods, and grates get a 600°F-plus high-heat paint. The heat map of a stove has the zone-by-zone call.
For the broader cabinet-and-furniture prep parallel, the cabinet spray paint round-up has the substrate decision tree for laminate and thermofoil, which carries over directly to dishwasher front panels and a fair number of European-built appliances.
Where Appliance Refinishes Go Wrong
- Peeled at the handle pulls inside six months. Wrong paint (regular spray paint, not appliance-rated) or skipped scuff-sand. Strip the failed area, sand 220, recoat with the right epoxy.
- Yellow ring around the oven vent. Appliance epoxy near a 350°F heat source, well past its ~200°F ceiling. Wrong chemistry; that panel needs Krylon High Heat Max or Rust-Oleum High Heat. Sand the yellowed film back and repaint the affected panel.
- Rust bleeding through new white finish at month four. Untreated rust under the topcoat. Sand back to bare metal, treat with Rust Reformer, prime with Self-Etching, recoat.
- Brush marks visible at one foot. Wrong brush (natural-bristle on waterborne, or oversized) or paint applied too thick. Sand smooth, recoat thinner with a synthetic 2-inch sash brush.
- Stainless-look kit smudged or streaky. Topcoat brush dragged in inconsistent directions. The brushed-stainless illusion needs one-direction pulls; sand back the smudged panel and redo.
- Aerosol cans two and three don’t match can one. Normal Krylon Appliance Epoxy behavior at scale; the fix is to start one can fresh on each visible panel, not finish a panel with two cans.
Three things move outcomes more than the can you bought. Scuff-sand and degrease every panel; that single step is the difference between a five-year finish and a six-month one. Two thin coats, never one thick; thick coats trap solvent and stay soft at the surface. Honor the 7-day cure; plug the fridge back in early to keep food cold, but don’t wipe the doors, don’t load magnets, don’t slam handles before day 7.
Also Tested, Also Passed Over
- Rust-Oleum Universal. Excellent general-purpose enamel, the top pick on our cabinet spray paint round-up for metal hardware. For appliance bodies, Specialty Appliance Epoxy’s cured-film hardness beats it at 30 days.
- Magic Cover Appliance Paint (private-label house brand). Soft cured film, no published cure schedule, regional stocking only. Skip.
- Rust-Oleum High Heat in appliance white. Right product for stove fronts, oven exteriors, hoods, and grills — wrong product for fridge doors, where it’s harder to apply than it needs to be. It earns its own slot in the heat map above and tops our high-heat round-up.
- Plain interior wall latex, any brand. Wrong product class entirely; burnishes under wipe-down within months and chips at the handle inside weeks. Worth drawing the line carefully, though: a hard scuff-resistant enamel like Benjamin Moore Scuff-X or SW Emerald Urethane over a bonding primer is a genuinely different animal from wall paint, and it’s the real answer when you need a color epoxy doesn’t make — see the any-color route above for where it works and where its softer film gives out.
- Generic auto touch-up. Color match is wrong for factory appliance whites; reads pink or grey against the original.
Companion Guides
For the prep math behind any factory-finish refinish, see the cabinet spray paint round-up — the laminate-and-thermofoil decision tree there applies directly to dishwasher front panels and many European-built appliances. For the porcelain-sink chemistry conversation, the tile paint round-up covers the two-part epoxy in more depth. For a sheen call across satin and gloss appliance finishes, the sheen guide. For everything above 200°F — oven doors, range hoods, burner grates, grills — the high-heat paint round-up is the companion page to this one, and what bonding primer actually does explains the grip step behind the any-color route.
Full comparison
| Product | Best for | Yellowing | Price |
|---|---|---|---|
| 🥇Rust-Oleum Specialty Appliance Epoxy | Top pick — fridges, washers, dryers | Low for an epoxy; meaningfully better than oil-based enamel on bright whites | $ |
| Rust-Oleum Specialty Tub & Tile Refinishing Kit | Best for porcelain sinks, tub-side panels, and chipped enamel basins | Low for an epoxy; will yellow under direct sun | $ |
| Krylon Appliance Epoxy | Best aerosol — small appliances, microwaves, door touch-ups | Low | $ |
| Giani Stainless Steel Paint for Appliances | Best for the brushed-stainless look on a white fridge | Low at room temperature; meaningful near heat vents | $$ |
| Touch Up Texas Appliance Touch-Up Paint | Best for chip repair on existing appliances | Low | $ |
Reviews
Pros, cons, and specs for each pick.
1. Rust-Oleum Specialty Appliance Epoxy
| Coverage | 30 sq ft / quart (two coats) |
|---|---|
| Sheens | Gloss (primary); satin in some markets |
| Dry / Recoat | Touch dry 4h · recoat 6h |
| Full cure | 7 days to scrubbable hardness |
| VOC | <450 g/L (solvent-borne) |
| Yellowing risk | Low for an epoxy; meaningfully better than oil-based enamel on bright whites |
| Primer | None on clean, scuff-sanded factory enamel; Rust-Oleum Self-Etching Primer on bare metal or rust |
| Price tier | $ |
- Cured film hardness is the closest a home-DIY coating gets to factory porcelain enamel — survives a Magic Eraser scrub on a refrigerator door without burnishing
- Brush-on quart is the only honest option for a full side-by-side fridge or a washer cabinet; aerosols run dry at the second door
- Stocked at most Home Depots and on Amazon; the quart pours easily and the can holds a reseal if you split the project over two days
- Solvent-borne with strong amine fumes — respirator with organic-vapor cartridges, open garage door, and a box fan are mandatory, not optional
- White only, with a single biscuit/almond off-white in some markets; no color deck, no tint base
- Full cure is 5–7 days before the appliance returns to daily wipe-down service; don't push it
2. Rust-Oleum Specialty Tub & Tile Refinishing Kit
| Coverage | 100 sq ft / kit |
|---|---|
| Sheens | Gloss white (primary). Tintable to off-whites via Rust-Oleum tint pack |
| Dry / Recoat | Touch dry 6h · recoat 1h within working window |
| Full cure | 3 days (no water) · 7 days for full service |
| VOC | <350 g/L (solvent-borne) |
| Yellowing risk | Low for an epoxy; will yellow under direct sun |
| Primer | None on properly etched porcelain; Stix on cultured-marble or fiberglass utility sinks |
| Price tier | $ |
- Two-part epoxy chemistry holds up to standing water on a porcelain laundry-room sink or a chipped washer-top enamel where Appliance Epoxy would soften
- $30 kit covers a full porcelain utility sink plus the panels around a top-load washer — more product than the brush-on quart at the same price
- Bonds to clean, etched, dry porcelain without a separate bonding primer; the etching cleaner ships in the kit
- Working time is 6 hours from the moment you mix part A and part B — you commit to the whole appliance in one go
- Smell is severe; this is the worst-fume pick in the round-up by a wide margin
- Wrong product for a refrigerator or a dryer body — overkill on dry exterior panels, and the cure window is harder to honor on a kitchen appliance you can't take out of service for a week
3. Krylon Appliance Epoxy
| Coverage | 20 sq ft / 12 oz can (two coats) |
|---|---|
| Sheens | Gloss |
| Dry / Recoat | Touch dry 30 min · recoat 1h |
| Full cure | 7 days to scrubbable hardness |
| VOC | Aerosol propellant + solvent-borne resin |
| Yellowing risk | Low |
| Primer | None on clean factory enamel; Krylon Bonding Primer on bare metal |
| Price tier | $ |
- Aerosol convenience for a small appliance — countertop microwave, dishwasher front panel, a single fridge door — without the brush-mark debate
- Faster recoat than the Rust-Oleum brush quart at 30 minutes, so a microwave gets two coats in an afternoon
- Multiple colors (white, almond, black) where the Rust-Oleum brush is essentially white-only
- Coverage runs thin — a full side-by-side fridge needs 3–4 cans and the second can never matches the first one's cured sheen exactly
- Aerosol overspray on appliance edges and adjacent cabinetry is a real cleanup; mask harder than you'd think
- Cured film is slightly softer than the brush-on Rust-Oleum at 30 days; chips at the handle pulls show first
4. Giani Stainless Steel Paint for Appliances
| Coverage | 30 sq ft / kit (one side-by-side fridge) |
|---|---|
| Sheens | Brushed-metallic (proprietary) |
| Dry / Recoat | Touch dry 1h · recoat 4h |
| Full cure | 7–10 days to handling hardness |
| VOC | <100 g/L (waterborne) |
| Yellowing risk | Low at room temperature; meaningful near heat vents |
| Primer | Included in kit |
| Price tier | $$ |
- Genuinely reads as brushed stainless from a few feet away — the metallic-fleck topcoat is the only home-DIY product that pulls this off without looking painted
- Three-component kit (primer, base coat, topcoat) ships everything you need for a side-by-side fridge in one box
- Water-based; cleans up with soap and water, no respirator-grade fumes, safe to recoat a kitchen appliance over a weekend
- Cured film is softer than the Rust-Oleum or Krylon epoxies; daily magnet hits and kid fingernails show wear at the door pull inside 12–18 months
- Not for cooking-surface adjacent zones; the topcoat is not heat-rated and yellows near a 350°F oven vent
- The brushed look depends on a careful pull of the topcoat brush in one direction — sloppy application reads as smeared metallic, not as stainless
5. Touch Up Texas Appliance Touch-Up Paint

| Coverage | ≤ 4 sq inches / bottle |
|---|---|
| Sheens | Gloss (factory-matched) |
| Dry / Recoat | Touch dry 15 min · second pass 30 min |
| Full cure | 7 days |
| VOC | Solvent-borne (small volume) |
| Yellowing risk | Low |
| Primer | None on a freshly cleaned chip; rust-spots get a dab of Rust-Oleum Rust Reformer first |
| Price tier | $ |
- Bottle-with-brush applicator is the right tool for a quarter-sized chip; aerosol overspray and a brush-on quart are both wrong for a 30-second repair
- Color-matched whites, almonds, biscuits, and blacks for the common factory enamels — saves the 'whose white is whose' guess that ruins most touch-ups
- Dries to handling in 30 minutes and back to wipe-down in a few hours; a chipped washer top is back in service same day
- Not a refinish coating — the bottle gives you maybe 4 sq inches of usable paint; do not try to recoat a whole door with this
- Color match is close but not perfect; on a glossy black fridge under kitchen LED, a careful eye sees the touched-up spot at one foot
- Soft film at the chip site for the first 7 days; a finger that catches the wet edge pulls the touch-up off
Rust-Oleum Self-Etching Primer
Appliance epoxy bonds well to clean, scuff-sanded factory enamel on its own. The case where it doesn't is bare metal at a rust spot, a deep scratch through the original coating, or a panel where the factory finish has flaked off down to galvanized steel. Self-etching primer chemically bites bare metal and gives the topcoat something to grab. Skip it on a sound factory finish; use it on every bare-metal spot before the appliance epoxy goes on. The Giani kit ships its own primer and doesn't need this; the Touch Up Texas bottle is small enough to skip primer on a clean chip but pair it with Rust-Oleum Rust Reformer if the chip has gone to rust.
BUY ON AMAZONFrequently asked questions
What's the best paint for refinishing a refrigerator?+
Can I use regular spray paint on appliances?+
Do I need primer before appliance epoxy?+
How long before I can use a refinished appliance?+
Will appliance epoxy paint hold up around the stove?+
Rust-Oleum or Krylon appliance epoxy?+
Can I paint a stainless-steel fridge to change its color?+
Is Touch Up Texas worth it over a Sharpie?+
What coating do appliance manufacturers use from the factory?+
Can I paint the inside of my fridge?+
What paint can I use on a stove top or hob?+
Is painting an appliance cheaper than replacing it?+
Can I paint an appliance a color that appliance epoxy doesn't come in?+
- Best high-heat paint — grills, stoves, and anything that gets hot
- Best cabinet spray paint — aerosols for wood, metal, and laminate
- Best tile paint — tubs, showers, backsplash, and floors tested
- Best multi-surface paint — one can across metal, wood, and plastic
- Sheen guide — matte, eggshell, satin, semi-gloss, gloss
- Fix mold on walls — the treatment-first guide before any paint