Best Tub and Tile Refinishing Kits
Five tub refinishing kits tested on cast-iron, porcelain, and fiberglass panels for adhesion, hardness, and hot-water soak. Top pick: Rust-Oleum Tub & Tile Refinishing Kit.

True 2-part epoxy acrylic at a 4:1 base-to-activator ratio, so a partial batch is legal — the only kit here you can mix half of without wasting the other half
Builds a film you can see the edge of. A poured Ekopel coat lands somewhere near 1 mm thick against roughly 3 mils for a brushed epoxy, which is why it hides pitting the others telegraph
Same epoxy acrylic chemistry as the brush kit in a $12 can, which makes it the cheapest way to test how the color reads in your bathroom before committing
One part, no mixing, no pot life. Open it, brush two coats, close it, and the leftover is still usable next season
Under $12 and it stops the actual failure that ruins tubs: a bare chip in the enamel that starts rusting the steel underneath
Disclosure: Some links below are affiliate links. We earn a commission if you buy through them, at no extra cost to you. Our picks come from the test protocol in “How I Tested”. No brand pays for placement.
Top pick: the Rust-Oleum Specialty Tub & Tile Refinishing Kit. At $30 to $40 for a quart that covers a standard 5-foot alcove tub in two coats, it’s a real 2-part epoxy acrylic sold at every Home Depot and Lowe’s in the country, and it posted the best crosshatch adhesion in this round-up on both cast iron and porcelain. It wins on bond strength, on price per square foot, and on being the only kit with a satin option and a color other than white. It falls short on fumes, which are serious, and on the three-day wait before water touches it. If you want the best-looking result and your bathroom has no window, Ekopel 2K is the odorless pour-on upgrade at six times the price. For a tile surround or a single sink, skip both and buy the aerosol.
Refinishing a tub is prep work with a coating step at the end. Not the other way around.
What a $35 Kit Can and Cannot Do
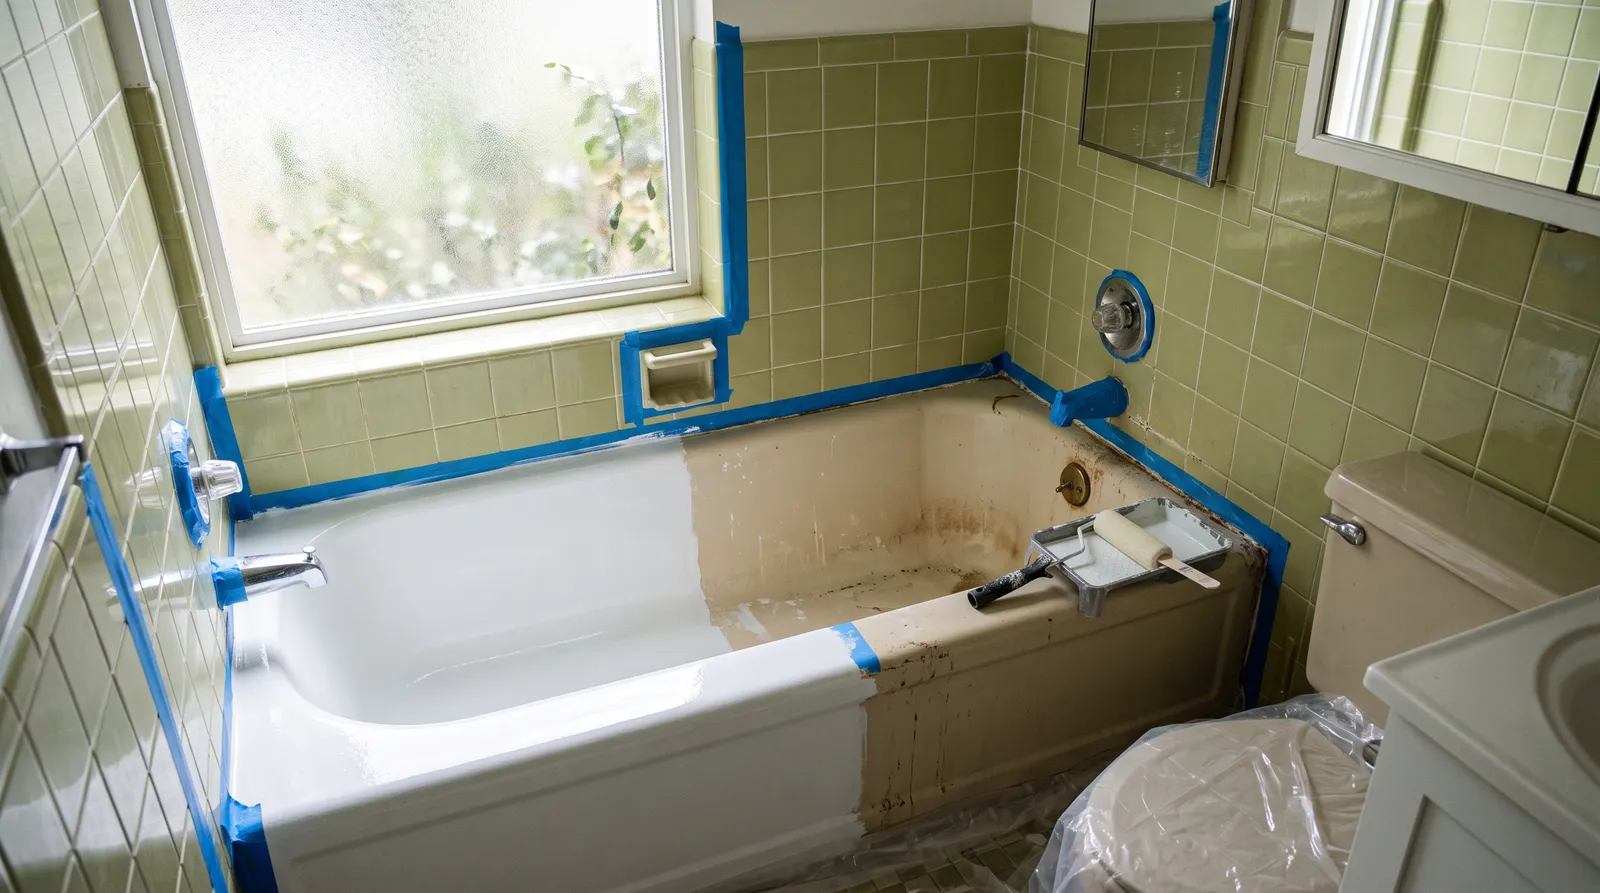
A refinishing kit changes the color and the gloss of a sound tub. It does not fix a cracked tub, it does not stop a tub floor from flexing, and it does not turn a 1972 fixture into a new one. What it does very well is take a stained, dulled, chalky, or dated-almond tub and make it read white and glossy again for three to five years, at about a tenth of the cost of replacement and a fifth of the cost of a pro reglaze.
The honest comparison is not kit versus new tub. It’s kit versus professional reglaze. A pro sprays an acrylic urethane over a chemical bonding agent in a masked-off room with a HEPA-filtered exhaust, charges $400 to $700 in most US metros, and warranties it for five years. You brush or pour a consumer epoxy, spend $35 to $200, and get a finish that looks close from three feet and lasts most of that same window if your prep was honest. Where the DIY version falls apart is never the can. It’s the forty minutes of sanding people decide they can skip.
How I Tested
Five kits went onto matched coupon sets cut from five real bathroom substrates: enameled cast iron from a salvaged 1968 alcove tub, vitreous china from a broken pedestal sink, glazed 4x4 wall tile with grout, gel-coat fiberglass from a shower pan, and cast acrylic. Every coupon got the same prep ladder that Rust-Oleum’s data sheet specifies: abrasive cream cleanser, rinse, wet-sand at 400 then 600 grit, rinse, 24-hour dry, tack cloth. Coating went on at 72°F and 45% relative humidity.
Then I abused them. Crosshatch tape pull at 7 days (ASTM D3359). Pencil hardness at 7 and 30 days (ASTM D3363), because 1-part films keep hardening for weeks after they stop feeling tacky. A 30-day soak in 105°F water with a weekly drain and refill, checking for blistering and edge lift. Ten scrub passes each with a non-abrasive bath spray, a bleach gel, and a cream cleanser on a weighted sponge. Gloss and color read against a masked control strip at twelve months. I also refinished a full cast-iron tub with the top pick and lived with it in a working two-person bathroom for a year. Three refinishing contractors talked me through what they get called to fix.
The Five Kits Side by Side
| Kit | Best for | Adhesion (cast iron) | Cure to shower | Price |
|---|---|---|---|---|
| Rust-Oleum Tub & Tile Kit | Top pick: whole tub, 2-part epoxy | 🟢 4B | 3 days | $ |
| Ekopel 2K Pour-On | Best finish, odorless, pitted tubs | 🟢 4B | 24–48h | $$$$ |
| Rust-Oleum Tub & Tile Aerosol | Tile surrounds, sinks, small areas | ⚪ 3B | 3 days | $ |
| Homax Tough As Tile Brush-On | Budget, no mixing, sinks | 🟡 2B | 48h | $ |
| Rust-Oleum Tub & Tile Touch-Up | Chips and nicks only | ⚪ 3B | 3 days | $ |
Two things jump out of that table. The 2-part chemistries beat the 1-part on adhesion by two full grades, which is the whole argument for mixing. And the cure-to-shower column is the one most people underestimate: three days without a bathtub in a one-bathroom house is a Friday-to-Monday commitment, not an afternoon.
Pick Yours in Thirty Seconds
- Standard tub, some ventilation, want it done cheap and right: Rust-Oleum Tub & Tile Refinishing Kit.
- Pitted or worn tub, windowless bathroom, want it to look genuinely good: Ekopel 2K Pour-On.
- Tile surround, a pedestal sink, or you want to test the color first: Rust-Oleum Tub & Tile Aerosol.
- Sink refresh, hate mixing, spending under $30: Homax Tough As Tile Brush-On.
- One chipped spot down to bare metal: Rust-Oleum Tub & Tile Touch-Up. Do not buy a full kit for a chip.
The Kits in Detail
Rust-Oleum Specialty Tub & Tile Refinishing Kit, Top Pick
This is the kit that made tub refinishing a home-center purchase. Two parts, mixed 4:1 base to activator, brushed or rolled on in two coats an hour apart, dried three days before it sees water. One quart does a 5-foot alcove tub with a little left over for a sink.
On adhesion it was the best in the round-up. The crosshatch grid over wet-sanded cast iron came up 4B, with only the finest flaking at the scribe intersections. Porcelain matched it. Fiberglass and acrylic each dropped a grade, which lines up with what the contractors said about flexing tub floors. Pencil hardness read 2H at 7 days and 3H at 30. The 105°F soak produced nothing: no blistering, no softening, no edge lift at the coupon perimeter after 30 days. Bleach gel and the non-abrasive spray left it alone. The cream cleanser dulled the gloss slightly after ten weighted passes, which is why the label tells you not to scrub for a week.
The 4:1 ratio deserves a specific note because it’s a practical advantage nobody advertises. Ekopel and most 2-part systems ship pre-portioned, so if you only need a sink done, you mix the whole thing and throw away what’s left. Rust-Oleum publishes the ratio, which means you can mix four ounces of base to one of activator for a small job and cap the rest.
Now the honest part. The fumes are the worst on this list. I ran a box fan in the doorway and wore an organic-vapor cartridge, and the bathroom still smelled like a body shop for two days. A windowless bathroom is not a place to freehand this decision. The pot life is six hours, which sounds relaxed, but the second coat goes on one hour after the first, so the actual working session is a locked-in afternoon. And three days before a shower is three days.
Buy it if your tub is cast iron or steel, you can ventilate, and you want the strongest bond per dollar in the category. Skip it if the bathroom has no window and no exhaust path; that’s Ekopel’s job.
Ekopel 2K Pour-On Bathtub Refinishing Kit, Best Finish
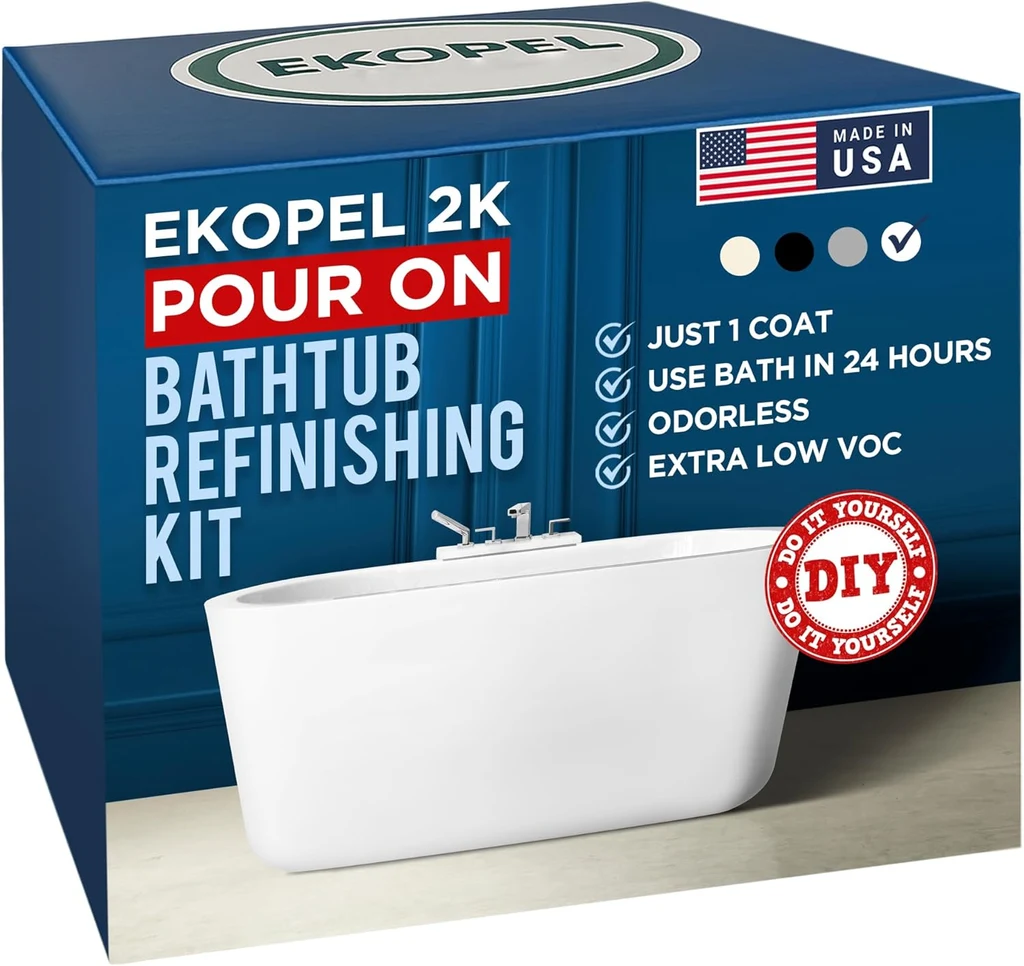
The premium answer, and it earns most of the premium. Ekopel is a 2-part odorless polymer you pour into the tub and spread with the included foam roller. The film it leaves is thick. Where a brushed epoxy lands around 3 mils, a poured Ekopel coat is closer to a millimeter, and that build is the entire reason to buy it: surface pitting, worn spots, and the fine crazing that old enamel develops all disappear under it instead of showing through.
Our Ekopel coupons matched the Rust-Oleum kit’s 4B crosshatch on cast iron and beat it visually by a wide margin. Under raking light the epoxy panel showed faint brush texture at twelve inches; the Ekopel panel showed nothing. Self-leveling continues for an hour or more after the roller leaves, so stipple and lap lines flow out on their own. Hardness came in slightly softer at 30 days than the epoxy, around H to 2H, which is a fair trade for the flexibility a thick film needs.
The odorless claim held. I poured a coupon set in a closed interior bathroom with no respirator on and no headache after.
Two real problems. The working window is under 40 minutes from the moment the parts meet, and a full tub is a continuous pour-and-roll with no pause. Overload the roller on a vertical wall and the material sags, and a sag in a self-leveling film cures exactly where it ran. Second, it’s $199.95 shipped direct, arriving in two to five business days, with no local stock anywhere.
Buy it if it’s your own bathroom, the tub has real surface damage, and the room has no ventilation. Skip it if this is a rental turnover or a flip; two Rust-Oleum kits cost a quarter as much.
Rust-Oleum Specialty Tub & Tile Aerosol, Best for Tile and Sinks
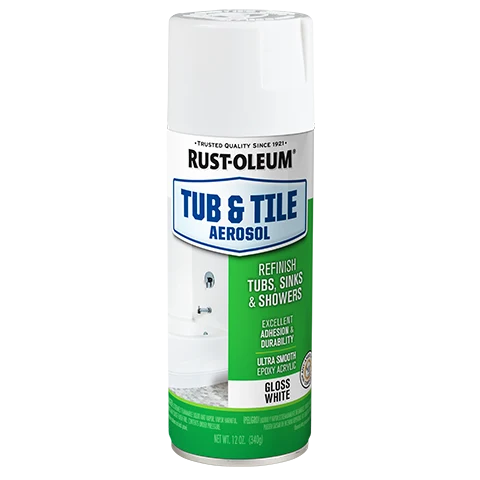
Same epoxy acrylic family as the brush kit, in a 15-ounce can for about $12. Coverage runs 12 to 15 square feet at two light coats, so one can handles a pedestal sink or a couple square feet of tile band.
Where it beats the brush kit is grout. On our glazed ceramic coupon the sprayed film wrapped into the grout lines evenly while a brush skipped over them and left the grout reading gray against fresh white tile. The atomized finish also left zero stipple. Crosshatch came in at 3B, a grade under the brush kit, and the 30-day soak was clean.
The color-drift result is the one to know about: at twelve months, the aerosol coupon read visibly warmer than the brush-kit coupon of the same nominal gloss white sitting beside it. Same brand, same chemistry family, different resin loading in an aerosol carrier.
Don’t refinish a whole bathtub with cans. Two cans won’t build enough film, the drain area wears through first, and you’ll have spent $25 to get a worse result than the $35 quart. Use it for what it’s good at: tile, sinks, and a cheap color test before you commit a quart.
Homax Tough As Tile Tub Refinish Brush-On, Budget Pick
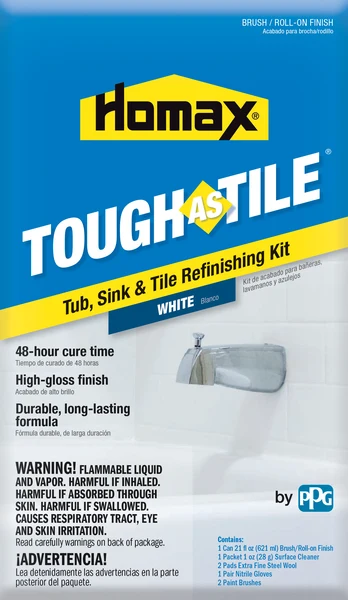
The no-mixing option, and the one where I have to be blunt about the compromise. Tough As Tile is a one-part solvent finish that air-dries to a high gloss in two coats, cures in 48 hours, and leaves whatever’s left in the container usable next season. PPG rates it for fiberglass, porcelain, and glazed ceramic tile.
It brushed beautifully. Self-leveling was better than I expected from a 1-part, and the porcelain coupon came out smooth and genuinely glossy. Then the tape came off the crosshatch grid and took coating with it: 2B on cast iron, two grades under the Rust-Oleum kit. Pencil hardness at 7 days was soft at HB, climbing to H by day 30, which is normal for an air-dry lacquer film and also a warning that the 48-hour “cure” is a handling cure, not a hardness cure. The hot-water soak showed slight softening at week three that recovered when the coupon dried.
PPG’s own product page says not for use on kitchen sinks. Take that seriously. A one-part film under a garbage disposal and a stack of dishes is a six-month coating.
Buy it if you’re refreshing a bathroom sink or a tile band on a tight budget and you want zero mixing. Skip it if the surface is a bathtub that gets daily use, because the adhesion gap over cast iron is real and it shows up as edge lift at the drain.
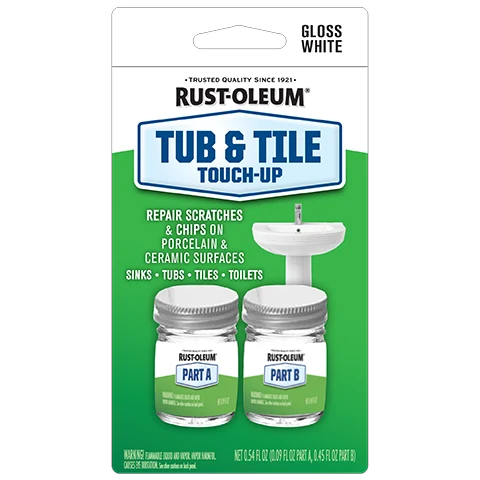
Rust-Oleum Specialty Tub & Tile Touch-Up
Not a refinishing kit, and I’m including it because half the people searching for one don’t need one. If your tub has a single chip where something heavy landed and the steel underneath is starting to rust, you don’t need a quart of epoxy and a lost weekend. You need $12 and ten minutes: sand the chip edge, remove the rust, dab, wait three days before running water.
Color match is the limitation. Gloss white against a 30-year-old almond or biscuit tub reads as a bright dot, and on a chip bigger than a nickel that’s worse than the chip. Test it somewhere hidden first.
Where These Jobs Actually Fail
- Peeling at the drain in year one. The drain flange never got sanded because nobody pulled the hardware. Remove the drain and overflow plates before prep, every time.
- Coating lifts in sheets off a fiberglass tub. Soap film and body oil were still in the gel coat. An abrasive cream cleanser and a full rinse comes before any sanding, not after.
- Cracking along the tub floor at month 18. The tub flexes under body weight and the hard film doesn’t. Support the tub floor before coating.
- Yellowing over the first summer. Almost always a 1-part film in a bathroom with a west window. Gloss white 2-part holds color far better.
- Sags and runs frozen into a poured finish. Roller overloaded on the vertical walls. Thin passes, then let it level.
- New caulk peels away from the fresh coating. Caulk went on before full cure. Remove all old caulk before coating, re-caulk after the cure window with a mildew-resistant silicone.
- Whole coat comes off with the tape. Masking tape pulled after the film cured hard around it. Pull tape while the coating is still soft.
The Prep Ladder That Decides the Outcome
- Strip the soap film first. Abrasive cream cleanser, a stiff pad, then a rinse until the water sheets instead of beading. Body oil and soap residue are why coatings fail, and they’re invisible.
- Wet-sand 400 then 600 until the shine is gone everywhere. Uniform dull is the target. Any remaining glossy patch is a future peel. Our sandpaper grit guide has the wet/dry paper worth buying for this.
- Pull every piece of hardware. Drain, overflow plate, spout escutcheon, and all the old caulk. Masking around hardware is how the edges fail.
- Dry a full 24 hours. Water trapped in a chipped enamel edge or a grout line blisters the film later.
- Ventilate before you open the can, not after. Box fan in the doorway blowing out, window open, organic-vapor cartridge on your face. See our painting respirator picks for the cartridge type.
- Mask the floor and the walls, then check the tape line. A good drop cloth beats a bedsheet; epoxy goes straight through cloth.
- Watch the humidity. Rust-Oleum wants below 85% RH and 50 to 90°F. A steamy bathroom in August throws off both. If the film stays tacky past the recoat window, our notes on paint not drying in humid conditions apply here too.
- Use a fine-bristle varnish brush, one direction only. Feather the edges. Don’t rebrush a setting film.
What It Costs Against a Pro Reglaze
| Route | Materials | Tools and prep | Total | Expected life |
|---|---|---|---|---|
| Rust-Oleum kit (1 quart) | $35 | $45 | ~$80 | 3–5 years |
| Ekopel 2K pour-on | $200 | $25 | ~$225 | 5–8 years |
| Homax brush-on | $28 | $45 | ~$73 | 2–4 years |
| Professional reglaze | included | included | $400–$700 | 8–15 years |
| Replace the tub | $400–$900 | plumber and tile repair | $2,000–$5,000 | 30 years |
The tool line covers sandpaper, a respirator with organic-vapor cartridges, tape, a drop cloth, and a decent brush. Buy the respirator once and it serves every other solvent job you’ll ever do.
Cabinets follow the same logic on a different surface, and if this project went well the kitchen is the natural next one. Our cabinet refinishing kit round-up covers that field.
What I Left Out and Why
- Miracle Method and similar franchise systems. Genuine pro-grade chemistry, applied only by trained applicators with spray equipment. It’s a service, not a product you can buy.
- Epoxy appliance paints repurposed for tubs. Appliance epoxy is engineered for dry heat on a refrigerator shell, not constant water immersion. Different failure profile, and the labels say so.
- Generic Amazon-only “bathtub refinishing kits” from unbranded sellers. No published data sheet, no consistent A/B ratio, no manufacturer to call when it fails. The category is full of relabels.
- Tub liners. An acrylic shell installed over the existing tub. A real product with a real use case, and completely outside a round-up about coatings.
- Anything sold for shower floors. A gloss epoxy on a wet horizontal surface you stand on is a slip hazard. Rust-Oleum routes floor tile to its floor coating line, and that’s the right call.
If your tub is cast iron, sound, and only ugly, buy the Rust-Oleum kit and spend the saved money on the respirator and the sandpaper. If it’s pitted and your bathroom has no window, pay for Ekopel. Everything else on this list is a small job pretending to be a big one.
Full Comparison
| Product | Best for | Yellowing | Price |
|---|---|---|---|
| Tub & Tile Refinishing Kit | Top pick — best 2-part kit for a whole tub | Low on gloss white; satin drifted slightly warmer at 12 months | $ |
| Ekopel Bathtub Refinishing Kit | Best finish quality and the only odorless option | Low | $$$$ |
| Tub and Tile Aerosol | Best for tile surrounds, sinks, and small areas | Medium; warmed faster than the brush kit over a year | $ |
| Tough As Tile Tub Refinish Brush-On | Budget pick — best 1-part brush-on | Medium | $ |
| Tub and Tile Touch-Up | Best for chips, nicks, and scratches only | Low | $ |
Every Pick, Pros and Cons
Pros, cons, and specs for each pick. The cons are not optional here.
1. Tub & Tile Refinishing Kit

- Coverage
- ~100 sq ft per 1-quart kit; one standard 5-ft tub at two coats
- Sheens
- Gloss and satin, in White and Coastal Fog
- Dry / recoat
- Touch dry 1h · recoat 1h · pot life 6h after mixing
- Full cure
- 3 days before water exposure; 7 days before scrubbing
- VOC
- Solvent-borne epoxy acrylic; high VOC, respirator and forced ventilation required
- Yellowing risk
- Low on gloss white; satin drifted slightly warmer at 12 months
- Primer
- None. Wet-sand at #400/#600 grit plus an abrasive cleaner is the prep
- Price tier
- $
- True 2-part epoxy acrylic at a 4:1 base-to-activator ratio, so a partial batch is legal — the only kit here you can mix half of without wasting the other half
- Scored 4B on crosshatch adhesion over wet-sanded enameled cast iron and 4B over porcelain, the best of the five on both substrates
- One quart covers a standard 5-foot alcove tub in two coats, and it sits on the shelf at Home Depot, Lowe's, and Ace for $30 to $40
- Four SKUs (gloss White, gloss Coastal Fog, satin White, satin Coastal Fog) instead of the single gloss white every competitor sells
- The solvent load is serious. Rust-Oleum's own label wants cross-ventilation, and a windowless bathroom needs a box fan in the doorway plus a NIOSH respirator, not a dust mask
- Six-hour pot life sounds generous until you realize the second coat goes on one hour after the first, so the whole tub is a single unbroken afternoon
- Adhesion on flexible acrylic and fiberglass tubs is a step down from cast iron. Ours held, but a flexing tub floor is where this film eventually cracks
- Three full days before water touches it. In a one-bathroom house that's a real logistics problem
2. Ekopel Bathtub Refinishing Kit
- Coverage
- One standard bathtub per kit (roughly 20 sq ft at full build)
- Sheens
- High gloss white
- Dry / recoat
- Under 40 min working time · self-levels 1–2h after rolling
- Full cure
- 24–48h before use; 7 days before any abrasive cleaner
- VOC
- Odorless, effectively zero VOC; no respirator needed
- Yellowing risk
- Low
- Primer
- None. Degrease, sand, dry
- Price tier
- $$$$
- Builds a film you can see the edge of. A poured Ekopel coat lands somewhere near 1 mm thick against roughly 3 mils for a brushed epoxy, which is why it hides pitting the others telegraph
- Genuinely odorless. I ran the pour in a windowless interior bathroom with the door shut and never reached for a respirator, which no other kit on this list allows
- Self-levels for over an hour after the roller leaves, so roller stipple and lap lines flow out instead of curing in place
- Kit ships with Part A, Part B, and the foam roller and handle, so there's no separate applicator run
- $199.95 direct. That is five to six Rust-Oleum kits, and on a rental-unit tub the math stops making sense fast
- Working time is under 40 minutes once the parts are combined. You pour, you roll, you leave the room. There is no going back for a touch-up at minute 50
- It runs. A thick self-leveling material on a vertical tub wall will sag if you overload the roller, and the sag cures in
- Direct-order only, 2 to 5 business days. Nobody stocks it locally, so a Saturday-morning emergency is out
3. Tub and Tile Aerosol
- Coverage
- ~12–15 sq ft per 15 oz can at two light coats
- Sheens
- Gloss white
- Dry / recoat
- Touch dry 20 min · recoat within 1h or after 48h
- Full cure
- 3 days before water exposure
- VOC
- High; aerosol solvent, respirator and open window required
- Yellowing risk
- Medium; warmed faster than the brush kit over a year
- Primer
- None. Sand, degrease, mask
- Price tier
- $
- Same epoxy acrylic chemistry as the brush kit in a $12 can, which makes it the cheapest way to test how the color reads in your bathroom before committing
- Sprayed tile grout lines evenly where a brush skipped over them, and the atomized film left no roller stipple on our glazed ceramic coupon
- One can per pedestal sink or per two square feet of tile band; buy what the job needs instead of a full quart
- Overspray goes everywhere. Masking a tile surround properly takes longer than the spraying does
- Our gloss white coupon drifted noticeably warm by month 12 next to the brush-kit panel from the same brand
- Film build is thin. Two cans on a full bathtub is a false economy and it wears through at the drain first
4. Tough As Tile Tub Refinish Brush-On
- Coverage
- One standard tub, or two bathroom sinks, per kit
- Sheens
- High gloss white
- Dry / recoat
- Two coats per label; recoat after the first coat sets
- Full cure
- 48 hours
- VOC
- Solvent-borne 1-part; ventilate and wear a respirator
- Yellowing risk
- Medium
- Primer
- None. Abrasive prep and a full rinse
- Price tier
- $
- One part, no mixing, no pot life. Open it, brush two coats, close it, and the leftover is still usable next season
- 48-hour cure to service beats the Rust-Oleum kit's 3-day water wait by a full day
- Self-leveling enough that a decent varnish brush leaves a smooth high-gloss film on porcelain
- One-part means air-dry lacquer chemistry, not a cross-linked film. It scored 2B on crosshatch over cast iron where the Rust-Oleum kit scored 4B
- PPG's own page says not for use on kitchen sinks, and a garbage-disposal sink is exactly the abuse that exposes a 1-part film
- Gloss white only, ready-mix custom color, so there's no satin and no off-white
5. Tub and Tile Touch-Up
- Coverage
- Nicks and chips; a few square inches per bottle
- Sheens
- Gloss
- Dry / recoat
- Handles in a few hours
- Full cure
- 3 days before water exposure
- VOC
- Small volume, same solvent family; ventilate
- Yellowing risk
- Low
- Primer
- None; sand the chip edge and remove any rust first
- Price tier
- $
- Under $12 and it stops the actual failure that ruins tubs: a bare chip in the enamel that starts rusting the steel underneath
- Applicator-in-cap format means no brush, no tray, no masking for a two-minute repair
- It is a repair product, not a refinishing product. Nobody should read this as a cheap version of the kit
- The touch-up gloss white will not match a 30-year-old almond or biscuit tub, and on a large chip that mismatch is more visible than the chip was
Ask a Question