Best Popcorn Ceiling Patch and Texture Sprays
Six popcorn ceiling patch products tested on aged perlite and polystyrene ceiling panels for aggregate match, sag, and paintability. Top pick: Homax PRO GRADE.

The trigger grip is the whole product — I held a steady 20-inch standoff for 40 seconds straight overhead where the button-top cans had my thumb cramping at 12 seconds
$13–17 and on the shelf at both big boxes plus every decent hardware store — this is the can you can buy on the way home
No aerosol, no masking radius, no drift onto the crown molding — the biggest practical advantage in an occupied room with furniture in it
Squeeze tube with a dab tip — no masking, no shaking, no wasted can for a 2-inch repair
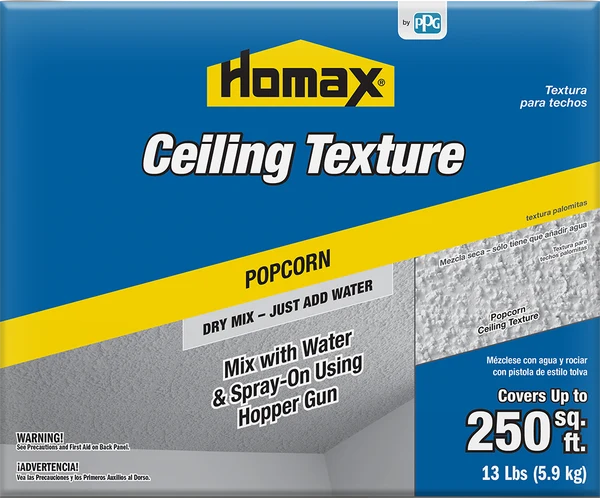
One 13 lb box covers up to 250 sq ft, which puts a 12x14 bedroom ceiling inside a single box
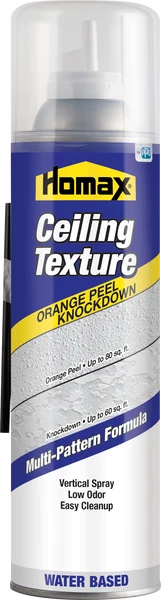
20 oz can, the largest aerosol in the round-up, and one nozzle sprays both orange peel and knockdown depending on how you set it
Disclosure: Some links below are affiliate links. We earn a commission if you buy through them, at no extra cost to you. Our picks come out of the test protocol in “How I Tested This,” and no brand pays for placement.
Top pick: Homax PRO GRADE Interior Aerosol Ceiling Texture Popcorn. At $22–28 a can it costs about double the standard Homax aerosol, and it’s the one I’d buy anyway, because the trigger grip is what lets you hold a steady 20-inch standoff overhead for a full minute instead of thirty seconds. PRO GRADE wins on chip variation, on coverage (roughly 20–25 sq ft of new texture per can in my test, against 5–8 for the button-top), and on being re-sealable when the job takes two sessions. It falls short on overspray radius and on price for a two-inch repair. If you need a 2-inch dab over four ceiling-fan screw holes, buy the $9 Homax squeeze tube instead. If the room has furniture you can’t move, the brush-on Zinsser Ready-Mixed Popcorn Ceiling Patch is the pick that doesn’t drift.
One warning before anything else. If your house went up before 1980, that texture may contain asbestos, and the hazard is entirely about disturbing it. Spraying new material over an intact ceiling is fine. Scraping, sanding, or wire-brushing the damaged area is not. Test a wetted sample at a lab for $50–100 before you take a scraper to anything, and read the containment section of our popcorn ceiling painting guide first.
How I Tested This
Six products went onto 2 x 2 ft drywall panels mounted horizontally overhead at 8 ft, at 72°F and 45% RH, against two reference panels: one built to match a 1994 polystyrene-chip tract-house ceiling, one hand-matched to a salvaged perlite sample from a 1974 ceiling. Match was graded blind by three people under a 3000K work light raking at 15 degrees, chip fallout was weighed on a tared drop cloth for the first 30 minutes, and every patch got painted at 24 hours with a flat ceiling white on a 3/4-inch nap to see what came back off on the roller. Pick-specific findings live inside each review below.
The Field at a Glance
| Product | Best for | Repair size | Aggregate match | Price |
|---|---|---|---|---|
| Homax PRO GRADE Aerosol | Top pick: spot repairs and mid-size patches | 1–25 sq ft | 🟢 Best of the aerosols | $$$ |
| Homax Aerosol Popcorn | The buy-it-on-the-way-home can | 1–8 sq ft | ⚪ Good on 1990s ceilings | $$ |
| Zinsser Ready-Mixed Patch | Furnished rooms, no masking | Under 4 sq ft | 🟢 Best under 2 sq ft | $$ |
| Homax Popcorn Ceiling Patch tube | Screw holes, nail pops | Under 1 sq ft | ⚪ Good, needs stippling | $ |
| Homax Dry Mix + hopper | Whole ceilings | 100–250 sq ft | 🟢 Adjustable, best control | $$ |
| Homax Orange Peel & Knockdown | After you scrape | 10–15 sq ft | 🔴 Different texture entirely | $$ |
Match the Can to the Hole
Repair size decides this category, not brand loyalty. Get the size band right and any of these products works. Get it wrong and the best can in the world produces a visible square.
- Four screw holes from a removed fixture: Homax squeeze tube. Ten minutes, nine dollars, done.
- A 1-foot water-damaged patch, room is furnished: Zinsser brush-on. No masking, no drift, and you can push the aggregate around until it sits right.
- A 3–20 sq ft repair after a roof leak: Homax PRO GRADE aerosol. This is the band it was built for.
- One bedroom ceiling, full re-texture: dry mix and a rented hopper gun. Two aerosol cans cost what the whole box does.
- You’ve decided popcorn is over: scrape, skim, prime, then Homax Orange Peel & Knockdown, or leave it flat.
The Picks
Homax PRO GRADE Interior Aerosol Ceiling Texture Popcorn, Top Pick
The trigger is the reason this can costs what it costs. Overhead aerosol work is a wrist-and-thumb endurance test, and the standard button-top can starts to wobble at about twelve seconds of continuous spray. Wobble shows up in the pattern as density banding, and density banding is exactly what makes a repair read as a repair. With the PRO GRADE grip I held a consistent 20-inch standoff for the length of a 40-second pass and the chip density came out even end to end.
On the 1994 polystyrene reference panel, PRO GRADE scored the highest blind match in the round-up among the spray products. The formula throws mixed chip sizes rather than the uniform bead the cheaper aerosols lay down, and mixed sizes are what real ceilings have. Against the 1974 perlite panel it lost ground, as everything modern does. Perlite has sharp irregular edges; polystyrene is round. At two feet nobody can tell. Under a west window at four in the afternoon, the patch has a softer shadow line than its surround.
Coverage is the other half of the value case. Homax claims 4x the coverage of a traditional aerosol, and my measured 20–25 sq ft against 5–8 for the standard can backs that up. On a 15 sq ft repair that’s one can instead of three, which erases the price gap entirely.
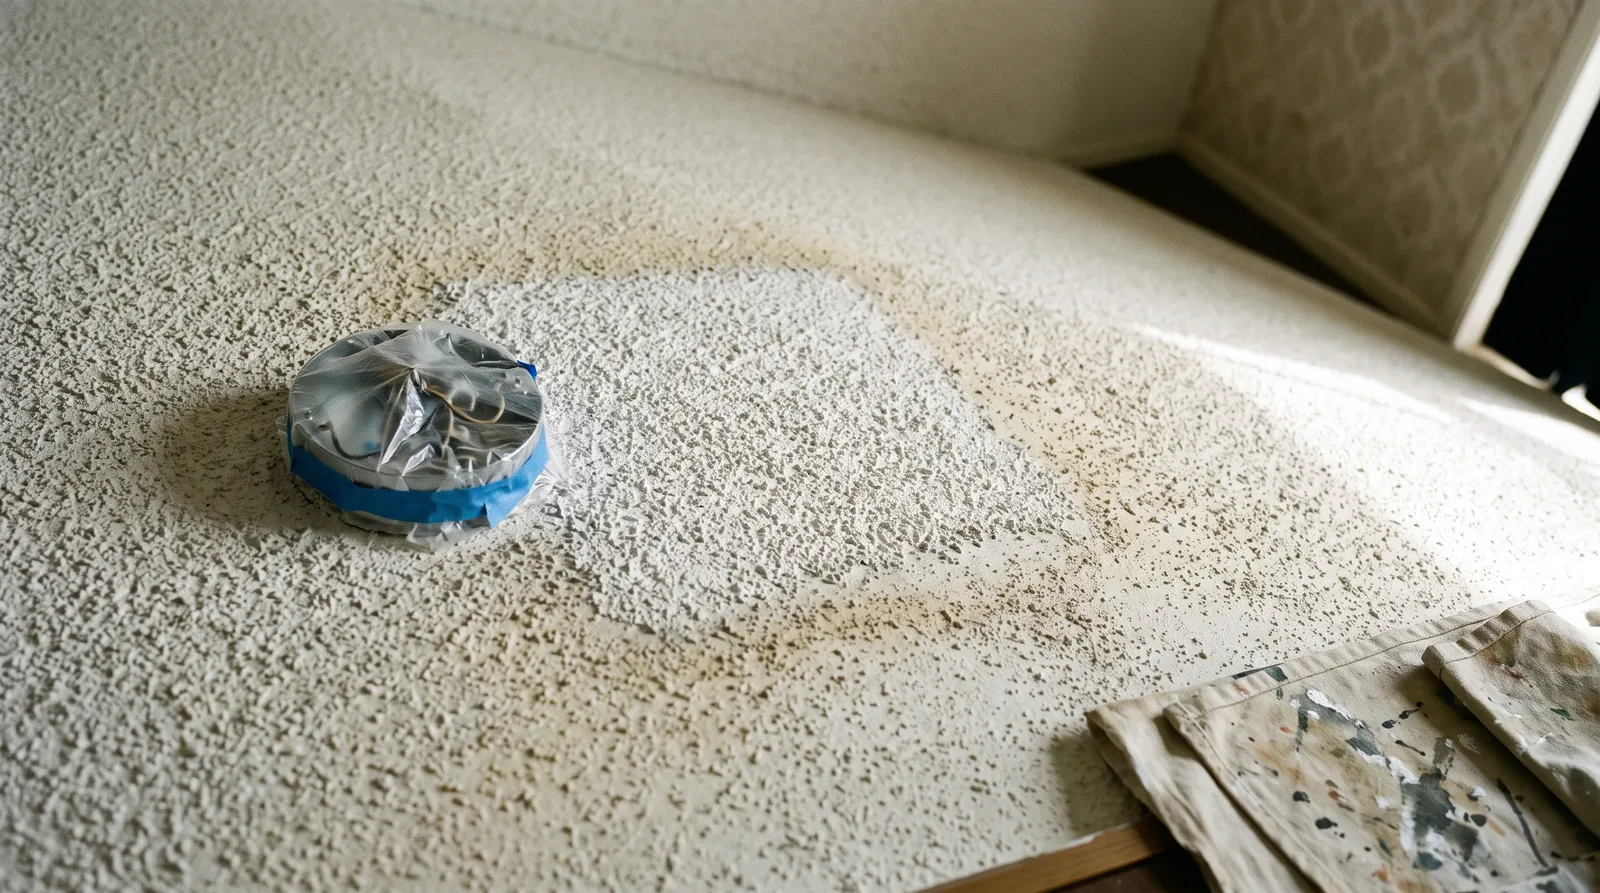
The overspray is real and worse than the button-top. Chip fallout registered on my tacky cards out to 3.5 feet from the target where the standard can stopped at 2 feet, a side effect of a fan pattern that’s genuinely wider. Mask 4 feet in every direction, bag the light fixture, and cover the floor past the mask line. The drop cloth picks matter more here than on almost any other paint job because falling chips bounce.
Buy it if your repair is between 3 and 25 sq ft, or if you’re doing several rooms and want a can you can re-lock and finish next weekend. Skip this if the whole job is four screw holes.
Homax Interior Aerosol Ceiling Texture Popcorn, Runner-Up
The can everybody has actually used. Pint size, water-based, button-top actuator, on the shelf at Home Depot, Lowe’s, Ace, and True Value. At $13–17 it’s the cheapest way to get sprayed texture onto a ceiling, and for a single small repair that’s the right trade.
It matched the 1994 reference panel well. Blind scoring put it a half-step behind PRO GRADE, which is a smaller gap than the price difference suggests on a repair under 5 sq ft. The chip is the same polystyrene family, and a tube touch-up next to a can repair blends because it’s all the same aggregate.
Two problems. The actuator is the first. Spraying straight up with your thumb on a button is uncomfortable within fifteen seconds and shaky by twenty, and on my second panel the fatigue banding was visible under the raking light without anybody pointing at it. The second is clogging. The nozzle plugs if you don’t clear it, and once it plugs mid-pass the can sputters chips in clumps that you then have to scrape off wet. I killed one can that way. Invert and clear for two seconds after every burst, the way the label says and nobody does.
Buy it if the repair is under 5 sq ft and you want to spend fifteen dollars. Skip this if you’ll be spraying for more than about a minute total.
Zinsser Ready-Mixed Popcorn Ceiling Patch, Best Brush-On
Zinsser’s tub is the pick for the room you can’t empty. No aerosol means no masking radius, no drift onto the crown molding, no chips in the sofa cushions. You load a stiff chip brush, dab it up onto the ceiling, and stipple until the pattern reads right. On repairs under 2 sq ft this scored the best blind match of anything in the round-up, including against the 1974 perlite panel, because a brush lets you make the aggregate irregular in a way a fan pattern can’t.
That advantage is also its ceiling. Hand rhythm drifts. My 6-inch knockout matched beautifully; a 3 sq ft trial on a scrap panel started reading as a wandering hand-stipple by the far edge. The blind scorers found the seam without being told where to look.
Drying is slower than the aerosols. A thick dab was still soft at hour 6 in a 45% RH room, and in a bathroom or a basement I’d hold off painting for 48 hours rather than 24. The other thing the tub won’t tell you: it sags if you load it heavy. Two thin passes with an hour between them hold; one fat pass slumps into a drip you’ll be sanding off later, which on an old ceiling you don’t want to be doing at all.
Water-damaged ceilings are the product’s stated use case, which is honest marketing given how many of these repairs follow a leak. The patch is not a stain-blocker, though. Shellac first, texture second.
Buy it if the room is furnished, the repair is under 2 sq ft, and you want the closest possible match. Skip this if the patch is bigger than a dinner plate by much.
Homax Interior Popcorn Ceiling Patch, Best for a Single Dab
A squeeze tube with a dab applicator tip, rated for up to 1 sq ft, under $11. That’s the whole product and it’s correctly designed. Remove a ceiling fan, you get four screw holes and a ring of clean paint where the canopy sat. Nobody should be masking a room and shaking an aerosol for that.
Fill the holes with a lightweight spackle first, let it set, then dab texture over the repair. The tip lays down a slightly domed blob that catches light if you leave it, so stipple it flat with a dry chip brush while it’s wet. Thirty seconds of stippling is the difference between a repair you can find and one you can’t.
The math turns against it fast. Three tubes to cover 3 sq ft costs more than a PRO GRADE can and the hand-dabbed result under raking light is worse. Know which job you have. For the spackle side of this work, see the wall filler and spackle picks.
Homax Interior Popcorn Ceiling Texture Dry Mix, Best for a Whole Ceiling
Thirteen pounds of powder, up to 250 sq ft of coverage, mixed with water and shot through a hopper gun. The cost per square foot is roughly a tenth of aerosol, and once a job passes about 100 sq ft the aerosol convenience premium stops being defensible.
The real advantage is control, which surprised me. Water ratio changes chip density and pattern weight, so you can mix a test batch, shoot a scrap panel, look at it against the existing ceiling, and adjust. No aerosol offers that. On the 1974 perlite reference, a slightly thick mix at low air pressure produced the closest match of any product I tested, because a heavy slow-moving spray drops fatter irregular clumps.
Learning curve is the price. My first batch was too thin and threw chips that hit the panel and slid off onto the drop cloth instead of grabbing, which is the classic wet-mix failure. Second batch, less water, longer soak time, held fine. A hopper gun needs a compressor at 20–30 PSI, rental runs $30–50 a day, purchase $40–70. Add two hours of masking for a full room; ceiling texture spray goes everywhere, including places you swore you covered.
The formulation is non-asbestos, which is worth stating plainly since a good share of the people buying it are re-texturing a ceiling they just had abated.
Buy it if you’re doing a full room or several rooms. Skip this if the job is under 100 sq ft; you’ll spend more on the gun and the masking than the texture saves you.
Homax Interior Aerosol Ceiling Texture Orange Peel and Knockdown, Best Exit Ramp
The honest option for people whose real question is how to stop having a popcorn ceiling. Twenty ounces, the biggest can here, one nozzle that sprays orange peel or knockdown depending on the setting and what you do next.
Knockdown is the better ceiling texture on almost every axis. It hides a mediocre drywall repair as well as popcorn does, it doesn’t collect twenty years of dust in its peaks, and it doesn’t shed onto your floor when someone bumps it with a ladder. The technique has a timing window: spray, wait for the wet gloss to dull (5 to 15 minutes depending on room temperature), then flatten the peaks with a wide knife held nearly parallel. Too early and it smears into mud. Too late and nothing flattens.
One can does not do a room. Budget three or four for a bedroom ceiling, at which point the dry mix and a hopper win on cost again. This is a patch-and-blend product for a scraped area, not a whole-ceiling solution.
Buy it if you’ve scraped and skimmed and want texture that isn’t popcorn. Skip this if you’re trying to match an existing acoustic ceiling; wrong tool, entirely.
The Stain Is the Real Job
Most popcorn ceiling repairs start with a leak. That means the sequence people get wrong is not the texture, it’s what goes under it.
Fix the water source. Let the ceiling dry completely, which takes days, not hours. Then seal the stain with a shellac-based aerosol primer before any texture goes on. Dried water stains carry tannins and rust that wick straight through fresh texture and fresh ceiling paint, and they come back tea-colored in two to four weeks. Shellac stops it in one coat. Latex stain-blockers, in my experience on ceiling rings, do not reliably.
The aerosol format matters overhead because a brush drags existing popcorn off the ceiling in clumps. Spray it, wait 45 minutes, then texture. For the diagnosis order and the leak-first checklist, our ceiling water stain fix covers it, and the primer round-up has the full stain-blocker comparison.
Where These Repairs Go Wrong
- Patch reads brighter than the ceiling forever. Aged texture carries thirty years of cooking film and UV yellowing. Repaint the whole ceiling plane after the patch cures, or feather to the nearest wall break.
- Chips fall off when you paint. You rolled at hour 6. Wait the full 24, and load the roller heavy so one pass does it.
- The roller pulled the texture off in ribbons. Back-rolling. Popcorn goes soft the instant it’s wet. One pass each direction, then walk away.
- Density banding across the repair. Thumb fatigue on a button-top can, or an inconsistent standoff distance. The trigger-grip can fixes the first; taping a 20-inch stick to the can fixes the second.
- Clumps and sputtering mid-pass. Clogged nozzle. Invert and clear between bursts.
- Stain came back three weeks later. No shellac under the texture. Strip the patch, seal, re-texture.
- Chip size obviously wrong. Perlite ceiling, polystyrene patch. Get closer with a slower spray at a shorter standoff, or switch to the brush-on and hand-stipple.
Spray Technique That Matches
- Shake for a full minute, then shake again halfway through. The chips settle. An under-shaken can throws binder without aggregate on the first burst.
- Test on cardboard first, every time. Set the nozzle, check the chip density against the ceiling, adjust standoff. Two minutes here saves an hour of scraping.
- Hold 18–24 inches and keep it constant. Closer means denser and wetter; farther means sparse and dusty. Constant matters more than the exact number.
- Spray in short bursts, moving. Continuous spray at one spot builds a wet blob that sags.
- Work from the outside of the repair inward, feathering the last passes into the existing texture so there’s no hard edge.
- Mask 4 feet out and bag the fixture. Falling chips bounce off the drop cloth and land where you didn’t cover.
- Wear eye protection and a respirator. You are spraying aerosolized material directly above your face. See the respirator picks; a P95 is the floor for this work.
- Set the ladder square and don’t reach. An extension pole handles the painting step; the texture step needs you close, so move the ladder instead of stretching.
What a Repair Actually Costs
| Repair | Product | Product cost | Extras | Total |
|---|---|---|---|---|
| Four screw holes | Homax patch tube | $9 | Spackle $6 | ~$15 |
| 1 sq ft water damage | Zinsser tub + B-I-N spray | $14 | Primer $12, brush $5 | ~$31 |
| 12 sq ft roof-leak patch | Homax PRO GRADE can | $25 | Primer $12, masking $15 | ~$52 |
| 30 sq ft, hallway ceiling | 2x PRO GRADE cans | $50 | Primer $12, masking $20 | ~$82 |
| 180 sq ft bedroom ceiling | Dry mix box | $32 | Hopper rental $40, masking $30 | ~$102 |
A drywall contractor charges $300–600 to re-texture a bedroom ceiling and $150–250 to come out for a single patch. The DIY savings on the small repairs are what make this category worth doing yourself; on a full re-texture, the gap narrows once you price the masking, the gun, and the day.
Also Considered
- Homax Easy Patch Interior Ceiling Texture Popcorn. A pint aerosol rated for up to 4 sq ft, sitting between the standard can and PRO GRADE. Fine product, awkward slot. If your repair is 4 sq ft you’re better off with PRO GRADE and its leftovers.
- Homax Interior Pre-Mixed Popcorn Ceiling Texture. The tub version of the dry mix, still needs a hopper gun. Convenient if you dislike mixing, heavier to carry, more expensive per square foot.
- Joint compound with polystyrene chips stirred in. A real contractor trick that works, and I’m not recommending it to a homeowner. Chip ratio is guesswork, and you get one shot at a mix you can’t test-spray without a gun.
- Rolled-on texture with a heavy-nap roller. Produces a stipple, not popcorn. Different look, useful on walls, wrong for matching an acoustic ceiling.
- Ceiling tiles or a plank cover-up over damaged popcorn. A legitimate answer when the ceiling is badly water-damaged over a wide area. Different project, different pillar, and worth pricing before you commit to re-texturing 400 sq ft.
If the repair is smaller than a dinner plate and the room is full of furniture, buy the Zinsser tub. Everything bigger, up to about 25 sq ft, buy the PRO GRADE can and mask further out than you think you need to.
Full Comparison
| Product | Best for | Yellowing | Price |
|---|---|---|---|
| PRO GRADE Interior Aerosol Ceiling Texture Popcorn | Top pick — best aerosol for repairs up to a few square feet | None on its own; the ceiling paint over it controls color | $$$ |
| Interior Aerosol Ceiling Texture Popcorn | Runner-up — the classic can, stocked everywhere | None | $$ |
| Ready-Mixed Popcorn Ceiling Patch | Best brush-on — zero overspray, full control | None | $$ |
| Interior Popcorn Ceiling Patch | Best for a single dab — nail pops, hanger holes, smoke-detector swaps | None | $ |
| Interior Popcorn Ceiling Texture Dry Mix | Best for a whole ceiling or a large re-texture | None | $$ |
| Interior Aerosol Ceiling Texture Orange Peel & Knockdown | Best exit ramp — when you're done with popcorn | None | $$ |
Every Pick, Pros and Cons
Pros, cons, and specs for each pick. The cons are not optional here.
1. PRO GRADE Interior Aerosol Ceiling Texture Popcorn

- Coverage
- 14 oz / pint can; ~20–25 sq ft of new texture in my test, more if you're spot-dabbing
- Sheens
- Flat
- Dry / recoat
- Touch-dry 1–2h at 70°F · paintable at 24h
- Full cure
- 24–48h before painting; longer in humid rooms
- VOC
- Aerosol; water-based formula, low odor
- Yellowing risk
- None on its own; the ceiling paint over it controls color
- Primer
- Stain-block first if the repair follows a leak — B-I-N aerosol under the texture
- Price tier
- $$$
- The trigger grip is the whole product — I held a steady 20-inch standoff for 40 seconds straight overhead where the button-top cans had my thumb cramping at 12 seconds
- Manufacturer claims 4x the coverage of a traditional aerosol; on my panels one 14 oz can covered a little over 20 sq ft of new texture with a usable amount left for touch-in
- Aggregate reads closer to perlite than any other aerosol I sprayed — the chips break up into mixed sizes instead of the uniform bead pattern the cheap cans throw
- Safety lock lets you park a half-used can and come back a week later; the standard cans clog at the nozzle if you don't clear them
- $22–28 a can, roughly double the standard Homax aerosol, and a single nail-pop repair doesn't need this much can
- Overspray radius is wider than the button-top can at the same distance; mask 4 feet out, not 2
- Still a polystyrene chip. On a genuine 1968 vermiculite ceiling, the patch reads slightly softer-edged in hard side light no matter how well you spray it
2. Interior Aerosol Ceiling Texture Popcorn
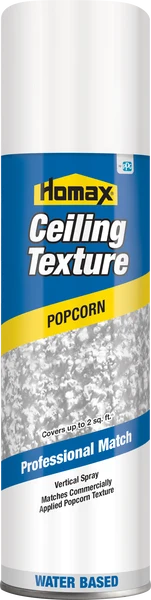
- Coverage
- Pint / 473 mL; small repairs, roughly 5–8 sq ft of new texture in my test
- Sheens
- Flat
- Dry / recoat
- Touch-dry 1–2h · paintable at 24h
- Full cure
- 24h before paint
- VOC
- Water-based aerosol, low odor
- Yellowing risk
- None
- Primer
- Seal water stains before texturing
- Price tier
- $$
- $13–17 and on the shelf at both big boxes plus every decent hardware store — this is the can you can buy on the way home
- Water-based, low odor, cleans off the drop cloth with a hose instead of mineral spirits
- Polystyrene chip size lands close to the 1985–1999 ceilings most people are actually patching
- Button-top actuator, no trigger. Overhead spraying past about 15 seconds is genuinely uncomfortable and the shake in your thumb shows up in the pattern
- Nozzle clogs if you don't invert and clear it between bursts; I lost one can to a plugged tip mid-repair
- No published square-foot rating, so buying for a room-sized job is guesswork
3. Ready-Mixed Popcorn Ceiling Patch
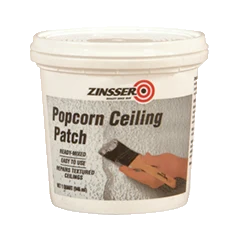
- Coverage
- 16 oz tub; small blemishes, scratches, and scrapes — roughly 2–4 sq ft of spot repair
- Sheens
- Textured flat
- Dry / recoat
- Touch-dry 2–4h · paintable at 24h, longer on heavy dabs
- Full cure
- 24–48h
- VOC
- Water-based ready-mixed compound
- Yellowing risk
- None
- Primer
- Stain-block under it on water-damaged ceilings; the patch is not a sealer
- Price tier
- $$
- No aerosol, no masking radius, no drift onto the crown molding — the biggest practical advantage in an occupied room with furniture in it
- Ready-mixed, so there's no water ratio to get wrong and no hopper gun to rent
- You can push the aggregate around with a stiff chip brush until the pattern matches, which no spray can lets you do
- Repairs water-damaged acoustic finish, which is the single most common reason anyone buys this category
- Stipple-by-hand results scale badly. Under 2 sq ft it's the most accurate match in the round-up; past that, hand rhythm drifts and the patch starts reading as a patch
- Slower drying than the aerosols in a humid room; I had a thick dab still soft at hour 6
- Heavier build means it can sag if you load it on. Two thin passes beat one fat one, and the tub doesn't tell you that
4. Interior Popcorn Ceiling Patch
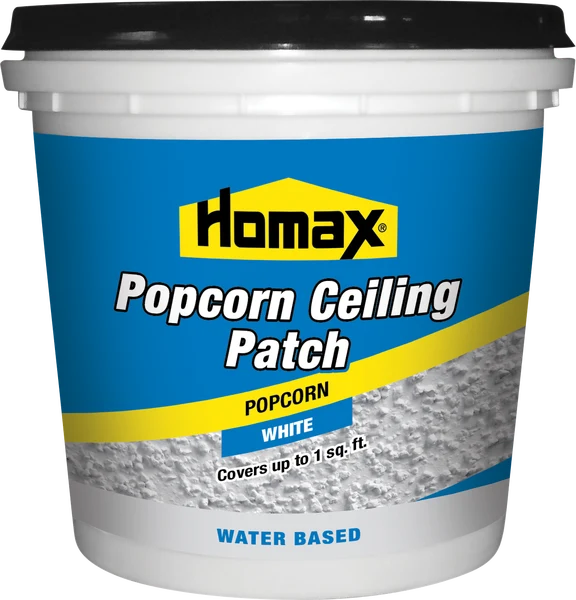
- Coverage
- Covers up to 1 sq ft per tube
- Sheens
- Flat
- Dry / recoat
- Touch-dry 2–3h · paintable at 24h
- Full cure
- 24h
- VOC
- Water-based ready-mix
- Yellowing risk
- None
- Primer
- Not needed on clean drywall; stain-block over rust rings from old fixture screws
- Price tier
- $
- Squeeze tube with a dab tip — no masking, no shaking, no wasted can for a 2-inch repair
- Under $11, which makes it the correct answer for the four screw holes left by a ceiling fan you removed
- Same polystyrene aggregate as the Homax aerosols, so a tube touch-up next to a sprayed repair matches itself
- Rated for up to 1 sq ft. Buying three tubes to cover a 3 sq ft water stain costs more than a can and looks worse
- The dab tip lays down a slightly domed blob; you have to stipple it back flat with a dry brush or it catches light
5. Interior Popcorn Ceiling Texture Dry Mix
- Coverage
- 13 lb box covers up to 250 sq ft
- Sheens
- Flat
- Dry / recoat
- Touch-dry 4–8h depending on mix thickness · paintable at 24h
- Full cure
- 24–48h; longer on a heavy mix
- VOC
- Dry powder, mixed with water; non-asbestos
- Yellowing risk
- None
- Primer
- Prime bare or repaired drywall with a drywall sealer first or the texture sucks in unevenly
- Price tier
- $$
- One 13 lb box covers up to 250 sq ft, which puts a 12x14 bedroom ceiling inside a single box
- Cost per square foot is roughly a tenth of aerosol; the aerosol convenience premium is enormous once the repair passes about 15 sq ft
- You control the mix. Thinner water ratio throws a finer chip, thicker throws a heavier one, so you can chase an existing pattern instead of accepting whatever the can gives you
- Non-asbestos formulation, which matters because half the reason people are up there is the ceiling above them isn't
- Needs a hopper gun and a compressor. Rental is $30–50 a day, purchase is $40–70, and neither is worth it under about 100 sq ft
- Mixing takes practice. My first batch was too wet and dropped chips onto the drop cloth instead of sticking to the lid
- Masking a whole room for hopper spray is a two-hour job before any texture goes up
6. Interior Aerosol Ceiling Texture Orange Peel & Knockdown
- Coverage
- 20 oz can; small to medium repairs, roughly 10–15 sq ft
- Sheens
- Flat
- Dry / recoat
- Knockdown pass at 5–15 min · paintable at 24h
- Full cure
- 24h
- VOC
- Water-based aerosol, low odor
- Yellowing risk
- None
- Primer
- Prime the scraped ceiling before texturing; bare scraped drywall drinks unevenly
- Price tier
- $$
- 20 oz can, the largest aerosol in the round-up, and one nozzle sprays both orange peel and knockdown depending on how you set it
- Knockdown hides a bad drywall repair better than popcorn does, and it doesn't collect twenty years of dust in the peaks
- Water-based and low odor, which matters when you're spraying a ceiling in a closed room
- Wrong product if your goal is matching existing popcorn. This is the can you buy after you've scraped
- Knockdown needs a timing window. Spray, wait for the wet gloss to dull, then flatten with a 18-inch knife. Miss the window by three minutes and the texture smears
- One can does not do a room; budget three to four for a bedroom ceiling, at which point the dry mix and a hopper gun win on cost
Zinsser B-I-N Shellac-Base Primer (aerosol)
Most popcorn ceiling repairs start with a leak, and a dried tannin-and-rust water stain will wick straight back through fresh texture and fresh ceiling paint. Shellac is the only common primer that stops it cold in one coat, and the aerosol is the right format overhead because a brush drags the existing popcorn off the ceiling. Spray the stain, let it flash off for 45 minutes, then texture over the sealed area. Skip this step and your beautifully matched patch turns tea-colored in about three weeks, at which point you get to do the whole thing again. One 13 oz can seals several ceiling stains.
BUY ON AMAZON
Ask a Question