The Complete Spray Painting Setup
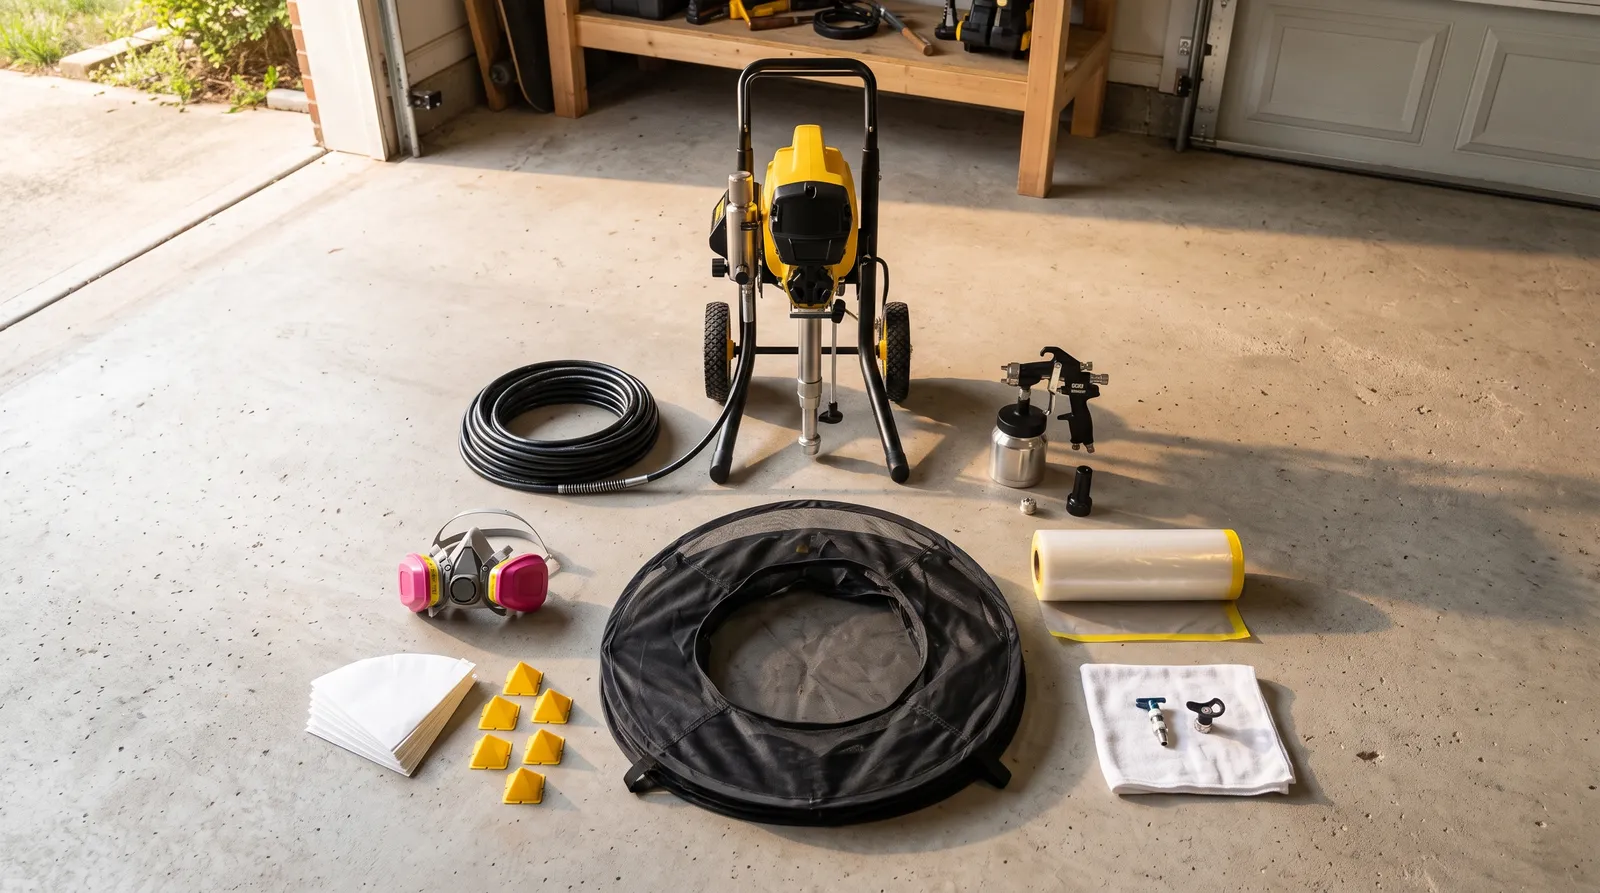
The nine-piece spray painting setup I actually use, tested across cabinets, siding, and interior walls. Top pick: Graco Magnum X7 — plus the shelter, respirator, strainers, and masking that make it work.

Disclosure: Some links below are affiliate links. We earn a commission if you buy through them, at no extra cost to you.
Top pick: the Graco Magnum X7. About $450, siphons straight out of a 5-gallon bucket, takes tips up to 0.017 in, and flushes clean off a garden hose in roughly ten minutes. It wins on volume and on cleanup, which are the two things that decide whether an airless stays in your garage or goes back to the store. It falls short on overspray, badly, and that is the whole reason this page is nine items long instead of one. A sprayer is not a setup. The sprayer is the loud part of the setup. The other eight pieces on this list cost about a third of what the machine costs and do most of the work of making the finish look sprayed instead of splattered.
If you are spraying cabinets and furniture rather than walls, buy the Wagner FLEXiO 3500 instead and skip the airless entirely.
The Nine Pieces and What Each One Buys You
Every spray job has the same five problems. Getting paint out of the can and into the machine without junk in it. Getting it onto the surface in a flat, even film. Keeping it off everything else. Keeping it out of your lungs. Getting the machine clean before the paint sets inside it.
Nine items cover all five. Three of them are sprayers, and you only need one, chosen by job. The tip is a $22 part that changes the finish more than a $200 difference in pumps does. The shelter and the masking film are containment. The respirator and the strainers are the two pieces people skip, and skipping them is how a spray project becomes a sanding project.
I have sprayed with a bare machine and no shelter. The finish was fine. The car in the driveway had a film of eggshell latex on the hood that took a clay bar to remove.
How I Tested the Kit
Nine weeks, four jobs, one rule: nothing got a pass because it was cheap.
The cabinet job. Thirty-one shaker doors and drawer fronts, waterborne alkyd enamel, sprayed in a garage with the shelter over a folding bench and the doors up on pyramids. This job carried the HVLP, the shelter, the pyramids, and the strainers. Finish scored under a raking LED work light at 24 hours, from about a foot away, looking for orange peel, dry spray at the edges, and grit.
The exterior. A detached garage in acrylic, two sessions, sprayed off the Magnum X7 on its stand. This job carried the airless, the masking film, and the respirator across a long session.
The overspray comparison. Two interior rooms of the same size, masked identically, one sprayed with the Control Pro 130 and one with the Magnum X7. Tacky witness cards taped down at 3, 6, and 12 feet from the work in both rooms, collected at the end of each session and compared side by side. The standard airless tip put visible solids on the 12-foot card. The high-efficiency machine did not, though it was not clean at 6 feet either.
The tip test. Six interior doors in enamel, same coating, same pump, standard 515 tip on three and the FFLP 211 on the other three. The three sprayed with the fine-finish tip needed no sanding between coats. The three sprayed with the standard tip did.
Clogs, spits, and tip reversals logged per gallon. Every coating strained through a fresh cone before it went anywhere near a pump. Prices checked at Home Depot, Lowe’s, and Amazon during the test window.
The Whole Setup at a Glance
| Item | What it is for | Price tier | Skip it if |
|---|---|---|---|
| Graco Magnum X7 | Walls, ceilings, siding, fences | $$$ | You only spray small parts |
| Wagner Control Pro 130 | Interior walls with less overspray | $$$ | You are working outdoors |
| Wagner FLEXiO 3500 | Cabinets, doors, furniture | $$ | Your only jobs are exterior |
| Graco RAC X FFLP 211 tip | Fine finish on trim and doors | $ | You bought an HVLP, not an airless |
| HomeRight Large Spray Shelter | Containment for doors and small parts | $$ | You spray rooms, not parts |
| 3M 6502QL respirator | Your lungs | $$ | Never |
| Trimaco SuperTuff cone strainers | Keeping junk out of the tip | $ | Never |
| Painter’s Pyramid stands | Spraying both faces of a door | $ | You only spray fixed surfaces |
| Trimaco Easy Mask film | Masking rooms, windows, built-ins | $ | You only spray in a shelter |
1. Graco Magnum X7, Top Pick
The X7 is the machine I reach for when the surface is measured in hundreds of square feet. It siphons out of the bucket, so a 5-gallon exterior job runs without a single refill stop. It takes tips up to 0.017 in, which means unthinned exterior acrylic goes through it without complaint. And the PowerFlush adapter, which threads onto a garden hose, is the reason this thing gets used instead of dreaded.
On the garage exterior it laid a full wet coat on lap siding faster than I could keep the hose out from underfoot. On the interior room test it covered a 12 by 14 bedroom in flat latex in about 25 minutes of trigger time, back-rolling included.
Cleanup was the surprise. Flush cycle, PowerFlush on the hose, pump storage fluid in, done in roughly ten minutes on waterborne. My old rented airless took forty-five.
The overspray is the trade-off, and it is not small. At full pressure with a standard 515 tip, the witness card at 12 feet came back with solids on it. Indoors that means floor-to-ceiling masking, every time, no shortcuts. Outdoors it means checking which way the wind is moving before you pull the trigger, and moving the neighbor’s car if it is parked downwind. The stand model also tips on uneven ground if you drag the hose sideways, which I did once on a lawn.
| Spec | Value |
|---|---|
| Max flow | 0.31 gal/min |
| Hose | 25 ft, extendable |
| Max tip | 0.017 in |
| Feed | Bucket siphon, 1 or 5 gallon |
| Approx. price | $400–$480 |
Buy it if: you have an exterior, a fence, a basement, or more than two rooms in front of you. Skip this if: your project list is cabinets and furniture. You will fight the overspray for a finish an HVLP gives you more easily.
2. Wagner Control Pro 130, Best for Interior Walls
Different problem, different machine. The X7 is a fire hose. The Control Pro 130 is a high-efficiency airless that runs at much lower pressure, and Wagner claims up to 55 percent less overspray as a result. In the two-room comparison that claim held up directionally: the 12-foot witness card came back clean, and the 6-foot card had noticeably less on it than the X7 room.
The integrated tank matters more than the spec sheet suggests. On a stair landing or a hallway there is no suction tube to knock over, no bucket to kick. You carry the machine, you spray, you move.
It is slower than the X7 on open surfaces, and the tank forces refills on anything bigger than a couple of rooms. The lower pressure also wants thinner coatings; heavy-bodied exterior acrylic makes it work harder than it should.
Buy it if: you are spraying inside an occupied house and the masking budget is your real constraint. About $400.
3. Wagner FLEXiO 3500, Best HVLP for Cabinets and Furniture
This is the machine most homeowners should buy first, and it is not close. Cabinets and furniture are where spraying beats rolling by the widest margin, and an airless is the wrong tool for a shaker door.
The 3500 sprays unthinned latex and waterborne enamel, which most sub-$200 handhelds cannot do without a viscosity cup and a lot of swearing. It ships with two nozzles: iSpray for door panels and Detail Finish for rails, stiles, and drawer fronts. Swapping between them takes about two minutes.
Across 31 doors it laid a film that read flat at arm’s length under the work light. Not furniture-grade against a proper turbine system, which is where the Fuji machines earn their price, but close enough that nobody who opens the kitchen will ever know.
Two real gripes. The cup is small, so a run of eight doors means several refills, and every refill is a chance to introduce grit. And the turbine noise sits right in the range that gets old after an hour. Wear the ear protection you already own for the sander.
| Spec | Value |
|---|---|
| Type | Handheld HVLP, X-Boost turbine |
| Nozzles | iSpray + Detail Finish |
| Coatings | Unthinned latex, enamel, primer, stain |
| Cleanup | Water, Lock-N-Go teardown |
| Approx. price | $180–$210 |
Buy it if: cabinets, doors, dressers, or shutters are on the list. Skip this if: you need to cover 1,800 sq ft of siding before it rains.
4. Graco RAC X FFLP 211 Tip, The Cheapest Real Upgrade
Twenty-two dollars. That is the entire pitch.
The six-door tip test was the clearest single result in nine weeks of work. Same enamel, same pump, same operator. The three doors sprayed with the standard 515 tip came out with light stipple that needed a 320-grit pass before the second coat. The three sprayed with the FFLP 211 came out flat enough to recoat straight away.
The mechanism is not mysterious. A fine-finish low-pressure tip atomizes properly at roughly 1,000 psi below where a standard tip needs to be. Lower pressure, smaller droplets, less bounce, less overspray, and a tip that wears more slowly at the same time. The 211 gives you a 4-inch fan from a 0.011 in orifice, which is trim-and-door geometry.
Do not try to paint a bedroom with it. A 4-inch fan on a 12-foot wall is a long afternoon. Keep a 515 for walls and the 211 for everything smaller, and switch them in the ten seconds it takes to unscrew a guard. The full tip-number breakdown lives in our airless spray tips guide.
5. HomeRight Large Spray Shelter, Containment for Parts
Bounce-back is the part nobody plans for. Paint that hits a cabinet door does not all stay there. Some of it rebounds off the concrete under the bench and settles back down onto the wet surface as dry, gritty specks. The shelter’s floor panel is the piece that fixes it, and it is the piece hung plastic never gives you.
Pops open in under a minute. Folds into a flat disc that hangs on a hook. Three walls, a floor, and a mesh back that lets air move so you are not standing inside a sealed vapor box.
Wind is the enemy. Anything over about 10 mph and it becomes a sail; stake the corners or move indoors. The floor picks up grit between jobs, so vacuum it before you spray or that grit ends up in your enamel. And the large size still handles one door at a time with room to walk around it, which means a 31-door kitchen is a multi-day rotation, not an afternoon.
Buy it if: you are spraying anything you can carry. About $70–$90.
6. 3M 6502QL Respirator, The Piece You Do Not Get to Skip
There is no version of this article where the respirator is optional.
Spraying atomizes coating into particles small enough to travel deep into the lungs, and you stand in that cloud for the entire session. A paper dust mask does nothing about it. The 6502QL is a silicone half-mask with a Quick Latch that drops the mask off your chin one-handed, so you can answer a question or take a drink without unstrapping the whole harness. Across a four-hour exterior session the silicone seal never got uncomfortable in the way cheap masks do around hour two.
Cartridges are the part people get wrong. P100 particulate filters (3M 2097) for waterborne coatings. Organic vapor cartridges with a P100 pre-filter (3M 60923) for lacquer, oil-based enamel, and anything solvent-borne. The mask ships bare, and a bare mask protects you from nothing.
Fit is the other half. Medium fits most adults; a narrow face leaks at the chin and you find out by feeling cool air on the seal when you inhale. Facial hair breaks the seal outright, and no amount of strap tension fixes it. The respirator round-up covers the fit-test procedure and the alternatives if 3M’s face shape does not match yours.
7. Trimaco SuperTuff Cone Strainers, 30 Cents Each
Straining a gallon takes about 45 seconds.
Clearing a clogged airless gun, pulling the tip, back-flushing, and then sanding out the run the clog left behind takes twenty minutes and puts you a coat behind. That is the whole math. A sealed can still forms skin on the surface, and the rim collects dried flakes every time it is opened, and one flake is all it takes.
Fine nylon mesh, cone shape, sits in a sprayer cup or a quart can or a 5-gallon bucket without a holder. Single-use by design; rinsing one and reusing it puts the grit back where you just took it out.
Standard mesh is too coarse for clear lacquer, where you want a 190-micron filter instead. For every coating in this test it was the right filter. Our paint strainer guide covers the micron ratings if you spray clears.
8. Painter’s Pyramid Stands, Both Sides in One Session
Ten small plastic tripods, a few dollars, and they solve a problem that otherwise costs you a full day.
Lay a cabinet door flat on a bench and you can spray one face. Put it on four pyramids and it sits about two inches up, the fan wraps the edges cleanly instead of blowing back at you off the bench top, and the contact point is a tip small enough that the mark it leaves vanishes under the next coat. Flip, spray the other face, done.
They slide under a heavy solid-core door on a smooth bench. Put a strip of blue tape under each one, or work on plywood. The tips also flatten over time under weight and heat, and a flattened tip stops being a point and starts being a mark. Replace them when they look squashed; a 10-pack is cheap enough that this is not a real cost. Our painter’s pyramid round-up compares them against door racks if you have a full kitchen to batch.
9. Trimaco Easy Mask Masking Film, Rooms Without Repainting the Ceiling
Masking film is the difference between spraying a room and repainting a room.
The 99-inch width is the spec that matters. One pull covers a window, a run of built-ins, or a refrigerator, and static cling holds it flat against glass and cabinet faces while you tape the top edge. On the interior room test, two rolls of film plus a roll of 1.41 in blue tape masked a 12 by 14 bedroom in about 40 minutes, including the ceiling line.
Cling fails on dust and on anything cleaned with oil soap; wipe the surface first or the film peels off mid-session and you find it stuck to a wet wall. You still need tape for the top edge, so buy a roll at the same time. And film loaded with overspray is slick underfoot if it drops. Deeper comparison in our masking film and paper round-up, and the floor side of the problem is covered in the drop cloth round-up.
Spray Day, in Order
The order is not arbitrary. Doing it out of sequence is how people end up masking a room with wet paint already in it.
- Prep and sand first, all of it. Sanding after masking fills your fresh film with dust that then lands in the finish. Fill, sand, and vacuum before a single piece of tape goes up.
- Mask from the top down. Ceiling line first, then windows and built-ins, then floor. Working downward means gravity holds your film against the wall instead of pulling it off.
- Strain the coating. Into a clean bucket or cup, through a fresh cone. Every can, every time.
- Set your pressure with the tip installed. Start low, spray a test pass on cardboard, and raise pressure only until the fan edges stop showing tails. Most people run 300 to 500 psi higher than they need, and every extra pound is overspray.
- Mask on, then trigger. Respirator and eye protection before the first pull.
- Spray, then back-roll on walls. A sprayed wall with no back-roll has a different texture than the rolled wall next to it, and on a repair or a partial repaint that mismatch shows.
- Flush before the coating sets, not after lunch. Waterborne enamel that sits in a pump for an hour is a teardown.
What I Left Off the List
- A pressure washer. Real prep tool for exteriors, wrong category for this page. Ours is covered in the pressure washer prep round-up.
- A turbine HVLP system. The Fuji four-stage machines lay a flatter finish than the FLEXiO. They also cost three to five times as much, and for a homeowner spraying one kitchen the gap does not justify it. See the HVLP sprayer round-up if furniture-grade is the goal.
- Cheap disposable spray socks and hoods. Useful on solvent work, not on a homeowner’s waterborne cabinet job. A cap and old clothes cover it.
- A dedicated spray booth fan. Overkill for a garage with the door open and a shelter with a mesh back.
- Airless tip extension poles. Genuinely useful on ceilings and second-story siding, but they are a second-sprayer purchase, not a first one.
Cleanup Decides Whether You Own a Sprayer Next Year
Every abandoned airless in every garage in America died the same way. Somebody sprayed a room, got tired, and left the pump full overnight.
Waterborne. Flush with clean water until it runs clear, run the PowerFlush cycle on the garden hose if you have an X7, pull the tip and guard and soak them, then pump storage fluid through until it comes out the return. Ten to fifteen minutes.
Solvent-borne. Mineral spirits flush, then storage fluid. Do it outdoors, wear the organic vapor cartridge, and never flush solvent through a machine into a bucket in a closed garage.
HVLP. The FLEXiO’s Lock-N-Go teardown means the nozzle assembly comes off in one piece and goes in a bucket of warm water. Take the air cap apart and clear the small passages with a soft brush, not a wire. A widened air passage sprays crooked forever.
Tips and filters. Reverse the tip and blow it clear before you soak it. Clean the gun filter and the manifold filter every session; a partially blocked filter reads as low pressure and sends people chasing a pump problem that does not exist.
Details on the fluids and brush kits are in the sprayer cleaning kit round-up.
Mistakes That Cost Me a Finish
- Spraying at full pressure by default. More pressure is not more coverage. It is more overspray, faster tip wear, and a rougher film. Start low, come up only until the tails disappear.
- Skipping the strainer on “clean” paint. One flake off a can rim clogs a 0.011 in orifice. Ask me how the fourth cabinet door went.
- Masking before sanding. The dust lands on the film, then the fan lifts it into the wet coat. Prep first, always.
- No back-roll on a patched wall. Sprayed texture and rolled texture do not match. On a full-room repaint nobody notices. On a repair, everybody does.
- Spraying doors flat on a bench. Bounce-back off the bench top lands on the wet face as dry grit. Get them up on pyramids.
- Trusting a dust mask. It stops sanding dust. It does not stop atomized coating and it does not touch solvent vapor.
- Leaving paint in the pump. The single most expensive shortcut in this hobby.
The Two Kits Worth Buying
For cabinets, doors, and furniture: FLEXiO 3500 ($190), HomeRight Large Spray Shelter ($80), 3M 6502QL with a pair of 2097 P100 filters ($50), a 100-pack of cone strainers ($15), and a 10-pack of painter’s pyramids ($10). Call it $345. That kit refinishes a kitchen, and the shelter and respirator carry over to every job after it. Pair it with the kitchen cabinet project guide and you have the whole plan.
For a house exterior or a whole-interior repaint: Magnum X7 ($450), an FFLP 211 for the trim ($22), the same respirator with 60923 cartridges if you are spraying oil ($70), strainers ($15), and two rolls of 99-inch masking film with a roll of blue tape ($35). About $590, and the machine is the only part you buy once. Coating choice matters as much as the gear here, so start with the exterior paint round-up before you touch the sprayer, and check the spray paint dry-time reference before you plan a two-coat day.
Buy the respirator and the strainers before you buy anything else on this page. They are the two cheapest items on the list and the only two where skipping them costs you something you cannot sand out.
Ask a Question