Best Laser Levels for Accent Walls and Stripes
Five laser levels tested on real accent walls, vertical stripes, and a color-block wall. Top pick: Bosch GLL100-40G, plus where each one falls short on a stripe layout.

Disclosure: Some links below are affiliate links. We earn a commission if you buy through them, at no extra cost to you.
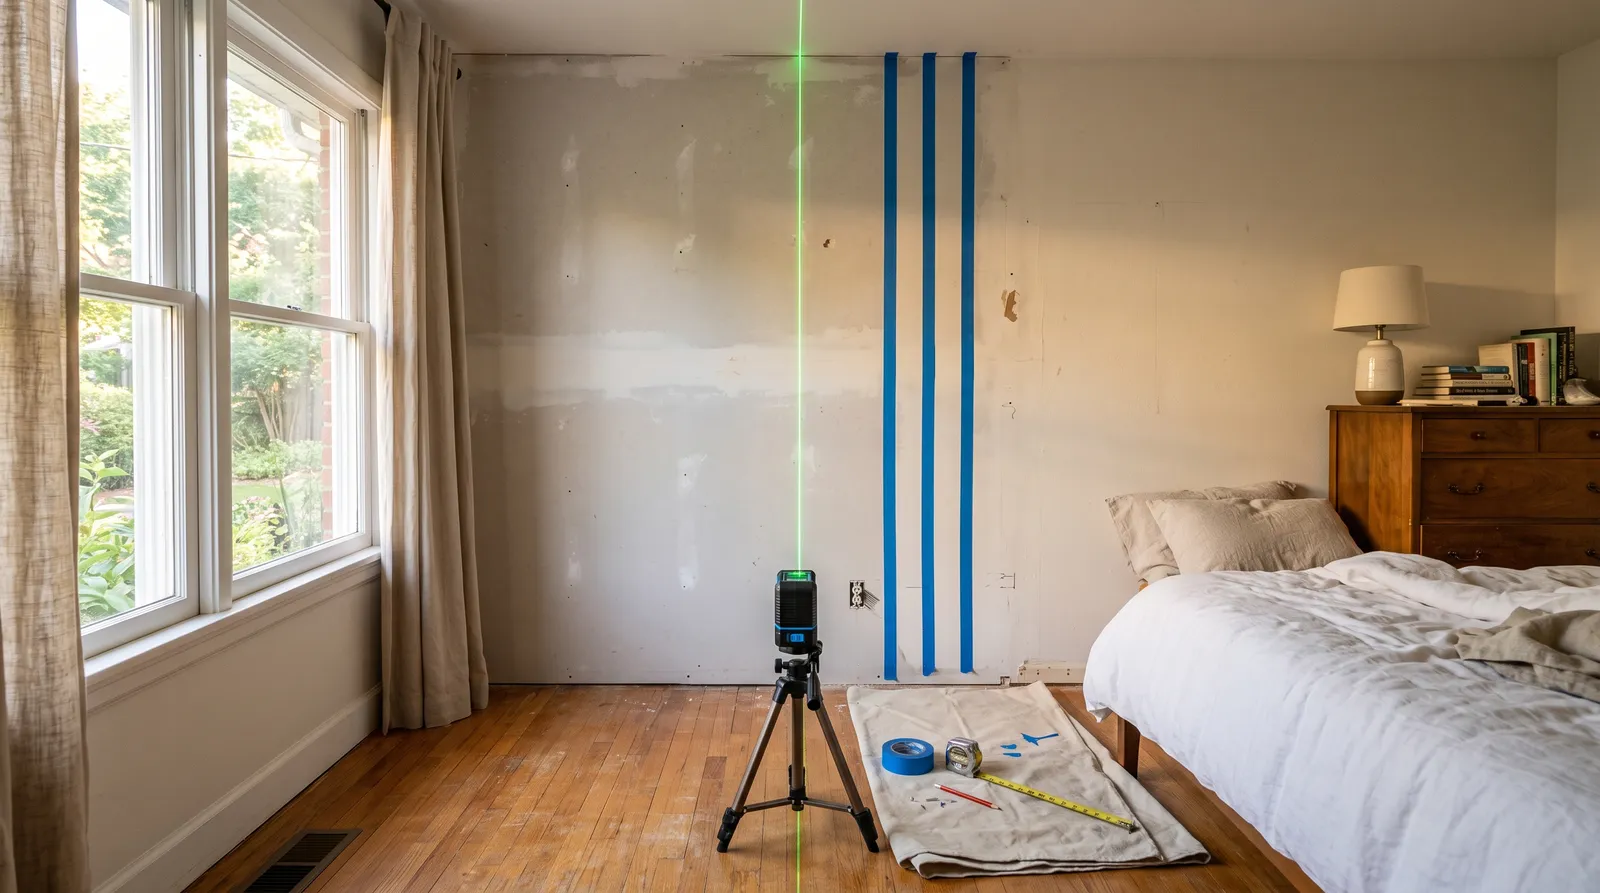
Top pick: the Bosch GLL100-40G. About $140, green beam, 100 ft of range, and the only laser in this test whose vertical line stayed thin enough at 12 ft that I could tape to one edge of it without guessing. It wins on line quality and on the LB10 bracket, which clamps to a door casing or a shelf lip so you can lay out a wall without owning a tripod. It falls short on power, still running four AA cells while the rest of the category moved to USB charging. If your layout wraps around corners, the Bosch GLL3-330CG throws three 360-degree planes and saves you an hour of re-siting. For the best line per dollar, the Huepar 902CG at around $95. For a rechargeable tool you can ignore for six months, the DEWALT DCLE14201G. For one accent wall and nothing after it, the SKIL LL9324G-01.
Stripes punish sloppy layout.
A wall in one flat color forgives a cut line that drifts a quarter inch over eight feet. Nobody sees it. Put eleven vertical stripes on that same wall and the drift stacks. Stripe one measures 12 inches, stripe eleven measures 12 and a half, and the eye reads the whole wall as leaning before it can explain why. A laser will not straighten a crooked wall. It gives you a reference that does not care what the wall is doing.
Why a Chalk Line Loses on a Feature Wall
I still keep a chalk line in the bag. It is fast, it costs nine dollars, and it snaps a dead-straight line across a long wall in about four seconds.
Then you put tape on it and the line disappears under the tape.
That is the whole argument. A chalk line is a one-shot reference. Once the tape covers it you cannot verify anything, and if the tape wandered you find out after the second coat when the stripe is visibly fat at the bottom. A laser line lands on top of the tape. You can tape the full run, step back eight feet, and see instantly whether the tape edge is riding the beam or drifting off it. Fixing a wandering tape edge before paint costs two minutes. Fixing it after costs a repaint.
The second argument is plumb. Your walls are not plumb. In a 1970s tract house I measured last spring, one bedroom wall was out by five-eighths of an inch top to bottom over 8 ft. Measuring stripe widths from the corner with a tape measure means every stripe inherits that lean, and by the far end of the wall the stripes are visibly tapered. A self-leveling laser ignores the corner and gives you true vertical.
The third is speed. Eleven stripes means twenty-two tape edges, and with a level you are marking and re-checking every one of them.
Green Beam, Red Beam, and What the Wall Color Does to Both
Every laser in this round-up is green. That is deliberate.
Your eye peaks in sensitivity around 555 nm, which sits much closer to a green diode at 510 to 520 nm than to a red one at 630 to 650 nm. Same output power, and the green line reads several times brighter. Manufacturers usually claim four times. Standing in a bedroom at 2 p.m. with the blinds half open, the practical difference is bigger than that: the green line is usable and the red line is a suggestion.
Base coat color matters more than most buying guides admit. On white primer everything works. On a mid-gray like Revere Pewter, the red-beam tools I keep for framing were unusable past about 8 ft, and on navy they vanished.
Green has one failure case, and it is worth knowing before you buy. A green line on a green wall sinks in. Sage, olive, and anything in the mid-value green family will eat the beam. Two workarounds: run your layout at dusk with the room lights off, or mark every pencil tick before the base coat goes on. I do the second one now on any green scheme.
How I Tested These
Five lasers, five weeks, three real jobs in occupied houses. Normal daylight, normal LED ceiling cans, no darkroom conditions that a homeowner will never have.
Job one, vertical stripes. Eleven tone-on-tone stripes across a 10 ft 4 in bedroom wall. Benjamin Moore Revere Pewter as the base, the same color in satin for the stripes. Mid-gray base coat is the hardest visibility case in normal use, because the wall is neither bright enough to bounce the beam nor dark enough to make it pop.
Job two, color block. A two-tone living room wall with a horizontal break at 62 inches, running around one inside corner into the adjoining wall.
Job three, a wrapping band. A hallway with a horizontal band above the chair rail, four walls, one continuous line. This is the job that separates a cross-line tool from a 360-degree tool, and it is where I stopped arguing with the price of the GLL3-330CG.
Six scoring axes: line thickness at 8, 12, and 16 ft photographed against a taped ruler; visibility on white primer, mid-gray, and navy; settle time from a deliberate 3-degree tilt; drift after a mount bump, checked by re-marking the same pencil tick; mount stability over a two-hour taping session; battery runtime under continuous use. Every layout got cross-checked with a 4 ft spirit level before tape went down, and every taped edge got inspected after the second coat.
The GLL100-40G won on line thickness at all three distances. The GLL3-330CG won job three outright and was pointless on job one. The Huepar was within a hair of the Bosch on line quality and $45 cheaper. The DEWALT won on runtime and on the fine-adjustment knob. The SKIL was the fattest line and the friendliest mount.
The Five, Side by Side
| Model | Beam | Lines | Working range | Power | Mount included | Price |
|---|---|---|---|---|---|---|
| Bosch GLL100-40G | Green | Cross-line (H + V) | 100 ft | 4 x AA | LB10 L-bracket, ceiling clip | ~$140 |
| Bosch GLL3-330CG | Green | Three 360-degree planes | 200 ft (330 ft w/ receiver) | 12V Max battery or 4 x AA | BM 1 positioning device | ~$400+ |
| Huepar 902CG | Green | 360-degree H + V | 130 ft | 4 x AA | Magnetic pivoting bracket | ~$95 |
| DEWALT DCLE14201G | Green | Cross-line (H + V) | 150 ft visual | USB-C rechargeable | Magnetic wall bracket, plate | ~$190 |
| SKIL LL9324G-01 | Green | Cross-line (H + V) | 65 ft | Li-ion, micro-USB | Multifunction clamp, tripod | ~$110 |
1. Bosch GLL100-40G, Top Pick
The line is why. Photographed against a taped ruler at 12 ft, the GLL100-40G’s vertical line was noticeably thinner than the SKIL’s and slightly thinner than the Huepar’s, and on a mid-gray base coat that thinness is what lets you tape to one edge of the beam instead of splitting it by eye. Over eleven stripes that discipline is worth an eighth of an inch of accumulated error, which is the difference between stripes that look drawn and stripes that look measured.
The mount is the underrated part. The LB10 L-bracket clamps to a door casing, a stud edge, a closet shelf lip, a step ladder rail. On job one I clamped it to the casing 5 ft off the wall and never touched it again for two hours. Tripods get kicked. Casings do not.
IP 64 housing, a Smart Pendulum system that self-levels inside about 4 degrees and flashes when it cannot, and a pendulum lock for the toolbox. It went off a step stool onto hardwood during job two and re-checked dead on against the same pencil tick.
Four AA batteries. In 2026. Every other tool here except the big Bosch charges over USB or takes a tool battery, and the green diode is not gentle with alkalines. Budget for rechargeable AAs and a charger, which puts the real cost closer to $165.
The other limit is planes. Two lines, one setup, one wall. Take it around a corner and you are re-siting the tool and re-establishing your reference, which is fine for a feature wall and slow for a whole room.
| Spec | Value |
|---|---|
| Beam | Green, up to 100 ft |
| Lines | One horizontal, one vertical |
| Self-leveling | Up to 4 degrees, locking pendulum |
| Power | 4 x AA (included) |
| Mount | LB10 L-bracket, DK10 ceiling clip, 1/4-20 thread |
| Rating | IP 64 |
| Approx. price | $130 to $160 |
Buy it if: you are laying out stripes, bands, or color blocks on individual walls and you want the cleanest line for the money. Skip it if: your layout wraps around a room, or you refuse to buy anything that eats AA cells.
2. Bosch GLL3-330CG, Best for Wrap-Around Layouts
Job three made the case, and I did not expect it to.
A horizontal band running around all four walls of a hallway is four separate layouts with a cross-line laser. Set the tool, mark wall one, move it, re-establish the height, mark wall two, and every handoff is a chance to introduce error. The band that comes back to its starting point half an inch off is a real thing that happens to careful people. With the GLL3-330CG standing in the middle of the hall, one 360-degree plane hit all four walls at once, crossed both inside corners without a break, and the band closed on itself.
That is one job in ten. The rest of the time this tool is doing nothing a $95 laser could not do.
Dual power is the quiet feature: a 12V Max lithium pack or four AA cells, so an empty battery is an annoyance instead of a stop. The BM 1 mount screws to drywall, clips to a stud, or stands on retractable feet. IP 54.
Two real gripes. Price, which starts around $400 and is more than most homeowners will ever spend on layout. And brightness indoors: the 360 lines are tuned for jobsite distance, and in a small room they bounce off mirrors, glass cabinet doors, and a TV screen into ghost lines that will have you chasing a reference that is not there. Kill the vertical planes you are not using.
Buy it if: you are running a continuous band or wainscot line around a full room, or you do this more than a few times a year. Skip it if: the project is one feature wall. Buy the GLL100-40G and spend the difference on paint.
3. Huepar 902CG, Best Value
Around $95 for a 360-degree horizontal plane is the best price-to-capability ratio here, and it is not close.
Huepar publishes plus or minus 1/9 inch at 33 ft, which on paper beats the SKIL and matches the class standard. On the wall, the line landed a hair fatter than the Bosch at 12 ft and I could not tell the difference at 8 ft, which is where most accent-wall work happens. The magnetic pivoting bracket is the feature I used most: fine-nudging the vertical line onto a pencil tick without disturbing the tool, over and over, eleven times.
Four AA cells and a thirstier diode than the Bosch. I went through a set and a half across job one.
The bracket thumbscrew is the part that will fail first. Snug it and it holds all day. Crank it and you can feel the plastic protest.
The other consideration is not a spec. Huepar is a direct-to-consumer brand, so warranty service is an email thread rather than a return counter at a store you can drive to. For a $95 tool that is a reasonable trade. For a contractor it is a reason to buy Bosch.
Verdict: the laser I recommend to anyone painting stripes who does not paint for a living. Buy it, buy rechargeable AAs, and put the savings toward better tape.
4. DEWALT DCLE14201G, Best Rechargeable
Two features justify the $190.
The integrated USB-C battery is rated at 11 hours per charge, and it means the tool you left in a drawer in March still works in September. Every AA-powered laser I own has been dead when I reached for it. This one has not been.
The fine adjustment knob is the better feature. It moves the vertical line in small controlled increments without touching the mount, which is what you want when you are walking a line onto a pencil tick eleven times in a row. On the Bosch and the Huepar you nudge the bracket and hope. On the DEWALT you turn a knob.
Magnetic wall bracket, mounting plate, both 1/4-20 and 5/8-11 threads, IP54, and a remote that lets you adjust the line from the far end of a long wall instead of walking back.
The specs are aimed past this job. Up to 150 ft visual range and 330 ft with the DW0892G detector is framing territory, not bedroom-wall territory, and you are paying for range you will never touch. When it does run flat, USB-C charging is a wait, not a battery swap.
Buy it if: you want a tool that is charged when you need it, and the fine-adjust knob is worth $50 to you. Skip it if: you have a drawer of rechargeable AAs already and $190 buys a lot of paint.
5. SKIL LL9324G-01, Best Budget
Around $110 with a tripod, a soft bag, and a clamp in the box, and the clamp is genuinely good. It mounts on the top or the bottom of the tool and grips a shelf lip, a door casing, or a ladder rung. For a homeowner painting one accent wall, that clamp does more for the finished result than any spec on the box.
The published accuracy is plus or minus 3/16 inch at 30 ft, the loosest here. Across the 8 vertical feet you actually work, that is a rounding error. The thing that costs you is line thickness. This is the fattest beam in the group at 12 ft, and it means you have to commit to taping the same edge of it every single time. Do that and the wall comes out fine. Get sloppy and you have given away a sixteenth per stripe.
Micro-USB. In 2026. About 6 hours of runtime, which covers a taping session, and 65 ft of range, which is honest.
Verdict: the right buy for one wall, one weekend, and no plans to do this again. Not the right buy if you are going to lay out stripes in three rooms.
Specs That Matter for Stripes, and the Ones That Do Not
Line Thickness Beats Accuracy Rating
Accuracy specs are quoted at 30 ft because that is where framers work. You are working at 8 to 14 ft, where every tool here is well inside what a taped edge can hold. What actually costs you precision is beam width. A line that is 1/16 inch wide at 12 ft lets you tape confidently. A line that is 1/8 inch wide makes you choose an edge and hold it, and holding it across twenty-two tape edges takes discipline nobody warns you about. No manufacturer publishes line thickness at working distance. Compare in the store if you can.
The Mount Is Half the Tool
A tripod on the floor of the room you are painting is one kicked leg away from restarting your layout. A clamp on a door casing is not. Both Bosch brackets, the SKIL clamp, and the DEWALT magnetic bracket give you off-floor mounting. Use them.
Self-Leveling Range and the Lock
Every tool here self-levels within about 4 degrees. What matters more is the pendulum lock. An unlocked pendulum bouncing around a toolbox is how lasers go out of calibration, and every one of these has a lock. Use it.
Pulse Mode
Pulse mode makes the beam readable by a receiver at distances your eye cannot see. It is for outdoor grade work. On an accent wall it does nothing except make the line look dimmer. Leave it off.
Laying Out Stripes With a Laser
Six steps. This is the part that decides how the wall looks.
1. Decide plumb or wall-following. Vertical stripes should be truly plumb, always. A stripe leaning next to a plumb door casing is obvious and it will bother you forever. Horizontal bands are the opposite: a level band under a ceiling that slopes half an inch across the room looks wrong, because the eye compares the band to the ceiling. Measure down from the ceiling at both ends, split the difference, and hold that compromise line straight with the laser.
2. Do the stripe math before you touch the tool. Measure the wall. A 10 ft 4 in wall is 124 inches. Want roughly 12-inch stripes? 124 divided by 12 is 10.33, which leaves a 4-inch runt at one corner. Divide evenly instead: ten stripes at 12.4 inches each, or eleven at 11.27 inches. If the math refuses to come out clean, put the odd stripe in the corner behind the door.
3. Mark ticks before you tape. Set the laser, then pencil a tick at the top and bottom of every stripe line. If the mount gets bumped later, you reset to the ticks instead of redoing the whole layout.
4. Tape one edge of the beam, every time. The tape goes on the side you are not painting, with its edge on the same edge of the line for the whole wall. Say the edge out loud before you start. Then walk to the far end of the room and look down the wall: a tape edge that drifted off the beam is obvious from eight feet away and invisible from arm’s length.
5. Seal the tape edge with the base color. Run a thin pass of the base color along the tape edge and let it dry. Any bleed under the tape is now base color into base color, and the accent coat lands on a sealed edge. This one step does more for a razor stripe than any tape upgrade, though the tape still matters. Our painter’s tape round-up covers which ones hold an edge on fresh paint, and the FrogTape vs ScotchBlue comparison settles the delicate-surface question.
6. Pull the tape while the paint is soft. Not fully cured, not soaking wet. Pull at a shallow angle back on itself once the accent coat has set but before it hardens, generally within an hour or two on a waterborne wall paint. Check the drying times chart for your specific product, because a satin enamel and a flat wall paint are not on the same clock.
Lasers I Bought and Set Aside
- Sub-$25 no-name cross-line lasers. The beam is red, the line is fat, and two of the three I have bought over the years arrived out of calibration. The flip test caught both.
- Bosch GLL30. A good, cheap, well-built cross-line laser and a fine tool for hanging shelves. Red beam. On any base coat darker than primer it stops being useful at conversational distance.
- Suction-cup wall mounts. Sold as the answer for smooth walls. They release. Usually about forty minutes in, usually after you have taped six stripes to a line that has since moved.
- Rotary laser levels. Outdoor grade tools. Horizontal spin, no vertical line, wrong tool.
- Laser tape measures. Different tool entirely. Useful for the stripe math in step two, useless for the layout.
Keeping It Accurate
Lasers drift. Not often, but a dropped tool or a hot car can knock one out, and the failure is silent.
The flip test. Set the tool on a tripod about 15 ft from a wall. Mark the horizontal line with a pencil. Rotate the tool 180 degrees on the tripod, re-level, and mark again. The two marks should sit on top of each other. A gap means the tool needs calibration, and every manufacturer here has a service path for it. Run this before any job where the layout matters.
Storage. Lock the pendulum. Pull the AA cells if the tool is going in a drawer for a season, because a leaking alkaline in a laser housing is the end of the tool. Keep it out of a truck bed in July; heat is what kills calibration.
Lens care. Dry microfiber, no solvents. Overspray on the lens makes the line fuzzy, so bag the tool if you are spraying in the same room. A well-treated cross-line laser lasts a decade; the parts that fail are mount hardware, the battery door, and the pendulum after a hard drop.
Mistakes That End Up in the Finished Wall
- Switching which edge of the beam you tape to. The single most common cause of stripes that look uneven. Pick an edge. Hold it for the whole wall.
- Trusting the ceiling. Measuring stripe height down from the ceiling on a horizontal band inherits every bit of the ceiling’s slope. Measure at both ends first, then decide whether you want level or ceiling-parallel.
- Skipping the pencil ticks. Then the tripod gets bumped and there is nothing to reset to.
- Not sealing the tape edge. Bleed under the tape is what makes a stripe look fuzzy, and it happens on textured and freshly painted walls more than on smooth cured ones. See the repaired drywall guide if your wall has patches, because a patch that flashes will show through a stripe edge.
- Green line on a green wall. Mark your ticks before the base coat goes on, or work at dusk.
- Sheen mismatch on tone-on-tone stripes. A satin stripe over a matte base of the same color is the whole effect. Get the sheen step wrong and the stripes vanish. The sheen guide covers the gloss steps that read as a real difference.
- Pulling tape the next morning. Cured paint tears at the tape line instead of releasing. Pull while the film is set but soft.
If you are painting one accent wall this weekend and the tool goes back in the closet after, buy the SKIL and use its clamp. If you paint a couple of rooms a year, buy the GLL100-40G, add a $30 tripod, and stop measuring down from the ceiling.
Ask a Question