How to Paint Interior Window Trim
First time painting window trim? Tape the glass, sand the old gloss, pick a semi-gloss enamel, and brush two thin coats. Every term explained, every mistake fixed.

Okay, so window trim is the part of the room everybody dreads. It’s fiddly, there’s glass right there waiting for a smear, and the strips between the panes are about as wide as your brush. Here’s the thing: it’s a small surface, and small surfaces are forgiving. A wall mistake is four feet of streak. A trim mistake is an inch you fix with a razor blade.
This guide walks you through it slow. Tape or scrape, your choice, both explained. Two thin coats beat one thick one every time. By the end you’ll have crisp white trim and clean glass.
TL;DR
- Scuff-sand the old gloss first. New paint slides off shiny old paint. A minute with 220-grit gives it grip.
- Use semi-gloss enamel, not wall paint. Enamel dries hard and wipes clean. BM Advance, SW ProClassic, or Behr Alkyd Enamel.
- Tape the glass or plan to scrape it. Tape is calmer for first-timers. Scraping after is faster once you can handle a razor.
- Two thin coats. Thick coats sag, run, and stay tacky. Thin coats dry flat and even.
- Pull the tape while the paint is still slightly soft. Bone-dry paint tears at the line.
What You’ll Get
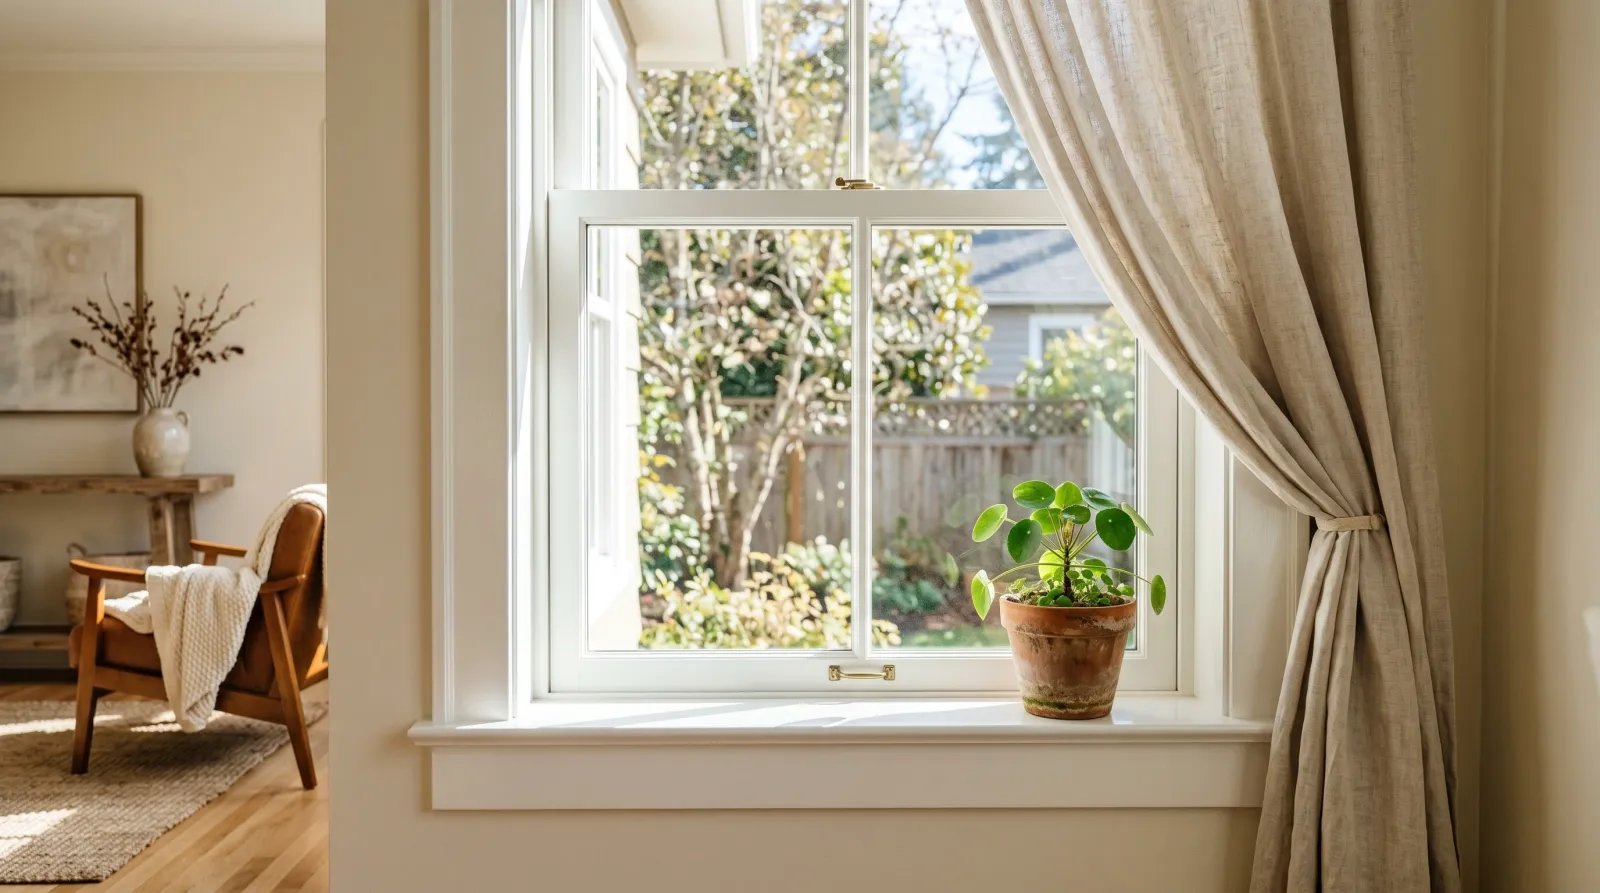
Crisp, clean window trim that wipes down when it gets dusty and frames the glass instead of looking tired around it. The line where paint meets glass will be sharp, not fuzzy.
Honest Take on Difficulty and Time
This is an easy project that punishes rushing. The painting itself is quick. The prep and the careful brushwork around the glass are where the time goes.
| What you’re painting | Active time | Total with dry time |
|---|---|---|
| One window | 1–1.5 hrs | Half a day |
| A room’s worth (3–4 windows) | 3–4 hrs | One full day |
| Whole-house single-hung windows | A long weekend | Two to three days |
The hardest window is the one with lots of small panes (called divided lights). Those thin muntins between the glass take patience. A plain picture window with one big sheet of glass is easy.
What You’ll Need
Paint and Primer
A 1-quart can of trim enamel in semi-gloss. Enamel is a hard-drying paint built for surfaces that get touched and cleaned, which is exactly what trim is. A waterborne alkyd (BM Advance, SW ProClassic) flows smoother than wall paint and leaves fewer brush marks. A quart covers the trim around several windows in one room.
Primer only if you need it. Bare wood, water stains, or knots bleeding through as brown dots all need a stain-blocking primer (Zinsser BIN or Cover Stain) on the problem spots first. Sound old paint that you’ve sanded dull doesn’t need primer.
See the best interior trim paint round-up for full picks, and the sheen guide if you’re torn between semi-gloss and satin. Most people want semi-gloss on trim.
Tools
A 2-inch angled sash brush is the one tool that matters here. The angled tip is what lets you cut a clean line right up against the glass. A 1.5-inch angled brush helps on the narrow muntins. Skip the foam brush; it leaves a stippled texture on enamel.
You’ll also want painter’s tape, paintable caulk, spackle, sandpaper, a razor blade for glass cleanup, and a small drop cloth for the sill. The brush is where you spend the money. A $14 Wooster or Purdy holds a sharp edge a $3 brush never will. Picks are in the best paint brushes round-up.
Step 1 — Clean, Fill, and Sand
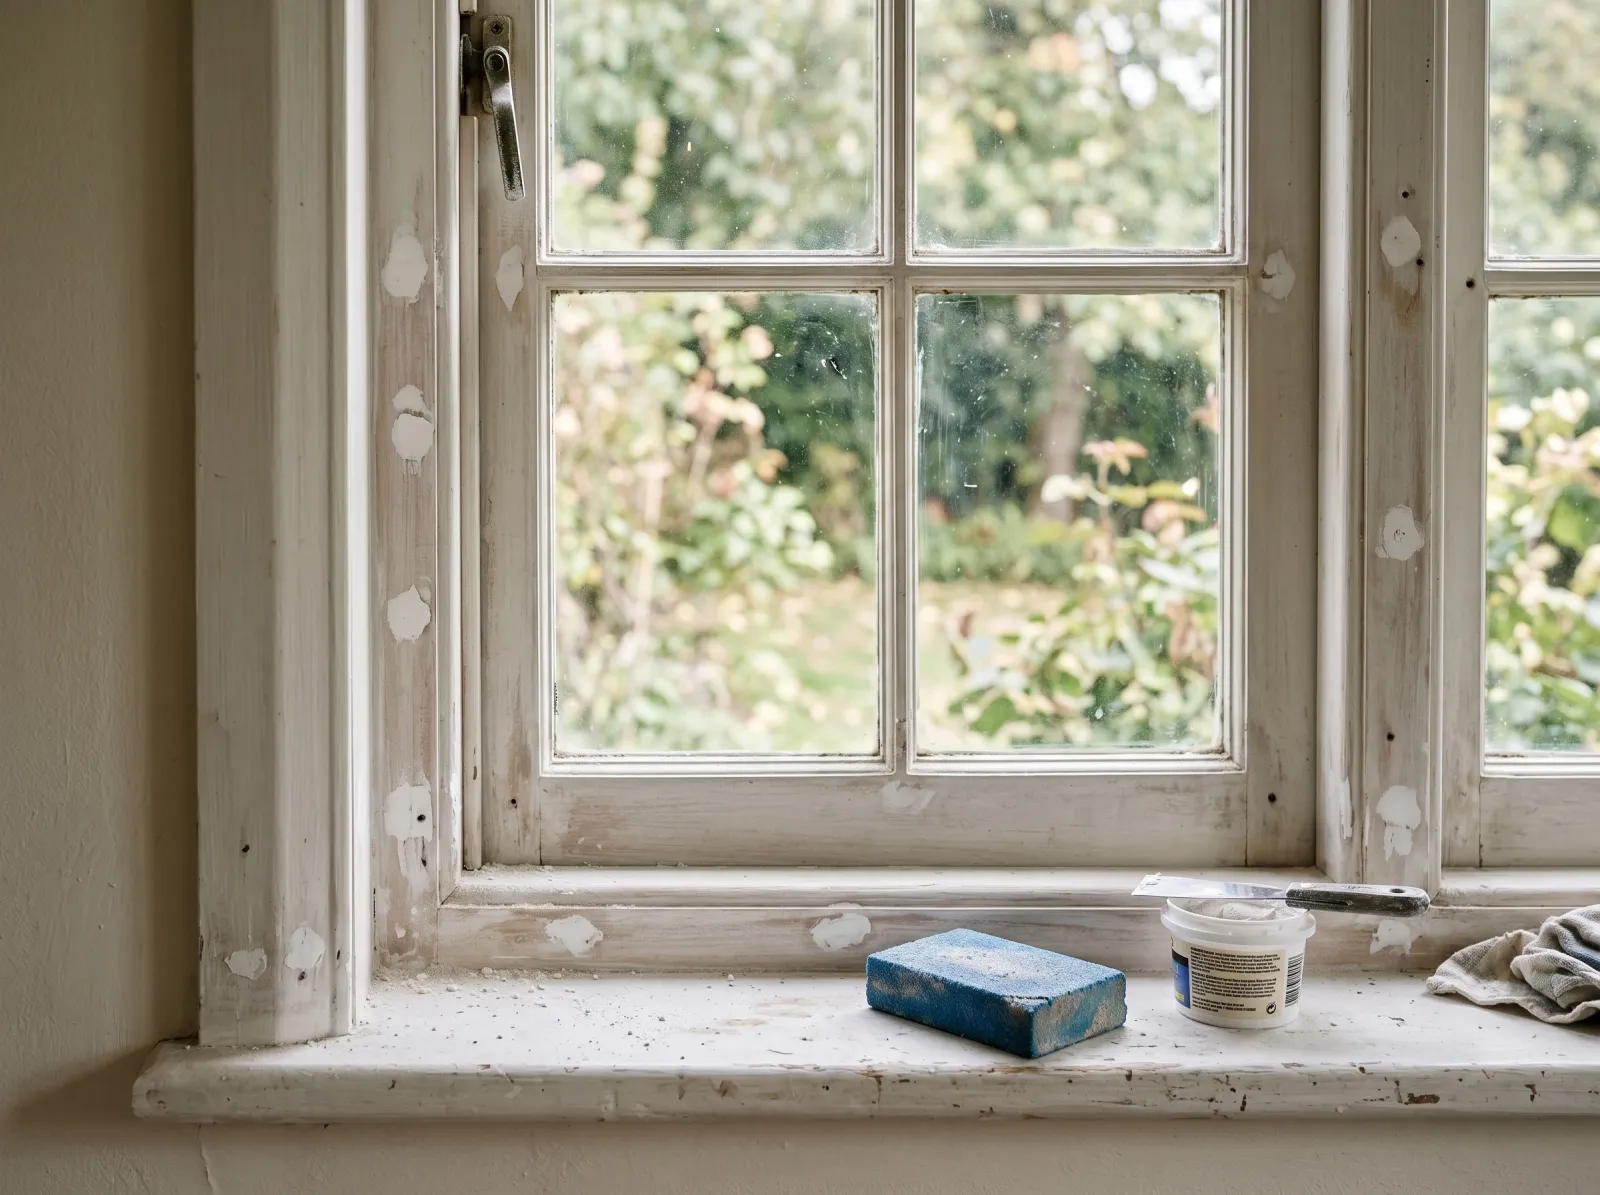
Old caulk gaps filled, dents spackled, the glossy old paint scuff-sanded so the new coat can grab.
Wipe the trim down first. Window trim collects dust and condensation grime. A damp rag with a drop of dish soap, then a clean-water wipe, gets it ready.
Fill dents, dings, and old nail holes with spackle. Press it in with the putty knife, scrape flush, let it dry, then sand smooth. Now scuff the whole surface with 220-grit. You’re not stripping it, just knocking the shine off so the new enamel has something to bite into.
Watch out for glossy old oil paint. If the trim was painted decades ago, it might be oil-based and slick. Sanding it dull matters more here, and a bonding primer is cheap insurance. Water-based enamel will peel off slick oil paint that wasn’t sanded.
Step 2 — Tape the Glass and Caulk the Gaps
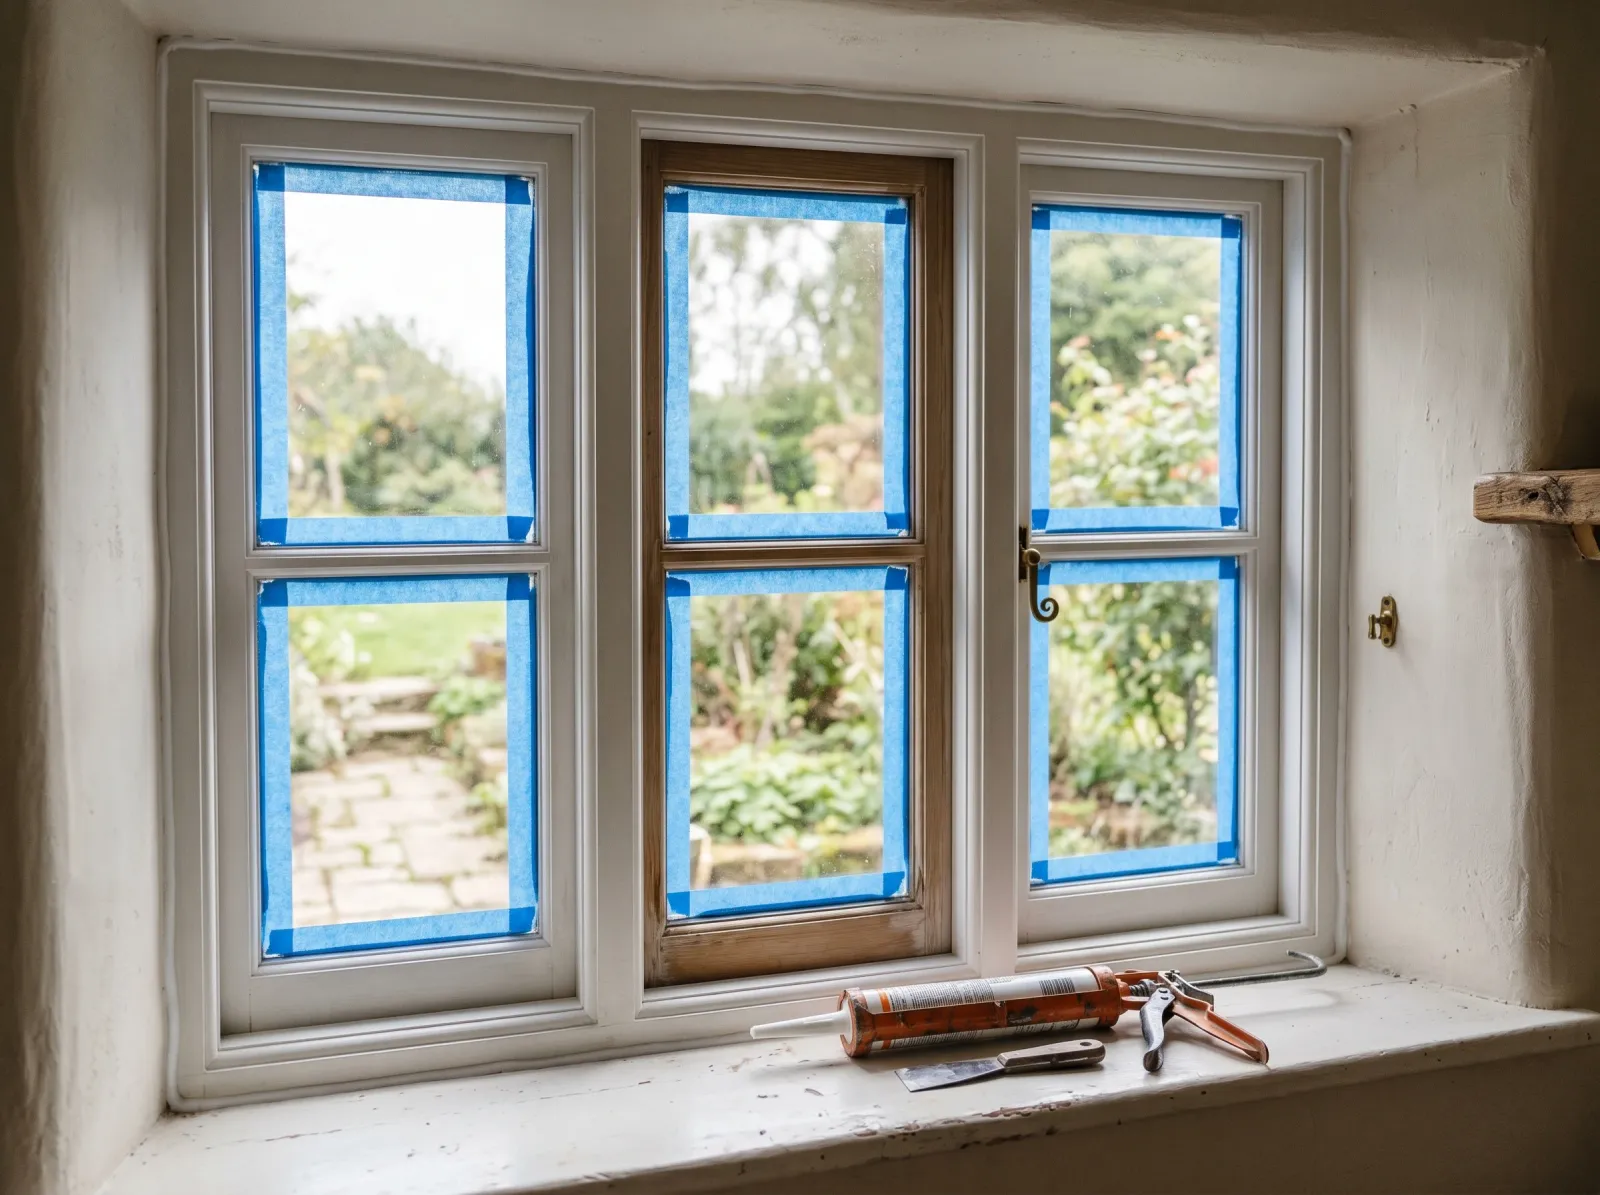
Tape pressed tight along the glass edge, a thin bead of caulk run where the casing meets the wall.
Run painter’s tape along the inside edge of each pane of glass, right where the glass meets the wood. Press the edge down hard with a credit-card corner so paint can’t sneak under it. That sneaking-under is called bleed, and pressing the edge is what stops it.
If there’s a gap where the trim meets the wall, run a thin bead of paintable caulk along it and smooth it with a wet fingertip. Caulk fills the shadow line so the trim reads as one piece. Let it skin over before you paint.
Watch out for taping the glass and forgetting to leave a sliver of paint onto the glass itself. A tiny overlap of paint onto the glass edge actually seals the wood-to-glass joint against moisture. Tape about 1/16-inch back from the wood, not flush against it.
Step 3 — Prime the Trouble Spots (If Needed)
Skip this step if your old paint is sound and sanded. If you’ve got bare wood, water stains, or knots, hit just those spots with the stain-blocking primer. Knots in pine bleed a brown or amber stain straight through paint for years if you don’t seal them. A spot of shellac-based primer that blocks knots shuts that down.
Let the primer dry per the can, then scuff it lightly with 220-grit before the finish coat.
Step 4 — Brush the First Coat

Thin first coat of semi-gloss enamel along the casing and muntins, brushed with the grain. Still looks a little streaky.
Dip the brush only a third of the way in and tap it once on the inside of the can. A loaded brush drips and runs on a vertical surface.
Start with the muntins (the thin strips between panes) using the 1.5-inch brush, then move to the wider casing with the 2-inch. Brush with the grain in long smooth strokes. Lay the paint on, then make one light pass back over it to level it out. Don’t keep brushing; enamel sets fast and over-brushing leaves drag marks.
Watch out for the bottom edge of the casing and the sill. Drips collect there. Check them for the first few minutes and brush out any sag while it’s still wet.
The first coat will look thin and a little streaky. That’s normal and it’s supposed to. Resist the urge to pile more on.
Step 5 — Recoat, Then Pull the Tape
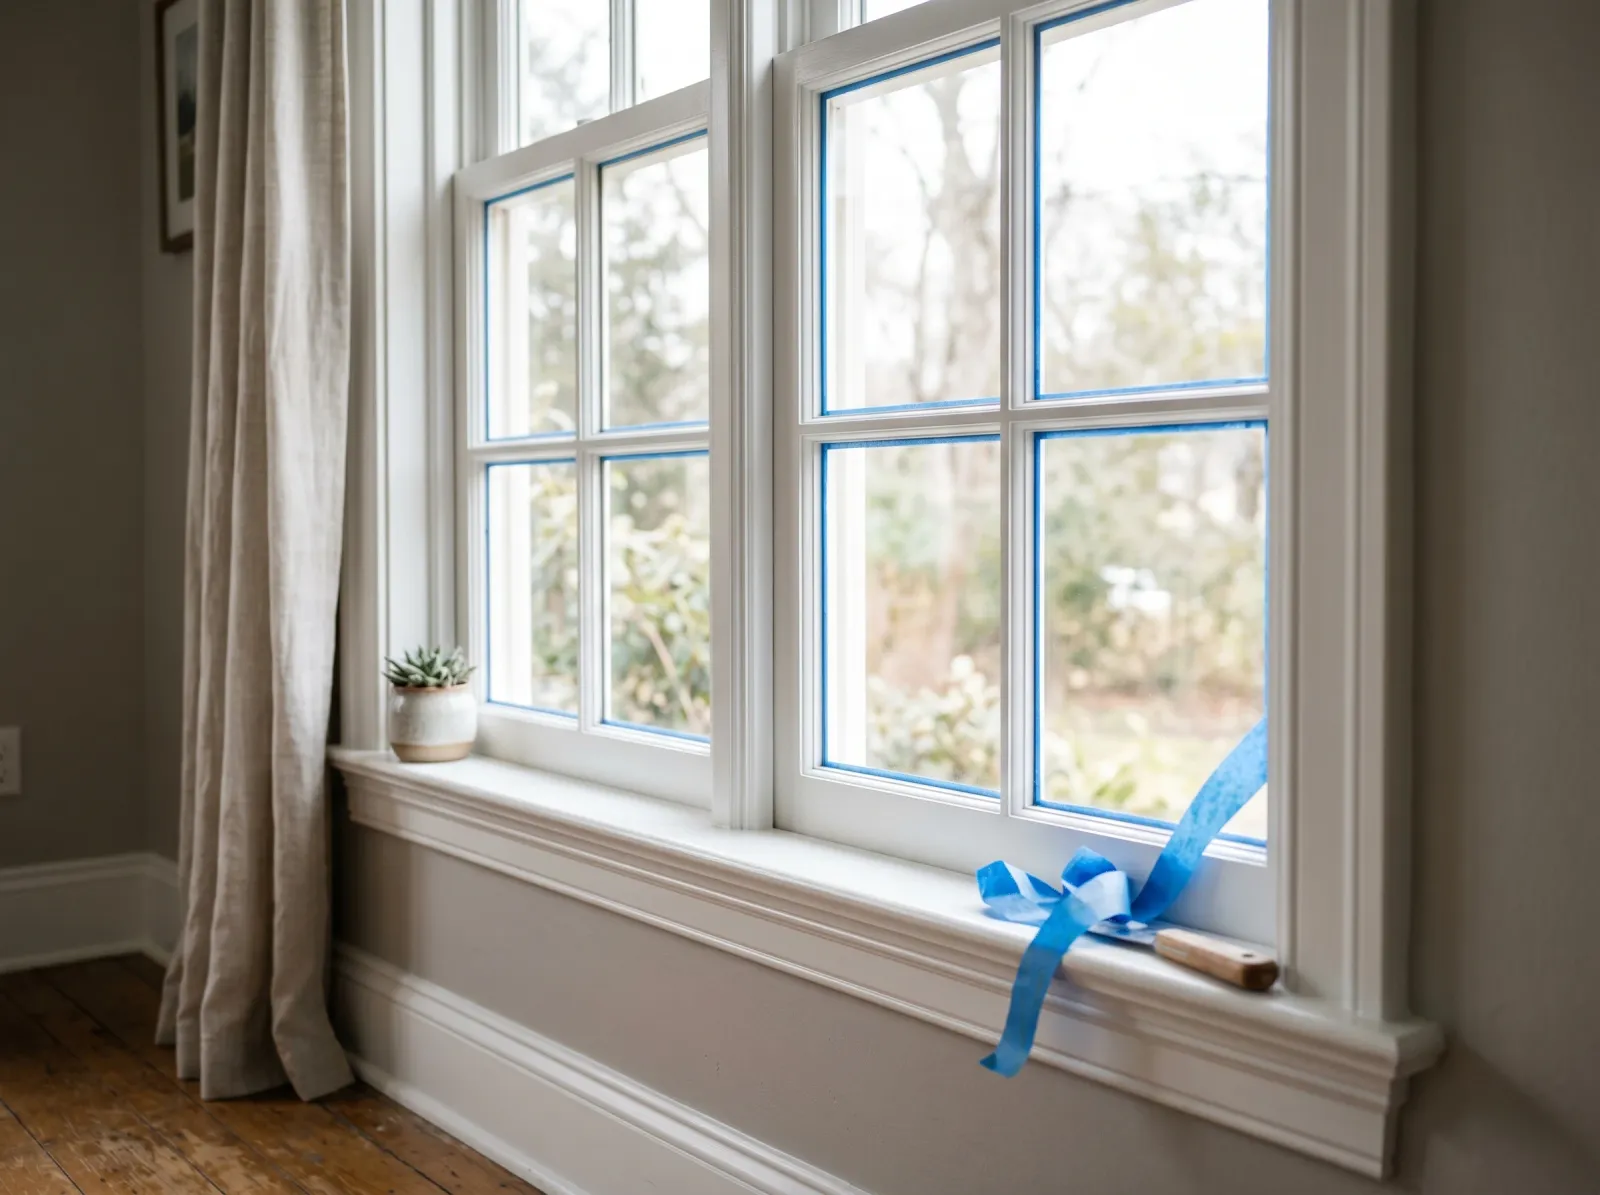
Second coat even and smooth, tape peeled at an angle while the paint is still slightly soft. The line against the glass is sharp.
Wait the recoat time on the can, usually 4 to 16 hours for a waterborne alkyd enamel (it’s slower than wall paint). Touch a hidden spot with a knuckle; if it’s dry and not sticky, brush the second coat like the first.
Pull the tape while the second coat is still slightly soft, not bone-dry. Pull slow, at a 45-degree angle, peeling back on itself. If the paint has cured onto the tape it tears a ragged line, so score along the tape edge with a razor first if you waited too long.
If you went the no-tape route, let the paint dry fully, then run a razor blade flat along the glass to shave off the overlap in one clean strip.
Common Mistakes
- Skipping the sanding. New enamel over slick old gloss peels off in a year, sometimes in sheets when you bump it. A one-minute scuff with 220-grit is the whole fix.
- Using wall paint instead of enamel. Wall paint on trim stays soft, marks up, and won’t wipe clean. Trim needs a hard enamel built for handling.
- Loading the brush too heavy. Drips on the casing edge, runs down the sill, and paint flooding under the tape. Dip a third, tap once.
- Over-brushing. Enamel sets faster than you think. Going back over a half-set area leaves drag marks and brush ridges. Lay it on, level it once, leave it.
- Painting the window shut. A closed sash dries glued to the frame. Crack the window open before you paint, and run a blade along the seam once it’s touch-dry to break any bond.
- Pulling tape too late. Cured paint bonds across the tape edge and tears when you pull. Pull while it’s slightly soft, or score the line first.
Cure Schedule
| Time after final coat | What’s safe |
|---|---|
| 30–60 min | Pull the painter’s tape |
| 4 hrs | Touch dry; break any window-sash bond with a blade |
| 24 hrs | Open and close the window gently |
| 7 days | Light dusting with a dry cloth |
| 30 days | Full cure; wipe clean with a damp cloth |
Waterborne alkyd enamels stay slightly soft longer than regular paint. Don’t rest anything against the trim or close blinds tight against it for the first few days.
Maintenance and Touch-Ups
Window trim painted with a good enamel lasts ten to fifteen years. Sun-facing windows chalk and fade a little faster.
For a chip or scuff, dip a small artist’s brush in your leftover quart and dab just the damage. Don’t repaint the whole length; you’ll see the edge of the new patch. For condensation grime, a damp microfiber rag with a drop of dish soap wipes it off once the paint is past 30 days cure.
Keep the leftover quart labeled with the room name and the color code from the lid sticker. That’s how you match it years later.
Cost Breakdown
| Item | $ |
|---|---|
| Trim enamel, 1 quart semi-gloss | $20 |
| Painter’s tape, 1 roll | $7 |
| Paintable caulk | $5 |
| Spackle + sandpaper | $8 |
| 2-inch angled brush (keep it) | $14 |
| Total | $54 |
Numbers are for a room’s worth of windows with a mid-tier enamel. Own a good brush already? Knock $14 off. A stain-blocking primer adds about $12 if you need it.
What to Do If It Goes Wrong
A few things trip up first-timers. Here’s the fix for each.
Paint got on the glass. Wait for it to dry, then run a razor blade flat along the glass and shave it off in a strip. Wet paint smears; dry paint scrapes clean. Normal, even for pros.
You painted the window shut. Run a utility knife along the seam between the sash and the frame to break the seal, then work the window open and shut a few times. Catch it within a day and it pops free easily.
The line against the glass is fuzzy. The tape edge wasn’t pressed hard enough and paint bled under. Let it dry, razor off the bleed along the glass, and touch up the wood edge with a small brush.