How to Paint Stair Treads and Risers
Painting stair treads and risers so they don't chip in a month. Real prep, the right floor enamel, and the cure schedule that keeps the stairs walkable.


Stairs are the hardest-wearing surface in a house. Harder than the kitchen floor. People hit the same nosing with the same shoe heel a few hundred times a week, and they do it for years. So here’s the rule before anything else: paint stair treads like a floor, not like trim. Floor enamel on the treads, trim enamel on the risers, and real prep underneath both. Skip that and you’ll be touching up the front edge of every step by Thanksgiving.
The riser is the easy part. Nobody steps on it. The tread is where projects go wrong, because people grab the trim paint they used on the baseboards and roll it on. It looks great for a month. Then the heel traffic chews through it.
TL;DR
- Treads get floor enamel. Porch and floor grade, satin or low-gloss. Trim paint scuffs off the nosing fast.
- Risers get trim enamel. They take no traffic, so BM Advance or ProClassic is plenty.
- Prep is the whole job. Sand the gloss off, fill the gouges, prime varnished or oil-finished treads with a bonding or shellac primer.
- Paint every other tread first so you can still use the stairs while the alternating steps cure.
- Add anti-slip grit to the tread coat or plan on runners. Painted stairs are slick.
- Stay off for 24 hours, light sock traffic at 48, full cure in 7 to 14 days.
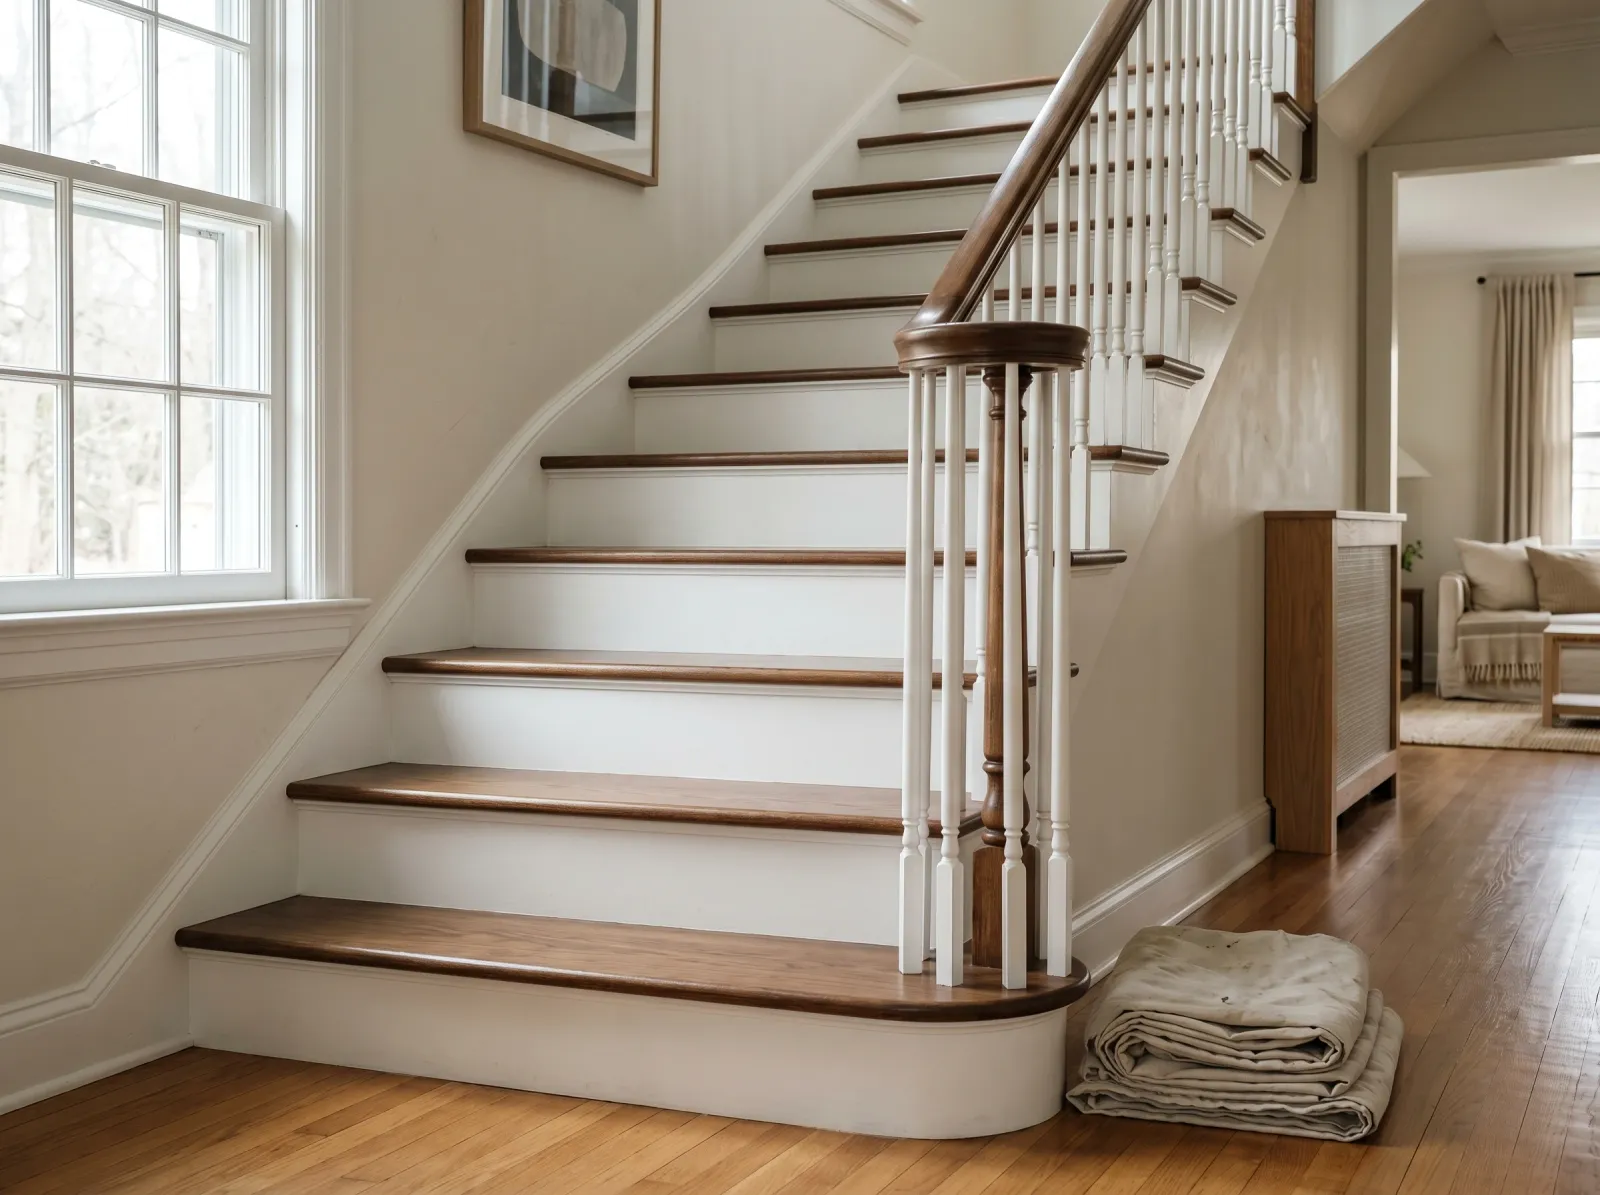
What You’ll Get
A finished flight where the risers read crisp and clean and the treads hold up to real shoe traffic for years instead of months. The most common version: white risers, color treads. It hides wear and looks intentional.
Honest Take on Difficulty and Time
This is a medium project, not an easy one. The painting is simple. The logistics are the headache, because it’s the one staircase you have and people still need to get up and down it.
Plan a weekend for the work. Day one: strip, fill, sand, prime. Day two: two coats, painting every other tread so half the flight stays walkable. Then a week of careful, sock-foot traffic while it cures hard.
If you’ve got a second way upstairs, close the painted flight off and skip the every-other-tread routine. One flight of stairs is a half-day of actual brushwork. The rest is dry time and staying off it.
| Step count | Active brush time | Total elapsed |
|---|---|---|
| 13-step flight, paint full at once (stairs closed) | 4–6 hrs | 1 weekend + 1 week cure |
| 13-step flight, every-other-tread (stairs in use) | 6–8 hrs | 1 long weekend + 1 week cure |
What You’ll Need
Paint and Primer
Two different products, because the treads and risers do two different jobs.
For the treads, a porch and floor enamel rated for foot traffic. Benjamin Moore Floor & Patio, INSL-X Tough Shield, or Behr Porch & Patio. Satin or low-gloss. This is the part your foot lands on, and it’s the only paint that survives there. For the SKU comparison, the best interior trim paint round-up covers the enamels that double as riser paint, and floor-grade enamel sits right beside them at the store.
For the risers, a waterborne trim enamel. BM Advance, SW ProClassic, INSL-X Cabinet Coat. Satin or semi-gloss. The riser takes no traffic, so it doesn’t need floor enamel.
For primer, it depends on what’s already on the wood. Glossy varnish or polyurethane wants a bonding primer (INSL-X Stix or Zinsser Bulls Eye 1-2-3 Plus). Old amber oil finish, or knots bleeding through, wants a shellac primer (Zinsser BIN). If you’re not sure what finish is on there, the guide to painting over varnished wood walks through the test.
Tools
A 2.5-inch angled brush for cutting in and the risers. A 4-inch foam mini-roller for the flat tread faces. Sandpaper in 120 and 220, a sanding block, a vacuum, a tack cloth, a putty knife, wood filler, tape, and drop cloths.
Don’t cheap out on the brush. A $4 brush sheds bristles into your floor enamel and you’ll be picking them out of the nosing. A $14 Wooster holds its edge. Picks are in the paint brushes round-up.
Step 1 — Strip, Fill, and Sand
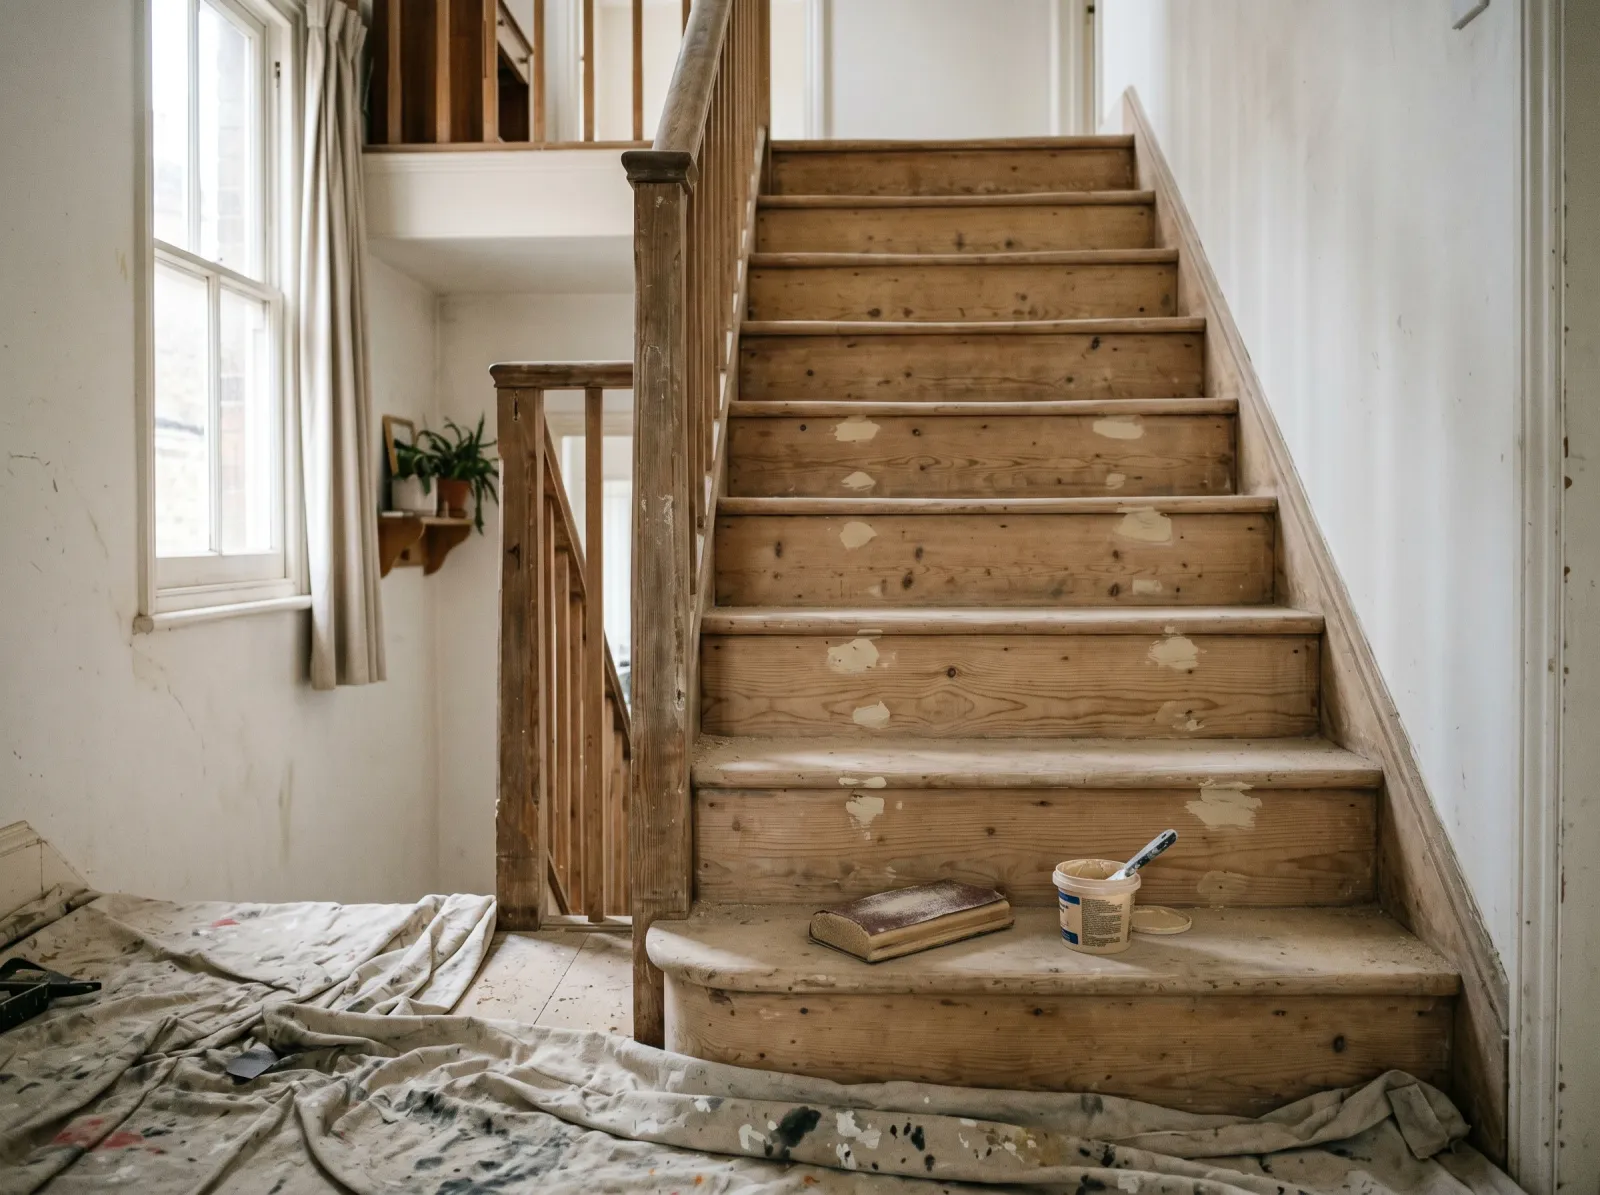 Old finish dulled, nosing repaired, every tread sanded flat and vacuumed clean.
Pull any old runner, carpet staples, and tack strips. Pry the metal nosing edge off if there is one. Now look at the wood. Most stairs wear a glossy varnish or polyurethane, and paint will not grip a glossy surface. It has to come off or get dulled.
Sand the treads with 120-grit first to knock the gloss down and flatten the worn dips at the front of each step. Then 220 to smooth it. Fill gouges, split nosing, and old staple holes with wood filler, let it dry, sand flush.
Watch out for loose or squeaky treads. Now is the time to drive a couple of trim screws down into the stringer and set the heads below the surface. You won’t get a cleaner shot at it. Fill over the screw heads before you sand.
Vacuum every speck of dust, then wipe with a tack cloth. Dust under floor enamel shows up as grit you’ll feel through your socks for years.
Step 2 — Tape the Risers, Prime the Treads
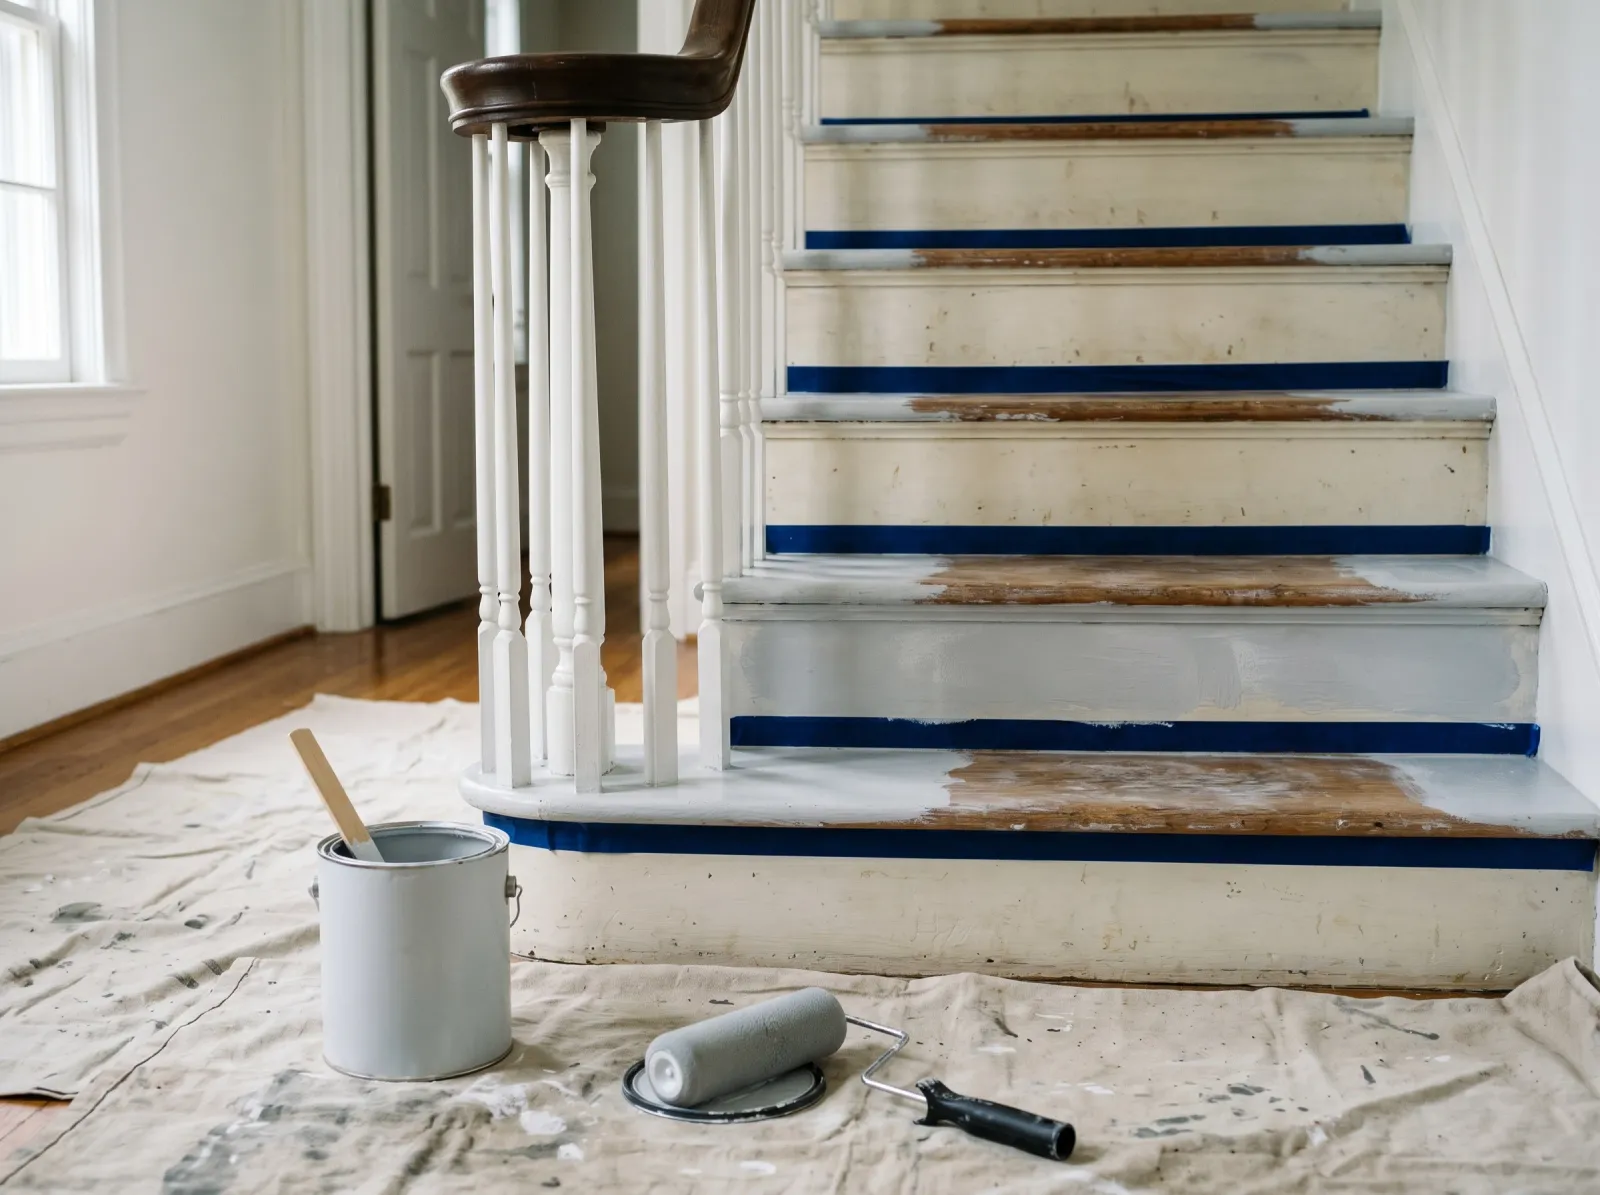 Tape protects the riser line. A bonding or shellac primer goes on the treads first.
Run painter’s tape along the bottom of each riser where it meets the tread behind it, so tread primer doesn’t slop onto the riser. Press the edge down hard with a fingernail so primer doesn’t bleed under.
Prime the treads. Bonding primer over glossy or scuffed varnish, shellac primer (Zinsser BIN) over old amber oil finish or bleeding knots. One coat, brushed into the corners, rolled on the flats. Let it dry the time the can says, then scuff with 220 to knock down any raised grain and tack it again.
If the treads were already bare, sanded, raw wood with no finish history, you can prime or go straight to floor enamel, depending on the can’s directions. Most floor enamels self-prime on bare wood. When in doubt, prime. It’s a buck of primer against a peeling tread.
Step 3 — Paint the Risers, Then Every Other Tread
 Risers go on in white enamel. Treads get floor enamel on alternating steps so the flight stays walkable.
Paint the risers first, top to bottom, with the trim enamel and the angled brush. Two thin coats look better than one thick one. They’re vertical, so watch for drips and brush them out while wet.
Now the treads, and here’s the trick that keeps the stairs usable: paint every other one. Coat steps 1, 3, 5, 7, and so on, and leave the in-between treads bare so you can step on them. Stir your anti-slip grit into the floor enamel before you start, or the finished stairs come out slick.
Brush the floor enamel into the corners and the nosing edge, then roll the flat with the foam mini-roller for a smooth, even film. Floor enamel is thicker than trim paint. Don’t overload the roller or it sags off the front lip.
Watch out for painting yourself into a corner. Work top-down or bottom-up with a plan for which treads you’ve coated, so you’re not trapped on a wet step.
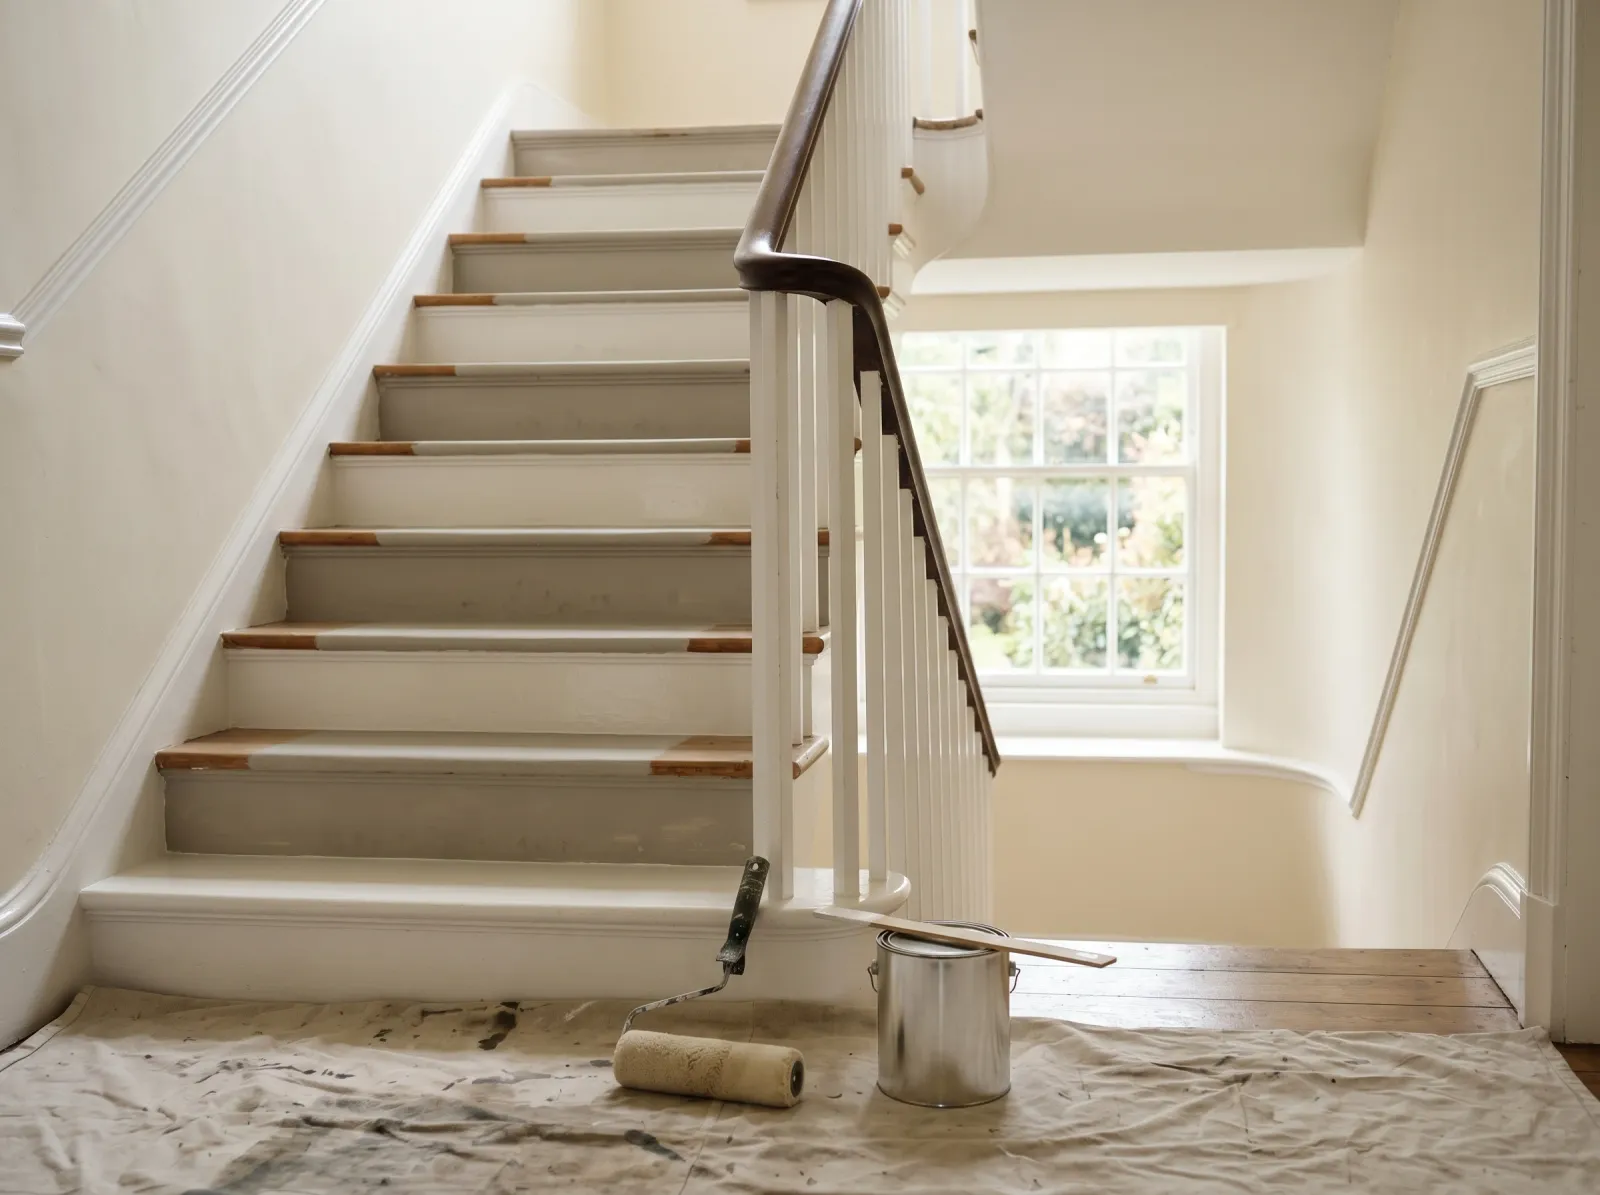
Step 4 — Second Coat, Then Switch Treads
 Both coats on, tape pulled. The flight cures hard before anyone walks it in shoes.
Let the first set of treads dry per the can, usually overnight for floor enamel, and give them a second coat. Once that first batch can take light foot traffic (a full day, sock feet), switch over: walk on the finished treads and paint the ones you skipped. Two coats on those too.
Pull the riser tape while the last coat is still slightly tacky, at a 45-degree angle. Bone-dry paint can chip along the tape line.
Two coats minimum on the treads. Always two. Floor enamel builds its abrasion resistance in the film thickness, and one coat doesn’t have the mil thickness to take heel traffic. The can may say one-coat. The nosing knows better.
Common Mistakes
- Using trim or wall paint on the treads. It looks fine for a month, then the nosing wears down to primer. Floor enamel only on the walking surface.
- Skipping the sand-and-prime on varnished treads. Paint doesn’t grip gloss. It peels off the front edge in sheets within weeks. See the fix for peeling paint if it’s already happening.
- Painting all the treads at once with no second way up. You strand yourself and someone walks the wet stairs at 6 a.m. Do every other tread, or close the flight.
- No anti-slip grit and a glossy sheen. Painted stairs are slippery, and a glossy painted stair in socks is a hospital trip. Add grit, or use satin, or run a runner down the middle.
- Recoating before the first coat cures. Floor enamel is slow. Recoat too soon and the roller drags the under-layer up into a wrinkled mess. Read the can and wait the full window.
Cure Schedule
| Time after final coat | What’s safe |
|---|---|
| 4–6 hours | Touch dry, don’t walk it |
| 24 hours | Stay off entirely |
| 48 hours | Light sock-foot traffic |
| 7 days | Normal traffic, shoes |
| 14 days | Full cure, scrub-clean, runner back down |
Waterborne floor enamel cures faster than oil but still needs the full two weeks to reach its real hardness. Walk it in heels on day three and you’ll print the tread. Patience here is the difference between a finish that lasts years and one you redo next spring.
Maintenance and Touch-Ups
Painted treads in floor enamel hold up 5 to 8 years before the nosing needs a refresh, longer on a low-traffic flight to a guest room, shorter on the main run with kids and a dog. Risers go a decade or more.
For a worn nosing, scuff just that edge with 220, dab on a little floor enamel with a small brush, feather the edge into the surrounding paint. Keep a labeled quart of each in the basement. Stairs are the one surface where you will use the leftovers.
When the whole flight finally looks tired, a single maintenance coat of floor enamel over a light scuff brings it back. You don’t strip to bare wood again unless it’s chipping.
Cost Breakdown
| Item | $ |
|---|---|
| Floor enamel, 1 quart (treads) | $25 |
| Trim enamel, 1 quart (risers) | $25 |
| Bonding or shellac primer, 1 quart | $20 |
| Anti-slip additive | $8 |
| Sandpaper, filler, tack cloth | $15 |
| Brush, foam roller, sleeves | $25 |
| Total | $118 |
Mid-tier products. A budget run with store-brand enamel lands near $60. Top-shelf (BM Floor & Patio plus Advance) closer to $140.
FAQ
Can you paint stair treads with regular wall or trim paint? No. Use a porch and floor enamel rated for foot traffic. Trim paint is fine on the risers, but the part your foot lands on needs floor-grade enamel or it scuffs off in weeks.
Do painted stairs get slippery? Yes, especially in socks. Stir in an anti-slip additive, drop the sheen to satin, or add a runner.
How long before you can walk on painted stairs? Stay off for 24 hours, light sock traffic at 48, full hardness in 7 to 14 days. Paint every other tread so the flight stays usable.
Should I paint or stain wood stairs? Stain solid hardwood in good shape. Paint a patchwork of species or filled wood. Stained treads with white risers is the combo that hides the most wear.