How to Paint Stripes on a Wall
Painting stripes on a wall comes down to clean tape edges and patient measuring. Here is how to lay out, tape, and paint crisp lines that read as drape, not wobble.


Stripes are the rare wall pattern that can read as either nursery-cute or quietly tailored, and the only thing that decides which one you get is the edge. A clean line falls like the seam of a curtain. A fuzzy line announces that someone taped a wall on a Saturday. Everything in this project bends toward that one edge.
The good news is that the painting itself is easy. You already know how to roll a wall. The work that matters happens before any color goes down, in the measuring and the taping, and in one small trick that almost nobody mentions out loud.
What You’ll Get
One accent wall in even, crisp stripes that catch the light differently across their width, the way good drapery does. A weekend of careful work, then a wall that looks like it cost more than two quarts of paint.
Honest Take on Difficulty and Time
This is a step up from rolling a plain room, not because the painting is hard but because the layout is fussy and the taping is slow. Budget about eight working hours for a single 10-foot wall: an hour to measure and mark, two to three hours to tape, an hour to seal and paint, and the rest in dry time between the base color and the stripes.
If you have never taped a pattern before, give yourself the full weekend and do the measuring when you are fresh, not at the end of a long day. Tired eyes drift, and a stripe that wanders a quarter inch over 8 feet is visible from the doorway.
What You’ll Need
Paint and Primer
Two quarts, same sheen. The base color is whatever sits on the wall now, or the lighter of your two tones. The stripe color is the second.
Matching the sheen matters more than people expect. If your base is flat and your stripe is satin, the stripes will flash and glint at every angle even where the colors are close, and the wall reads busy. Same sheen keeps the pattern calm and lets the color do the talking. The exception is the deliberate tone-on-tone look, where the sheen difference is the pattern.
Choose colors that share an undertone. A warm white next to a greige with a warm base sits together like a single palette. A cool blue-white next to a warm sand-stripe will quietly fight, and you will feel the friction without being able to name it. If you are unsure which way your colors lean, the undertones explainer walks through how to read them before you commit.
Tools
A laser level is the single tool that earns its place here. A 4-foot bubble level works, but over a tall wall you stack the level three or four times and small errors compound. A laser throws a true vertical line in one shot.
Beyond that: a tape measure, a soft pencil, delicate painter’s tape, a 9-inch roller for the open bands and a 4-inch foam roller for the narrow ones, a 2-inch angled brush, and a plastic putty knife to burnish the tape down. For tape that lifts clean off fresh paint, see the best painter’s tape round-up.
Step 1 — Plan the Stripes Before You Touch the Wall
Measure the wall edge to edge. Decide your stripe width, then divide. The math almost never comes out to a whole number of even stripes, and that is fine. Start the layout from the center of the wall and work outward, so the leftover partial stripes land in the corners where the eye forgives them.
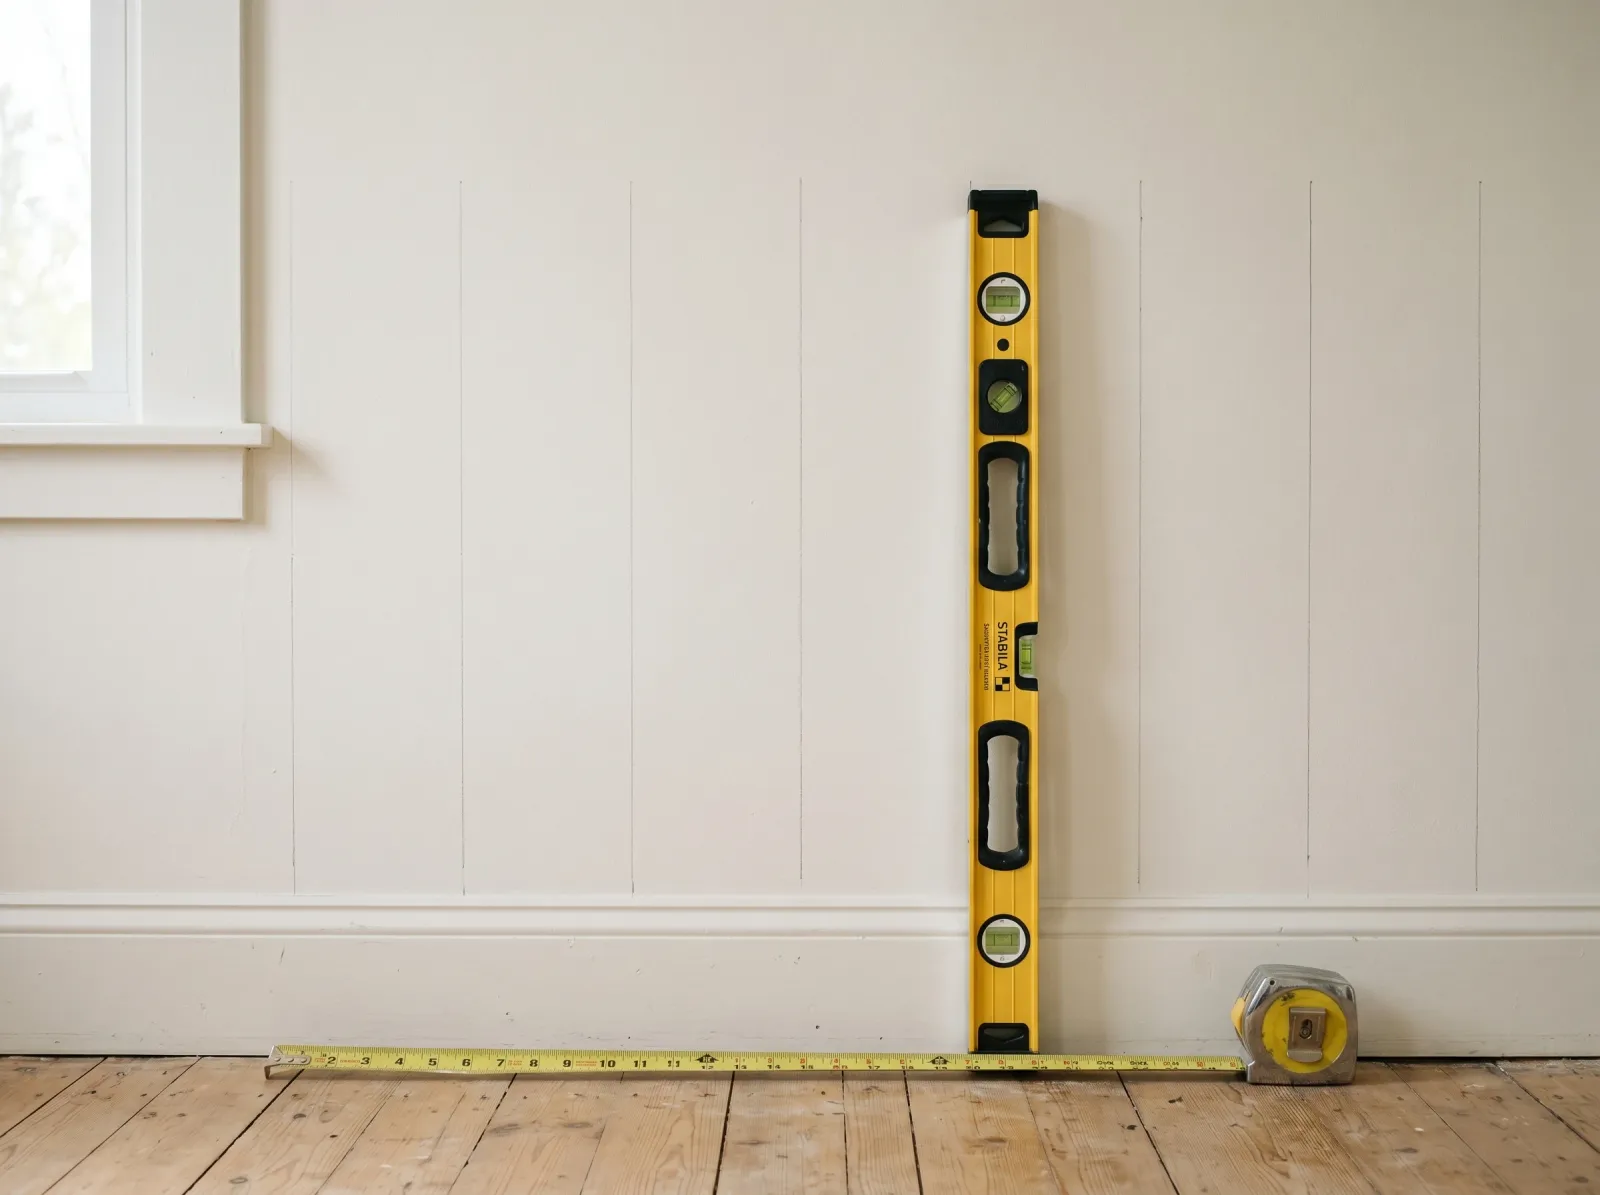 The whole wall measured and divided from the center out, each line drawn light in pencil with a level. Nothing painted yet.
For a tailored, dressy look, keep bands between 4 and 12 inches wide. For a soft, modern feel, go wider, 12 to 18 inches. Vertical stripes lift a low ceiling; horizontal ones widen a narrow room but show every sag in the floor line. For a first try, go vertical.
Watch out for marking your lines too dark. Press lightly with a 2B pencil. A heavy graphite line can ghost through a pale stripe color, and you will see it in raking afternoon light.
Step 2 — Mark and Tape the Lines
Run a true vertical at each stripe boundary with the laser or level, then mark each line in light pencil. Before you tape, flag which bands get the stripe color so you do not paint the wrong ones. A small piece of tape inside each “paint me” band is enough.
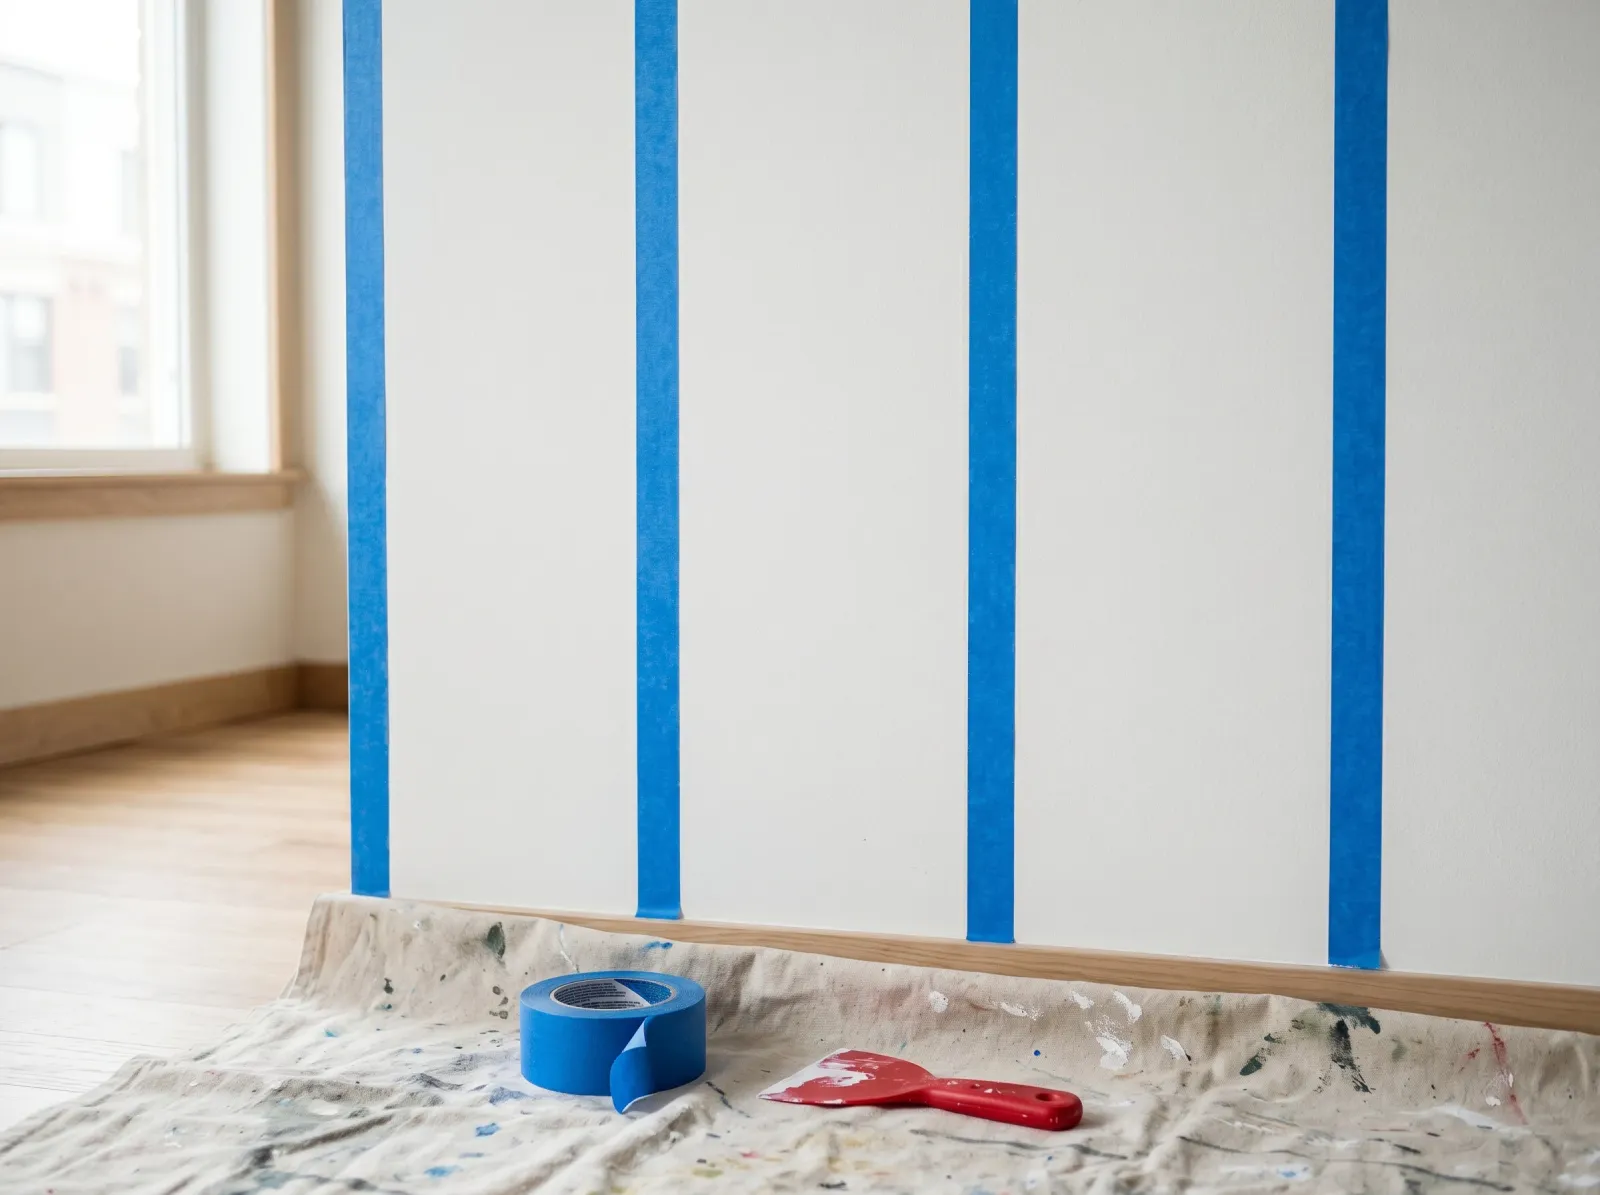 Delicate tape pressed along the outside of every line that frames a stripe, edges burnished down hard.
Tape goes on the outside of each line, on the side that will not be painted, so the inside edge of the tape sits exactly where you want the stripe to end. Press the full length of every edge down hard with the plastic putty knife. Air gaps under the tape are where bleed lives.
Watch out for the base coat not being cured. If you painted the wall less than a few days ago, delicate tape can still lift the paint when you pull it. Wait, or test a small strip first.
Step 3 — Seal the Tape Edge (The Step That Makes It Crisp)
This is the move that separates a crisp wall from a fuzzy one. Before you roll the stripe color, run a thin pass of the base color along the inside edge of the tape, the edge that faces the stripe.
Here is why it works. Paint creeps under tiny gaps in the tape. If the first thing to creep under is the base color, it seeps into the gap and dries with a clean edge, sealing it. By the time you paint the stripe color, there is nowhere left for it to bleed. Let this base-color pass dry for an hour before the stripe color goes on.
Clear caulk works the same way if you would rather not fuss with a brush. A thin bead wiped along the tape edge with a fingertip seals it just as well.
Step 4 — Roll the Stripe Color
Use the 9-inch roller for wide bands and the 4-inch foam roller for narrow ones. Roll away from the tape toward the center of the stripe on your first pass so you are not driving paint into the tape edge. One thin even coat usually covers when the two colors are close in value.
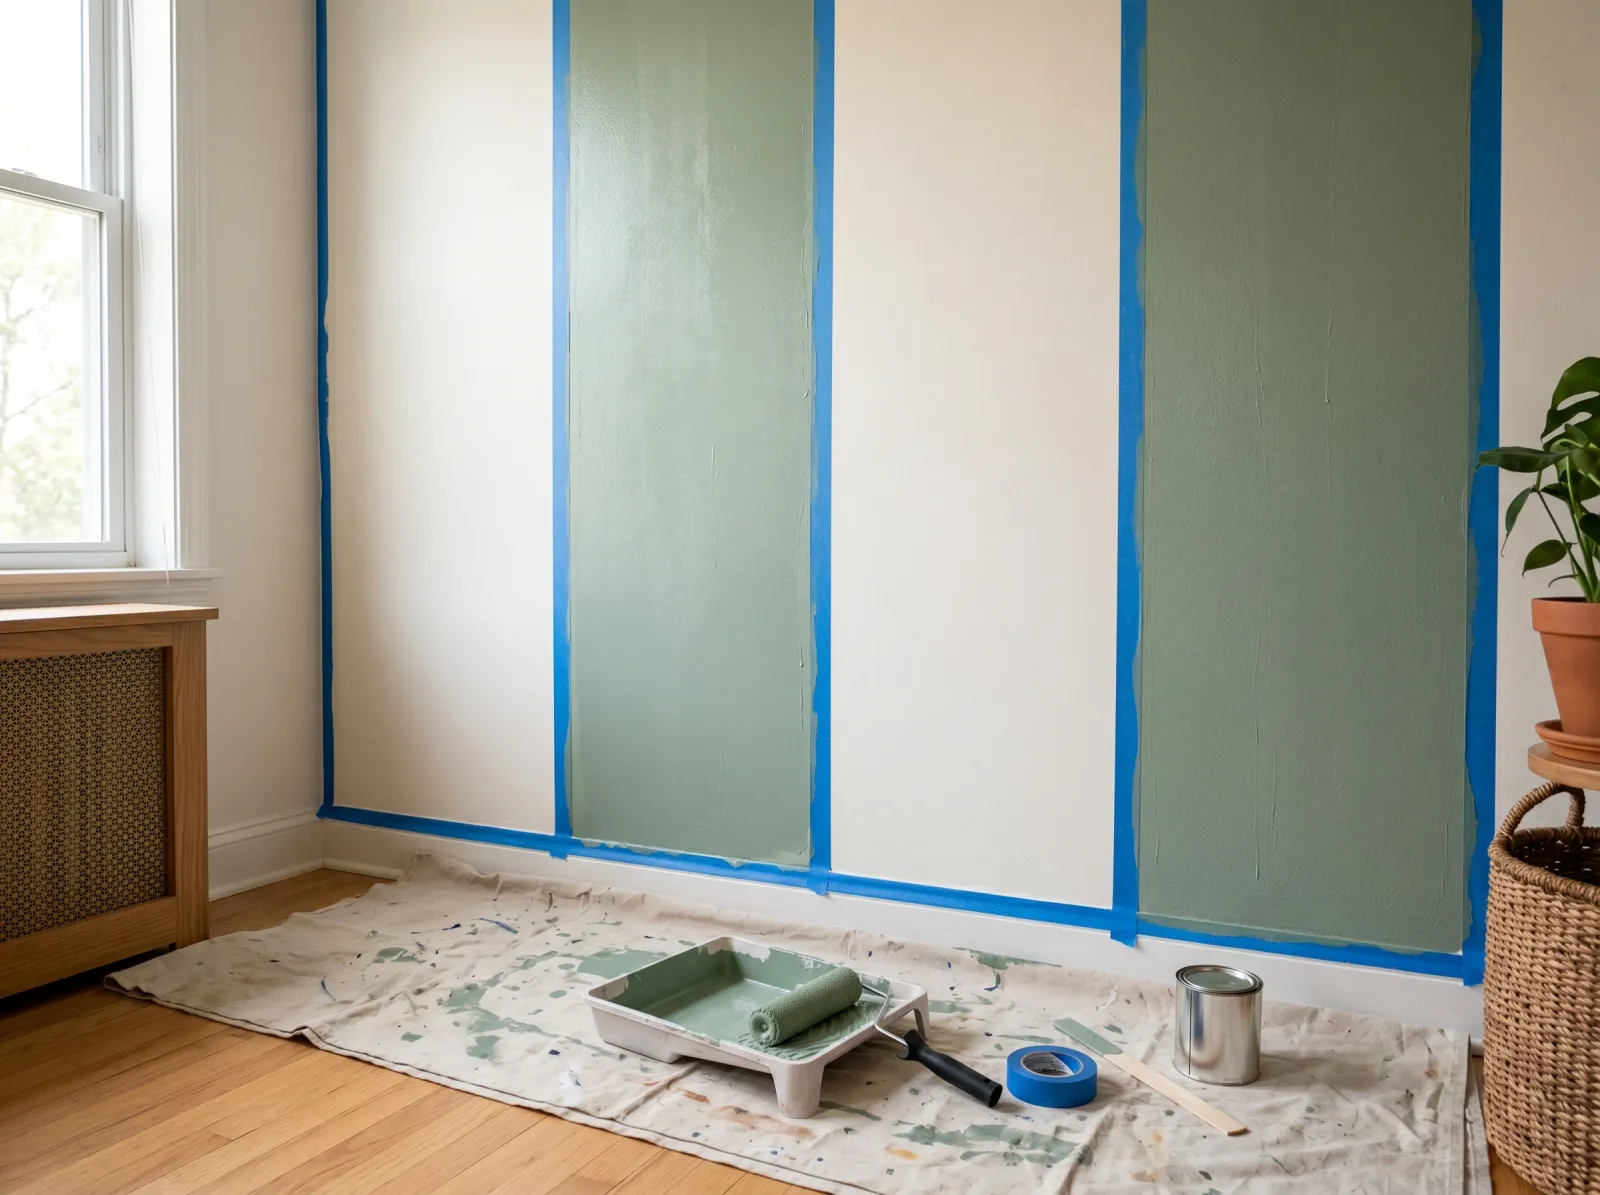 The bands between the tape filled with the second color, one thin even coat, tape still in place.
If you are going high-contrast (a deep color over white), expect two coats. Let the first dry the time the can states, usually four hours for water-based, before the second. A thin second coat over a dry first coat keeps the stripe even. A thick single coat sags and the edge gets ropy.
Watch out for overloading the roller in a narrow band. Excess paint pools at the tape line and bleeds even through a sealed edge. Keep the foam roller barely damp with color.
Step 5 — Pull the Tape and Reset
Pull the tape while the stripe color is still slightly tacky, not fully dry. A wet-but-set film breaks cleanly at the tape edge; a bone-dry film can tear across the stripe and chip. Pull each strip back on itself at a low angle, slow and steady.
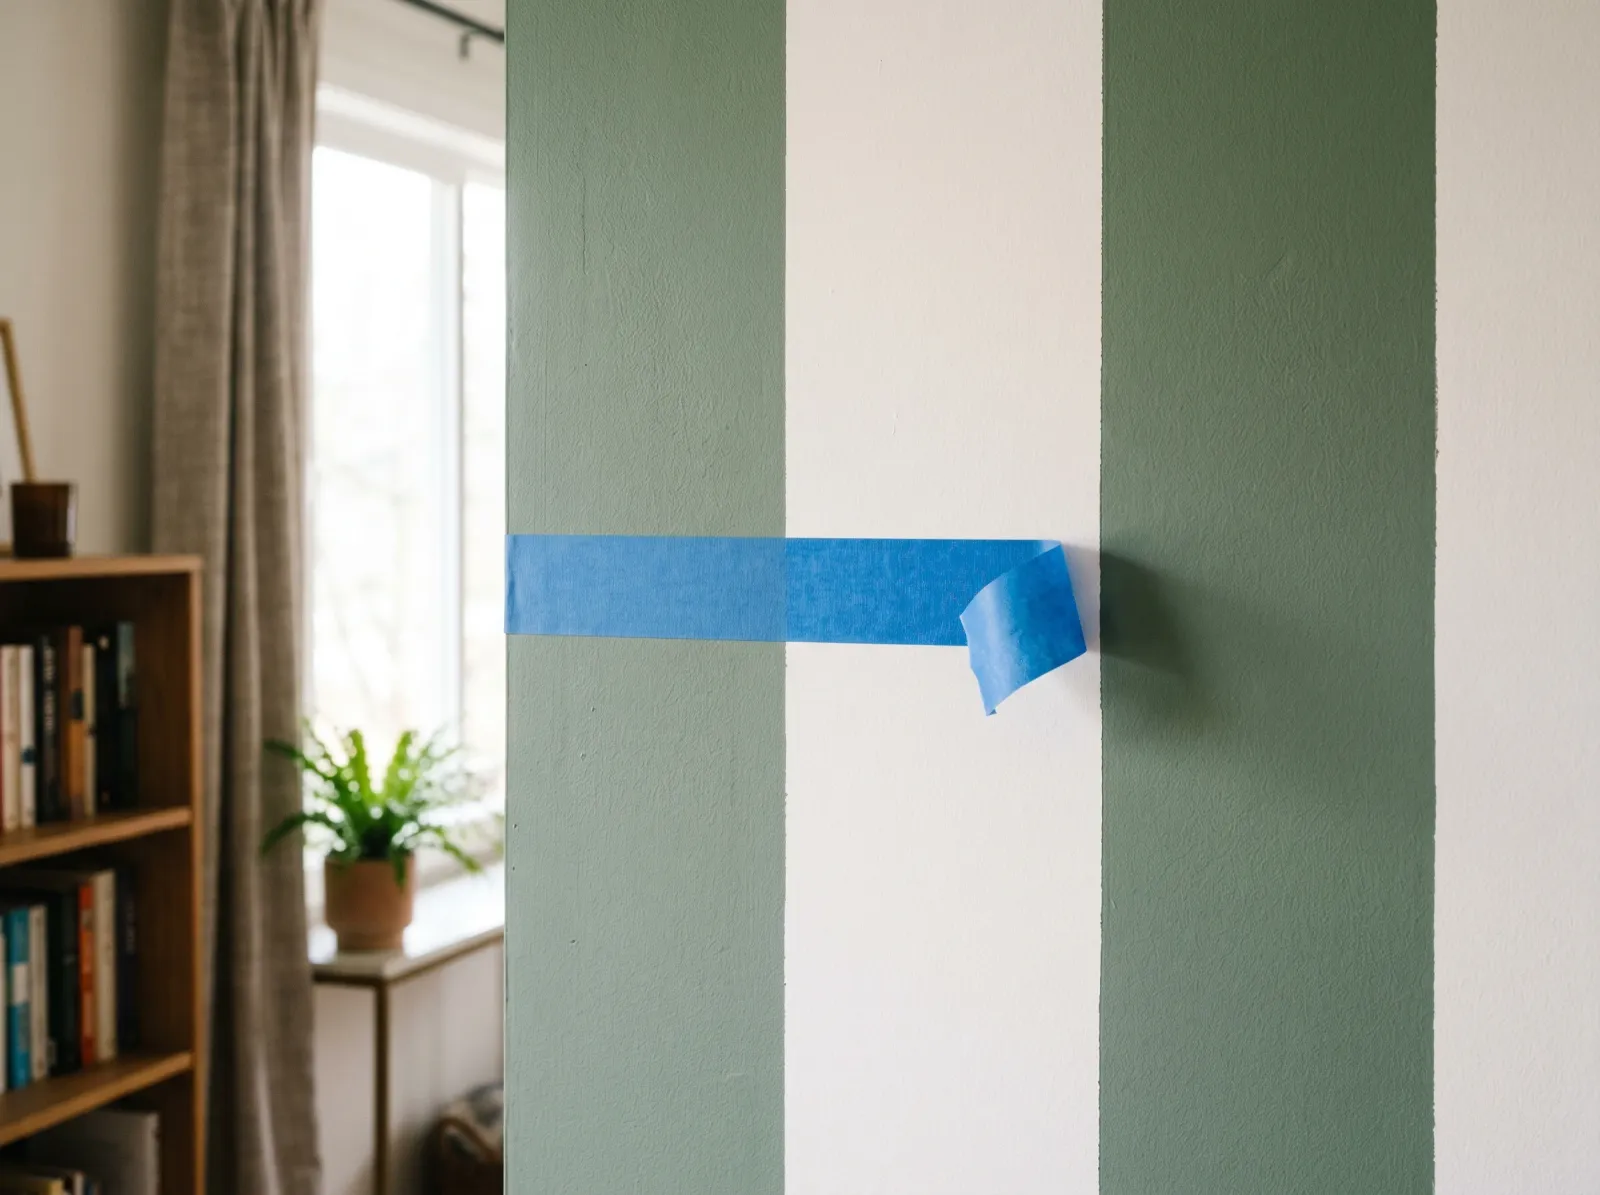 Tape peeled back at a low angle while the stripe color is still slightly wet, leaving a clean edge.
Erase any pencil marks that show in the base bands with a clean white eraser, gently. Stand across the room and look at the wall in the light you actually live in. Stripes read completely differently at 9am than at 4pm, so check both before you decide anything is wrong.
Common Mistakes
- Skipping the base-color seal. This is the number one reason stripes come out fuzzy. The stripe color creeps under the tape and dries with a ragged edge. Seal with the base color first, every time.
- Mismatched sheens by accident. A flat base and a satin stripe flash under side light and make the wall look busy even when the colors are subtle. Match the sheen unless the sheen difference is the whole point.
- Taping over fresh, uncured base paint. Delicate tape still lifts paint that has not cured. Give the base coat 24 to 72 hours, or test a strip first.
- Marking lines too dark. Heavy pencil ghosts through pale stripe colors in raking light. Light 2B, light pressure, erase what shows after.
- Pulling the tape too late. Dry paint tears at the tape edge instead of releasing cleanly. Pull while the stripe is still slightly tacky.
- Letting the math force even stripes. Forcing whole-number stripes leaves an awkward sliver against one wall. Lay out from the center and push the partials into the corners.
Cure Schedule
| Time after the stripe coat | What’s safe |
|---|---|
| 1 hour | Pull the tape |
| 4 hours | Touch dry, don’t lean anything on it |
| 24 hours | Hang light art back up |
| 7 days | Wipe a scuff with a damp cloth |
| 30 days | Full cure, washable |
Maintenance and Touch-Ups
Striped walls hold up exactly like a normal painted wall, which is to say years. The only extra is touch-up: keep both quarts, labeled with the room and which one is the stripe.
For a scuff on a stripe edge, re-tape just that short section, seal with the base color, and dab the stripe color with a small piece of the foam roller so the texture matches. A brush leaves a different texture than the rolled stripe and the repair shows. For a scuff in the open field, a dab of leftover paint on a small roller piece disappears.
Cost Breakdown
| Item | $ |
|---|---|
| Base color, 1 quart eggshell | $22 |
| Stripe color, 1 quart eggshell | $22 |
| Delicate painter’s tape, 1 roll | $10 |
| Foam roller, sleeve, tray | $18 |
| Total | $72 |
Numbers are mid-tier paint. If the base color is already on the wall, you only buy one quart and the total drops near $50. Top-shelf paint pushes it past $100.
A Specific Recommendation
If this is your first striped wall, do tone-on-tone, vertical, wide bands. Pick one color you already love, buy it in flat and in satin, and run wide vertical stripes that alternate the two sheens. There is no contrast line to keep perfectly crisp, the stripes appear and vanish as the light moves through the day, and the effect is the most forgiving and the most timeless version of the whole idea. For the bolder two-color version, work out your pairing first against the floor and the trim, the same way you would for any two-tone wall, and lean on the base-color seal for the edge.