How to Paint a Fireplace Mantle
Painting a fireplace mantle the right way: degloss, prime the knots, and lay down a hard semi-gloss enamel that survives heat, dust, and a season of holiday garland.

A fireplace mantle is short trim with a hard job. It’s the most looked-at piece of wood in the room, it collects dust, it gets a candle set on it every December, and it sits a foot off a heat source. Paint it like a wall and it’ll scuff by spring. Paint it like furniture and it’ll hold for a decade.
The whole job is half a day of work spread across a weekend, most of which is waiting for primer to dry. The part people skip is the part that bites them: deglossing and blocking the knots. Skip those and you’ll be repainting in a year.
What You’ll Get
A mantle and surround in a hard semi-gloss enamel that wipes clean, resists fingerprints and dust, and doesn’t yellow over the firebox. The kind of finish that looks like the trim came that way from the factory.
Honest Take on Difficulty and Time
Easy project. The skill ceiling is low because a mantle is small. The trap is the dry times, not the brushwork.
Real schedule: about an hour of prep, twenty minutes to prime, then a wait. An hour per coat with a wait between. Two coats means two waits. Plan it across a Saturday and Sunday and you’re not standing around watching paint flash off.
If you’re using a shellac-based primer, that part dries in 45 minutes and you can topcoat the same afternoon. The enamel is the slow part. It wants four to six hours between coats and a full day before you load up the shelf.
What You’ll Need
Paint and Primer
A quart of waterborne alkyd enamel in semi-gloss covers a typical mantle twice over. BM Advance, SW ProClassic, or Behr Alkyd Enamel. These flow out flatter than straight latex and cure to a hard film that takes abuse. Semi-gloss is the sheen for trim; it wipes clean and reads crisp at the corners. The sheen guide covers why flat and eggshell don’t belong on something people touch.
For primer, a quart of shellac-based stain blocker (Zinsser BIN). Shellac locks down knots, old varnish, and tannin in one coat. If you put latex straight over an oak or pine knot, the knot bleeds an amber ring through your white topcoat in a few weeks. The block-knots-bleeding fix walks through why that happens and what stops it.
Tools
A 2-inch angled sash brush does most of the work. A mantle is brush work; there’s not enough flat surface to bother with a full roller. For the wide top shelf, a 4-inch foam roller lays down a glass-smooth coat with zero brush marks. Add a liquid deglosser, sanding sponges, painter’s tape, paintable caulk, and a drop cloth.
The brush is where you don’t cheap out. A $4 brush sheds bristles into your enamel and leaves a streaky line at the corners, which is exactly where the eye lands on a mantle. A $14 Purdy holds a clean edge. Picks are in the best paint brushes round-up.
Step 1 — Clear, Tape, and Degloss
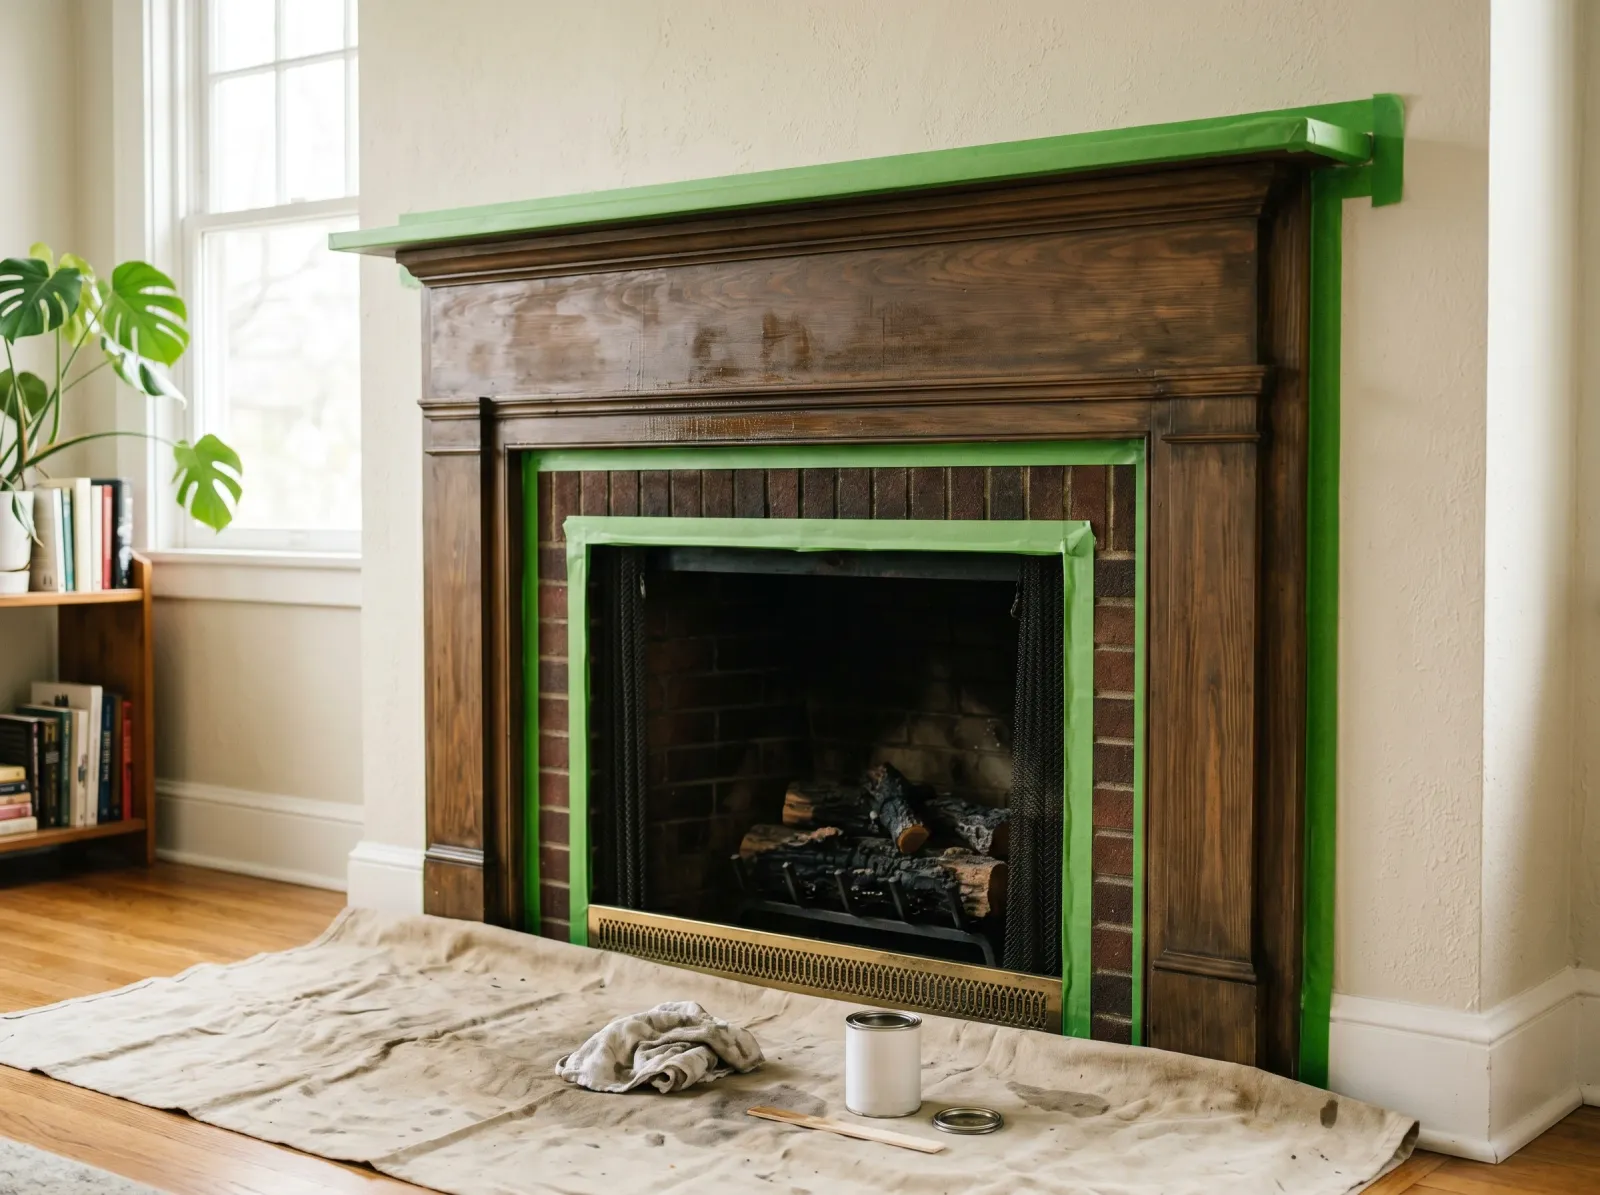
Hardware off, drop cloth down, the old varnish wiped with liquid deglosser, tape along the wall and firebox edge.
Take everything off the mantle and off the wall above it. Pull any hooks or brackets. Lay a drop cloth over the hearth and the floor in front. Tape the wall line where the mantle meets it, and tape the firebox edge so you don’t get enamel on the metal or brick.
Now degloss. Wipe the whole mantle with liquid deglosser on a rag, working with the grain. The old varnish goes dull. That dull surface is what the primer grabs. If you’d rather sand, scuff the whole thing with a 150-grit sponge until the shine is gone, then wipe off the dust with a tack cloth.
Watch out for the underside of the mantle shelf and the inside edges of the legs. People degloss the front and forget the bits they can’t see straight on. Paint peels first where prep was skipped.
Step 2 — Fill, Caulk, and Prime
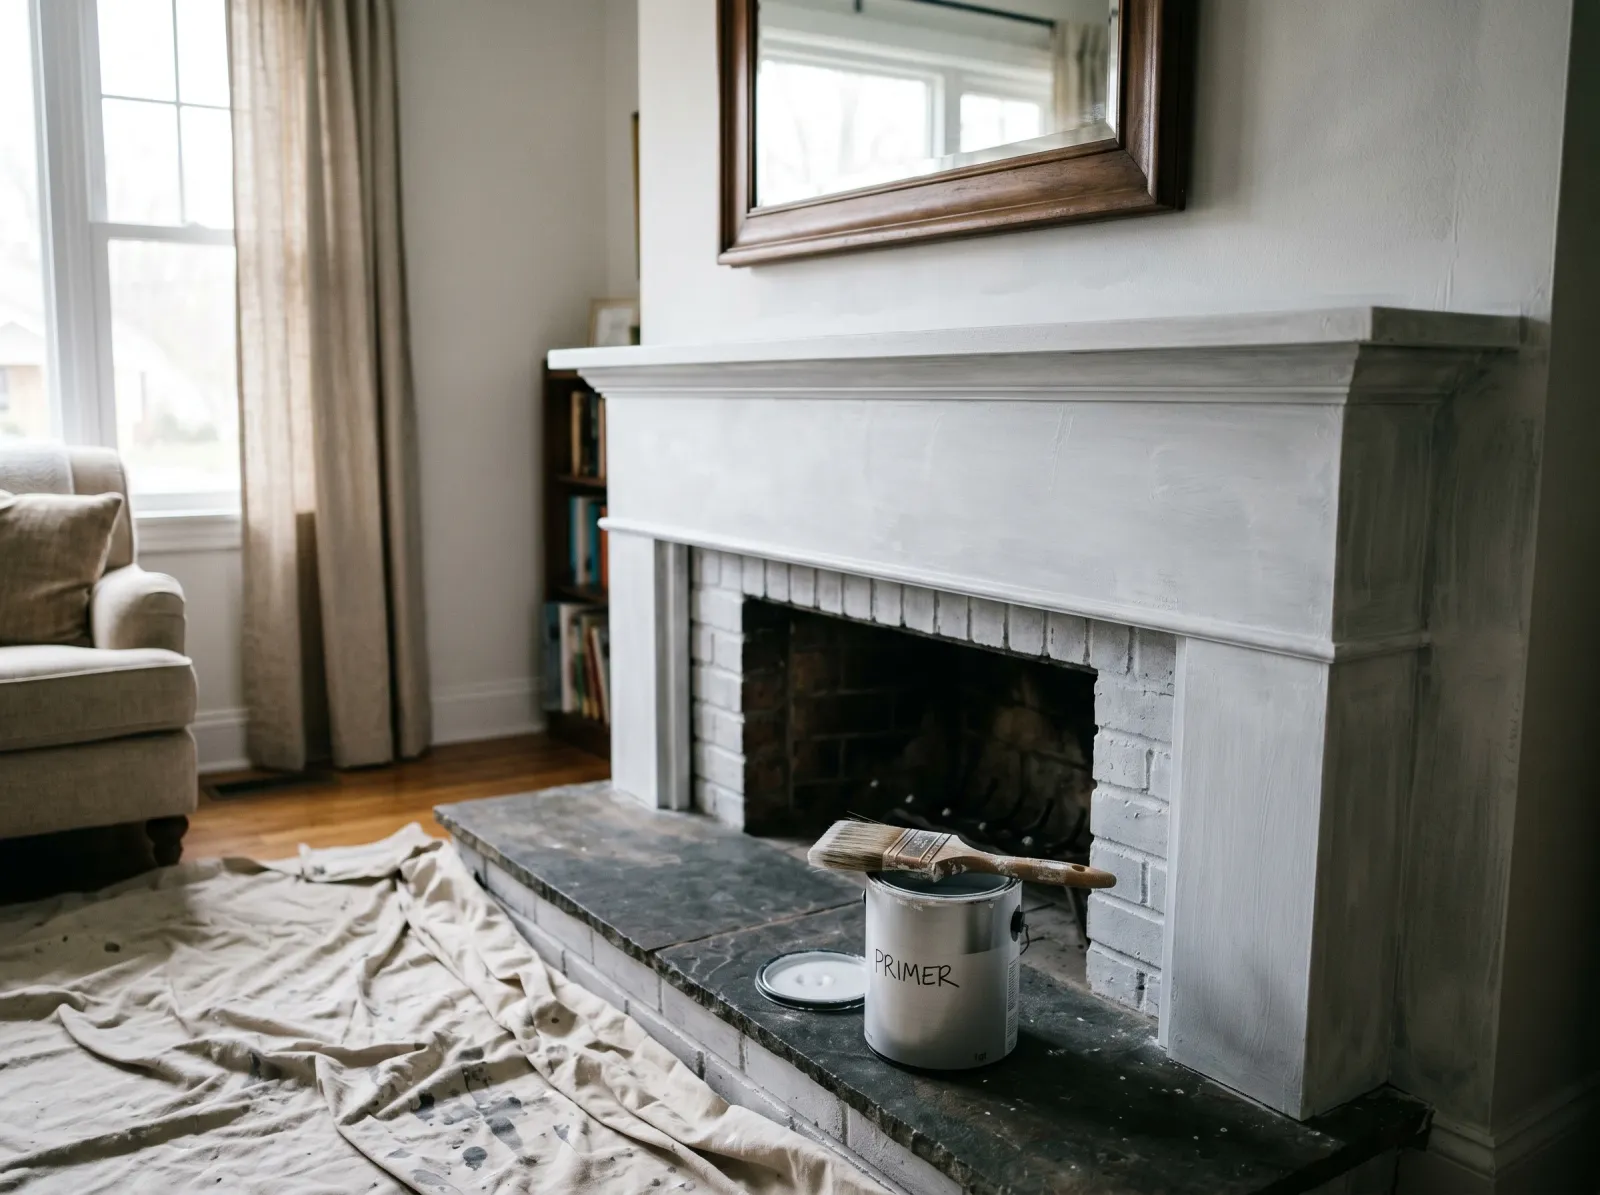
A single coat of stain-blocking primer over the whole mantle, knots blocked, the wall seam caulked smooth.
Push wood filler into old nail holes and any dings with the putty knife. Scrape it flush, let it dry, and sand it smooth with the 220-grit sponge. Run a thin bead of paintable caulk along the seam where the mantle meets the wall, then smooth it with a wet fingertip. That caulk line is what makes the mantle look built-in instead of bolted-on.
Brush one full coat of shellac primer over the entire mantle. Wear a respirator; shellac fumes are sharp and they flash off fast. Hit the knots like you mean it. The primer dries in about 45 minutes.
Watch out for loading the brush too heavy with shellac. It sets quick and ropes up if you keep brushing it. One pass, move on, don’t go back over a half-set section.
Step 3 — First Coat of Enamel

Thin first coat of semi-gloss enamel, brushed with the grain on the trim and rolled on the flat top.
Stir the enamel, don’t shake it. Shaking whips in air bubbles that dry into little craters. Brush a thin coat on the legs and the front trim, working with the grain in long strokes. On the wide flat top shelf, switch to the 4-inch foam roller for a smoother lay-down.
Thin coats. Two thin coats beat one thick one every time. A heavy coat of enamel sags and runs on a vertical surface, and a run on a mantle shows from across the room.
Watch out for drips on the bottom edges of the legs and the underside lip of the shelf. Enamel is self-leveling, which is great on a flat, but it pulls into a fat drip at any bottom edge. Check those edges for the first ten minutes and feather the edge out with a dry brush if one starts.
Step 4 — Second Coat, Then Pull the Tape
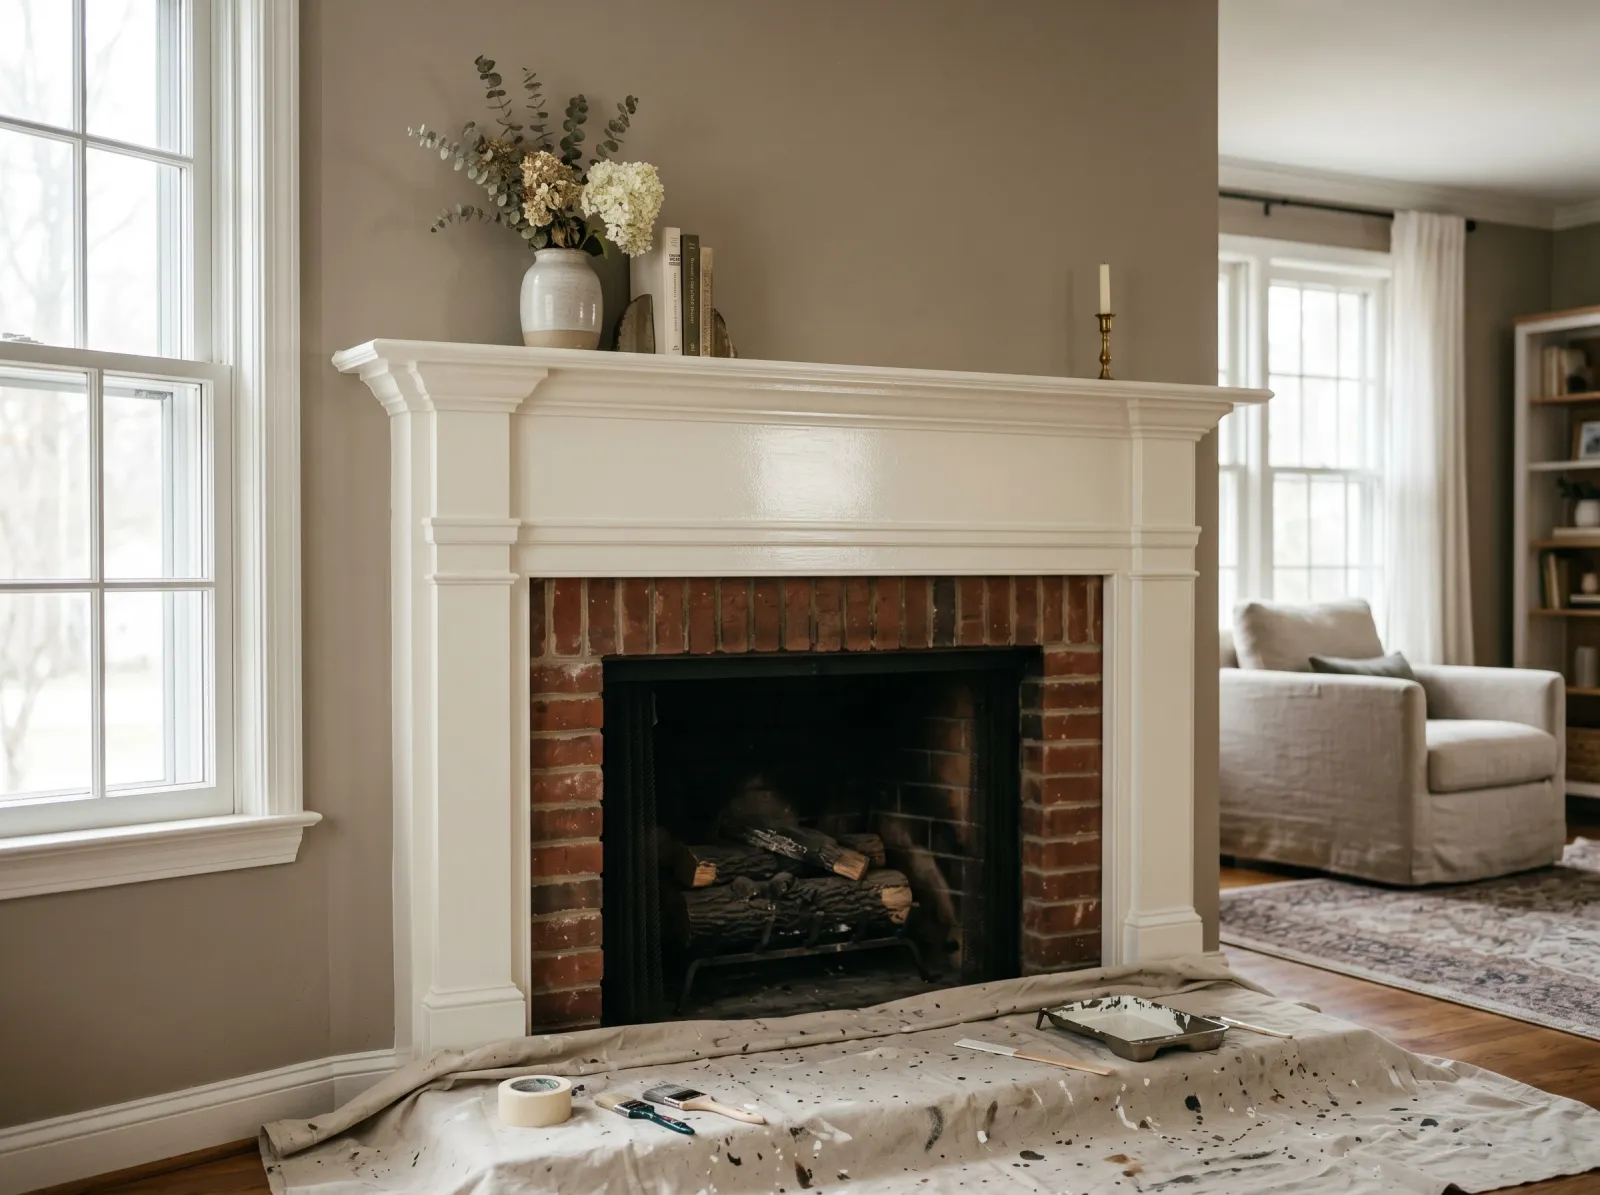
Second coat down even and glossy, tape peeled at an angle while the film was still tacky.
Wait the recoat window on the can, usually four to six hours for waterborne enamel. Touch an inconspicuous spot with a knuckle. Dry and not tacky means you’re clear. Recoat too soon and the brush drags the first coat right back up.
Lay the second coat on the same way: thin, with the grain, foam roller on the top. The first coat looked translucent in spots. This one fills it in and evens out. Don’t fuss it. Enamel keeps flowing and leveling after the brush leaves, so overworking it leaves marks the leveling would have erased on its own.
Pull the tape while the second coat is still slightly tacky, about 30 to 60 minutes after you finish. Pull slow, at a 45-degree angle. A cured enamel film bonds across the tape edge, and pulling dry tape tears a ragged strip of paint off with it.
Common Mistakes
- Painting over the shine. Old varnish and old enamel are slick. Fresh paint won’t bite into slick, and it peels off in sheets when you bump it. Degloss or scuff-sand every surface first. This is the number-one reason a repainted mantle fails.
- Skipping the knot blocker. Latex straight over a pine or oak knot lets the resin bleed an amber ring through your white topcoat within a month. Shellac primer stops it. Nothing else reliably does.
- One thick coat instead of two thin ones. A heavy enamel coat sags on the vertical legs and pools at the bottom edges. Two thin coats level out flat and cure harder.
- Loading the shelf too soon. Enamel is touch-dry in two hours but stays soft for days. Set a heavy candlestick on it at hour three and you press a permanent dent into the finish. Wait 24 hours, and use felt pads.
- Pulling the tape after it’s bone dry. The cured film grips the tape edge and lifts off in a jagged line. Pull while the paint is still tacky for a clean break.
Cure Schedule
| Time after final coat | What’s safe |
|---|---|
| 30–60 min | Pull the painter’s tape |
| 2 hrs | Touch dry; keep things off it |
| 24 hrs | Light items back on the shelf, with felt pads |
| 7 days | Normal use; small fire in the firebox |
| 14–30 days | Full cure; wipe down with a damp cloth |
A small fire before the enamel cures isn’t a fire hazard, but the lingering warmth keeps the film soft and dust sticks to it. Give it a week before the first burn.
Maintenance and Touch-Ups
A semi-gloss enamel mantle holds for 8 to 12 years before it needs a refresh, longer if nobody bangs it. Dust it with a dry microfiber cloth weekly so grit doesn’t grind into the finish. Wipe fingerprints with a barely-damp cloth once the paint is past its 30-day cure.
For a chip or a scratch, dab leftover enamel on with a small artist’s brush, just the damage, not a whole patch. Save the rest of the quart with the color code on the lid. A mantle touch-up is a five-minute job if you kept the paint.
Cost Breakdown
| Item | $ |
|---|---|
| Enamel, 1 quart semi-gloss | $25 |
| Shellac primer, 1 quart | $20 |
| Liquid deglosser | $12 |
| Wood filler, caulk, tape | $18 |
| Brush + foam roller | $20 |
| Total | ~$95 |
Numbers run on mid-tier enamel like Behr Alkyd. Top-shelf (BM Advance) pushes it toward $120. If you already own a decent brush and a drop cloth, you’re closer to $60.
FAQ
Do I have to sand the mantle before painting? You have to kill the shine, not sand to bare wood. A liquid deglosser does the same job as sanding in a third of the time. Wipe it on, let it sit, wipe it off. A 150-grit scuff-sand works too. Either way the goal is a dull surface the primer can grab.
What kind of paint do I use on a fireplace mantle? A waterborne alkyd enamel in semi-gloss. It cures to a hard furniture-grade film that takes dust and fingerprints without yellowing. Skip wall paint; flat and eggshell scuff the first time someone sets a candle down.
Will the paint handle the heat from the fire? On a standard wood-trim mantle, yes. Code keeps the wood far enough from the firebox that the surface never gets hot enough to bother a normal enamel. High-temp stove paint is only for metal parts that touch the fire.
Do I need primer if the mantle is already painted? If the old paint is sound and deglossed, spot-prime bare wood and stains only. Bare or varnished wood going to paint for the first time needs a full coat of shellac blocker so the knots don’t bleed.
How long before I can put things back on the mantle? Touch dry in 2 hours. Wait 24 hours before loading the shelf, and use felt pads. Full cure is 14 to 30 days.