How to Paint a Home Office
Painting a home office without moving out for a week. Low-odor paint, a color that won't wreck your video calls, and a two-coat plan around the desk.

Okay, so you work in this room every single day, and that’s the part that makes painting a home office feel different from painting a bedroom. You can’t move out for a week while it dries and the smell clears. You’ve got a call Monday morning and the desk is staying right where it is. Don’t worry. This is a small, easy paint job, and the two things that trip people up here are both fixable before you open the can.
The first is the smell, which you fix by buying low-VOC paint and cracking a window. The second is the color, because the wall behind your chair shows up on every video call, and the wrong shade makes you look washed out or vaguely green on camera. We’ll deal with both.
What You’ll Get
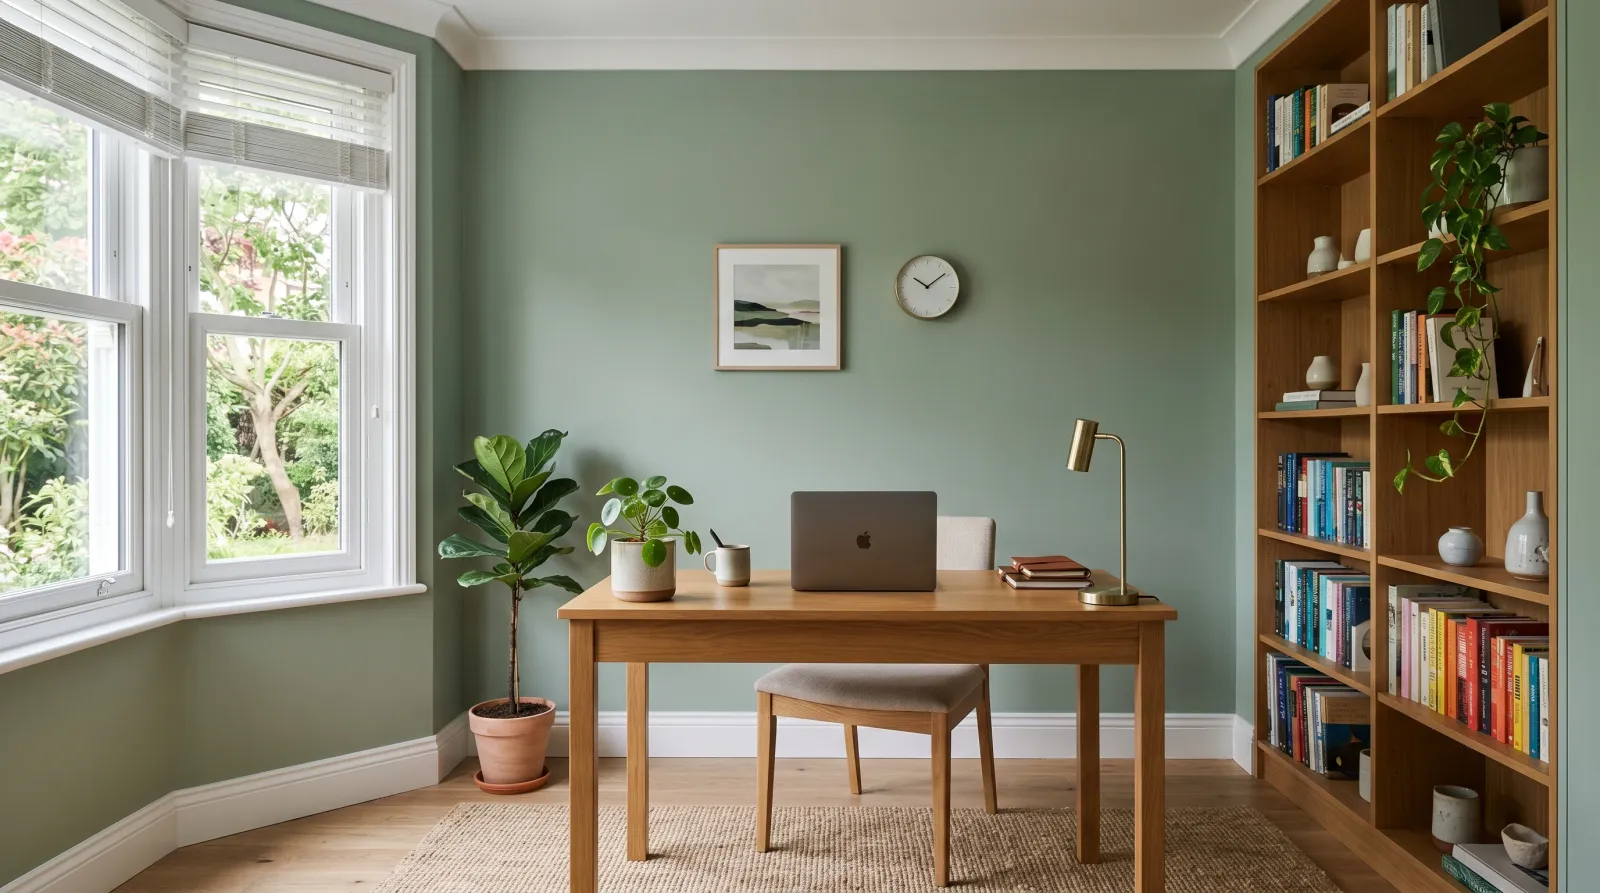
A repainted office you can work in the next morning, with a wall color that behaves on a webcam and a finish that wipes clean when the chair backs into it. One small room, one weekend at most.
Honest Take on Difficulty and Time
This is one of the easiest rooms in the house to paint, because it’s usually small and there’s not much furniture. A 10x10 office is a single Saturday. The catch is the desk and the cables. Boxing up your setup and getting it out of the way takes longer than people expect, maybe an hour on its own.
| Office size | Active time | Total elapsed |
|---|---|---|
| Small (10x10, desk only) | 3–4 hrs | One Saturday |
| Standard (12x12, shelves + desk) | 5–6 hrs | One full Saturday |
| Office plus ceiling | 7–8 hrs | One weekend |
If you’re also painting the ceiling, that’s the difference between a Saturday and a weekend. The ceiling is optional. Most office repaints are walls only.
What You’ll Need
Paint and Primer
Buy low-VOC eggshell wall paint. VOCs (volatile organic compounds) are the chemicals that make fresh paint smell, and you’re going to be breathing them at a desk for hours. Low-VOC and zero-VOC lines like BM Natura, Sherwin-Williams Harmony, and Behr Premium Plus Low VOC cut the odor way down so you can be back in the room the same day. The VOC explainer goes deeper if you want the why.
Eggshell is a soft low-shine finish. It hides drywall flaws and wipes clean, and it doesn’t bounce light into your webcam the way satin does. For trim, a quart of satin or semi-gloss covers the baseboards and the door casing.
A 10x10 office takes about 1 gallon for two coats. Primer only matters if you’re going from a dark color to a light one or covering scuffs and marks, in which case grab a quart of low-odor stain-blocking primer (Zinsser Bulls Eye 1-2-3 or KILZ 2). For a same-color-or-similar repaint, skip it.
See the sheen guide if you’re stuck between eggshell and satin for the walls. For an office, eggshell wins.
A Word on Color
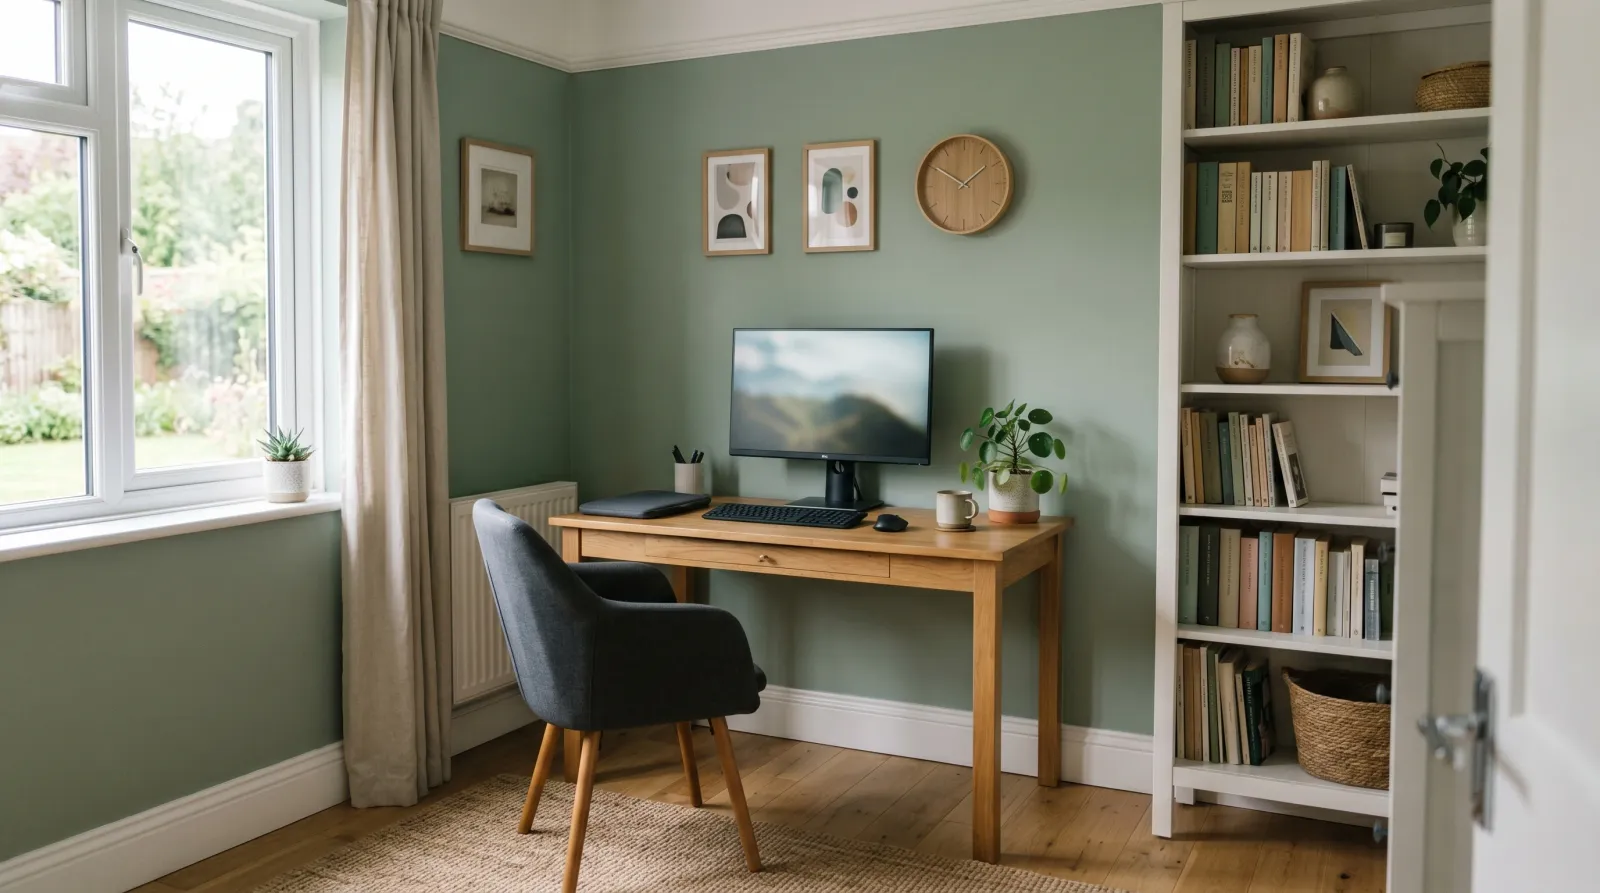
Here’s the thing nobody tells you about office color. The wall behind your chair is on camera every time you take a call, and the camera doesn’t see color the way your eyes do. Bright white blows out under a ring light and makes you a silhouette. A strong saturated color, deep blue or rich green, throws a tint onto your face. A muted mid-tone (sage, greige, a dusty blue, a warm gray) reads clean behind you and doesn’t fight your skin tone.
Buy a sample quart, paint a two-foot square on the call wall, and hop on an actual video call to look at it. You’ll know it when you see it. Do this before you buy a gallon.
Tools
A 2.5-inch angled brush for cutting in (painting the clean edge along the trim and ceiling that the roller can’t reach). A 9-inch roller frame, two 3/8-inch nap microfiber sleeves, a tray, an extension pole, a step stool, tape, spackle, and a drop cloth. Plus a couple of boxes for the desk stuff.
The brush is the one tool not to cheap out on. A $4 brush sheds bristles into the wet paint and leaves a ragged cut line. A $14 Wooster or Purdy holds a clean edge for years. Picks are in the roller round-up, and the same page links the brush guide.
Step 1 — Clear the Desk and Patch the Walls
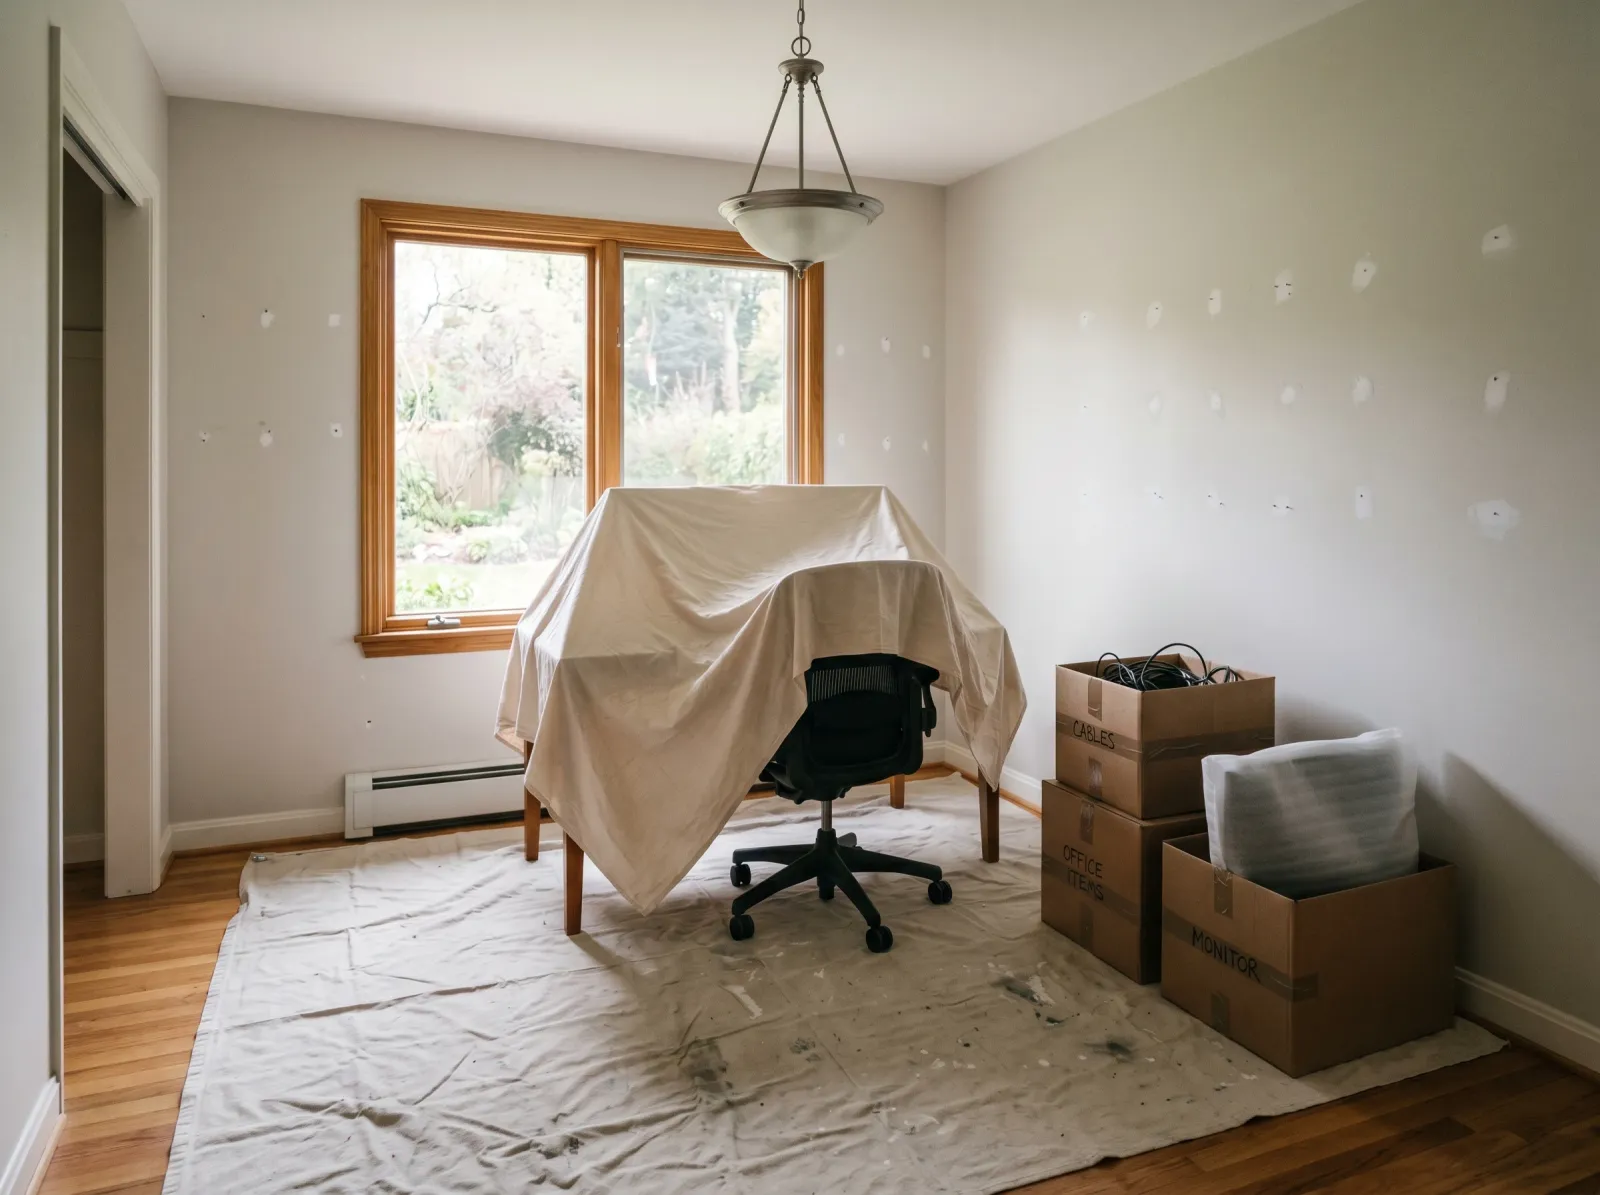
Monitor and cables boxed, desk and chair pushed to the center under a sheet, nail holes from old shelves patched.
Unplug everything and box it. Take a photo of the back of your computer first so you remember which cable goes where. Box the monitor, the cables, the desk clutter, and carry it to another room.
Push the desk and chair to the center and throw a sheet over them. If the desk is too heavy to move, slide it 3 feet off the wall and drape it, and you’ll paint behind it from the side. Take down any wall shelves, monitor mounts, and the outlet and switch plates. Bag the screws.
Patch every nail hole and shelf anchor with spackle, scrape flush, let it dry 30 minutes, then sand smooth with the 220-grit sponge. Offices collect a lot of holes from shelves and pegboards. Find them all now.
Watch out for the mess of holes left by a floating shelf or a monitor arm. Those anchors leave bigger holes than a nail. Press spackle in deep, let it dry, and check if it sank. A sunken patch needs a second fill.
Step 2 — Tape Off and Paint the Trim First
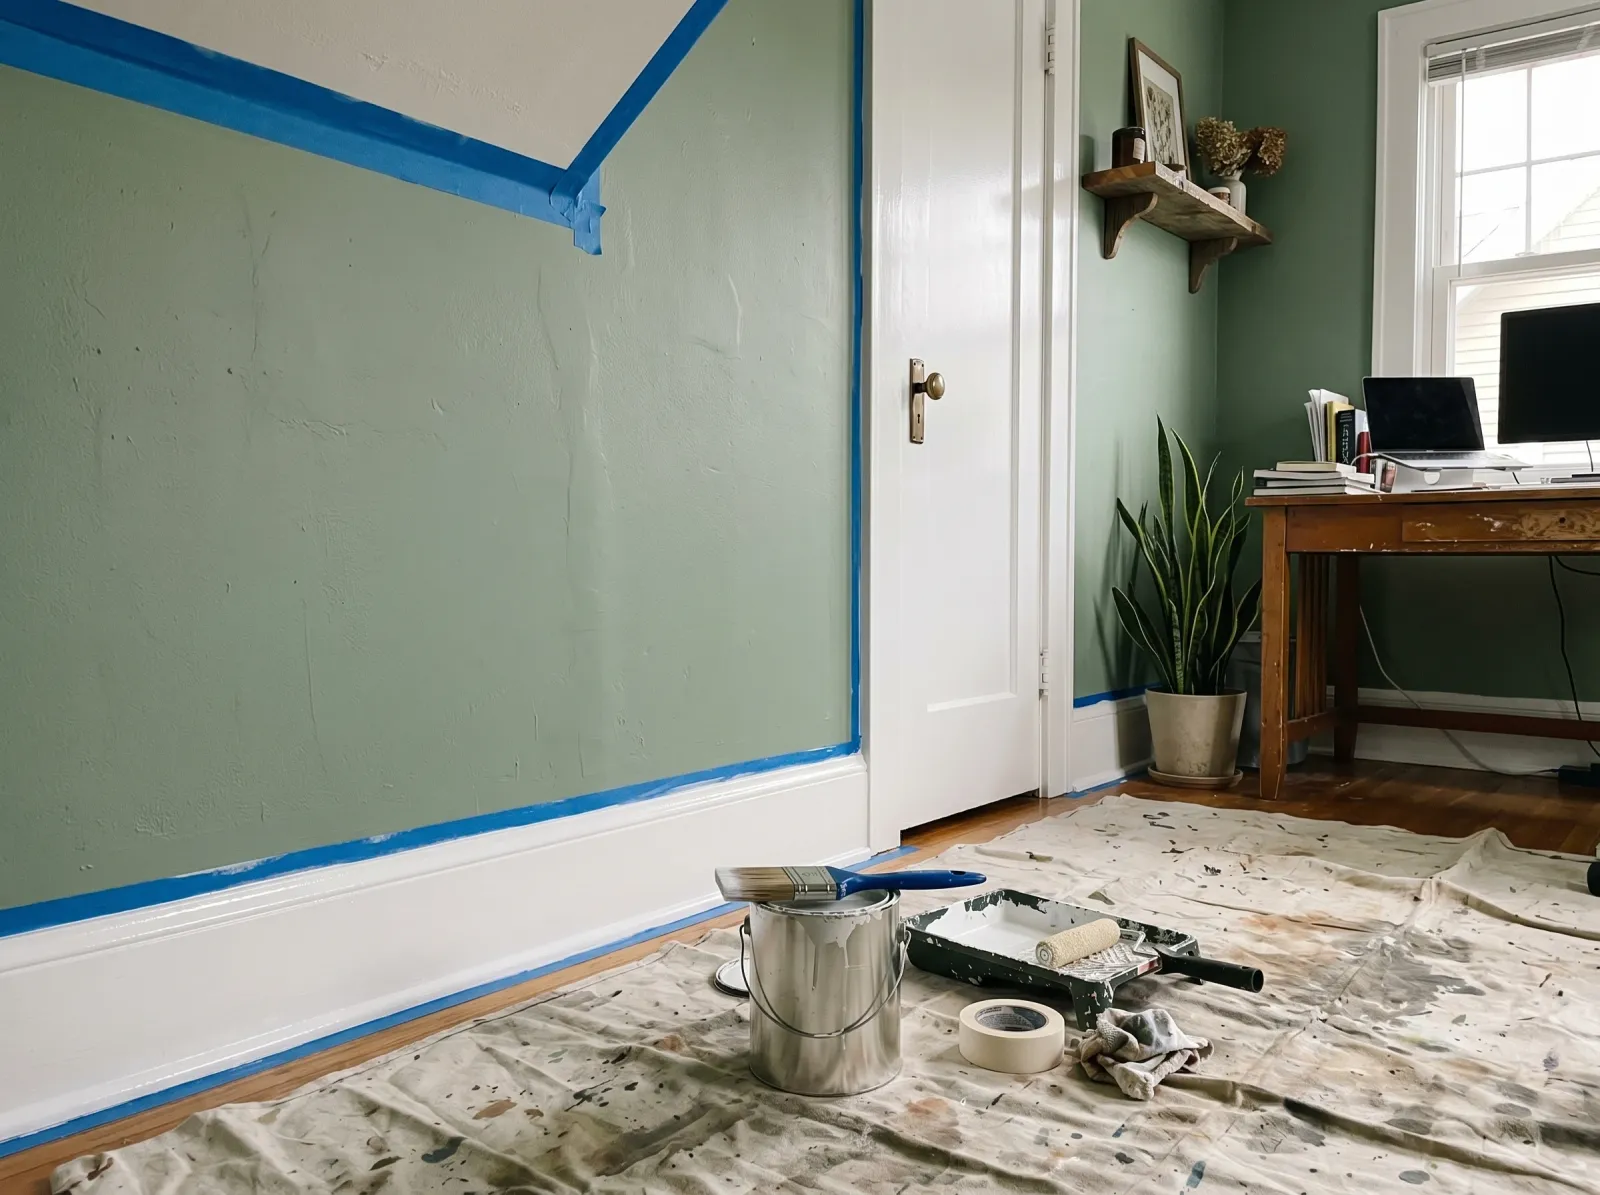
Painter’s tape along the ceiling line and baseboard. The trim goes on first while you’re fresh.
Run painter’s tape along the top of the baseboard, the ceiling line, and around the door and window casings. Press the edge down hard with your thumbnail so paint doesn’t bleed under it (bleed is paint sneaking past the tape and leaving a fuzzy line on the wood).
Lay the canvas drop cloth on the floor along the wall you’re starting on. Canvas soaks up drips and doesn’t slide like plastic.
Paint the trim first. I know that feels backward, but trim is the slow fiddly part and you’ll do it cleaner while you’re fresh. Load the angled brush a third of the way, brush in the direction of the wood grain, two thin coats. Once the trim is dry you tape over it and the walls go fast.
Watch out for drips along the bottom of the baseboard. Check them for the first half hour and brush them out while wet. A dried drip means sanding and recoating.
Step 3 — Cut In, Then Roll the First Coat
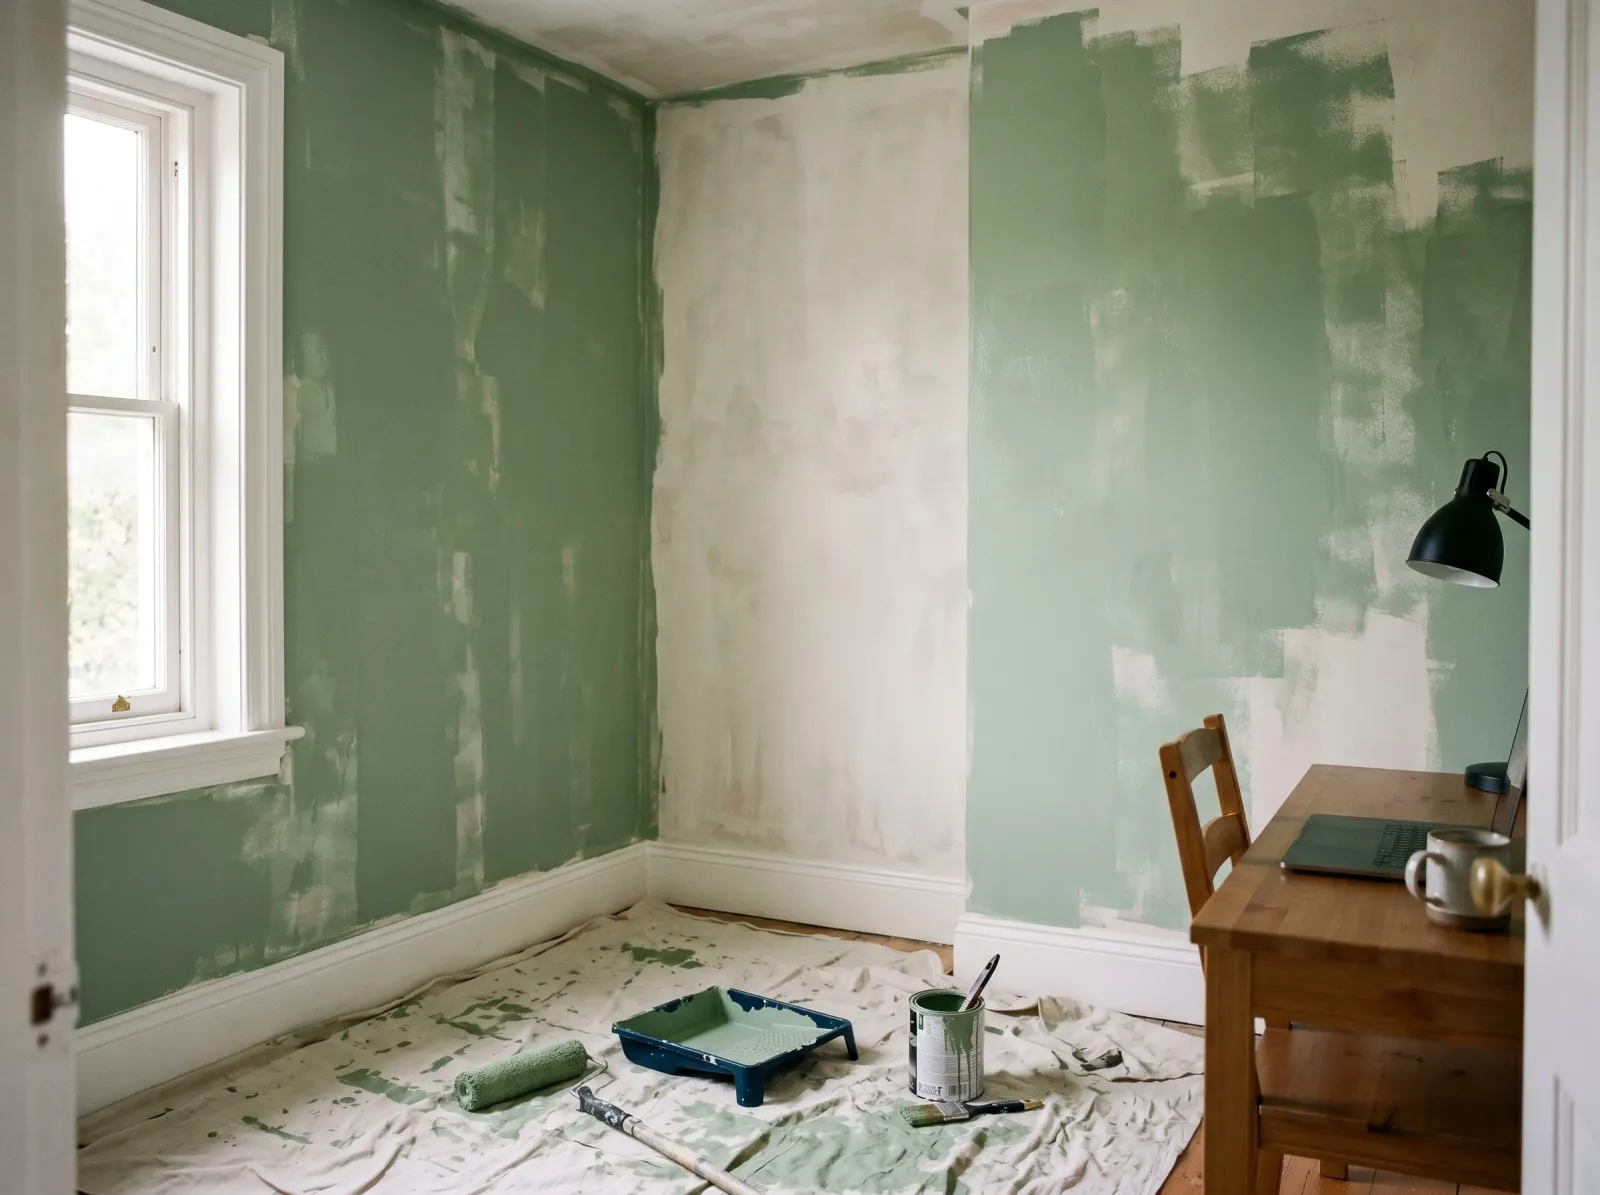
Cut in the edges with a brush, then roll the open wall in W-shapes. The first coat always looks patchy.
Cutting in means brushing a 2-inch band of color along every taped edge before the roller touches the wall. Without it the roller stops short and leaves a strip of different texture at every corner and edge.
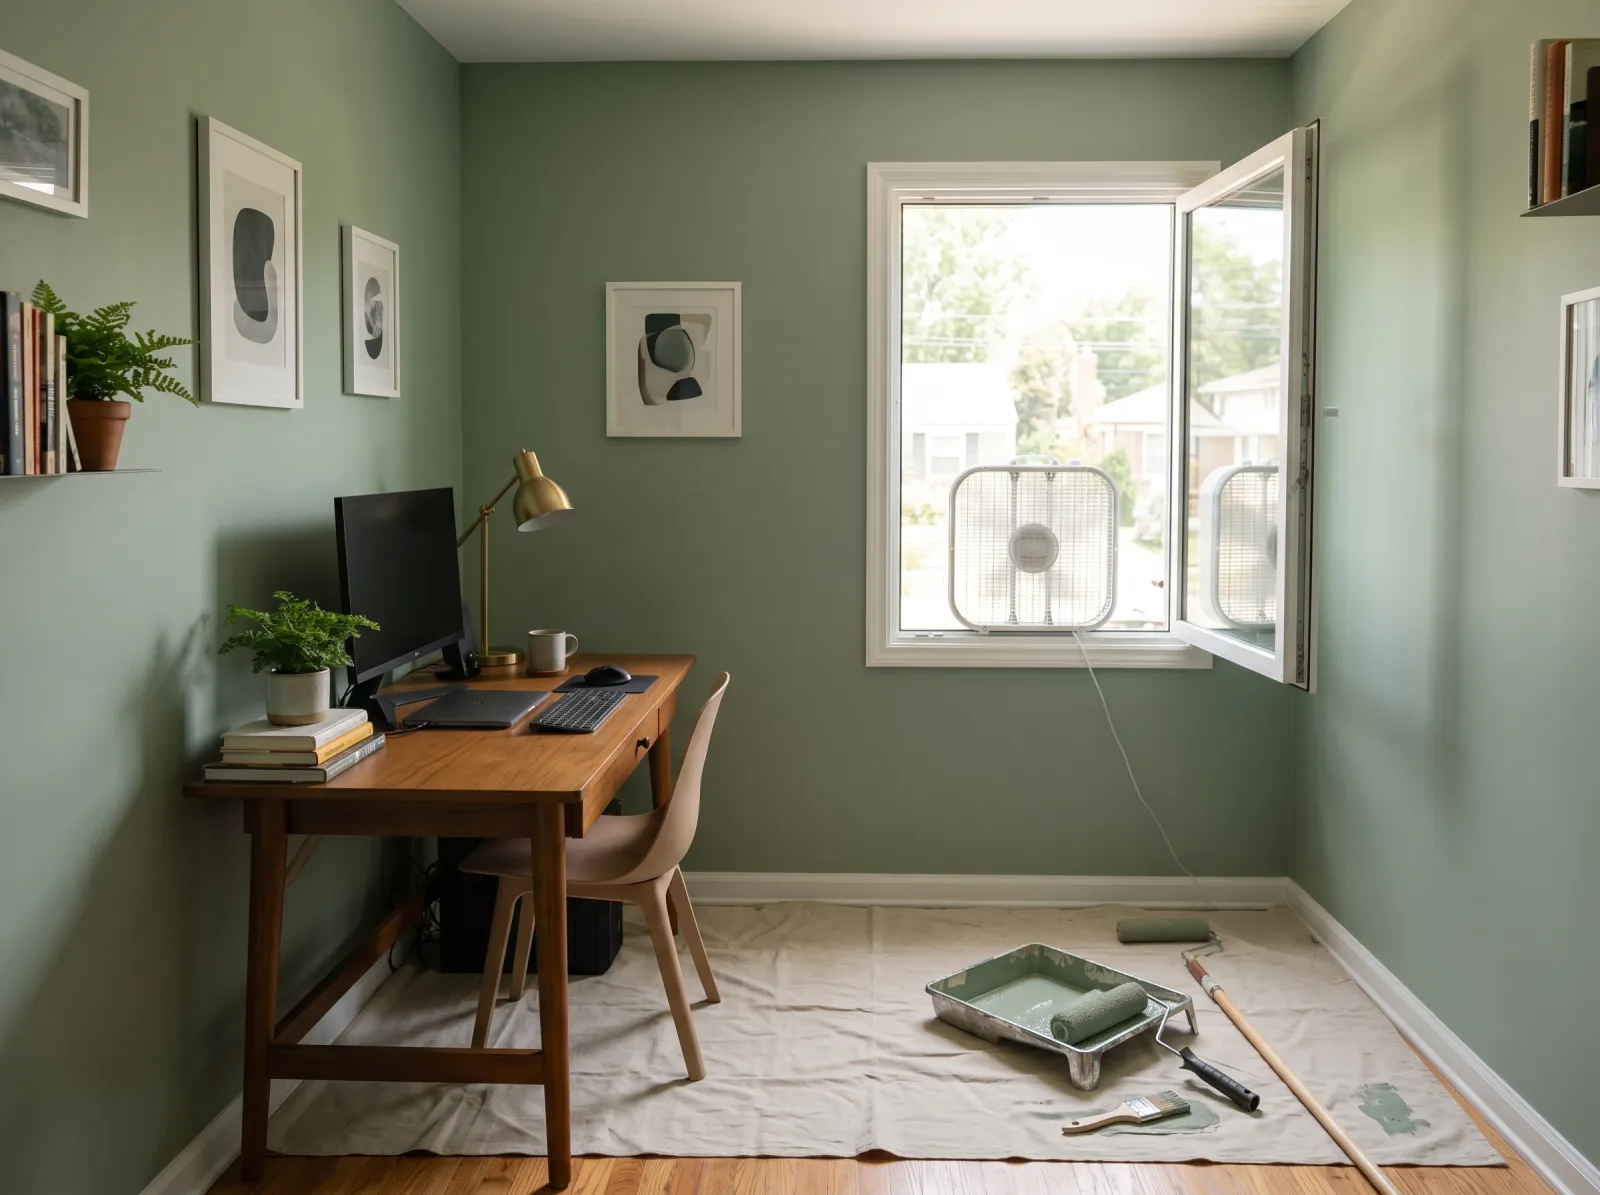
Open a window and put a fan in it facing out before you start. Even low-VOC paint smells a little, and you’re going to be in here a while.
Pour paint into the tray a third of the way up, load the roller, roll off the excess on the tray ramp, and roll the wall in a big W, then fill it in. Keep the roller about an inch off the cut-in band so the wet edges blend as you cross. Work one wall at a time: cut in, then roll, then move on. If the cut-in dries before the roller reaches it, you get a faint picture-frame outline of different sheen on the finished wall.
The first coat looks patchy and thin. That’s normal. Don’t panic and don’t keep rolling over half-dry spots.
Step 4 — Wait, Then Roll the Second Coat
Second coat rolled while the cut-in is still wet. Windows open, fan running.
Wait the recoat window on the can, usually 2 to 4 hours. Touch the wall with a knuckle. Dry and not sticky means you’re clear. Recoat too soon and the roller drags the first coat up into a streaky mess.
Second coat goes on the same way: cut in, then roll, one wall at a time. This is where the color fills in and evens out. The patchiness from the first coat disappears. You’ll need this second coat. Almost every wall paint looks bad after one, then good after two.
Step 5 — Pull the Tape and Put the Desk Back
Drop cloth folded, desk and chair back in place, monitor and plant returned. Back to work Monday.
Pull the tape while the second coat is still slightly tacky, about 30 to 60 minutes after you finish rolling. Pull slow, at a 45-degree angle, in one continuous strip. Wait until the paint is bone dry and the film cracks where the tape edge sits.
Wait about 4 hours before sliding the desk back against the wall. The paint is dry to the touch but soft, and pressing furniture into it at hour two leaves a mark. Plates back on, monitor remounted, cables back per your photo. Keep a window cracked overnight. You’re back at the keyboard in the morning.
Common Mistakes
- Skipping the color test on a real video call. The chip on the wall and the chip on camera are two different things. A color that looks calm in person can read sickly green or wash you out on a webcam. Sample the call wall and get on an actual call before you buy the gallon.
- Using satin or semi-gloss on the walls. The shine bounces light from your window and ring light straight into the camera and onto your screen, and it shows every drywall flaw under raking light. Eggshell on the walls, save the shine for the trim.
- Skipping low-VOC paint in a room you breathe in all day. Standard paint off-gasses for days. You’ll have a headache by hour three at the desk. Low-VOC paint is the single easiest upgrade for a work room and it costs a few dollars more.
- Painting around a monitor and cables instead of boxing them. You’ll knock something, get paint on a cable, or cut in crooked working around an obstacle. Spend the hour to box the setup. It’s faster overall.
- Not patching the shelf-anchor holes properly. Office walls are full of bigger anchor holes than a bedroom. A shallow spackle pass sinks as it dries and leaves a dimple that shows under the new paint. Fill deep, let dry, check, fill again if it sank.
Cure Schedule
| Time after the second coat | What’s safe |
|---|---|
| 30–60 min | Pull the painter’s tape |
| 1 hr | Touch dry, don’t bump it |
| 4 hrs | Slide the desk back against the wall |
| 24 hrs | Work in the room normally, smell mostly gone |
| 7 days | Wipe a scuff with a damp cloth |
| 30 days | Full cure, hang shelves, scrub if needed |
Maintenance and Touch-Ups
Eggshell office walls hold up for 7 to 10 years before they need a refresh. The spot that wears first is wherever your chair backs into the wall. Office chairs leave a dark scuff at one height, and that mark is usually dirt, not paint damage.
Wipe a scuff with a damp microfiber cloth and a drop of dish soap first. For a real scratch or a ding, dab leftover paint on with a small piece of roller, not a brush, so the texture matches the wall around it. Keep a labeled quart of the wall color and the trim color so the touch-up matches.
If you mount a new shelf down the line and it leaves a hole when you move it, patch, sand, and dab. Same as the bedroom in the whole-room painting guide.
Cost Breakdown
| Item | $ |
|---|---|
| Low-VOC wall paint, 1 gallon eggshell | $45 |
| Trim paint, 1 quart satin | $20 |
| Brush, roller, tray, sleeves | $35 |
| Tape, drop cloth, spackle | $25 |
| Total | $125 |
That’s mid-tier low-VOC paint (BM Natura runs higher, Behr Premium Plus Low VOC runs lower). A budget build comes in around $90. If you go top-shelf and add a primer quart and a sample for the color test, closer to $180. Want a deeper color as a single feature behind your desk instead of the whole room? See the accent wall guide.