How to Paint Exterior Walls
Painting exterior walls the way it holds up: wash off the chalk, scrape and prime the bare spots, watch the weather, and back-roll two coats that last.

Exterior walls don’t fail because the paint was bad. They fail because the prep was. Chalk, mildew, a loose flake somebody painted over five years ago. Get the prep right and a mid-grade paint lasts a decade. Skip it and the best paint on the shelf peels off the south wall in two summers.
Here’s the order that holds up. Wash, scrape, prime the bare spots, caulk, then two coats, watching the sky the whole time.
What You’ll Get
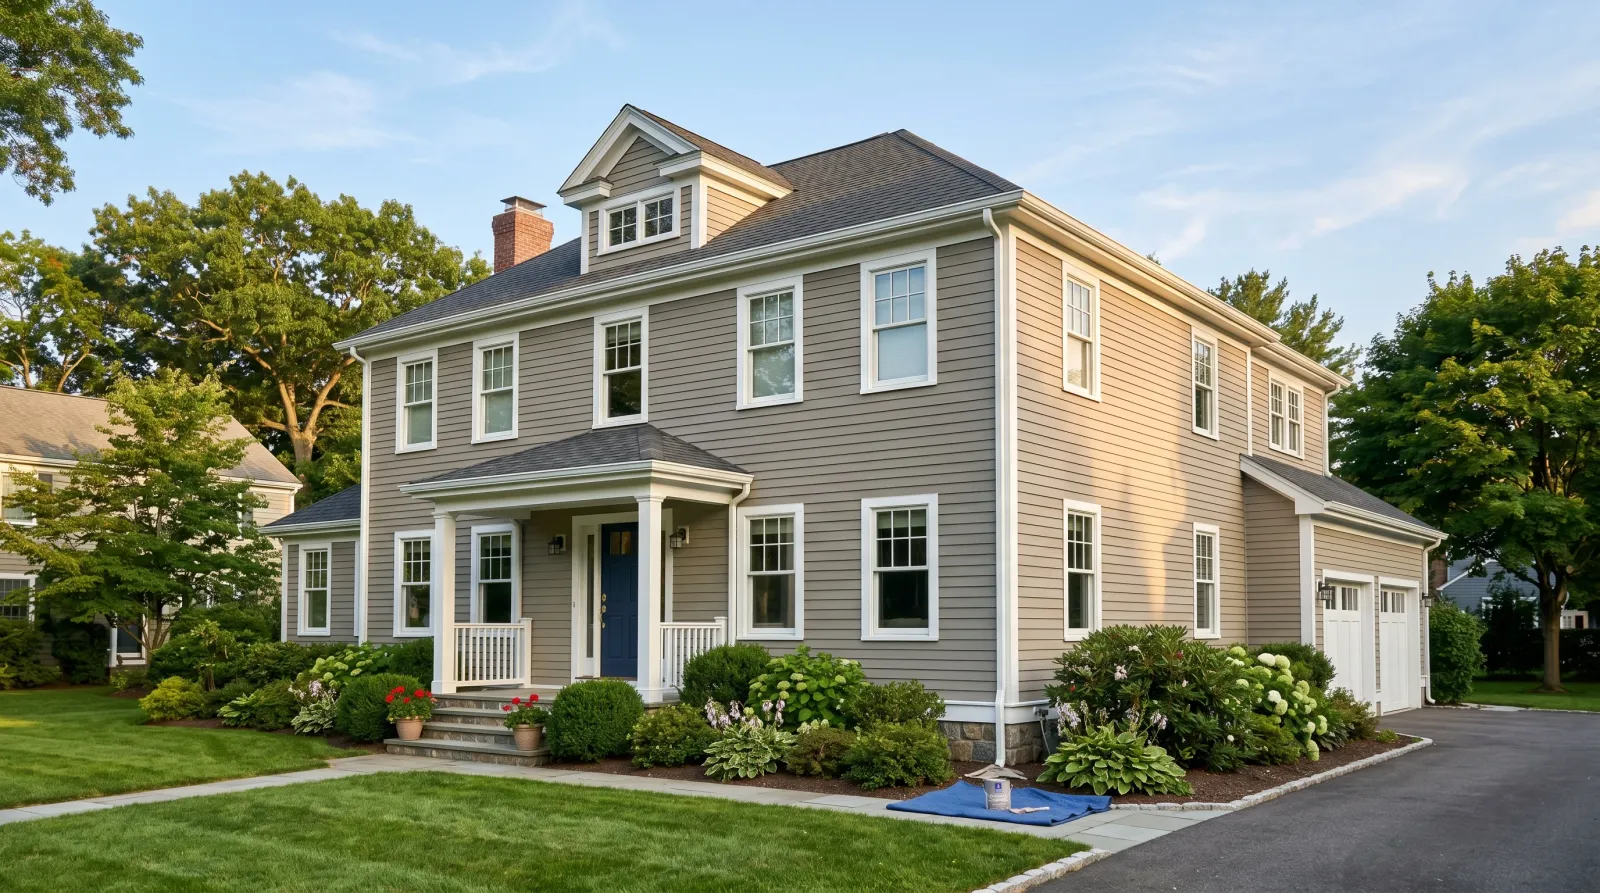
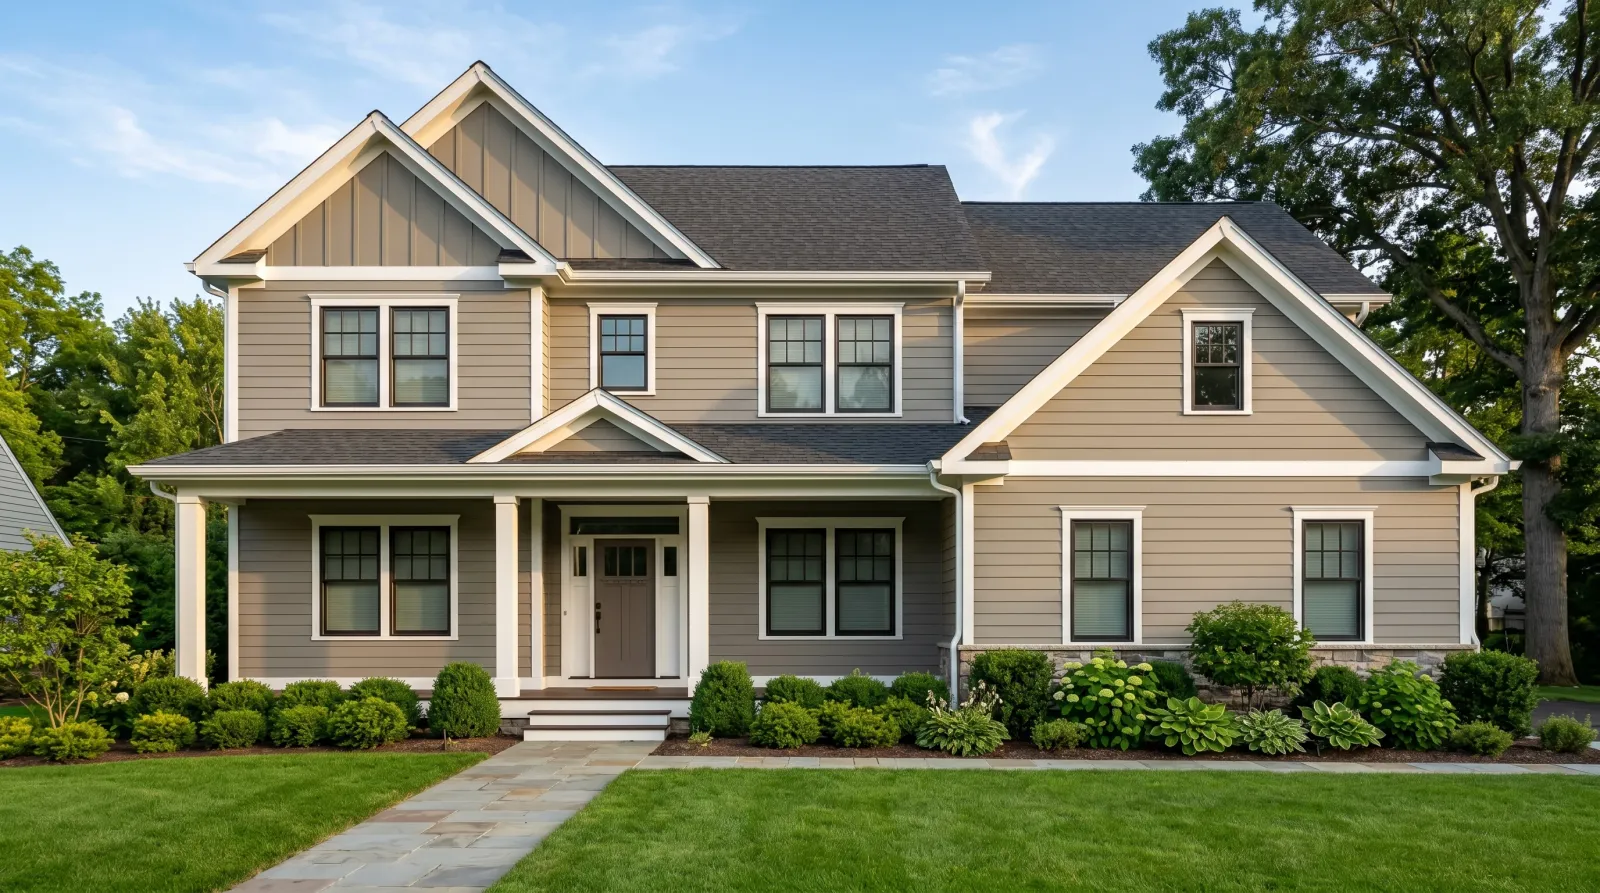
A house that looks repainted from the curb and stays that way for eight to twelve years, with the south and west walls aging at the same rate as the shaded sides instead of failing first.
Honest Take on Difficulty and Time
This is a medium job, not a hard one, and most of it is grunt work on a ladder. The painting is the fast part. The prep is the job.
A single-story house with decent existing paint is a long weekend, less if you spray. A two-story with heavy scraping runs three to four days. Add a full day of dry time between coats if the weather turns humid.
| House | Active time | Total elapsed |
|---|---|---|
| Single-story, sound paint | 2 days | A long weekend |
| Single-story, heavy scraping | 3 days | Most of a week |
| Two-story | 3–4 days | A full week with weather |
The part that bites people is the weather window. You need a stretch of dry days, moderate temps, and no rain overnight. Don’t start a wall you can’t finish before the forecast turns.
What You’ll Need
Paint and Primer
Buy 100% acrylic exterior paint. Acrylic stays flexible, and exterior walls move with the temperature all day. Behr Marquee, BM Aura Exterior, and SW Duration are the ones I keep going back to. A single-story 1,500 sq ft house drinks about 6 gallons for two coats. Measure your wall area and divide by 350 for a gallon-and-a-half cushion. The coverage and gallons math walks it if you want it exact.
For sheen, satin or low-luster on the field. Flat hides chalk and old patches but holds dirt and won’t scrub. Satin sheds rain and wipes down. The sheen guide covers the trade-off.
Primer is spot-prime, not whole-house, for most repaints. A gallon of Zinsser Cover Stain or KILZ Adhesion handles the bare wood, knots, and rusty nail heads. Full SKU picks live in the best exterior paint round-up.
Tools
A 4- or 5-inch exterior brush moves a lot of paint on trim. A 9-inch roller with a 1/2-inch nap (3/4-inch for rough siding) covers the field. If you’re spraying, an airless puts it on fast, but you still back-roll behind it, which means rolling over the wet sprayed paint to push it into the grain.
You also need a hose for washing, a carbide pull-scraper, an orbital sander, exterior caulk and a caulk gun, drop cloths, and a ladder you trust. Tool picks are in the best paint brushes and paint rollers round-ups.
Method: Spray or Brush?
Two valid paths, and the right one depends on your gear and your wind.
Spray and back-roll is fastest on big plain walls. Mask everything you don’t want painted, lay it on, then back-roll the wet pass right away. Skip the back-roll and the paint sits on top of the siding like a sticker instead of bonding in.
Brush and roll is slower, gives better adhesion, and makes zero overspray. On a breezy day it’s the only option. Spray drifts a long way onto cars and the neighbor’s siding.
Either way the prep is identical. Do the prep before you decide.
Step 1: Wash the Whole House
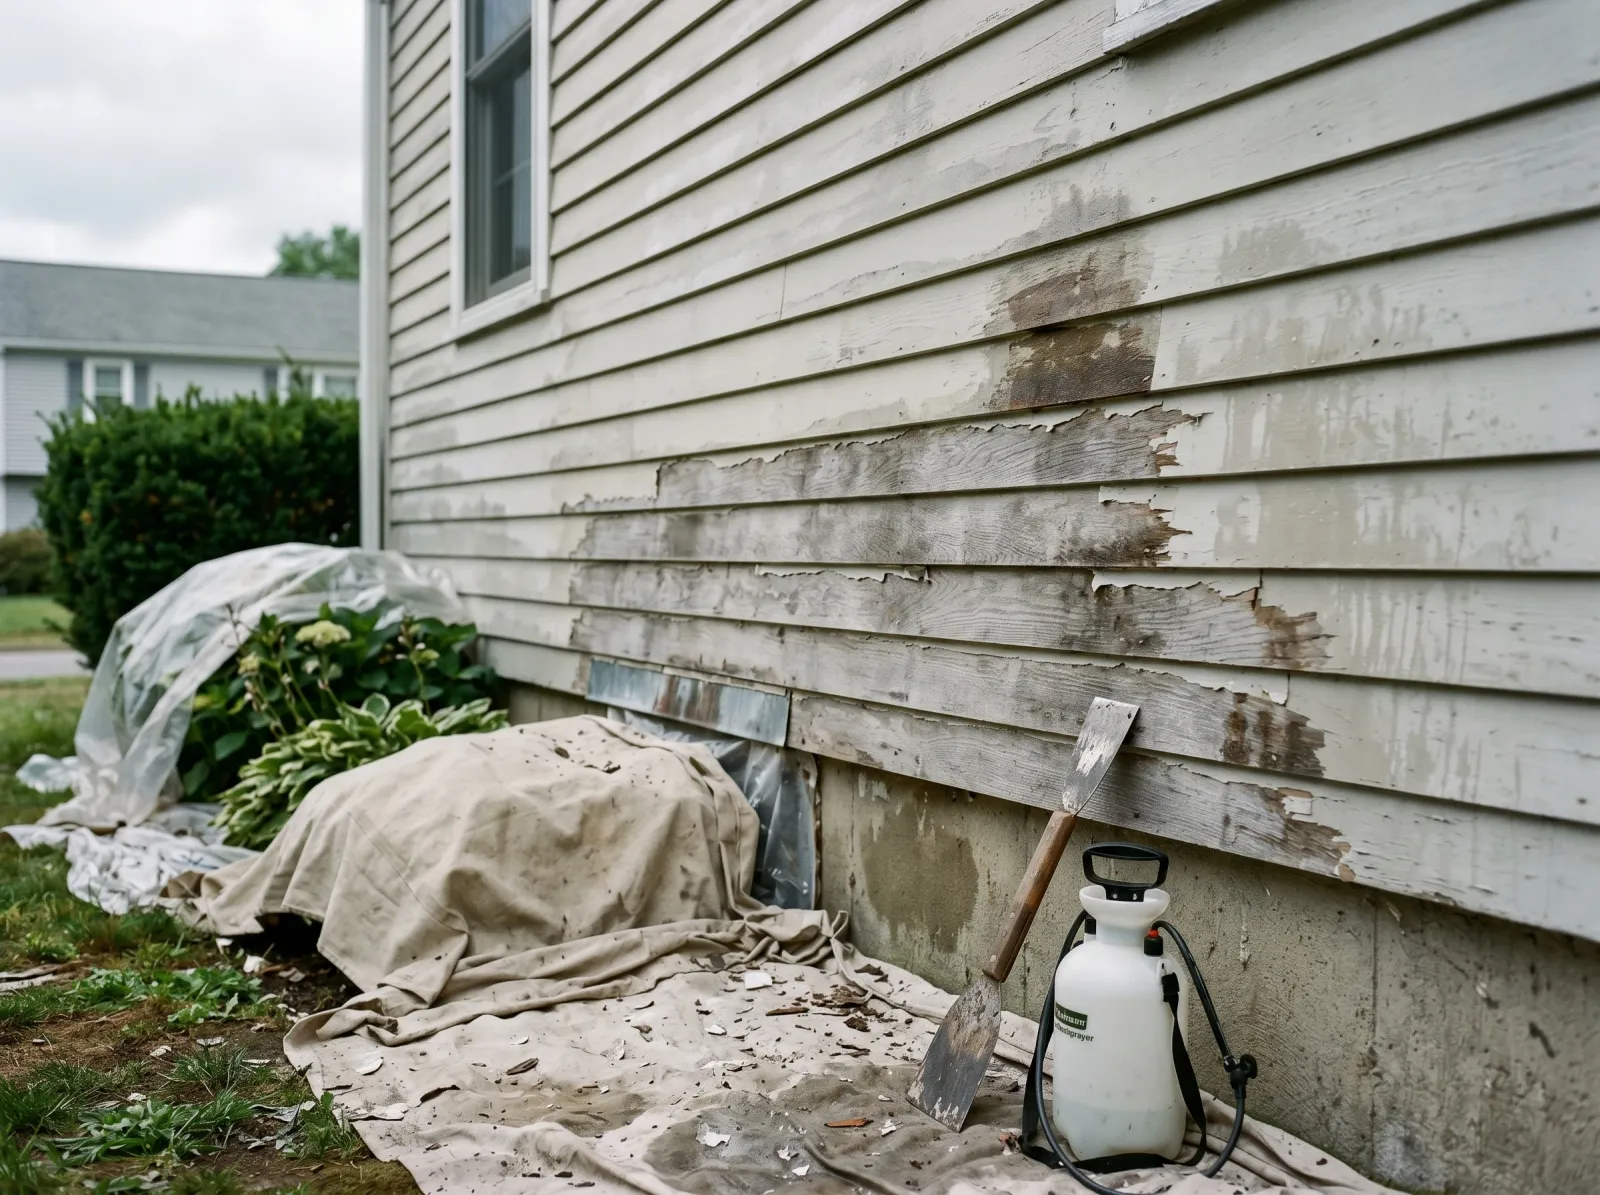
House washed down to kill chalk and mildew, loose paint scraped back to a sound edge, the scraped patches feathered smooth.
Run your hand down the old paint. If it leaves a chalky film on your palm, that’s oxidized binder, and paint won’t stick to it. Wash it off with a deck wash or TSP substitute and a stiff brush, then rinse.
Mildew shows up as black or grey blotches, mostly on the north and shaded walls. Hit it with a 3-to-1 water-bleach mix, let it sit ten minutes, and rinse. Painting over live mildew just feeds it under the new coat.
Watch out for the pressure washer. A 3,000 PSI tip drives water behind the siding and gouges soft wood. Use the lowest tip that does the job, or a hose and a brush. Let everything dry a full day before you go further.
Step 2: Scrape, Sand, and Set Nails
Scrape every loose, lifting, or flaking edge back to paint that won’t budge. Pull the scraper toward you, and if a flake is loose, it goes, stubborn or not.
The scraped spots leave a hard ridge where the old paint ends. Feather that ridge with 80-grit on the orbital so the transition disappears under paint. A sharp edge telegraphs straight through two coats.
Sink any popped or rusty nails with a punch and a hammer. Rusty heads bleed an orange stain through latex within a season.
Watch out for lead. Houses painted before 1978 can have lead paint, and dry-scraping it is a hazard. Test with a $10 swab kit first. If it’s positive, wet-scrape and follow EPA RRP handling, or bring in a certified crew.
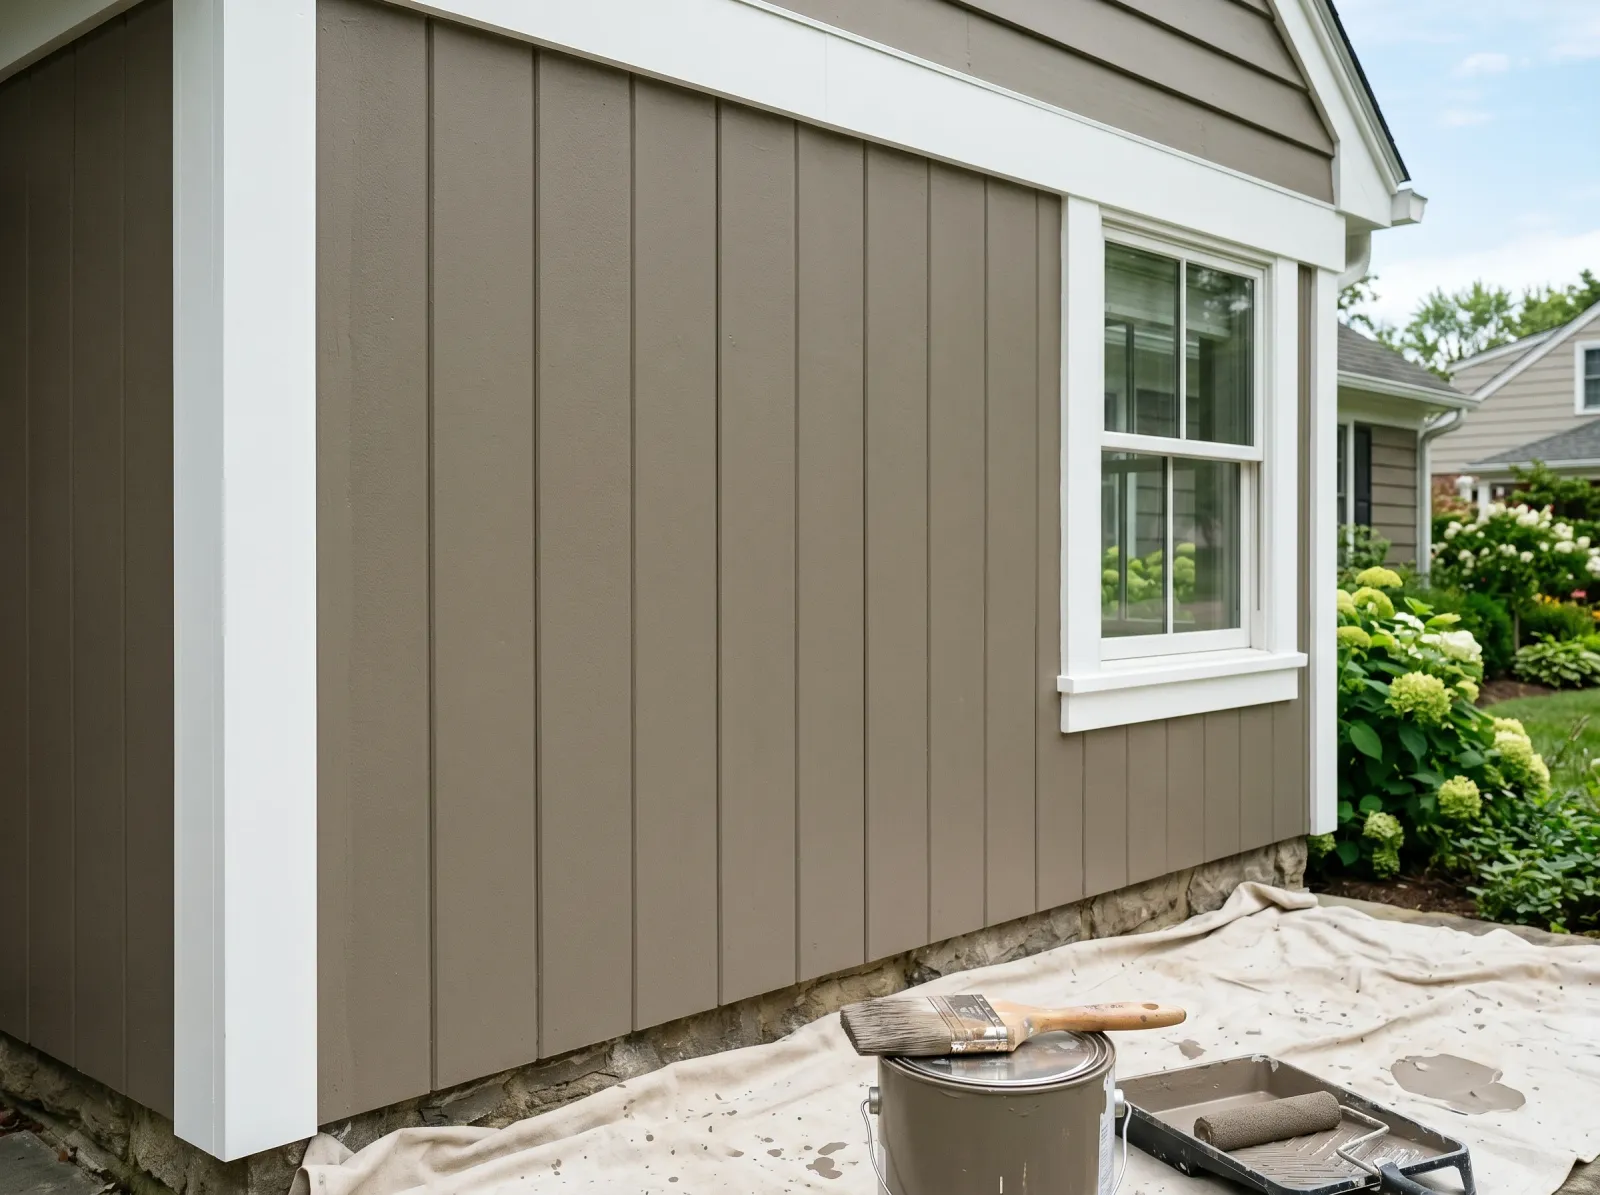
Step 3: Prime the Bare Spots and Caulk the Gaps
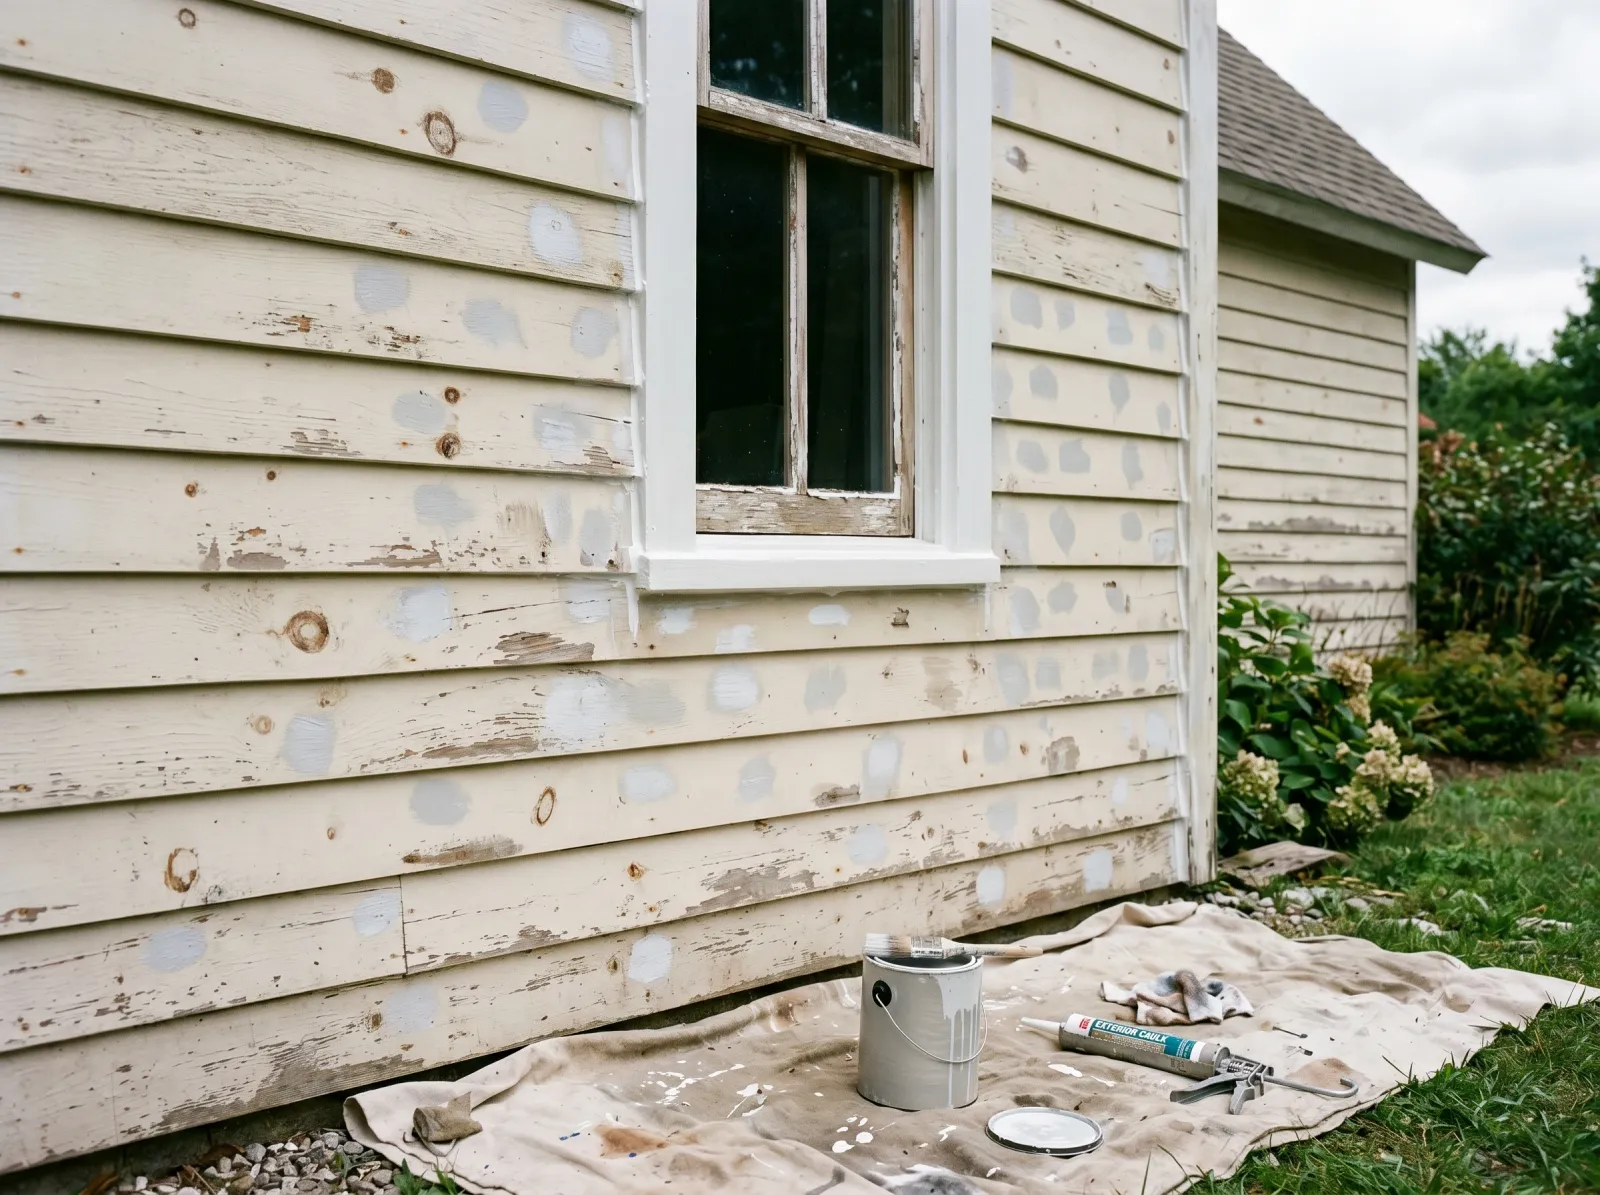
Spot-primer over the bare patches and knots, fresh acrylic caulk along the trim joints and window edges.
Brush primer onto every bare-wood patch, knot, and nail head you set. Knots bleed sap-stain through finish paint, so stain-blocking primer there isn’t optional. The block knots from bleeding fix covers the stubborn ones.
Once the primer is dry, caulk the gaps. Run a bead of paintable acrylic caulk where trim meets siding, around window and door casings, and at vertical butt joints. Tool it smooth with a wet finger. Skip silicone. Paint won’t stick to it and you’ll see a shiny stripe forever.
Watch out for caulking the horizontal lap seams shut. The bottom edge of each clapboard needs to breathe so trapped moisture can escape. Caulk the verticals and trim, leave the lap bottoms open.
Step 4: First Coat, Working the Shade
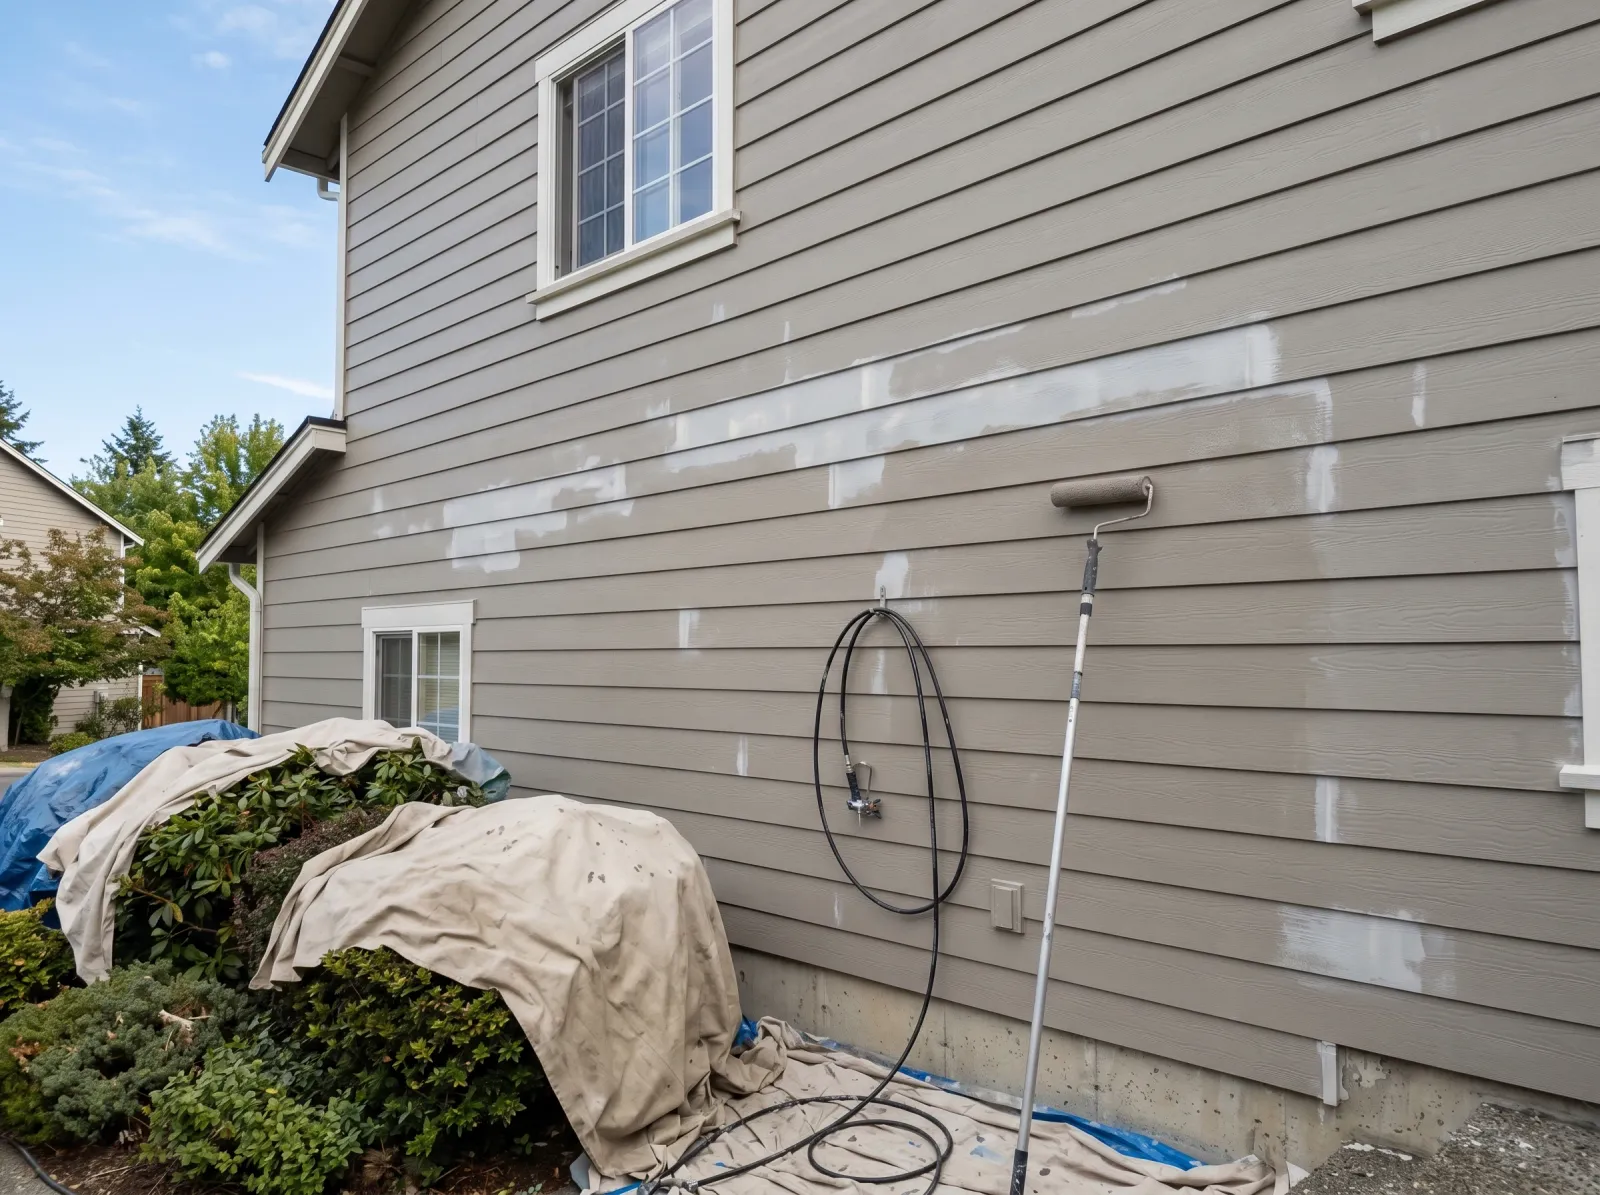
First finish coat going on, sprayed for speed and back-rolled into the grain so it bonds to the siding.
Start on the wall in shade and follow the shade around the house as the sun moves. Paint baking on a sunlit wall skins over before it levels, and you get lap marks where each pass dries before the next catches it.
Cut in the corners, trim edges, and around windows with the brush first. Then roll or spray the field, back-rolling every section while it’s wet. Keep a wet edge and don’t stop in the middle of a wall. Finish a full course of siding before you set the roller down.
Watch out for the surface temperature, not just the air temp. A dark wall in June sun can hit 110°F. Touch it. Too hot to hold your hand on means too hot to paint.
Step 5: Second Coat and Cut In the Trim
Second coat brings the color up solid and even, trim and corners cut in by brush for a clean line.
Wait the recoat window on the can, usually 4 hours in good conditions, longer if it’s humid. The first coat looks thin and a little blotchy over the primed patches. That’s normal. The second coat is where the color goes solid and the UV protection lives.
Same routine: shade side first, cut in, then field. After the field is done, cut in the trim and corner boards with the angled brush. If trim is a separate color, that’s its own pass.
Watch out for quitting at one coat because the first one “looks fine.” It looks fine for about eighteen months. Then the south wall thins where the sun cooks it, and you’re back up the ladder. Two coats. Always two coats.
Step 6: Pull Masking and Pack Out
Two coats cured, ladders down, drop cloths off the shrubs, the wall reading clean and even in raking light.
Pull the tape and masking film while the last coat is still slightly soft, within an hour or two of finishing. Pull it bone dry and the cured film tears at the tape line.
Uncover the shrubs and pull the drop cloths before they bake onto anything. Wash brushes and sleeves under warm water until it runs clear. Flush the sprayer per its manual or the tip gums up overnight.
Walk the house in raking light, low morning or evening sun, and look for holidays, the thin spots and skips you missed. Touch them while the paint’s fresh so they blend.
Common Mistakes
- Painting over chalk. That powdery film is dead binder. New paint grips it about as well as it grips talcum powder. Wash every wall and rinse before you open a can.
- Skipping the spot-prime on bare wood. Bare cedar and knots wick moisture and bleed tannin. Finish paint alone won’t block it, and the stain ghosts through within a season.
- Caulking the lap bottoms shut. Seal the verticals and trim, leave the horizontal clapboard edges open so the wall can dry out. Caulk it all and you trap moisture behind the paint.
- Painting in direct sun on a hot wall. The film flashes before it levels. You get lap marks and poor adhesion on the walls that need the most protection. Chase the shade.
- One coat to save a day. It’s the cheapest day you’ll ever regret. Two coats is the difference between a ten-year job and a three-year one.
- Ignoring the overnight forecast. Rain on a half-cured coat leaves surfactant streaks running down the wall. Check the radar for the full 24 hours after you finish.
Cure Schedule
| Time after final coat | What’s safe |
|---|---|
| 1–2 hours | Pull masking and tape; sheds a light drizzle |
| 4 hours | Touch dry; recoat window if you’re going again |
| 24 hours | Safe from a real rain; reattach light fixtures and downspouts |
| 7 days | Lean a ladder, hang shutters, normal contact |
| 30 days | Full cure; pressure-wash or scrub if needed |
Cold or humid weather stretches every one of these. A 55°F damp morning can double the recoat window.
Maintenance and Touch-Ups
A two-coat acrylic job holds eight to twelve years on the shaded walls and a little less on the south and west, where UV does the damage. Expect the sunny side to fade or chalk first.
Rinse the house once a year with a hose and a soft brush to keep mildew and grime from setting in. It adds years. For a touch-up, wash the spot, scuff it, spot-prime any bare wood, and dab with leftover paint, feathering the edge so it blends.
Keep a labeled gallon of each color in the garage. Bring the lid sticker to the paint counter if you run out, and they’ll match it.
Cost Breakdown
| Item | $ |
|---|---|
| Exterior paint, 6 gallons | $240–$420 |
| Spot primer, 1 gallon | $30 |
| Caulk, filler, wash, bleach | $40–$60 |
| Brushes, roller, sleeves, tape | $60–$90 |
| Drop cloths and masking | $30 |
| Total (materials) | $400–$630 |
That’s materials for a single-story house with mid-grade paint. A sprayer rental runs $50–$90 a day, and a contractor crew for the same house runs $3,000 to $7,000 depending on prep. Doing it yourself is the savings, and the prep is the work.
If you’ve got a vinyl or fiber-cement house instead of wood, the prep changes. See the vinyl siding guide and the fiber-cement siding guide first, because the priming rules are different. If your old paint is already lifting in sheets, fix that with the peeling paint repair steps before you come back here.