Can You Paint Over Wallpaper? Yes, If It Passes Four Checks
You can paint over wallpaper when it is stuck down tight, flat, and not vinyl. Here is how to test yours, how to prime the seams so they do not telegraph, and when stripping is genuinely the easier job.

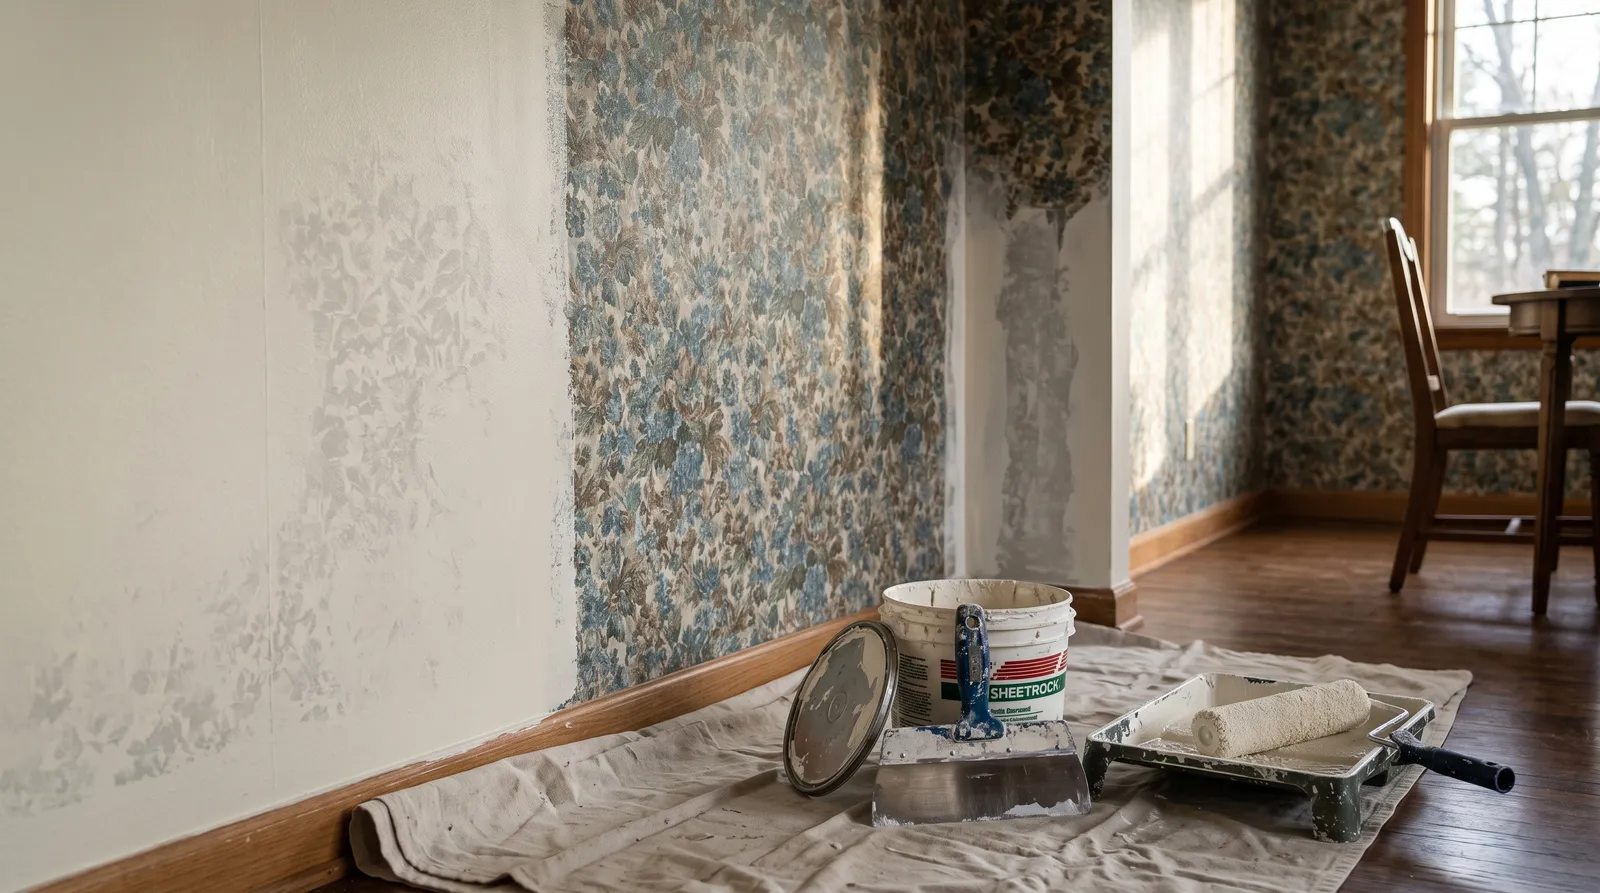
Okay, so you have a room full of wallpaper you did not choose, and you are standing there hoping somebody tells you that you can just paint over it. You can. But only if your wallpaper passes four checks, and only if you use the right primer, because the wrong primer turns the whole wall into bubbles within an hour.
Here is the honest version. Painting over wallpaper is a legitimate approach that professional painters use all the time, especially in old houses where the paper is glued to plaster and stripping it would tear the wall apart. It is not a shortcut you should feel guilty about. It is a shortcut that has conditions, and the conditions are what this article is about.
The Four Checks
Do these before you buy anything. They take about ten minutes for a whole room.
1. Is it stuck down tight? Press your flat palm against the wall and move it around, section by section. You are feeling for hollow spots, places where the paper is no longer bonded to the wall behind it. A hollow spot feels slightly springy and sometimes crackles. Then run a fingernail under every seam you can reach, especially at inside corners, around windows, and along the top edge. If nothing peels back, you are good.
2. Is it one layer? Look at a torn spot, or lift a corner behind a switch plate. If you can see a second pattern underneath, somebody papered over paper. Two layers means twice the glue and twice the chance of the whole stack letting go. Strip it.
3. Is it vinyl or foil? Vinyl wallpaper is a thin plastic film over a paper backing. It usually feels slightly slick and slightly rubbery, and water beads on it instead of soaking in. Foil is obviously metallic. Both are non-porous, which means primer sits on top instead of soaking in and grabbing. You can paint them, but this is the version of the job most likely to peel later.
4. Can you live with the texture? Paint does not hide texture. It hides color. A dark floral pattern disappears under two coats of primer and paper. The raised weave of a grasscloth, or a deep embossed damask, will still be right there when you are done, just painted. Stand at the far end of the room, then walk toward the wall with a lamp held low. Whatever you can see now, you will see after.
Pass all four and you paint. Fail two or more and you strip. Fail one and it is a judgment call, which I will get into next.
When Stripping Is Actually the Easier Job
I know that sounds backwards, but there are three situations where painting over it costs you more work in the end than removing it would have.
The paper is already lifting. If seams are curling or a corner peels back with almost no effort, wet paint is going to accelerate that. You will end up stripping painted wallpaper, which is genuinely miserable, because the paint film seals out the water you need to soften the glue. Strip now while it is easy. Our wallpaper removal walkthrough covers the scoring and steaming part.
It is heavily textured and you want smooth walls. Grasscloth, deep embossing, anything with a visible weave. You can bury it under a skim coat, which I explain below, but at that point you are doing drywall work either way and you may as well start from a clean wall.
There is more than one layer. Two or three layers of paper plus paste plus your new primer plus two coats of paint is a lot of stacked material with a lot of stacked moisture, and the bottom layer is usually the oldest and weakest glue in the pile.
Everything else, honestly, paint it.
Why Water-Based Primer Ruins This
This is the part almost everyone gets wrong, so I want to be blunt about it.
Wallpaper paste is water-soluble. That is by design, it is how you remove wallpaper in the first place. When you roll a water-based primer onto wallpaper, the water in that primer soaks straight through the paper and reactivates the old glue underneath. The glue turns to slurry, loses its grip, and the paper starts floating off the wall. You will watch bubbles rise in real time. It is horrible and it is completely avoidable.
So the primer needs to carry itself in something that is not water.
- Oil-based stain-blocking primer. Zinsser Cover Stain is the standard here, and KILZ Original oil-based does the same job and sells at Home Depot. It seals the paper, blocks any pattern or ink that might bleed through, and does not touch the glue. Recoat in about two hours. Cleanup is mineral spirits and the smell is real, so open windows.
- Shellac primer. Zinsser B-I-N. Alcohol-carried, dries hard in about 45 minutes, blocks absolutely everything including old nicotine and marker. It is the strongest option and the fastest, and it also has the strongest smell. Clean brushes with denatured alcohol.
- Gardz. This is the odd one out, and it is worth knowing about. Zinsser Gardz is a water-based sealer, but it is formulated so thin that it penetrates the paper and cures into it rather than sitting on top and soaking it. It was made for exactly this job and for sealing torn drywall paper. It goes on like water, dries clear, and turns soft paper into a hard sealed surface. It is the go-to when you plan to skim coat.
If you want the deeper chemistry on why alcohol and oil carriers behave so differently here, what shellac primer does is the companion read, and the stain-blocking primer round-up has specific cans.
The Steps
Give yourself a weekend. Most of the clock is drying time, not working time.
Step 1: Clean the Walls
Wipe everything down with a damp sponge and a little dish soap, then a clean-water pass, then let it dry fully. Kitchens and anywhere near a stove need degreaser instead, because primer will not bond through cooking grease. What this looks like: the sponge should come away clean on the second pass.
Do not soak the wall. Damp, not wet. You are cleaning paper.
Step 2: Glue Down Every Loose Edge
Any seam or corner that lifts even slightly gets fixed now. Buy a small tube of seam adhesive (sold as wallpaper seam repair, a few dollars, at any hardware store), squeeze a thin bead under the lifted edge with the nozzle, press it flat with a damp cloth or a seam roller, and wipe the squeeze-out immediately. Give it a couple of hours.
Trim any torn flaps flush with a fresh utility blade rather than trying to save them.
Step 3: Deal With the Seams
Here is the thing nobody mentions until after you have painted. Every wallpaper seam is a tiny step in the surface, either a ridge where two edges overlap or a hairline valley where they butt together. Paint is roughly 3 thousandths of an inch thick when dry. It cannot fill a step. So the seams stay visible, and worse, they catch light in a line down the wall and your eye goes straight to them.
The fix is joint compound, the same white mud used for drywall seams. Lightweight all-purpose is fine, sold in a tub for about $15.
- Use a 6-inch putty knife to lay a thin band of compound over each seam.
- Switch to a wider knife, 10 or 12 inches, and feather it out. Feathering means pressing harder at the outside edges so the compound thins to nothing about 6 inches either side of the seam. No ridge, no hard stop.
- Let it dry, usually overnight for lightweight compound.
- Sand with 120-grit on a sanding sponge, lightly. You want smooth, not bare. If you sand through into the wallpaper you have created a new problem.
- Wipe the dust off with a barely damp cloth.
Do this before priming if you sealed with Gardz, or after priming with oil or shellac. Either order works. What matters is that the compound gets primed at some point before paint, because bare compound is thirsty and will flash (dry duller than the wall around it).
Step 4: Prime the Whole Wall
Wall to wall, not just the seams. Cut in the edges with a brush, roll the field with a 3/8-inch nap roller cover. One full coat, not two thin ones. You want a proper wet film going down, because that is what seals the paper.
If the wallpaper is dark or busy, tint the primer grey. Any paint counter will do it for a couple of dollars and it saves you a topcoat.
Let it dry the full time on the label. Oil wants two hours minimum and overnight is better.
Step 5: Paint
Two coats of your finish paint, normally. Roll in a section about 3 feet wide at a time, keeping a wet edge so the sections blend.
Sheen matters more than usual here. Flat or matte hides seams and texture because it scatters light in every direction. Eggshell is the highest I would go. Satin and semi-gloss reflect light along the wall and will spotlight every seam you did not fill perfectly, so save those for trim.
The Skim Coat Option
If the texture is the problem rather than the pattern, you can bury the whole thing.
Seal the wallpaper first with Gardz or a shellac primer. Then spread joint compound across the entire wall in a thin layer with a 12-inch knife, working in overlapping passes and scraping most of it back off as you go. It feels wrong the first time. You are not building a layer of mud, you are filling the low spots and leaving almost nothing on the high ones. Let it dry, sand, then do a second thin coat if the texture still reads. Prime again, then paint.
This turns an embossed 1970s wall into a flat modern one for the cost of a tub of compound and a lot of sanding. It is the same skill as finishing drywall, so if you have never done it, practice inside a closet first. The technique carries over from painting plaster walls, which has the same feathering logic.
What to Do if It Goes Wrong
Bubbles appear while priming. Stop. Small ones often flatten as the primer dries and pulls tight, so give it an hour before panicking. If they are still there, slit each bubble with a blade in an X, work seam adhesive under the flaps with a small brush, press flat, let it dry, spot-prime. If a whole section is lifting, that section needs to come off and be patched.
Seams show after painting. You can still fix it. Feather compound over the offending seams, sand, spot-prime with the same primer you used, and roll one more finish coat over the whole wall so the sheen matches. It is annoying but it is not a redo.
Paint peels a few weeks later. That usually means moisture, not bad prep, especially in a bathroom or on an exterior wall. Peeling paint walks through diagnosing it.
And if you are actually dealing with the paintable stuff, the white embossed paper made specifically to be painted, that is a different and much easier job with different rules. Painting paintable wallpaper covers it.
Don’t worry too much about this one. If the paper is tight and you keep water out of it until it is sealed, painting over wallpaper is one of the highest-reward weekends in the whole DIY catalog. You walk in on Saturday with a floral dining room and walk out Sunday with a plain one.
Ask a Question