How to Paint a Corrugated Metal Roof
Painting a corrugated metal roof without peeling — identify Galvanized vs Galvalume, strip the oxidation, lock it down with self-etching primer, top with Henry Tropi-Cool or BEHR DTM.

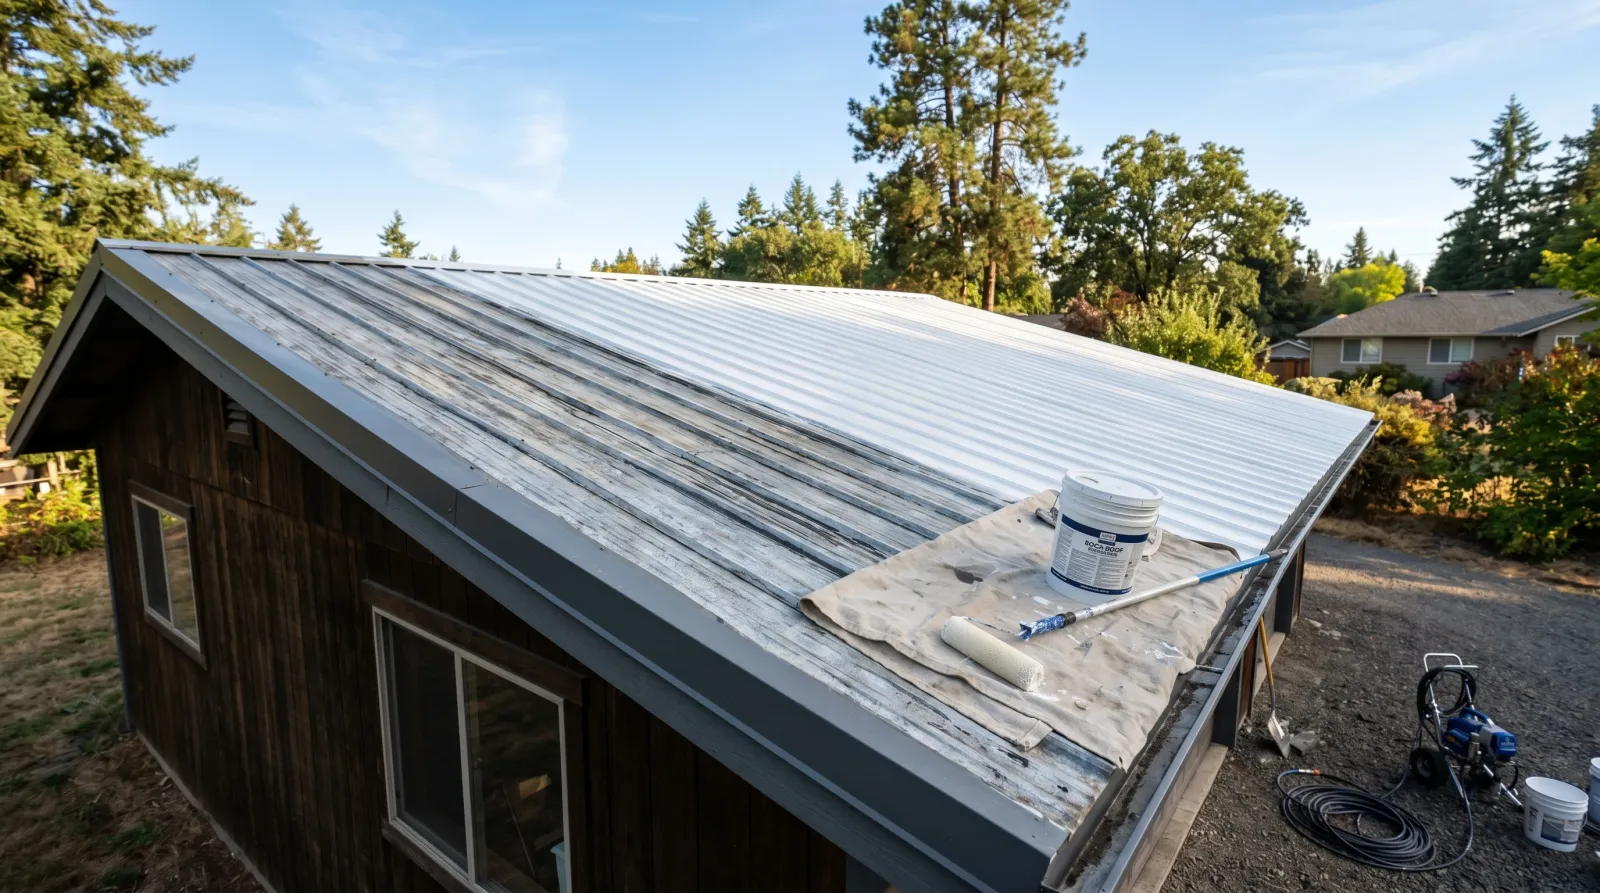
A corrugated metal roof is the easiest surface in the world to paint badly. Looks like a flat job. It isn’t. Two alloys hide under the same dull silver finish, the factory passivation has to come off before primer touches the deck, and the weather window is narrower than people think. Skip any of it and the coat sheets off in the first winter.
TL;DR
- Identify first: Galvanized (zinc only, coarse spangle) versus Galvalume (zinc-aluminum, smoother, lighter). Prep changes by alloy
- Wash: TSP substitute, soft deck brush, 1,500 PSI rinse on a 25-degree tip. Knock off the chalk, oxidation, and factory oil
- Treat the rust: Rust-Oleum Rust Reformer on every red spot, day before primer
- Primer: Rust-Oleum Self Etching Primer for fastener spots and edge work, INSL-X Stix for the full deck. Not regular exterior primer
- Topcoat: Henry Tropi-Cool 887 elastomeric in hot climates, BEHR Premium DTM or SW Pro Industrial DTM elsewhere. Two coats
- Weather window: 50–90°F surface temperature, 24-hour rain-free, no dew. Tighter than air temperature alone tells you
- Skill: hard. The roof access alone bumps this out of medium
What Is a Corrugated Metal Roof?
Corrugated metal roofing is sheet steel rolled into ribs for stiffness, then coated to stop it rusting. The coating is what you’re painting. Two alloys cover most residential installs in the US.
Galvanized is the older spec. Pure zinc, hot-dipped onto the steel. The surface shows a coarse crystalline spangle pattern when new and turns dull gray-white as it weathers. Common on barns, sheds, and older homes. Galvalume is the modern standard since the early 1990s. A zinc-aluminum alloy, roughly 55% aluminum, 43% zinc, 2% silicon. Smoother, lighter silver, longer service life. Most residential standing-seam and exposed-fastener panels installed since 2000 are Galvalume even if the homeowner calls them “galvanized.”
Tell them apart by the surface texture. Galvanized has visible spangle (looks like frost on a window). Galvalume is uniform and matte. If you’re not sure, check the panel stamp on the underside. “G90” or “G60” is galvanized. “AZ50” or “AZ55” is Galvalume.
Why a Metal Roof Is Different
Three problems stack on top of each other.
Passivation. Both alloys ship with a thin oil, wax, or chromate film to keep panels from white-rusting on the warehouse pallet. The film is invisible. Standard primer floats on it instead of bonding to the zinc or aluminum.
Reactive substrate. Fresh zinc is mildly alkaline. Aluminum oxidizes the second it sees air. Either reaction wrecks a normal latex bond from underneath. The primer has to be formulated for non-ferrous metal or it saponifies inside a year.
Roof geometry. Seams, fasteners, ridge caps, and valleys are every place water sits. The flats are the easy part. The ribs, the lap joints, and the screw heads are where coatings fail first.
I see this every spring on barn roofs that got a “quick refresh.” Eight months later, the ribs are still holding paint and the flats peel like sunburn. Flats heated faster, bond was weaker, rain pooled in the valleys. Three failures at once.
Step 1: Identify the Alloy and Inspect the Panels
Walk the roof before you buy anything. Soft-sole shoes, harness if the pitch is over 4:12.
Look for the panel stamp first. AZ-prefix is Galvalume, G-prefix is Galvanized. No stamp visible, check the cut edge at a gable for the silver-gray two-tone of Galvalume versus the pure zinc whiteness of Galvanized.
Count the rust spots. Surface chalking is normal and washable. Red-rust spots around fasteners and lap joints are normal on roofs over fifteen years old and treatable with a converter. Through-rust (actual holes you can see daylight through) means the panel is past coating. Replace it before you paint anything else.
Check the fasteners. Old neoprene washers under exposed screws crack and let water in. Replace any cracked washer before you wash; trying to seal one under fresh coating doesn’t hold.
Check the lap joints and ridge cap for failed butyl tape or caulk. Bad seam sealant is the second failure mode after primer. Cut the old butyl out with a putty knife, clean it, lay a fresh bead before the primer goes on.
Step 2: Wash Hard and Test for Chalk
This is the longest step and the one most homeowners shortcut.
Pressure-wash the whole roof from the ridge down. 1,500 PSI maximum on a 25-degree tip, eighteen inches off the panel. Higher pressure dents Galvalume and forces water under the lap joints. Lower pressure leaves chalk on the surface.
Follow with TSP substitute at label dilution and a soft deck brush on an extension pole. Work in three-foot strips, top to bottom. Add a cup of household bleach per gallon on north-facing slopes where mildew lives. Rinse clean. Let dry 24 hours, 48 if humidity has been high.
Now run the chalk test. Clean white cotton rag, slightly damp. Drag it across a south-facing section of the roof.
- Clean rag, no transfer. Old factory finish is sound, standard bonding primer fine
- Light gray smear. Moderate chalk, use Stix or a self-etching primer
- Heavy color transfer, rag stained to the color of the roof. Heavy chalk, second wash needed before any primer
Heavy chalk that doesn’t come off with one TSP wash needs a second pass with a stiffer brush. The chalk is loose pigment from UV-broken binder, and any primer over it bonds to the chalk, not the metal. The chalk lets go in the next freeze-thaw cycle and takes your topcoat with it.
Step 3: Treat Rust, Reseal Seams, Spot-Sand
Order matters here.
Rust spots first. Every red spot gets a brush coat of rust converter (Rust-Oleum Rust Reformer or Corroseal). The polymer reacts with the iron oxide and leaves a stable black film that primer bonds to. Don’t sand the rust off first. Bare steel exposed in open air flashes a new oxide layer in under an hour, and you’ll be priming over fresh rust again. Convert, cure overnight, prime.
Seam tape and caulk next. Cut out any failed butyl with a flexible putty knife. Wipe the joint clean with denatured alcohol. Lay a fresh bead of butyl seam sealant (3M 5200 or Geocel 2300) into the joint and tool it flat. Let it skin 24 hours before primer.
Spot-sand last. Light scuff with a maroon Scotch-Brite pad on the immediate area around every converted rust spot and every reset fastener. 220-grit hand-sanding sponge on the ribs where the old finish is glossy. No power tools on the panel face. A wire wheel cuts straight through Galvanized or Galvalume and exposes bare steel. The whole panel needs a tooth, not a stripped surface.
Safety: roofs built before 1978 may have lead in the original factory coating. Lead-test if you’re sanding into the substrate on an old farmhouse barn or pre-war home. RRP rule applies. Same goes for asbestos cement panels. Corrugated cement sheets look identical to corrugated steel from below.
Step 4: Self-Etching Primer
The chemistry has to bite zinc or zinc-aluminum, not just stick to it.
For Galvalume and aluminum-content panels. Rust-Oleum Self Etching Primer in the aerosol. Phosphoric acid microscopically bites the oxide layer, dries in 15 minutes, recoats in an hour. Use the rattle can on fastener spots, rib edges, lap joints, ridge cap, and anywhere a sprayer can’t reach evenly. Two light coats, six to ten inches off the panel. Don’t bury it.
For full-deck coverage on either alloy. INSL-X Stix Acrylic Bonding Primer. 100% acrylic-urethane that grabs slick non-porous substrates including weathered zinc and aluminum. One full coat, 1/2-inch microfiber roller on the flats, 2.5-inch angled sash on the ribs. Watch for holidays. The bonding primer goes on translucent and it’s easy to miss a strip on the underside of a rib lap. Hold a work light at a shallow angle and look for bare metal showing through. Hit those spots before the topcoat.
For galvanized only, the vinegar option. Household white vinegar applied wet, 5-minute dwell, rinsed clean. Dulls the spangle to a flat matte and gives any waterborne primer a tooth to grab. Don’t use vinegar on Galvalume. The aluminum content pits under acetic acid dwell.
Skip oil-based primer. Alkaline zinc and aluminum oxide both saponify oil binders inside a year. Waterborne acrylic or aerosol etch only. One coat is enough on properly washed metal. Recoat at four hours for Stix, one hour for the aerosol etch.
Step 5: Topcoat with Elastomeric or DTM Acrylic
Two chemistries, climate and goal pick the call.
Henry Tropi-Cool 887 Silicone-Modified White Elastomeric. Heat-reflective, waterproof, 25 wet mils per coat. The Florida and Texas spec. Drops attic temperature 10–20°F in summer and seals seams as a continuous membrane. Two coats with a 1/2-inch nap roller or a 517 airless tip. The first coat goes on heavy and looks like a milk-paint stain; the second lays down to a uniform bright white that reflects 85%+ of solar load. Use this on sun-blasted, low-pitch, or leaking-seam roofs.
BEHR Premium DTM Acrylic. Home Depot stock, direct-to-metal acrylic, tinted at the store. Good film build, comparable durability to the SW industrial line on residential work. Use this for color and corrosion protection on a normal pitched roof in a temperate climate. Two thin coats over the Stix primer. 1/2-inch microfiber roller on the flats, 2.5-inch sash on the ribs.
Sherwin-Williams Pro Industrial DTM Acrylic. The pro-store version. Tougher film, narrower color range, slightly finicky to spray. Use this on commercial barn roofs, agricultural buildings, and anything a contractor is putting a workmanship warranty on. Holds up 10–12 years over a Pro-Cryl primer.
For the full SKU comparison across cool-roof and standard DTM, see the best residential roof paint round-up.
Method by section:
- Flats and broad valleys. Airless sprayer with a 517 tip, back-rolled with a 1/2-inch microfiber. Spray-only leaves stipple and skips holidays at the rib edges. Back-rolling evens the film and pushes coating into the pinholes around fasteners
- Ribs and lap joints. 2.5-inch angled sash brush. Two passes, perpendicular directions, feather the edge into the wet field before it flashes
- Fasteners and screw heads. Dab with the sash brush after the surrounding rib is coated. Pull a small puddle around the washer and feather. Fasteners are the first place a topcoat fails on a pitched metal roof
Always two coats. One-coat coverage on a metal roof is a fairy tale told by the can label. The first coat sits on the etch primer and looks chalky and uneven; the second gives you the finish and the weather seal.
Step 6: Weather Window and Cure
The weather window is what most people underestimate.
Surface temperature, not air temperature. Lay a contact thermometer on the panel before you mix paint. Safe range is 50–90°F for waterborne DTM and elastomeric. A dark panel in late-morning May sun reads 60°F air and 110°F surface, and any waterborne coating flashes off the roller before it can level. Lap marks you can’t fix without sanding back to primer.
No rain in the forecast for 24 hours after the first coat, 48 hours after the second on DTM, 72 on elastomeric. Tropi-Cool needs the longer window because the film is thicker and cures slower than acrylic DTM.
No dew. Don’t start at sunrise when panels are still wet from overnight humidity and don’t push into evening when the dew is coming back. Paint between 10am and 4pm in spring and fall. In summer, 7am-10am and 5pm-7pm on the cool-side roofs, skip noon entirely.
Real cure numbers:
- Touch-dry: 2 hours DTM, 4 hours elastomeric
- Recoat: 6 hours DTM, 12 hours elastomeric
- Foot traffic: 24 hours DTM, 72 hours elastomeric
- Full cure: 30 days DTM, 45 days elastomeric
Don’t pressure-wash the new finish for 60 days. No ladders leaned against the gutter into fresh elastomeric. The foot bites a print into the film that sets permanently.
Common Mistakes
- Painting fresh panels straight from the install. The passivation oil is still on them. Wash with TSP and self-etch first, every time. Always
- Skipping the chalk test. Heavy chalk under a new coat lets go in the first freeze-thaw. Test with a damp rag, second-wash anything heavier than a light smear
- Vinegar on Galvalume. The aluminum content pits under acid dwell. Use a self-etching primer formulated for aluminum-content panels instead
- Standard exterior primer on the deck. Kilz Premium, Zinsser Bulls Eye 1-2-3, contractor white. None bond to zinc or aluminum oxide. Use Stix, Rust-Oleum Self Etching, or SW Pro-Cryl
- Painting in the wrong temperature window. Surface above 90°F flashes the topcoat off the roller. Surface below 50°F leaves a soft film that powders in the first winter
- Ignoring the seams and fasteners. The flats hold paint a year longer than the joints if you don’t seal the seams and dab the screw heads. Address the seams before the primer goes on
- Walking on wet coating. Foot prints set into elastomeric and don’t sand out. Plan your roof path before you start the second coat
Maintenance and Longevity
A properly washed, etched, primed, and two-coated metal roof lasts 8–12 years on a DTM acrylic system and 10–15 on a Tropi-Cool elastomeric system. Galvalume panels run an extra year or two over Galvanized because the aluminum content slows substrate corrosion under any pinhole.
Annual care: soft pole brush, dish soap, ground-level rinse from a garden hose. No pressure washing in year one. After year one, 1,000 PSI on a 40-degree tip is the ceiling, from the ground, never from a ladder against the gutter.
Walk the roof every spring. Spot-touch any fastener showing red the same season it shows. A touched-up rust spot at year three takes ten minutes. Ignored two winters, it becomes a streak that runs the full panel and needs a strip-and-recoat. Keep a labeled quart of topcoat in the garage.
What’ll bite you in two years: skipping the etch on a fresh Galvalume install, using oil-based primer on the deck, or painting at a 95°F surface temperature in July. Get those three right and the system holds a decade.