How to Paint Aluminum — Siding, Trim, and Fixtures
Painting aluminum across siding, trim, and fixtures: chalk wipe-test, TSP scrub, self-etching primer (Rust-Oleum or INSL-X Stix), DTM acrylic topcoat. Field-tested.

Aluminum doesn’t rust. It chalks. That’s the whole reason this job is different from painting steel, wood, or fiber-cement, and it’s the reason most aluminum repaints fail inside two summers.
The oxide layer on aluminum is microscopic, hard, and chemically slick. Standard latex slides off it. Standard exterior primer slides off it. What bites it is acid, either an etch primer with phosphoric acid in the chemistry or a true 100% acrylic bonding primer that’s been formulated for non-ferrous metal. Wash, scuff, etch, topcoat. Same skeleton whether you’re painting a 1,200-square-foot siding job or a single porch light.
TL;DR
- Test: rub a damp white rag on the surface. Gray transfer means chalk and you commit to a dechalk-rated primer
- Wash: TSP or Krud Kutter Original, soft brush, rinse low-pressure
- Primer: Rust-Oleum Self Etching Primer for sprayable fixtures and trim. INSL-X Stix for brush/roll on siding and big surfaces
- Topcoat: DTM (direct-to-metal) acrylic. Two coats. SW Pro Industrial DTM, Behr Premium Plus DTM, or Rust-Oleum Professional DTM
- Color: LRV 40+ on south and west siding walls. Dark colors warp panels in summer
- Skill: medium. The chalk test is the gate; everything past it is discipline
What Is Aluminum, for Paint Purposes
Aluminum is a non-ferrous metal. It won’t rust because it doesn’t contain iron, but it oxidizes the second it sees air. That oxide layer is what gives raw aluminum its dull silver-gray look and it’s what stops paint from bonding mechanically. On painted aluminum (factory-baked siding, powder-coated fixtures), UV breaks down the binder over years and leaves a chalky pigment residue on the surface — the same oxide story, one layer up. Either way the paint has to bite through something to grab the metal below.
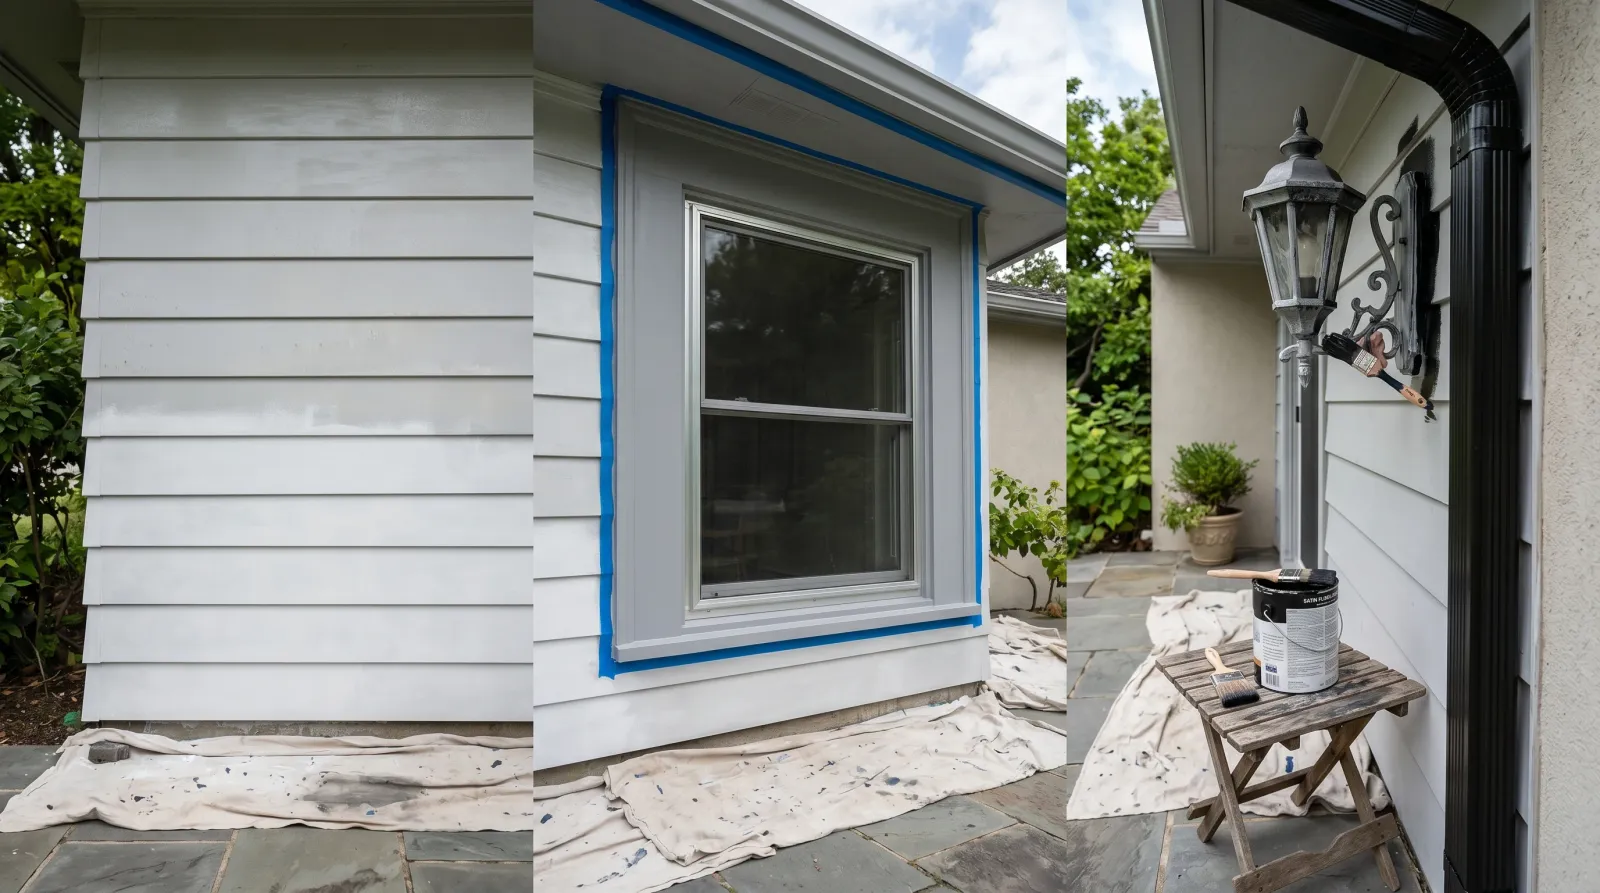
This guide covers all three common residential aluminum surfaces: lap siding, trim and soffit, and fixtures (gutters, downspouts, porch lights, exterior light fixtures, aluminum railings). Prep changes by surface; chemistry doesn’t.
Why Aluminum Is Different
It oxidizes instantly. Sand bare aluminum and the fresh metal you exposed has a new oxide layer within minutes. You can’t outrun it. The primer is what locks down the freshly oxidized surface, not the sanding.
It chalks. Old factory-baked enamel on 1960s-1980s siding loses its binder to UV and leaves loose pigment. New paint over loose pigment has nothing to grab. The chalkiness test (clean rag, light pressure, damp surface, look at the rag) is non-negotiable on any aluminum older than about 15 years.
It heats. Low thermal mass, high conductivity. A dark color on a south-facing aluminum wall hits surface temperatures that warp the panels and bake the topcoat early. Color choice is part of the spec, not an afterthought.
It’s soft. Aluminum siding is thin sheet metal. Lean a 9-inch roller into an unsupported lap and you’ll crease it. Pressure-wash too close and you’ll dimple the face. Light hand on every step.
Step 1 — Wash and Run the Chalkiness Test
Pressure-wash first if the surface is dirty. 1,500 PSI ceiling on siding, 25-degree tip, 18 inches off the wall. Higher pressure dimples aluminum and forces water up under the laps where it sits and rots the sheathing behind. On trim, soffit, and fixtures, a garden hose and a scrub brush is usually enough.
Mix TSP (or Krud Kutter Original) at label dilution. Add a cup of household bleach per gallon for the north and east elevations where mildew lives. Soft-bristle car-wash brush, work bottom up. Rinse clean. Let dry 24 hours.
Then run the test. Clean white cotton rag, slightly damp. Rub a hand-sized circle on the surface, ideally a south-facing section in direct sun. Look at the rag.
- Clean rag → sound substrate, you can use a standard bonding primer
- Faint gray smear → light chalk, use Stix or a self-etching primer
- Heavy gray or wall-colored transfer → heavy chalk, dechalk-rated primer (Zinsser Peel Stop Triple Thick) and possibly a second wash
The damp-rag version of the test is more sensitive than the dry one. If the dry rag looks clean but the damp rag pulls color, treat it as chalk.
Step 2 — Scuff, Repair, Wipe Down
Scuff-sand the whole surface with a 220-grit sponge. Light pressure. You’re breaking the gloss of the old finish, not removing material. Aluminum panels deform under aggressive sanding before they take a real cut, so go light, especially on the unsupported field of a siding lap.
Dings and small dents get a feather of light-body Bondo, sanded flat with 220 after it kicks. Big dents on siding (anything that punched the panel inward past the field) get a panel replacement. Filler over a deep deformation telegraphs through the topcoat as a visible scar in raking light.
Wipe everything down with denatured alcohol or a tack cloth. Aluminum holds a static charge after sanding and grabs dust faster than wood does. Wipe twice if the surface has been sitting.
Safety: aluminum dust is a nuisance dust, not a heavy toxic one, but the old factory enamel from a 1960s house can contain lead. If the home was built before 1978 and you’re sanding into the original factory finish, lead-test first. Same RRP rule that applies to wood trim.
Step 3 — Etch-Prime
Match the primer to the surface.
Aerosol — fixtures, trim, downspouts, gutters, railings. Rust-Oleum Self Etching Primer in the rattle can is the standard. Phosphoric acid in the formula, microscopically bites the oxide layer, dries in 15 minutes, recoatable in an hour. Two light coats, six to ten inches off the surface. Don’t bury it — etch primers work as a thin, even key coat, not a build coat. The green-gray tint shows you where you’ve covered and where you’ve missed.
Brush and roll — siding and big trim runs. INSL-X Stix Acrylic Urethane Bonding Primer. Stix isn’t a true acid etcher but it’s a 100% acrylic-urethane bonder formulated to grab non-ferrous metals, vinyl, and slick previously-painted surfaces. Brushes and rolls cleanly, doesn’t fume up the neighborhood, and it bonds to weathered aluminum siding after the chalk wash. One full coat. 2.5-inch angled sash for the lap underside, 1/2-inch microfiber roller for the field. Light pressure on the roller.
Skip oil-based primer. Aluminum oxide is alkaline. Alkaline substrates saponify oil binders — the chemistry turns the binder into soap and the primer fails from underneath inside a year. The same reaction wrecks oil paint on fresh masonry. Waterborne acrylic or aerosol etch only.
Step 4 — DTM Acrylic Topcoat
DTM stands for direct-to-metal. The chemistry is built to flex with the metal as it expands and contracts in heat, and to hold its sheen against UV better than a generic exterior latex.
Three that work on residential aluminum:
- Sherwin-Williams Pro Industrial DTM Acrylic — the contractor default for institutional and commercial metal, also fine for siding. Self-priming on light-duty applications, but I still etch-prime under it for residential warranty work
- Behr Premium Plus DTM — Home Depot stock, decent film build, fine for fixtures and trim. Lighter color load than the SW
- Rust-Oleum Professional DTM — quart cans, easier for fixtures and small repairs than mixing a gallon
Two coats. Always two coats. One-coat coverage on aluminum is a fairy tale told by the can label. The first coat sits on the etch and looks chalky and uneven; the second coat is what gives you the actual finish.
Method by surface:
- Siding — brush the lap underside with a 2.5-inch angled sash, roll the face with a 1/2-inch microfiber. Light pressure. Don’t lean into the roller. Keep it loaded so you’re laying paint, not pressing it.
- Trim, soffit, fascia — brush the inside corners and edges, mini-roller (4-inch, 1/4-inch nap) the flats. Feather the edge into the wet brushwork before it flashes.
- Fixtures and downspouts — paint in the shade, in the morning, before the metal heats. Aerosol cans of DTM (Rust-Oleum Professional or 2x Ultra Cover) lay down smoother on round pipe and ornamental work than a brush will. Two light coats, ten minutes between.
Color limits matter on siding. LRV 40 or higher on south and west walls. Black, charcoal, deep navy: fine on north and east, risky on south, will warp panels on a west elevation under afternoon sun. Original 1970s factory colors (sand, soft beige, pale sage) worked because they reflected enough heat to keep the panels stable.
For SKU picks across all three product tiers, see the best exterior paint round-up — the comparison covers Aura Exterior, Duration, Marquee, and the Kompozit exterior acrylic in the same table.
Step 5 — Dry, Recoat, Full Cure
Real numbers, not vibes:
- Etch primer touch-dry: 15–30 minutes (aerosol), 1 hour (Stix brushed)
- Etch primer recoat: 1 hour (aerosol), 4 hours (Stix)
- Topcoat touch-dry: 1–2 hours
- Topcoat recoat: 4–6 hours minimum, 16 hours on siding
- Full cure: 30 days
Don’t pressure-wash the new finish during cure. No leaning ladders against the wall, no setting downspout brackets back, no scrubbing fingerprints off a fresh railing. Aluminum holds a fingerprint in fresh DTM acrylic for the first two weeks.
Common Mistakes
- Skipping the chalk test on old siding. Standard primer over chalky enamel peels in sheets the second summer. Wipe-test before you buy the primer.
- Oil-based primer under acrylic. Saponifies on aluminum oxide, lets go inside a year. Waterborne or aerosol etch only.
- Burying the etch primer. Two heavy coats from the rattle can leaves a soft underbase that the topcoat sinks into. Two light coats, even coverage, see-through is fine.
- Heavy roller pressure on siding. Dents the lap face under raking light. Light hand, microfiber sleeve, keep the roller loaded.
- Dark color on a south or west siding wall. LRV under 30 hits 160°F surface temperature in July and warps the panels. Stick to LRV 40+ on those faces.
- Painting fixtures in the sun. Hot aluminum flashes the solvent out of the paint before it levels. Lap marks you can’t fix without sanding back to the primer. Paint fixtures in the morning shade.
Maintenance and Longevity
Washed, etched, and two-coated, expect 10–15 years on north and east siding and 8–10 on south and west. Aluminum fixtures and downspouts run longer because they don’t flex like siding panels do. The original factory baked enamel was a 30-year finish, and no field-applied coating matches a baked finish. Don’t expect it to.
Wash annually with a soft pole brush and dish soap. No pressure washing in the first year of cure. After year one, 1,000 PSI on a 40-degree tip is the ceiling. Keep a labeled quart of the topcoat color in the garage for touch-ups. South-face refresh at year eight if it’s chalking ahead of the rest, full repaint at year twelve.
What’ll bite you in two years: skipping the chalk test, using oil under acrylic, or putting a dark color on a sun-blasted west wall. Get those three right and the finish holds for a decade.