How to Paint Over Chrome
Painting chrome is all adhesion. Etch the gloss, use a self-etching or bonding primer, and let it cure hard, or the paint peels off the first time you touch it.

Chrome is the slickest thing in your house, and paint hates it. The metal is mirror-hard and non-porous, so nothing grips it on chemistry alone. Get the prep wrong and your fresh color peels off the day someone grabs the handle.
TL;DR
- Clean: dish soap, then acetone or denatured alcohol right before primer
- Scuff: 320-grit until the mirror gloss goes uniformly dull gray
- Primer: self-etching primer (Rust-Oleum or Dupli-Color), 2 light coats
- Brush-on option: INSL-X Stix or Krylon Fusion bonding primer if you can’t spray
- Paint: acrylic enamel or urethane, light coats; clear coat on high-wear parts
- Cure: 7 full days before the part goes back into service
- Skill: medium. The prep is easy to do and easy to skip
What Chrome Actually Is
Chrome isn’t a solid metal part. It’s a plating. Under that mirror surface sits a base of steel, zinc, or pot metal, then a layer of copper, then nickel, then a thin flash of chromium on top. The chromium is what gives it the shine and the hardness. It’s also what makes it slick.
That top layer is dense and non-porous, polished smooth at the molecular level. Paint sticks to most surfaces by sinking into pores or reacting with the surface. Chrome offers neither. There’s nothing to soak into and nothing to grab. Adhesion has to be built mechanically, by roughing the surface, and chemically, with a primer that bites.
You find chrome on faucets, cabinet pulls, towel bars, light fixtures, appliance trim, car bumpers and wheels, and the bright accents on old furniture. Same prep on all of it.
Why Chrome Is Different From Other Metal
Bare steel has surface oxide for a primer to lock into. Even glossy painted trim has a film with some tooth once you scuff it. Galvanized steel has a zinc layer that needs its own primer, but at least it’s reactive. Chrome is the worst case: hard, slick, inert, and usually on something that gets handled.
That last part matters more than people think. Chrome lives on the parts of a house you touch constantly. Faucet handles, drawer pulls, the grab bar in the shower. Skin oil, soap scum, and hand cream build up on those surfaces in a film you can’t see. Prime over that film and the primer bonds to the grease, not the metal. It peels in a sheet.
Chrome parts also flex and get torqued. A faucet handle twists. A cabinet pull gets yanked. A car bumper vibrates and flexes. A rigid coating over a flexing slick part cracks at the stress points and then lifts. So the topcoat needs some flexibility, and the bond underneath needs to be real.
Two enemies, then. The gloss and the grease. Beat both or don’t bother.
Step 1: Remove the Part if You Can
Take the part off. A faucet, a cabinet pull, a towel bar, a bumper trim piece. Anything you can unscrew, unscrew it.
Off the wall, you can lay it flat, hit every face evenly, and hang it to dry without runs pooling in the curves. You also keep overspray off the sink, the counter, and the drywall behind it. Self-etching primer overspray travels and it doesn’t wipe off porous surfaces clean.
If the part can’t come off, like a built-in handrail or a window crank, mask hard. Painter’s tape and masking paper over everything within two feet, because etching primer drifts.
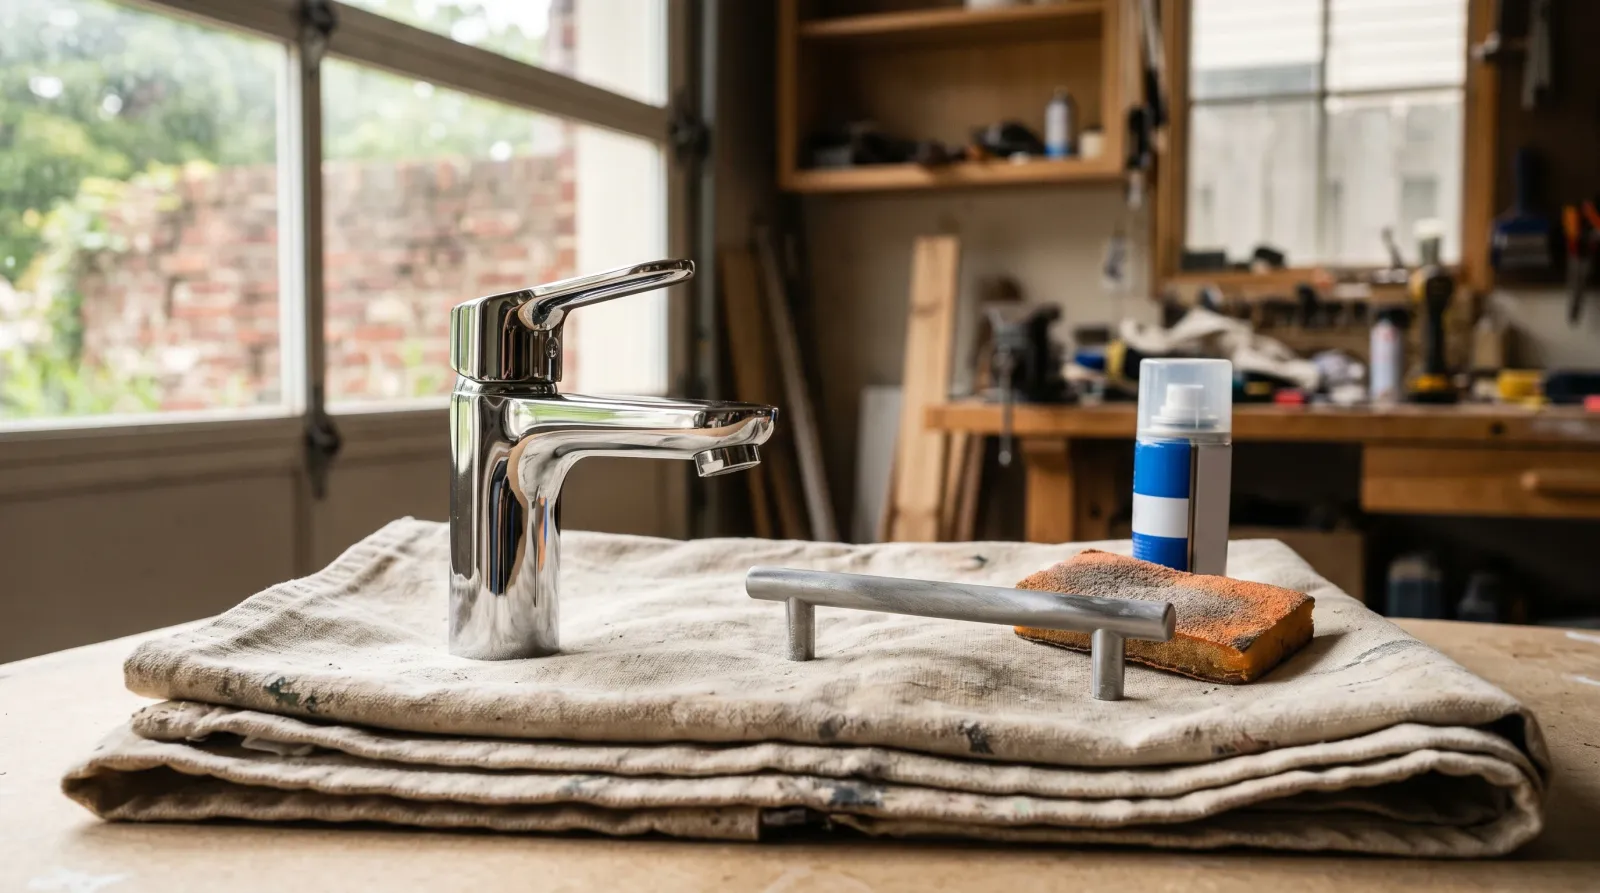
Step 2: Wash, Then Degrease
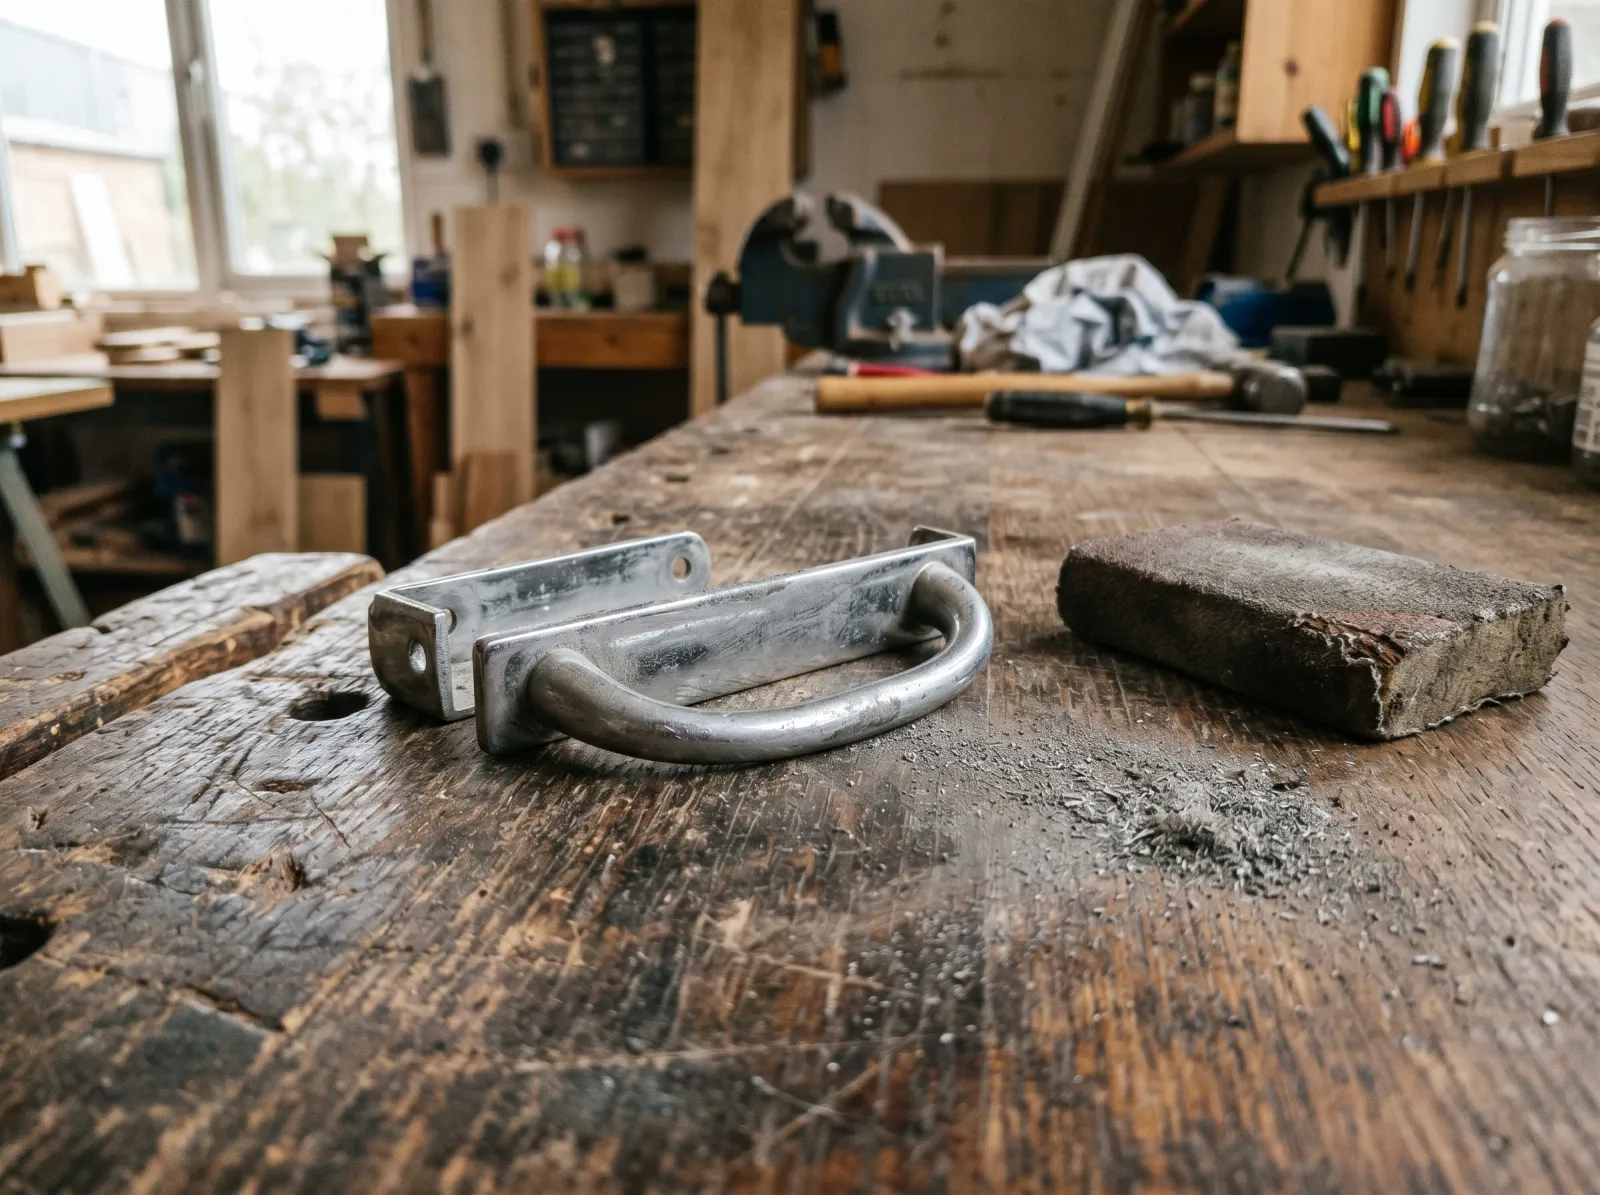
320-grit until the mirror shine goes uniformly dull gray. No bright spots left, or the primer lets go there first.
Wash first with dish soap and warm water to cut the heavy grime and soap film. Scrub the knurled grips and the threaded areas where gunk hides. Rinse and dry.
That’s the first pass. The real degrease comes after sanding, right before primer. Hold that thought.
Step 3: Scuff the Gloss Flat
This is the step that decides the job. Scuff-sand the entire chrome surface until the mirror shine is gone and the metal reads a uniform dull gray.
Use 320-grit wet/dry, or a fine sanding sponge for the curves and detail. Wet-sanding cuts cleaner and keeps the chrome dust down (that dust is metal, wear gloves and a mask). Get into every recess. The bottom of a curved spout, the inside of a handle loop, the back of a bracket. Any spot you leave bright is a spot the primer can’t grip, and that’s where peeling starts.
You’re not trying to grind through the chrome. You’re knocking the polish off so the surface has tooth. When the whole part looks evenly hazy gray with no shiny patches, you’re done. Sand too little and the primer skates. There’s no upside to leaving gloss anywhere. For the why behind grit choices on slick surfaces, see the sanding vs deglosser breakdown. On chrome, sand. Liquid deglosser alone doesn’t give chrome enough tooth.
After sanding, tack-cloth the dust off, then wipe the whole part down with acetone or denatured alcohol on a lint-free rag. This is the degrease that counts. It pulls off the sanding residue and any oil your hands left while you worked. From this point, handle the part by the edges or with gloves. One fingerprint on the bare scuffed metal is enough to fail the bond under it.
Step 4: Self-Etching Primer

Two light passes of self-etching primer from 10 inches. Thin and even, not one wet coat. The primer is the whole job.
Self-etching primer is the default for chrome. It carries a mild phosphoric acid that etches into the chromium and the nickel below, building a chemical bite on top of the mechanical tooth from sanding. Rust-Oleum Self Etching Primer and Dupli-Color Self Etching Primer both come in rattle cans and both work. This is a spray product. There’s no brush-on self-etch worth using.
Spray two light coats from about 10 inches, 10 minutes apart. Light coats. The whole point is a thin, even etch layer, not a thick build. A heavy wet coat runs on the curves and the acid doesn’t etch any better for being thick. Wear an organic-vapor respirator. Self-etching primer is nasty to breathe.
If you genuinely can’t spray (an indoor part, no ventilation, a rental), the fallback is a bonding primer brushed on: INSL-X Stix or Krylon Fusion. These grip slick surfaces without the acid etch. They bond well, but on chrome the scuff-sanding does even more of the work than it does with self-etch. Sand harder if you’re going the brush-on route. For the full primer landscape, including which bonding and etching products hold up, see the primer round-up.
Let the etch primer flash and dry per the can, usually an hour before topcoat. Some self-etch primers want a separate sandable filler primer on top if the surface is rough, but on smooth chrome you can go straight to color.
Step 5: Topcoat
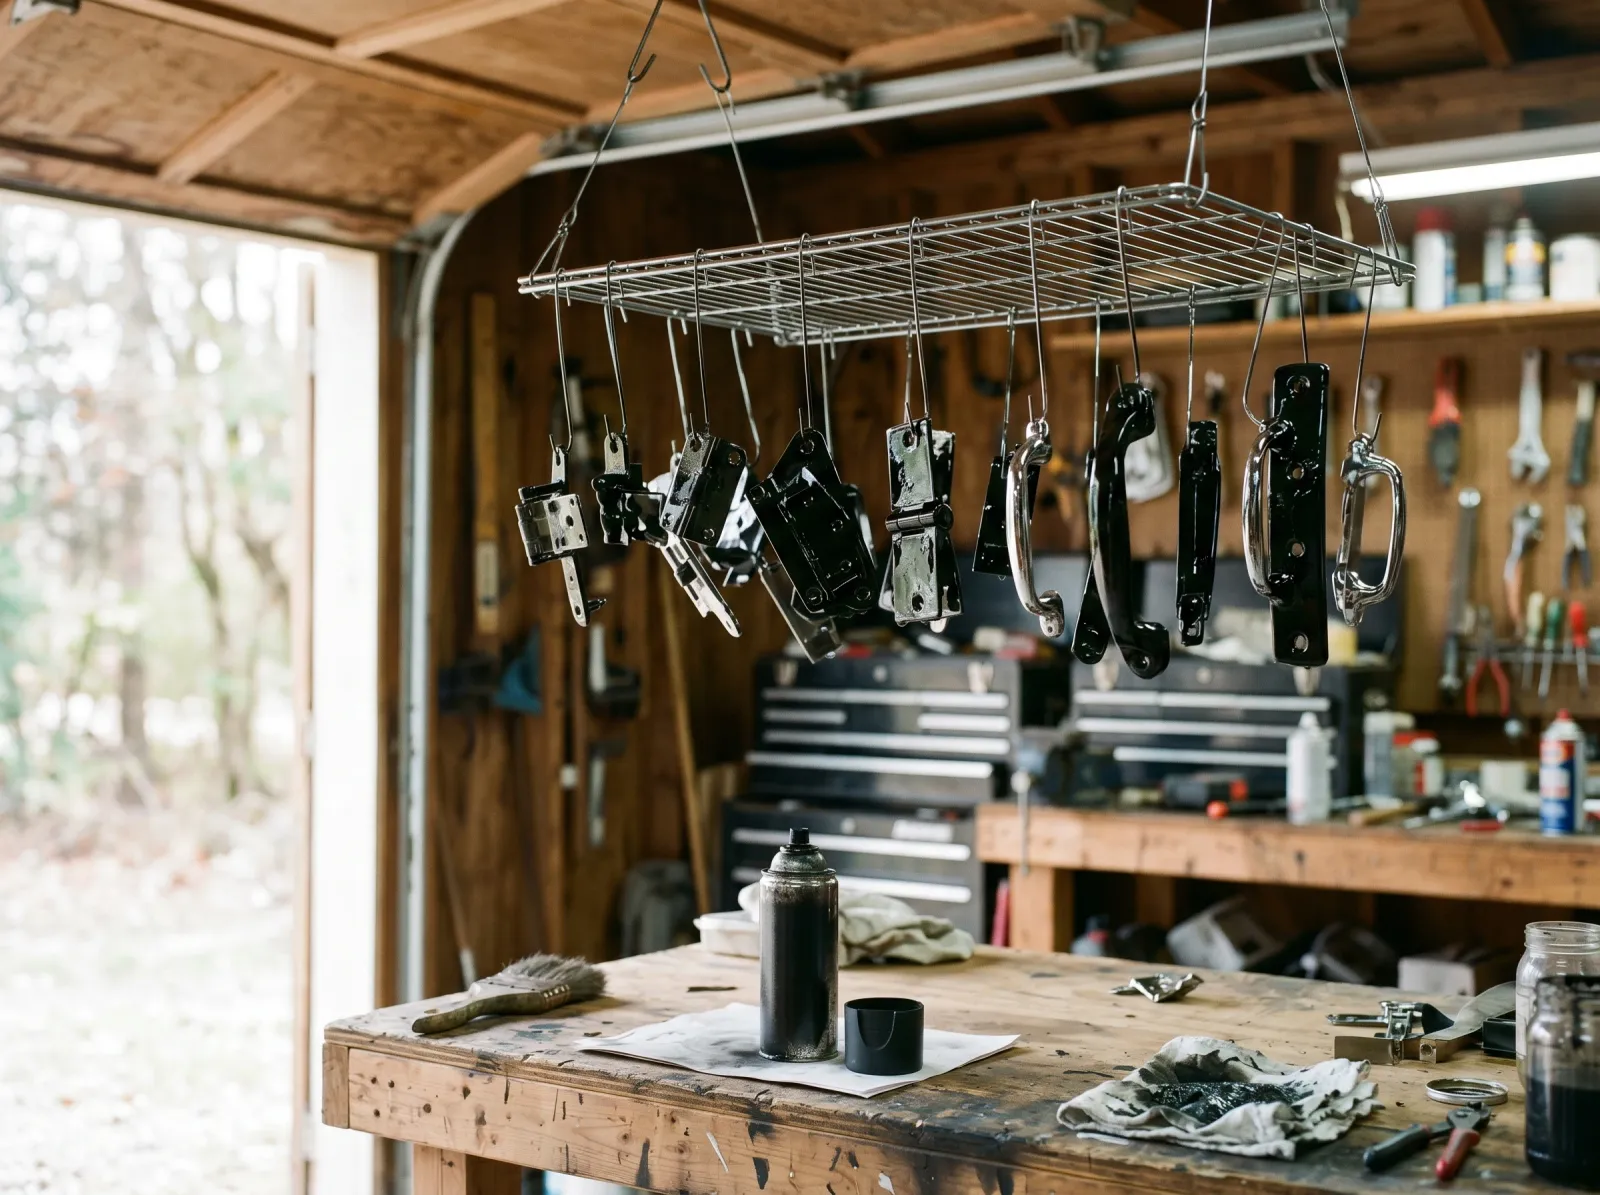
Light coats, 10 minutes apart in the same session. Build the color slow. Heavy passes run on the curves.
Over a self-etching primer, you’ve got options. Acrylic enamel in a rattle can is the easy path for fixtures and trim. Rust-Oleum’s enamels and the automotive acrylic lacquers both lay down smooth over etch primer. For a faucet or anything that takes daily abuse, step up to a urethane, and on wheels or bumpers a 2K urethane (the two-part kind with a hardener) is the only thing that survives long term.
Sheen is your call. Matte black over a chrome faucet is the popular look right now. Gloss black reads more like factory. If you’re unsure how the finish will wear and clean, the sheen guide lays out which sheens hold up to wiping. Higher sheen cleans easier and shows wear less on handled parts.
Spray light coats, 10 minutes apart, all in the same session while the previous coat is still tacky. Three light coats beat one heavy one every time. Heavy coats run on every curve a fixture has, and chrome parts are all curves. Build the color slow.
On anything that gets handled or sees weather, finish with a clear coat. Two light coats of clear urethane over the color seals the edges and takes the abrasion that would otherwise wear the color off. The clear is what makes a painted faucet last four years instead of one.
Step 6: Dry, Recoat, and Cure
Touch-dry comes fast, 30 minutes to an hour. Recoat windows on rattle-can enamel are tight: either within the first hour, or after 48 hours of full dry. The in-between zone is where you get wrinkling, because the solvent in the new coat lifts the half-cured one under it. Read the can and respect that window.
Full cure is the number people skip. Seven days before the part goes back into normal service. The film is dry to the touch in an hour but it’s soft for a week, and a soft film on a handle picks up dents, fingerprints, and edge wear that lock in permanently. A faucet you reinstall and start gripping on day two will show wear at the grip by month two.
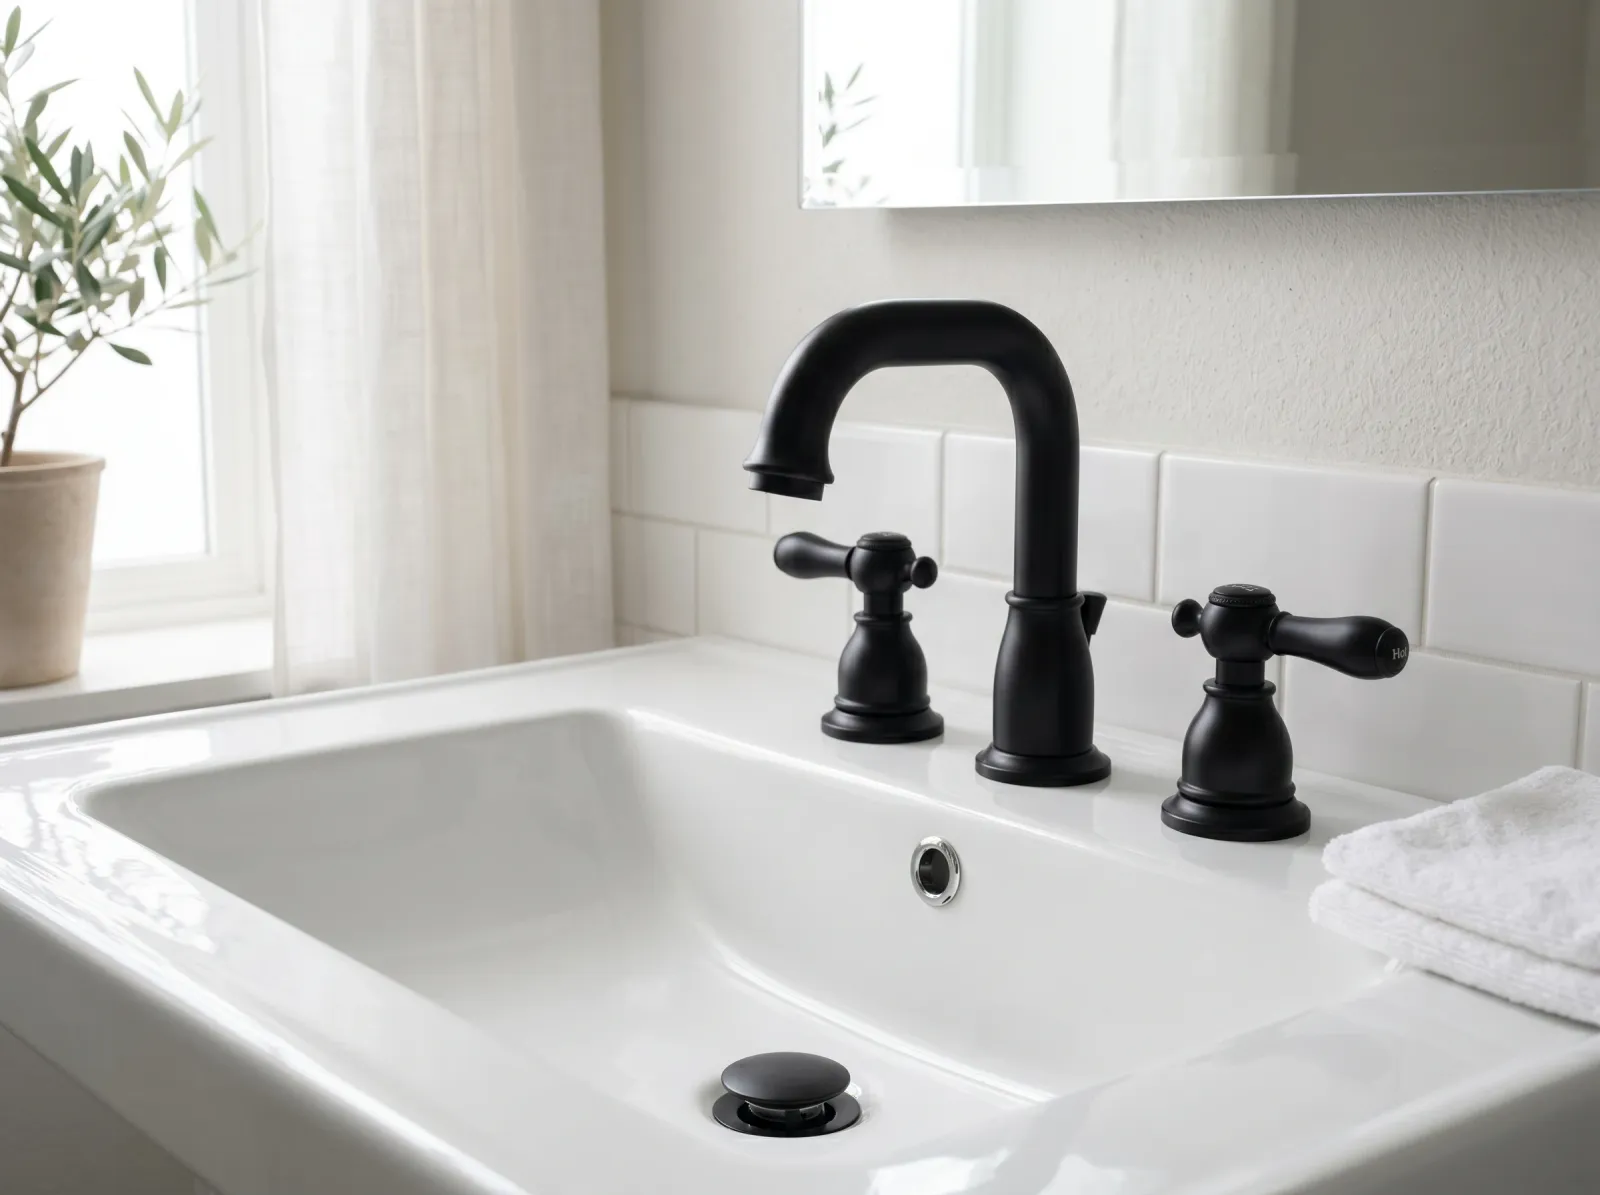
Seven days before it goes back into service. Matte black faucet reinstalled, even color, no peel at the edges.
If the part has to go back early, handle it by the parts you didn’t paint and keep water off it. Painted chrome in a wet zone, like a shower fixture, needs the full cure plus a clear coat or the water creeps under the edges.
Common Mistakes
- Spraying color straight onto bright chrome. No etch, no scuff, no grip. It peels off in a sheet the first time the part is touched. Scuff to dull gray and self-etch first, always.
- Priming over an invisible grease film. The primer bonds to the skin oil and soap scum, not the metal. Degrease with acetone right before primer and don’t touch the bare metal after.
- Leaving bright spots in the curves. Hard-to-reach recesses get under-sanded, the primer skates there, and peeling starts at those spots. Use a sanding sponge and check every recess in raking light.
- Heavy coats to “save time.” Thick passes run and sag on every curve and stay soft for weeks underneath. Light coats, more of them.
- Putting the part back into service before cure. A faucet handle gripped on day two wears at the grip by month two. Seven days, no shortcuts.
- Skipping the clear coat on handled or outdoor parts. Bare color wears through at the touch points and water lifts the edges. Clear urethane roughly doubles the lifespan on anything that gets gripped or rained on.
Maintenance and Longevity
Painted chrome is a cosmetic fix with a clock on it. On a low-touch part, a light fixture, a decorative trim piece, a cabinet accent that nobody handles, a properly etched and cleared job holds 5 to 10 years. On a faucet handle, a drawer pull, or a wheel that gets gripped, twisted, and cleaned daily, expect 2 to 4 years before edge wear shows at the touch points. A 2K urethane with a clear coat roughly doubles those numbers.
Clean painted chrome with mild soap and a soft cloth. No abrasive pads, no bleach, no scouring cleaners. Those cut through the topcoat and expose the primer, and once water gets under a chipped edge it lifts the whole patch. When the color starts wearing at a grip point, scuff that area, re-prime the bare spot, and recoat early. Catch it before the chrome shows through and the touch-up blends in.
Will it bite you in two years? Only if you skipped the scuff, primed over a greasy surface, or sent the part back into daily use before it cured. Painting chrome is easy to do right and easy to ruin, and the difference is entirely in the prep. If the part flexes hard or lives in standing water, like a shower valve, accept that even a perfect job is on borrowed time. For the same slick-metal problem on a different surface, see how to paint galvanized steel, and if your real issue is paint already lifting off a slick finish, the glossy-finish fix covers the rescue.
FAQ
Can you paint directly over chrome? No. Chrome is a hard, slick, non-porous plating that nothing grips on its own. Scuff the gloss flat with 320-grit, degrease it, and put down a self-etching or bonding primer first. Paint sprayed straight onto bright chrome peels off the first time the part gets touched, flexed, or wiped.
Why does paint peel off chrome? The chrome was too glossy or it was contaminated. Chrome lives on faucets, handles, and trim that get touched and cleaned, so skin oil and soap film are the usual culprits under a failed bond. Scuff to dull gray, degrease with acetone right before priming, and keep your hands off the bare metal after.
How long does painted chrome last? On a low-touch part like a light fixture, 5 to 10 years. On a faucet handle or drawer pull that gets gripped daily, 2 to 4 years before edge wear shows. A 2K urethane topcoat with a clear coat roughly doubles those numbers.
Can I spray-paint chrome bathroom or kitchen fixtures black? Yes, and matte black over chrome faucets is a common refresh. Scuff, self-etch, two light color coats, a clear coat, and a full 7-day cure before it goes back into service. Even done right, a daily-use handle wears at the grip in 2 to 4 years. It’s cosmetic, not forever.