How to Paint Over Old Wallpaper Glue
Paint over wallpaper glue and it'll bubble, streak, or peel. Here's how to test for residue, wash it off, seal what's left, and get a flat wall that holds.

Wallpaper glue is water-soluble. Latex paint is mostly water. Paint straight over the dried paste and the topcoat re-wets it, the bond lets go, and you’re looking at bubbles in a week. Get the residue off or seal it right, and the wall holds. Skip that and you’ll be scraping again by next month.
Does This Match What You’re Seeing?
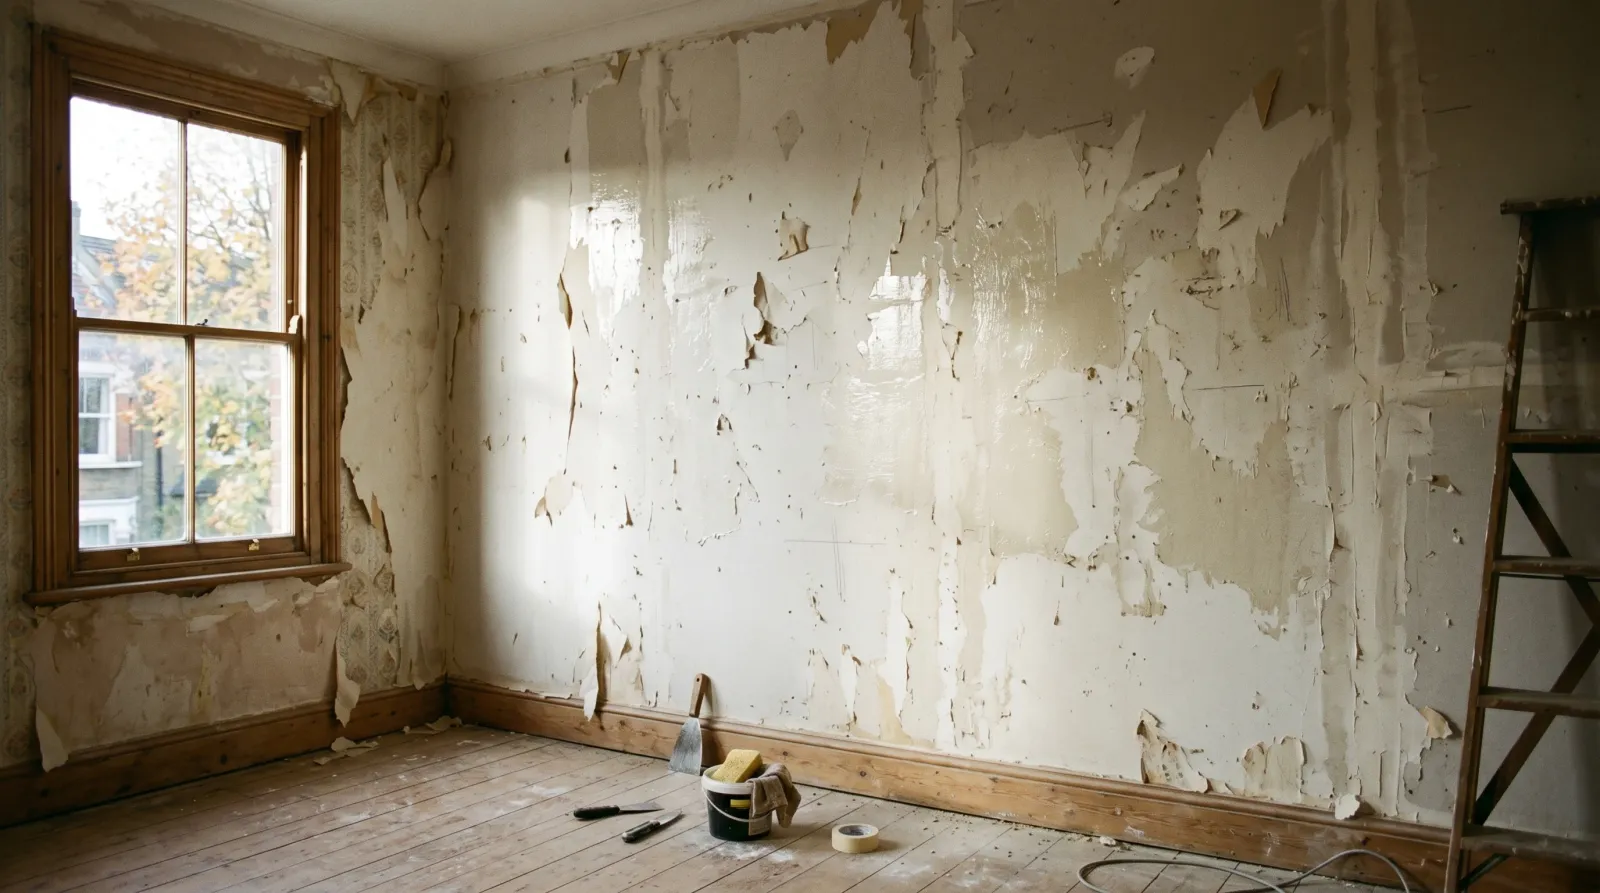
Run your hand over the stripped wall and look at it under raking light from the side. You’ll spot one of these.
- Shiny patches that stay glossy when dry. Dried paste. Topcoat won’t grip a glossy film.
- Slick or tacky feel when you mist it with water. Active, water-soluble glue still on the wall.
- Streaky bands that telegraph through fresh paint. You painted over uneven residue and the gloss difference shows.
- Bubbles or blisters appearing days after painting. The water in the paint dissolved the glue underneath and the film lifted.
- Torn paper face, fuzzy gray patches. You gouged the drywall during stripping. That’s a skim-and-prime problem, not a glue problem.
If half the wall feels clean and half feels slick, you stopped washing too soon. The slick half is still loaded.
How Serious Is This?
Cosmetic and fully fixable. The wall isn’t damaged. The glue just won’t let paint bond, so this is a prep problem, not a structural one. A careful weekend of washing and sealing solves it on a normal room.
Two things bump the effort up. A whole-house worth of old paste means real labor, not real difficulty. And a pre-1978 home means the wall under the paper may carry lead paint, so test before you sand anything. More on that below.
Why This Is Happening (root Cause)
Wallpaper paste is designed to stay water-reversible so the paper can be removed later. That’s the feature that wrecks your paint job.
When you strip paper, a film of that paste stays behind on the wall. It dries clear and glossy. Two problems follow. First, the dried film is slick, and paint needs a slightly toothy surface to grab. A glossy layer gives the topcoat nothing to bite into. Second, and worse, the dried glue is still water-soluble. Roll a water-based latex over it and you’re brushing water onto dried paste. The paste softens, swells, and the paint film floating on top loses its footing. That’s your bubble.
It gets uglier over time. Even where the paint seems to hold, leftover glue keeps absorbing humidity from the room. On a bathroom or kitchen wall, that means the film stays soft underneath and starts streaking or peeling at the first run of steamy days. I’ve stripped rooms where the previous owner painted over the paste, and the topcoat came off in sheets the second a sponge touched it.
The other failure is uneven sheen. Residue dries in random patches. Where there’s glue, the topcoat sits glossier. Where the wall is clean, it sits flatter. Under side light you read every streak the old paper left behind, even if nothing peels.
The Fix
Step 1. Test for Residue
Mist a two-foot patch with warm water from a spray bottle. Wait two minutes, then drag your fingertips across it. Slick, tacky, or slimy means glue. Dry the patch and look at it sideways under a work light. Any patch that stays shiny is paste.
Test several spots. Glue never comes off evenly, so one clean square doesn’t mean the wall is clean.
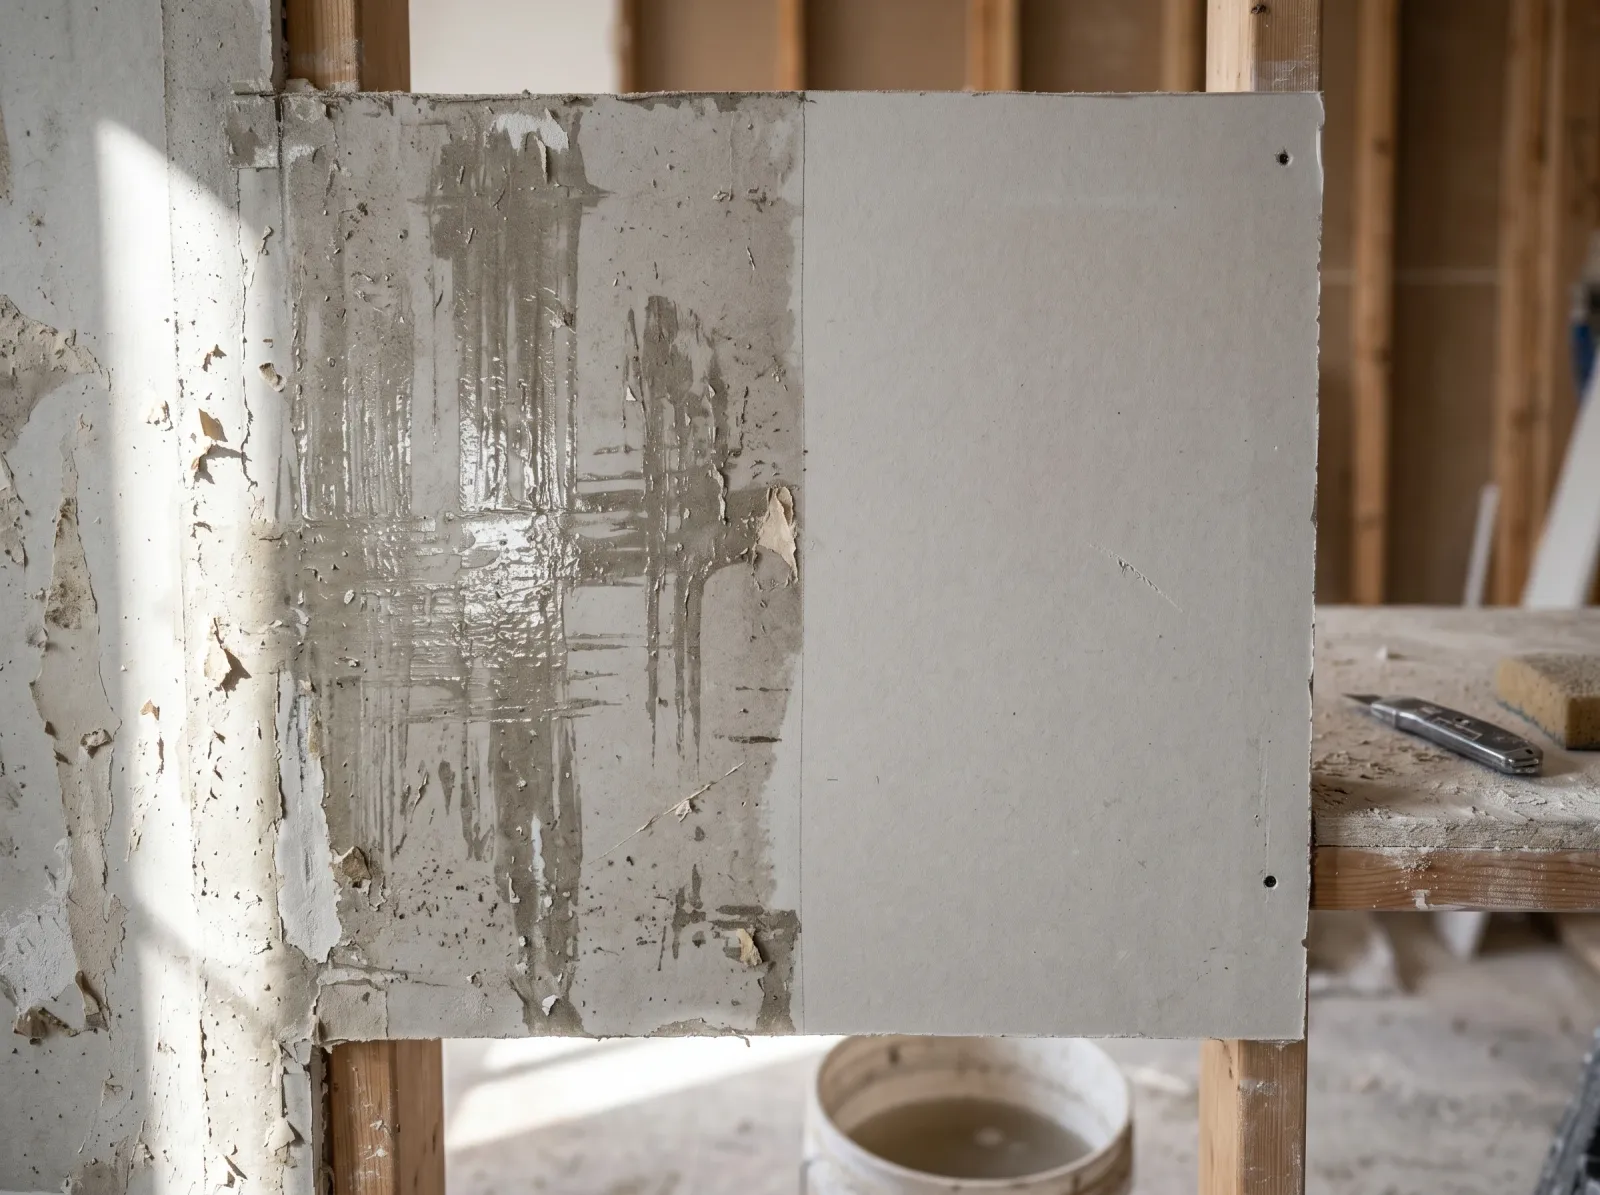 Left: glossy paste still on the wall. Right: the same wall after washing, dull and ready to grip primer.
Step 2. Wash the Glue Off
Mix warm water with a wallpaper-paste softener. DIF gel is the standard, or a few drops of dish soap per gallon for light residue. Sponge it on heavy, let it soak three to five minutes so the paste re-dissolves, then pull it off with a 4-inch or 6-inch flat scraper held nearly flat.
Work top to bottom so the runoff doesn’t re-coat what you cleaned. Change the water the second it goes cloudy. Dirty water just smears thinned glue back across the wall.
Heavy adhesive usually needs two passes. Rinse the whole wall with clean warm water and a fresh sponge at the end. That rinse is the step people skip, and it’s the one that decides whether the paint holds.
Step 3. Let It Dry, Then Re-Test
Dry 24 hours. Drywall and plaster pull water in during washing, and you can’t prime a damp wall.
Re-run the water test from Step 1. Still slick anywhere? Wash that spot again. Don’t move on with glue still on the wall and a plan to “seal over it.” Sealer buys you tolerance for a thin haze, not for a wall you didn’t clean.
Step 4. Skim Any Damage
If stripping tore the paper face of the drywall or left fuzzy gouges, knock the loose bits down with a scraper and skim those spots with lightweight joint compound. Sand flush at 150 grit once dry. Feather the edges so the patch reads flat under side light.
A torn paper face left bare will flash and fuzz under topcoat. Seal it in the next step or it drinks paint unevenly.
Step 5. Seal With the Right Primer
This is where the wrong primer undoes all the washing. A standard PVA drywall primer is water-borne, and any glue haze left on the wall re-activates under it. Use a sealer that doesn’t re-wet paste.
- A clear water-base sealer like Zinsser Gardz. Soaks into residual paste and torn drywall paper, dries hard, and locks the surface so latex can’t re-dissolve what’s under it. The go-to for stripped walls.
- Oil-based primer (Zinsser Cover Stain) or shellac (Zinsser BIN). Non-water carriers, so they won’t activate leftover glue. BIN also kills any stain bleeding through. For the difference between them, see what shellac primer does and when to reach for a bonding primer.
One full coat, cut in your edges, roll the field. Let it dry per the can before topcoat.
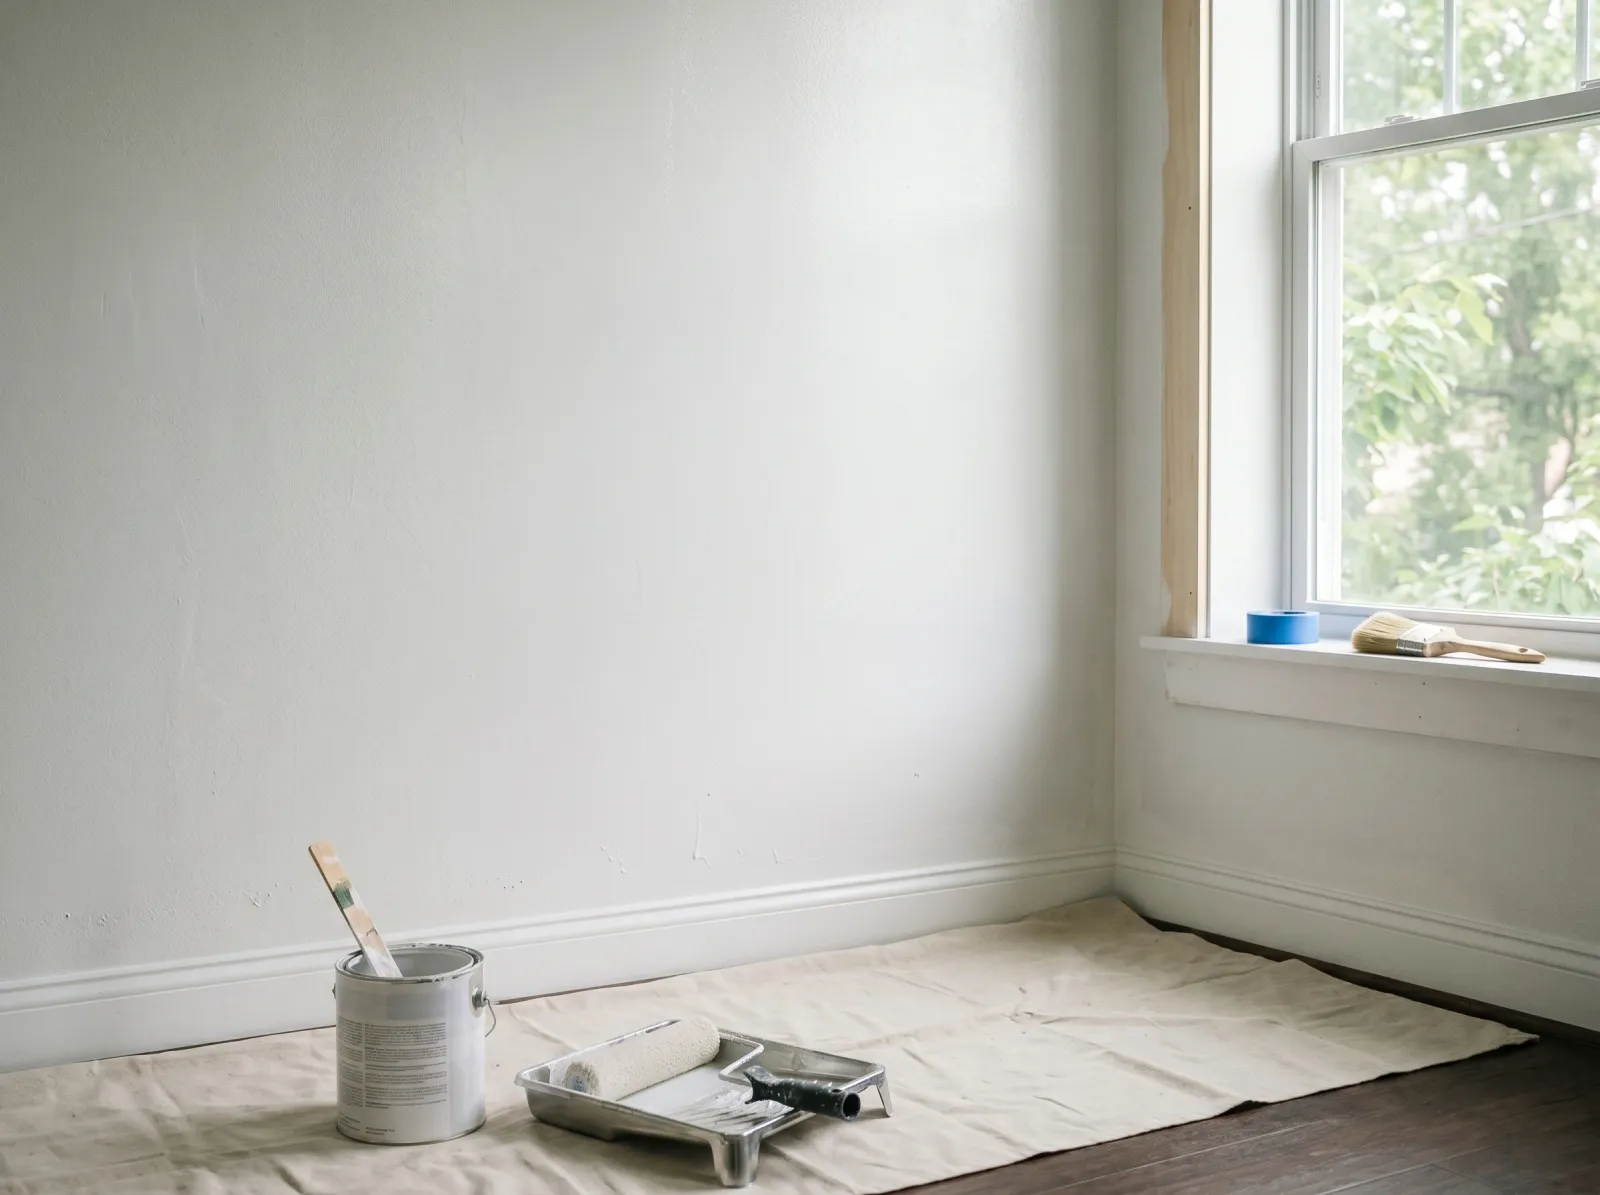 Washed, dried, and sealed. A uniform low-sheen surface that gives the topcoat something to grab.
Step 6. Repaint
Two coats. Always two coats. The primer evened the porosity, so now the wall takes paint like fresh drywall.
Standard interior wall paint in your sheen of choice works once the wall is sealed. Cut in the corners, roll while the cut-in is still wet, and don’t stop in the middle of a wall. For the full surface-prep rundown, the drywall painting guide and the plaster guide cover the substrate-specific quirks.
Safety
Ventilate while priming, especially with shellac or oil-based primer. Those carry strong solvent fumes. Wear nitrile gloves with paste removers and eye protection when scraping overhead. Never mix a bleach cleaner with vinegar, ammonia, or any other cleaner while prepping. It produces toxic gas.
How to Pick the Right Primer
| Wall condition after washing | Primer to use | Why |
|---|---|---|
| Light glue haze, sound drywall | Clear water-base sealer (Zinsser Gardz) | Locks residual paste and porous paper |
| Heavy residue you can’t fully remove | Shellac (Zinsser BIN) or oil (Cover Stain) | Non-water carrier won’t re-wet glue |
| Torn paper face, skimmed patches | Gardz, then spot-prime patches | Seals raw gypsum and feathers sheen |
| Truly clean, bare drywall | PVA drywall primer | Cheapest correct option once no glue is left |
| Stains bleeding through (old paper dye, water) | Zinsser BIN shellac | Blocks bleed and seals in one coat |
When in doubt, treat the wall as if a thin haze remains and use Gardz or a non-water primer. The cost difference over PVA is a few dollars a gallon. The cost of guessing wrong is stripping a peeled topcoat off later.
Common Mistakes
- Painting straight over the paste. The single most common one. Latex re-wets the glue and the film bubbles.
- Sealing over glue you never washed off. Primer tolerates a thin haze, not a loaded wall. Wash first, seal second.
- Using PVA primer on a glue-haze wall. It’s water-borne and re-activates the paste. Use Gardz or a non-water primer instead.
- Skipping the clean-water rinse. A soapy or paste-clouded film dries on the wall and the topcoat sits on top of it. Rinse last.
- Priming a damp wall. Drywall holds water after washing. Give it 24 hours.
- Dry-sanding the glue off. Gums the paper, loads the sandpaper, and risks lead dust on old walls.
Prevention
This problem starts at the stripping stage, not the painting stage. A few habits keep it from coming back.
- Strip the paper fully, then wash the same day. Glue is easiest to remove before it fully cures and hardens again.
- Use a paste softener, not just plain water. DIF or a wallpaper steamer breaks the bond so the residue lifts instead of smearing.
- Rinse and re-test before you ever open a primer can. The water test takes two minutes and saves a re-do.
- Seal raw drywall paper. If stripping tore the face, a clear sealer stops it fuzzing and drinking paint.
- Don’t re-paper over old paste either. New adhesive bonds to a clean wall, not a glazed one. The same prep applies.
When to Call a Pro
- Pre-1978 home where the wall under the paper is painted. Test for lead with a 3M LeadCheck swab before sanding anything. Positive means follow EPA RRP rules or hire a certified contractor. Don’t dry-sand old paint.
- Plaster walls cracking or coming loose as you strip. That’s a repair job, not a paint job. A failing plaster key needs more than primer.
- Glue that won’t release after repeated washing. Some old industrial or clay-based pastes need a steamer and real labor. If a whole room is fighting you, a pro with a steamer finishes it in a fraction of the time.
- Visible water staining or soft drywall behind the paper. That’s moisture intrusion. Find the source before you seal it under paint, the same way you’d chase down a peeling paint problem.
What’ll Bite You in Two Years
The glue you left in the corners and behind the door is the glue that comes back. It hides where the light doesn’t rake, so you skip it, prime over it, and it sits there absorbing humidity. Two summers of damp days later, the topcoat in those low spots goes soft and streaky while the rest of the wall looks fine. Wash the whole wall, not just the parts you can see clearly. The corners are where it bites.