How to Fix Paint Peeling on Laminate Furniture
Paint peeling on laminate is an adhesion failure, not a paint defect. Here is the chemistry behind why it lifts, and how to scuff, prime, and recoat so it holds.

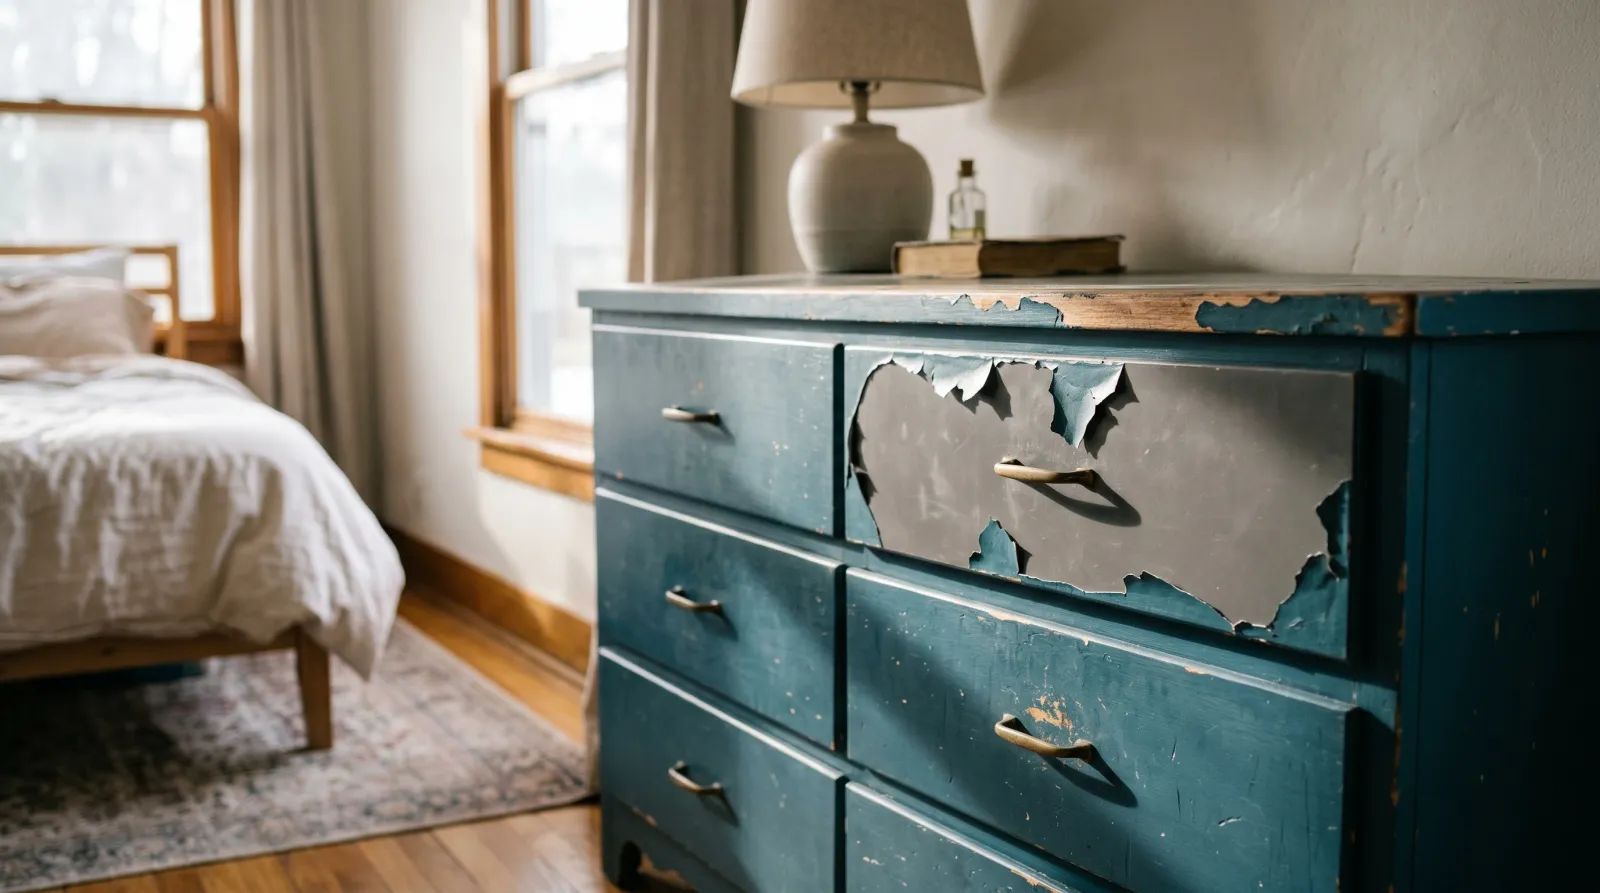
Most people make the same diagnosis when paint lifts off a laminate dresser: bad paint. It’s almost never the paint. Laminate peels because the surface gave the film nothing to hold onto, and that’s a story about adhesion, not about what was in the can.
Does This Match What You’re Seeing?
Look at how the paint comes away. The pattern tells you the cause.
- Clean sheets lifting with no paint left behind on the laminate: classic adhesion failure. The film never bonded. It was sitting on top like a sticker.
- Chips at edges, corners, and drawer pulls first: high-contact zones shear the weakest bond first. The rest of the panel is next.
- Paint peeling that takes a thin glossy layer with it: the topcoat grabbed the laminate’s factory finish, and the whole stack let go together.
- Bubbling or wrinkling rather than clean lift: that’s a different problem, usually a solvent or moisture issue. See the general peeling-paint fix for that pattern.
If you can peel a strip off with your thumbnail and the laminate underneath is smooth and clean, you have a textbook bond failure. The fix below is built for exactly that.
How Serious Is This?
Low severity. Nothing structural is wrong, and nothing is rotting. This is a cosmetic redo, and the piece is fully recoverable in a weekend.
The one thing that pushes it up a notch: if the laminate skin itself is delaminating from the MDF core underneath (lifting at the edges, soft or swollen corners from past water exposure), that’s a substrate problem, not a paint problem. Glue or clamp the skin back down, or replace the panel, before any paint goes on.
Why This Is Happening (root Cause)
Here’s the chemistry. Paint holds onto a surface two ways: mechanically and chemically.
Mechanical adhesion is the film flowing into pores and tiny valleys and then hardening, so it’s physically anchored. Think of roots gripping soil. Real wood is full of grain and open pores, which is why paint clings to it so readily.
Laminate gives you almost none of that. What furniture makers call laminate is usually a melamine-impregnated paper or a thermofused resin bonded to an MDF or particleboard core. The top layer is a cured thermoset surface, hard, sealed, and close to non-porous. There are no pores for the film to sink into and no grain to grab. A coat of paint laid straight onto that just rests on the surface.
Chemical adhesion is the second mechanism, and it’s where most laminate jobs fail. For the film to bond chemically, the binder in the paint or primer has to be compatible with the substrate and able to form attractive forces at the interface. A standard latex wall paint has no affinity for a slick cured melamine surface. So you’re left with neither mechanism: no mechanical key, no chemical grip. The film dries into a continuous sheet that’s mechanically intact but bonded to nothing. The first knock, the first drawer yank, the first cat landing, and it shears off in one piece.
That’s the reason laminate peels in clean sheets while wood almost never does. The failure isn’t in the film. It’s at the interface, where the bond was never built.
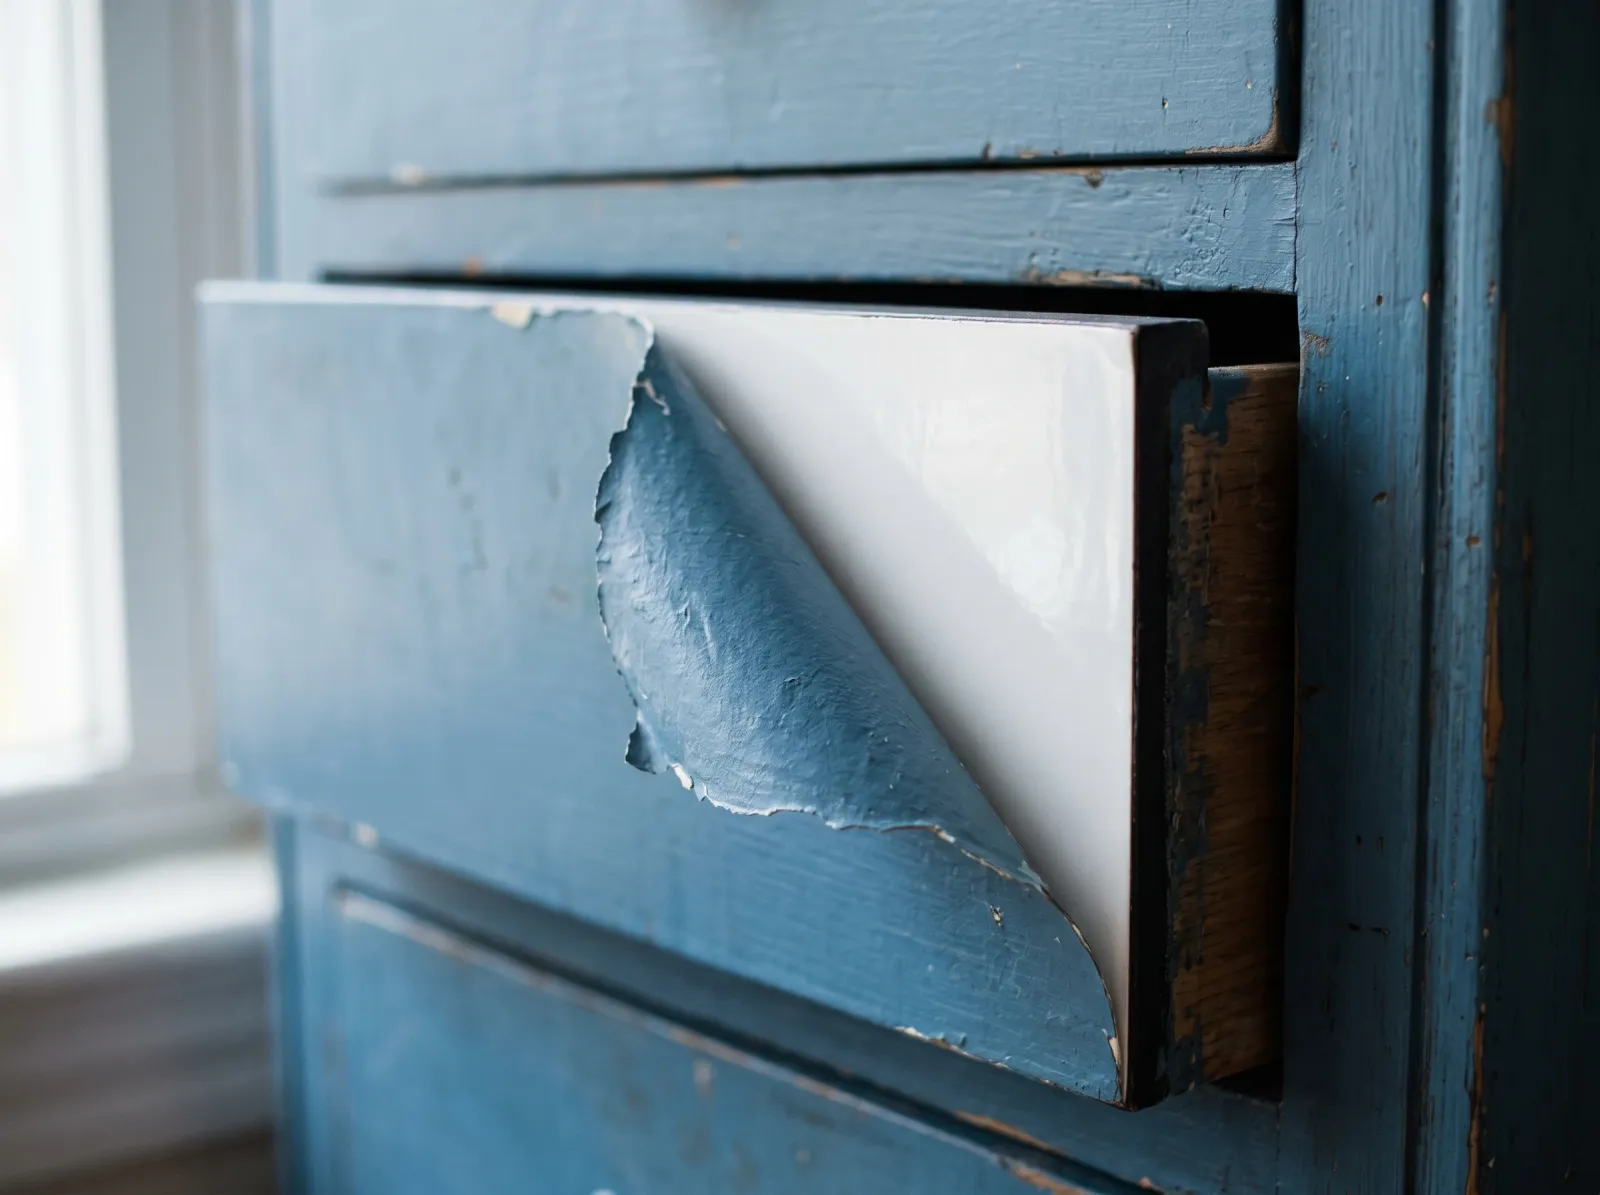 A clean lift with no paint stuck to the laminate is the signature of pure adhesion failure.
The Fix
You rebuild the bond two ways: scuff the surface to create mechanical tooth, then use a bonding primer engineered to grip chemically. Do both. Skip either and you’re back here in a month.
Step 1. Clean Off the Grease
Laminate furniture carries a film of body oils, furniture polish, and silicone from years of dusting sprays. Silicone is the enemy of adhesion; primer beads off it. Wash the whole piece with a degreaser. A TSP substitute mixed per the label, or a 1:1 dilution of a cleaner like Krud Kutter, scrubbed on and rinsed with clean water. Let it dry for 2 hours. Wipe a final pass with denatured alcohol or a 70% isopropyl wipe to pull any residue.
Step 2. Scuff to a Uniform Dull Haze
Sand the entire surface with 150 to 220 grit. Hand sanding or a sanding block, light pressure. You are not removing the laminate. You’re knocking the factory gloss off so it goes from shiny to evenly matte. The dull haze is the visual cue that you’ve created enough tooth. Don’t sand through into the MDF core; that exposes a raw, thirsty edge that primes unevenly. Vacuum the dust, then tack the surface with a microfiber cloth dampened in the same alcohol.
Step 3. Apply a Bonding Primer
This is the step that decides the whole job. Standard PVA primer is formulated to soak into porous drywall and has no way to anchor on slick laminate. You need a bonding primer, which uses a different binder chemistry built to grip hard, glossy, non-porous surfaces.
Two I trust:
- INSL-X STIX — an acrylic-urethane bonding primer made for exactly this. It films down hard and grabs glossy melamine, tile, and PVC without a deglosser. My default on laminate.
- Zinsser Bulls Eye 1-2-3 — a water-based bonding primer, widely available, slightly easier cleanup. A solid second choice on furniture that won’t take heavy abuse.
One thin, even coat. Don’t flood it; a thick primer coat dries with internal stress and can pull away from the very surface you’re trying to bond to. Recoat window is on the label, usually 1 to 4 hours. For the chemistry behind why these primers grip and PVA doesn’t, see what bonding primer actually does.
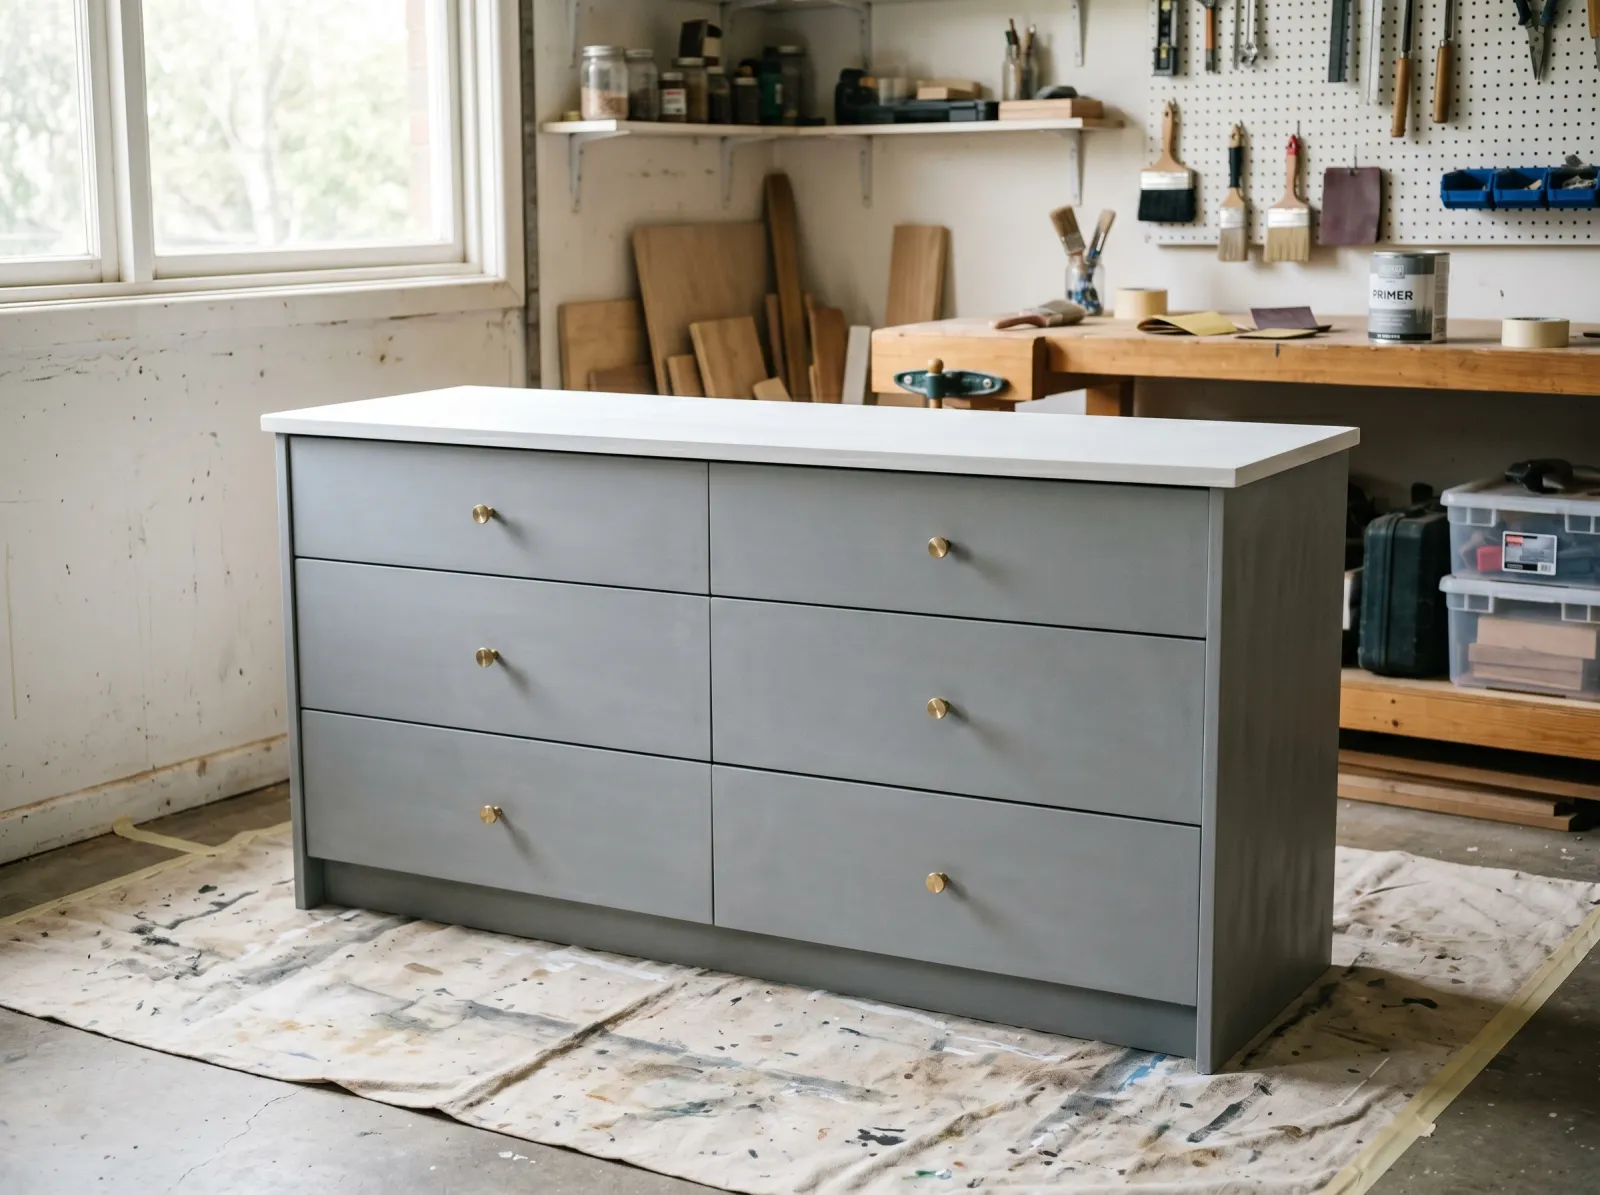 Scuffed dull, then one thin even coat of bonding primer. The mechanical tooth and the chemical grip together carry the topcoat.
Step 4. Topcoat with a Durable Enamel
Once the primer is keyed in, the topcoat sticks to the primer, not the laminate, so your paint choice is about durability rather than adhesion. Use a hard-drying acrylic or acrylic-alkyd hybrid enamel, the same category you’d use on cabinets. Benjamin Moore Advance, Sherwin-Williams Emerald Urethane, or a quality furniture enamel all cure to a film hard enough to survive drawer wear.
Two thin coats, not one thick one. Sand lightly with 320 grit between coats, vacuum, and tack. A satin or semi-gloss sheen wears better and cleans easier than a flat on furniture. The furniture paint round-up breaks down which enamels cure hardest if you want a deeper comparison.
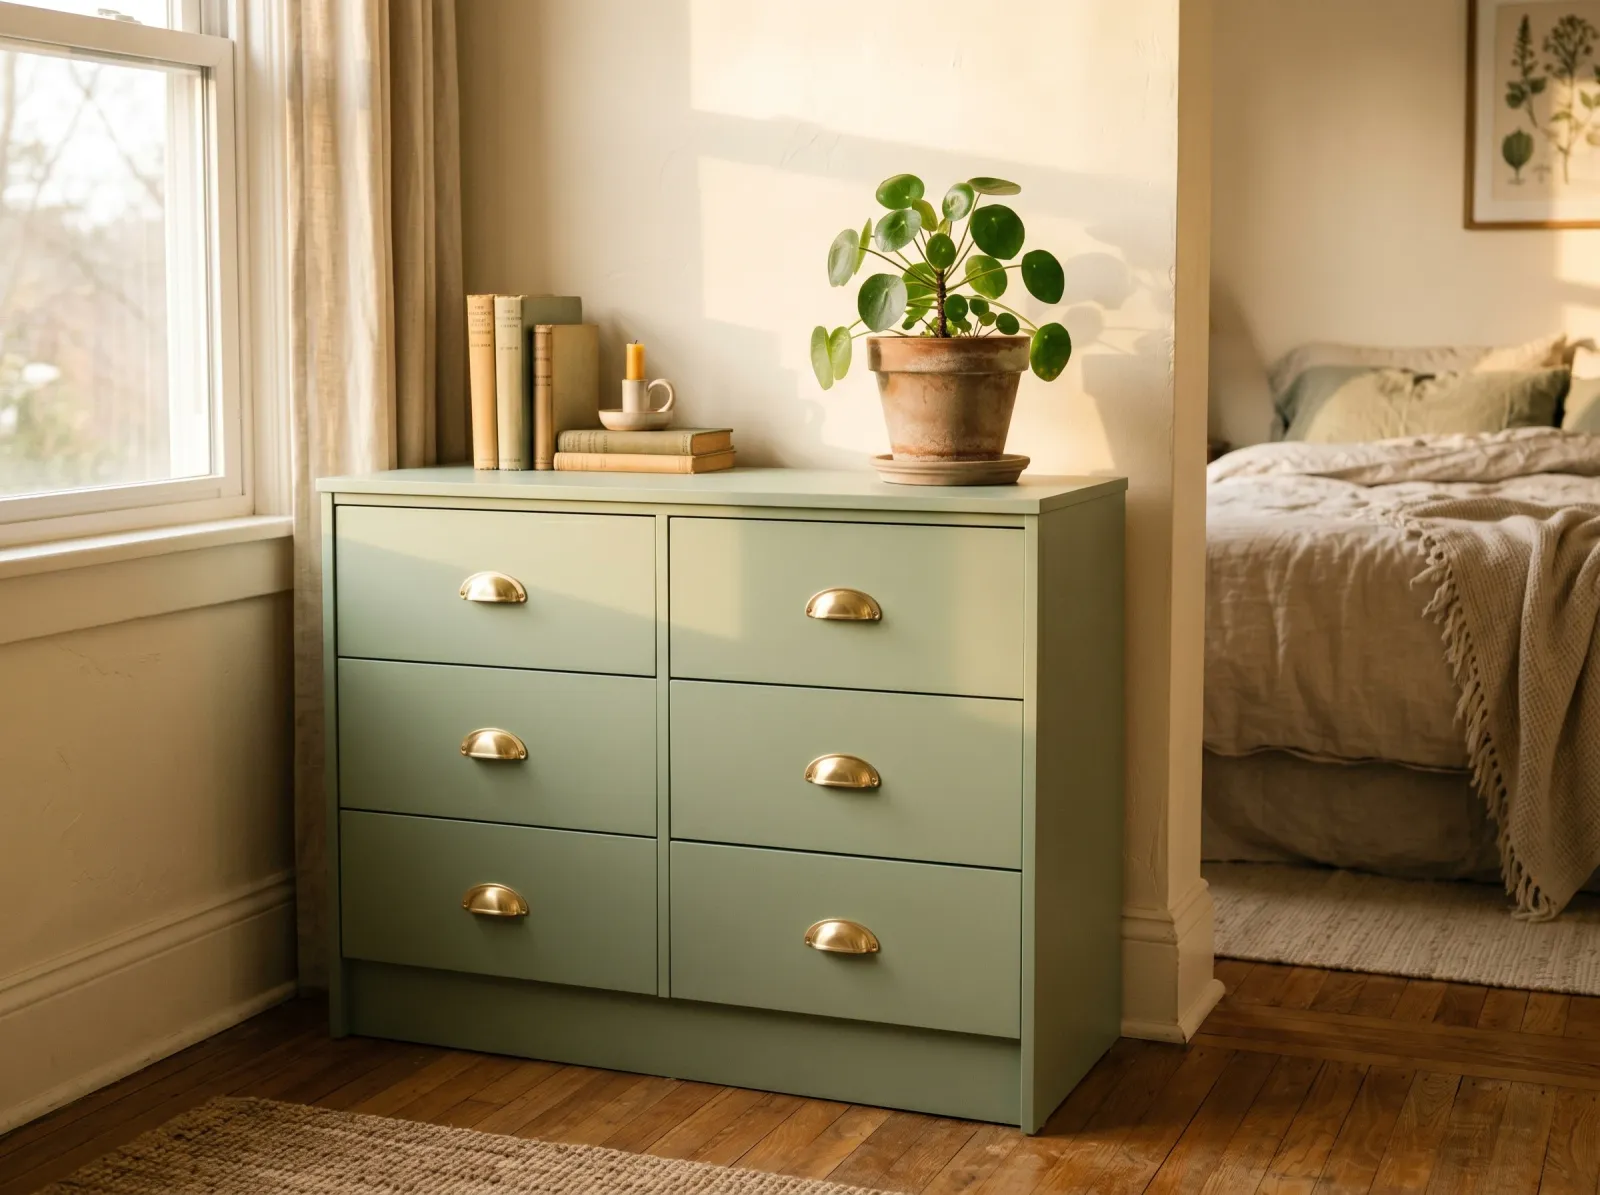 The corrected result: scuffed, bonded, and topcoated. The film now holds because it has something to hold onto.
Safety
Work in a ventilated space; bonding primers and enamels carry solvents that need air movement. Wear an N95 while sanding and nitrile gloves with the degreaser and alcohol. Never mix the degreaser or any bleach-based cleaner with ammonia or acid cleaners — that combination releases toxic gas. Rinse and dry fully between any two different cleaners.
At a Glance
| Step | What you’re doing | Why it matters |
|---|---|---|
| Degrease | TSP substitute, then alcohol wipe | Silicone and body oil defeat any primer |
| Scuff sand | 150–220 grit to a dull haze | Builds mechanical tooth |
| Bonding primer | One thin coat of STIX or 1-2-3 | Builds chemical grip the laminate can’t give |
| Topcoat | Two thin coats of hard enamel | Durability; bonds to primer, not laminate |
| Cure | 7–14 days before heavy use | Film hasn’t reached final hardness yet |
Common Mistakes
- Skipping the scuff because you used a primer. Bonding primers grip better with tooth under them. Belt and suspenders.
- Using PVA or self-priming wall paint. Neither has a mechanism to hold on slick laminate. This is the single most common reason a laminate repaint fails.
- One thick primer coat. It dries with built-in stress and lifts. Thin and even beats thick and gloppy every time.
- Putting the dresser back in service after a day. Dry to touch is not cured. Early abrasion shears a film that hasn’t finished cross-linking.
- Painting over delaminating or water-swollen laminate. Fix the substrate first. Paint won’t glue a lifting skin back down.
Prevention
The bond you build now is what keeps it from peeling again, so the prevention is mostly in the prep you just did. A few habits extend it:
- Let it cure fully before heavy use. Two weeks for a high-traffic dresser. The film keeps hardening the whole time.
- Use coasters and felt pads on the painted top. Standing water and dragged objects abrade even a well-bonded enamel.
- Re-coat high-wear edges every few years. Drawer pulls and front edges take the most contact and will dull first. A light scuff and a fresh coat keeps them ahead of failure.
If you’re starting a fresh laminate piece rather than fixing a failed one, the full laminate furniture painting guide walks the prep from a bare factory finish. And for general furniture refinishing across wood and laminate, the repaint old furniture guide covers the finish-identification step first.
When to Call a Pro
- The laminate skin is delaminating or the MDF core is swollen and soft from water. That’s furniture repair, not painting.
- The piece is a large built-in or a wall of cabinets where spray application and proper masking matter for the finish quality.
- You’ve already redone it once with a bonding primer and it peeled again. Something else is going on, usually a contaminant in the surface that needs a stronger solvent prep than a homeowner should run indoors.
Most laminate peel jobs are none of these. They’re a weekend, a quart of bonding primer, and an honest scuff. Build the bond the surface can’t give you on its own, and the film stays exactly where you put it.