How to Fix Drywall Nail and Screw Pops Before Painting
Fixing nail pops before paint means re-anchoring the board, not hammering the head back. Re-screw, kill the old fastener, fill with setting compound, prime, then paint.

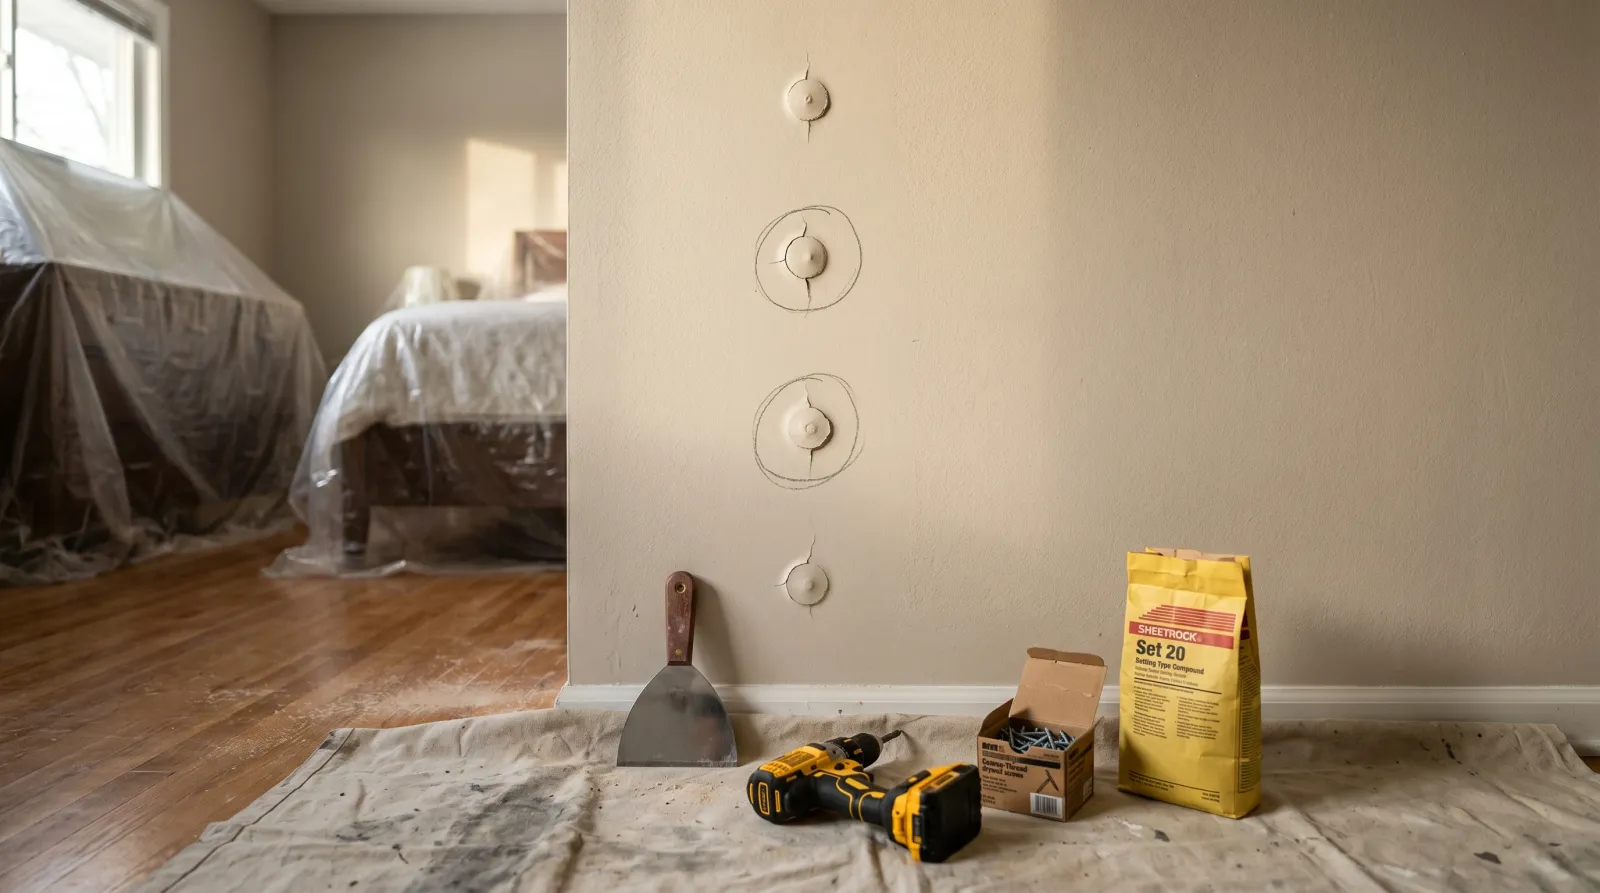
You’re about to repaint a room and the walls are dotted with little round bumps. Paint won’t fix them. Paint locks them in. A pop is a fastener that’s worked loose, and rolling color over it just buries the crack ring so the next pop tears a bigger flake. Fix every one during prep, before the primer goes on.
Does This Match What You’re Seeing?
Walk the room under a work light held flat to the wall. Raking light throws a shadow off every bump and shows you what you’re dealing with.
- True nail pop. Round bump about a dime to a nickel across, a hairline crack ring around the rim, sometimes a rust-colored dot in the center where the nail head pushed through. Common on ceilings and on walls 8 to 15 years after the house was built.
- Screw pop. Same bump, but look for a tiny cross or star in the center where the bit backed out. More common in builds from 2005 on, when screws replaced nails.
- Tape lift or blister, not a pop. No fastener under it, soft to the touch, sometimes a long ridge instead of a round bump. That’s joint tape letting go or a paint film failure, and it patches differently.
- Brown ring on a ceiling bump. Stop. That’s water, not a fastener. Find the leak above, dry the cavity, then come back.
If you only catch the pops once primer is on, you’ve wasted a coat. Find them now while the wall is bare and the light is honest.
 Raking light from a side window throws a shadow off every pop. Circle them in pencil before you mask anything off.
How Serious Is This?
Cosmetic. Drywall doesn’t hold the house up, and a handful of loose fasteners doesn’t change that. The board is still pinned by dozens of other nails along the same stud.
What it is, is a forever problem if you skip the cause. Roll fresh paint over a pop and you’ve reset the clock to zero. The stud moves next summer, the head walks forward, and the bump comes back through your new color with the crack ring a little wider than before. Do the prep once, do it right, and you won’t see that wall again for a decade.
One pattern bumps the urgency. A whole vertical line of pops on the same stud means that stud is moving more than its neighbors. Re-anchor the entire line while the wall is open, and check the bay for soft spots or staining before you commit paint to it.
Why This Is Happening (root Cause)
The framing behind your drywall is wood, and wood moves. A 2x4 cut green at the mill loses 5 to 8 percent of its width over the first heating season after the house goes up. Even a kiln-dried stud cycles a percent or two every year as indoor humidity swings from 50 to 60 percent in August down to 15 to 25 percent in February with the furnace running.
A drywall nail is a smooth shank driven into that moving wood. When the stud shrinks, the nail doesn’t shrink with it. The board is pinned tight by the head, so as the stud pulls back the nail rides forward relative to the drywall paper. Over a few seasons the head walks through the paint film. That bump is the pop.
Screws fail the same way, slower. The threads grip wood better than a smooth shank. But a cheap screw that bottomed out below the paper face during install has no paper holding it, only crumbly gypsum, and it rides back out too.
The original fastener has lost its grip on the stud, on the paper, or both. Pushing it back doesn’t restore either. The new fastener has to bite fresh wood and intact paper, an inch away from the old hole, not back into it. Skip that and your fresh paint job inherits the same problem the last one had.
The Fix
Do this before you mask, before you prime, before anything. The whole sequence is re-anchor, kill the old head, fill flat, sand, prime.
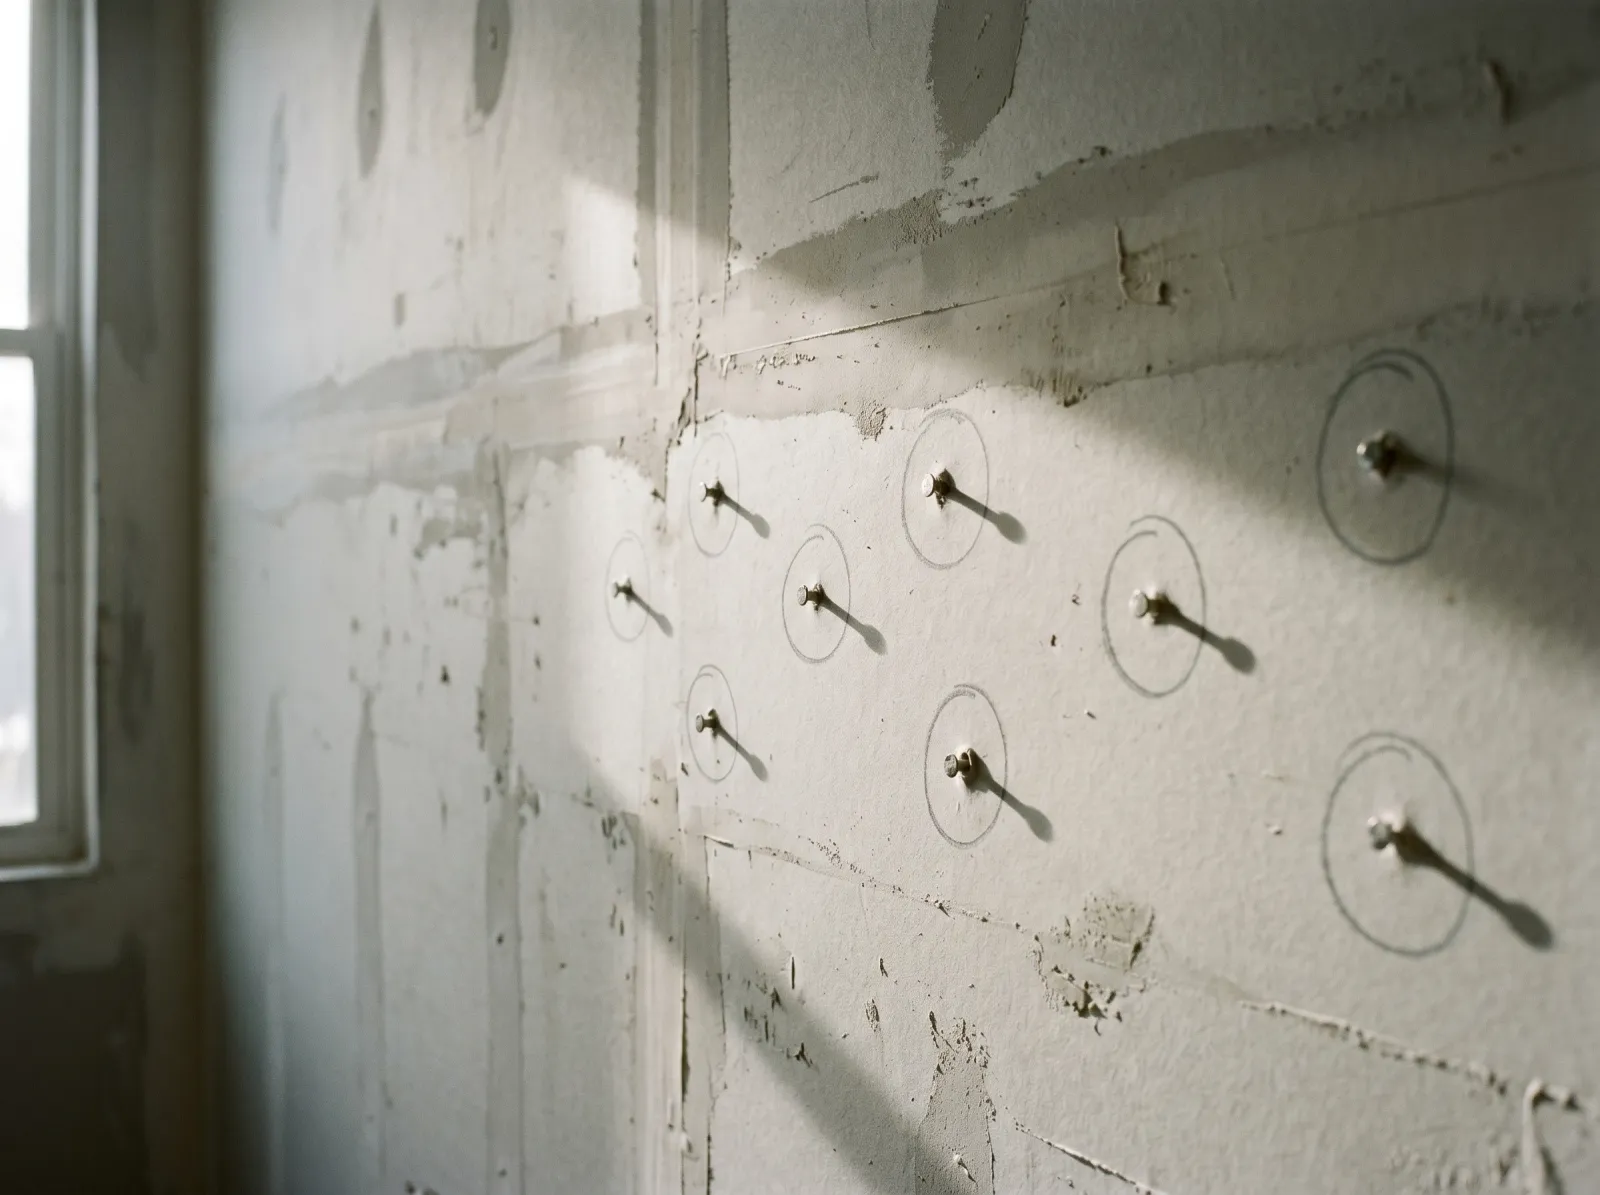
Step 1. Find the Stud and Mark Each Pop
Run a stud finder over the pop. The fastener sits dead-center on a stud or a ceiling joist. If the finder won’t read clearly through old plaster-over-drywall or heavy texture, push a pin into the wall just above the bump. A sixteenth-inch of give means gypsum only. A hard stop means you’ve hit wood.
Mark a pencil spot one inch above the pop and one inch below it, both over the stud. On a 2x3 garage wall where you only catch wood for half an inch on each side, one screw above is enough.
Step 2. Drive Screws Beside the Old Fastener
Use 1-5/8-inch coarse-thread drywall screws for 1/2-inch board, or 2-inch screws for 5/8-inch board (most garages and ceilings). Coarse thread, not fine. Fine thread is for metal studs and spins without grabbing in wood.
Set your screw gun to dimple the head just below the paper face, not through it. The paper has to stay intact around the screw or the gypsum crumbles and the screw rides right back out. Aim for a dimple about 1/32-inch deep. If you can feel a crater with your fingertip, you went too far. Back it out and drive a fresh one a half-inch over.
Two screws per pop, one above and one below.
Step 3. Kill the Old Fastener
Two ways to deal with the popped head. Pick by feel.
If the head sits barely proud, a sixteenth-inch or less, set it. Hold a nail set on it and give one moderate tap. Push the head about 1/16-inch below the paper, breaking the paint film clean. Don’t pound it or you’ll crater the gypsum into a real hole.
If the head sits higher, or has already torn the paper, scrape it off. A sharp 1-inch chisel or a stiff putty knife shears the head flush at the gypsum surface. Sounds crude. Works. The shank stays in the stud, the new screws hold the board, and you’ve got a clean flat spot to fill.
Either way, give the spot a quick pass with 150-grit to knock off the broken paint ring and any loose paper. Light pressure, roughing it, not removing material.
Step 4. Fill With 20-Minute Setting Compound
Setting-type joint compound, USG Easy Sand 20 or 45, mixed from the bag. Not premix tub mud. Setting compound cures by chemistry in the time on the bag regardless of humidity, and it barely shrinks. Premix takes 24 hours, shrinks as it dries, and on a fastener fill you’ll watch the patch sink overnight and crack your fresh paint.
Mix a small batch, half a cup does a dozen pops. Stiff peanut-butter consistency, no dry lumps. The 20-minute working time is real. After 18 minutes it turns gummy.
First pass, 6-inch knife: skim a thin coat across the pop, the two new screw dimples, and the scraped or set head. Feather 3 to 4 inches past the patch in every direction. Don’t pile it on. Let it set 25 minutes (set, not dry, that’s the chemical cure).
Second pass, 10-inch knife: a thinner coat over the first, feathered 6 to 8 inches out. The wider the feather, the more invisible the patch reads under sidelight once paint is on. A 4-inch feather catches light like a halo. An 8-inch feather disappears.
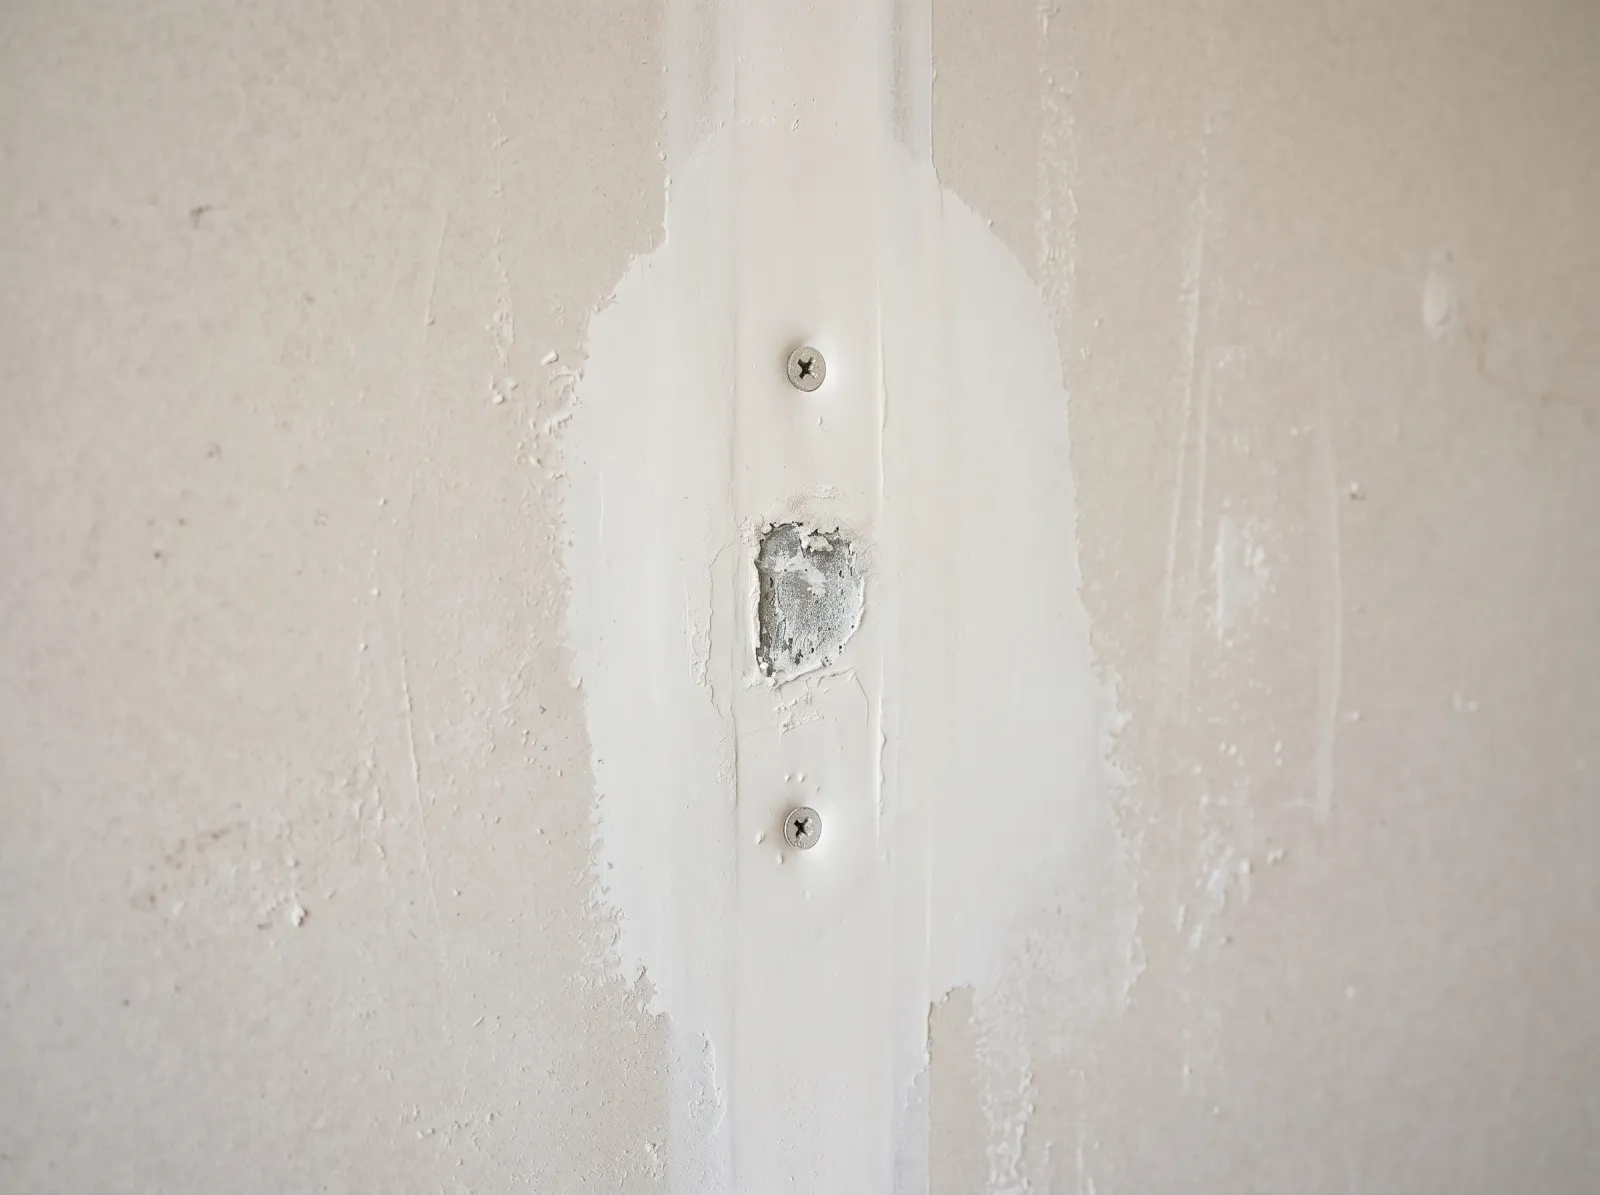 Two screws above and below the old head, the fastener spot scraped flat, and a wide feathered skim of setting compound. This is what re-anchored and ready-to-sand looks like.
Step 5. Sand Flush
Sand once the second pass is fully set. 220-grit on a sanding sponge, light pressure. Run your hand over the spot with your eyes closed. If you can feel a ridge or a dish, you’ll see it under paint. Knock it flat now while sanding is free.
Step 6. Spot-Prime Every Patch
This is the step homeowners skip, and it’s the one that makes patches show. Bare setting compound is thirsty. It sucks the binder out of wall paint and flashes dull, so every patch reads as a flat circle through your topcoat the second morning light hits the wall.
One coat of PVA drywall primer over each patch, or a shellac-based primer like Zinsser BIN if you scraped down to a stained or rust-marked spot. PVA matches the porosity of the surrounding wall. The patch and the wall then drink your color at the same rate, and the repair vanishes. Give the primer its full dry time on the can before topcoat.
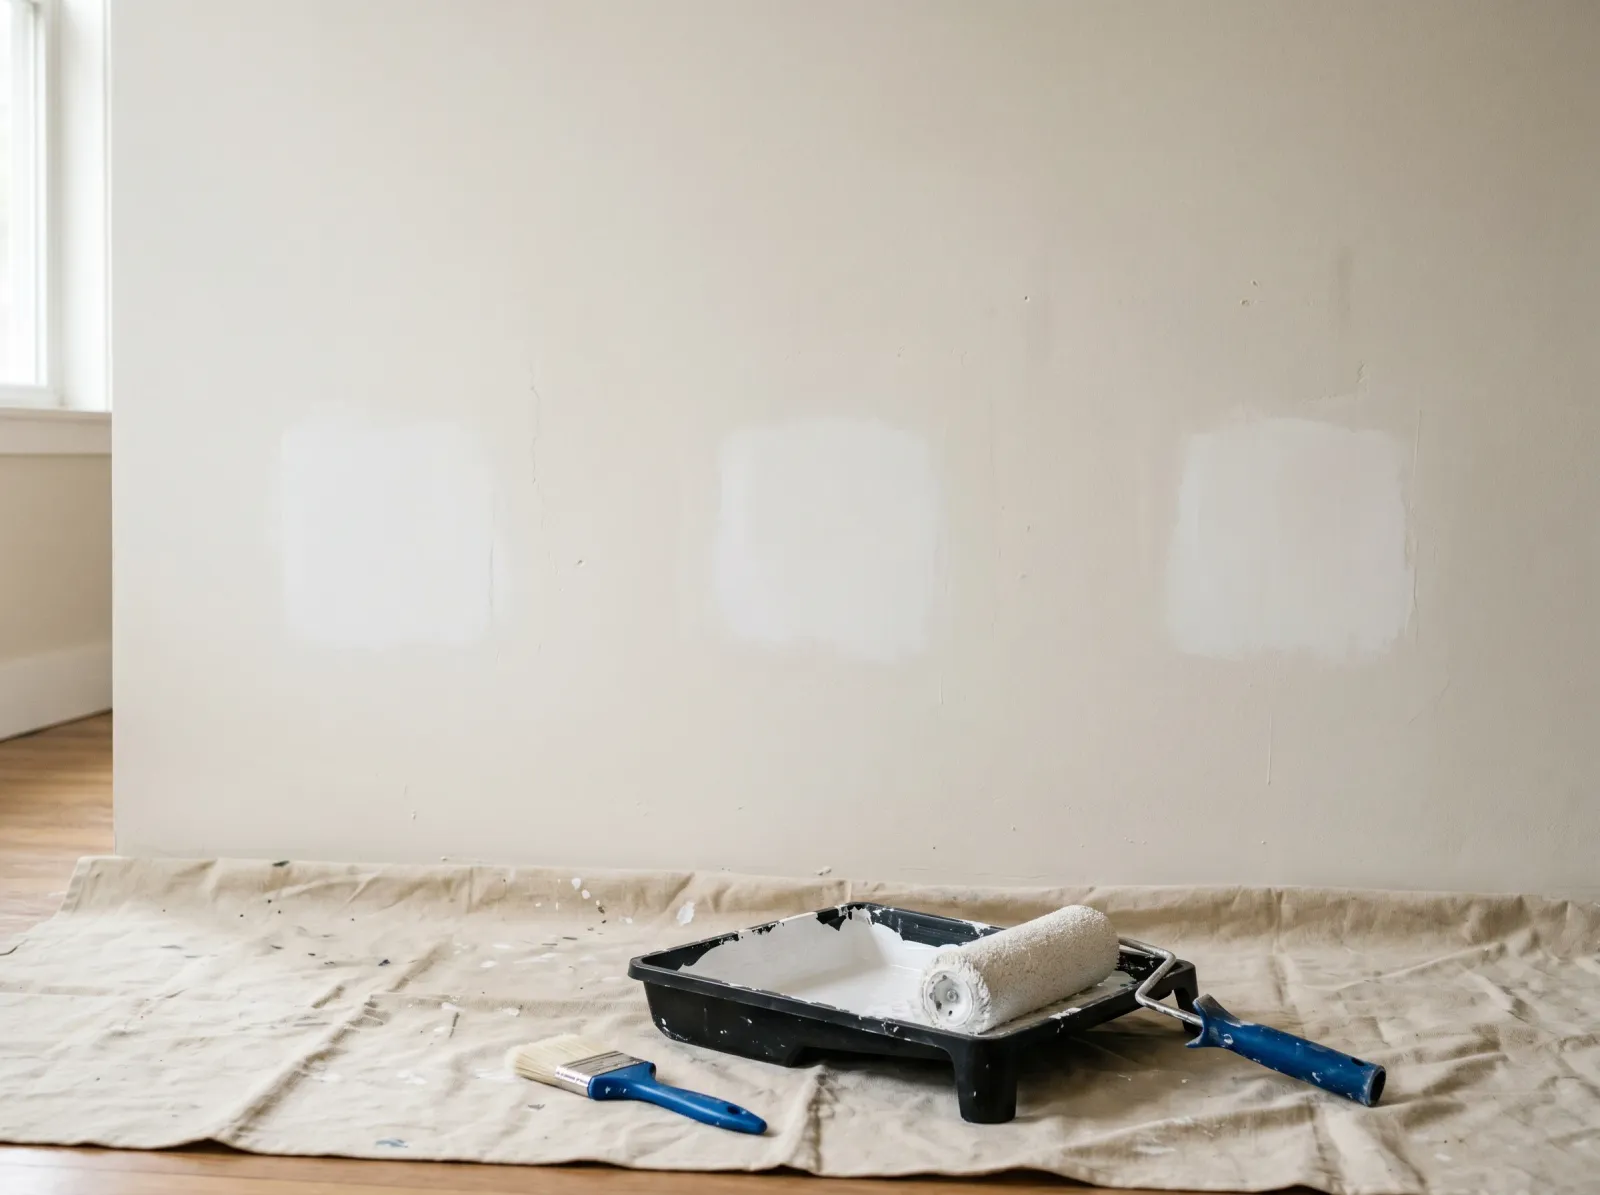 Each patch sealed with primer so it drinks paint at the same rate as the wall around it. Now the room is ready to roll.
Step 7. Paint the Wall
Two coats, corner to corner. Don’t try to spot-paint just the patched zone. Touch-up over an old finish almost never blends, especially on anything above a flat sheen, and you’ll trade a patch ring for a touch-up ring. Roll the whole wall in one session. For the full painting sequence once prep is done, see how to paint a whole room.
Nails vs Screws at a Glance
| Nail pop | Screw pop | |
|---|---|---|
| What you see | Round bump, rust dot center | Round bump, tiny cross or star center |
| Common in | Homes built pre-2000 | Builds 2005 and newer |
| Why it failed | Smooth shank rode out as stud shrank | Bottomed out below paper, no grip |
| Pull it or leave it | Leave the shank, scrape the head | Leave it, scrape or re-set the head |
| Re-anchor with | Two coarse-thread screws | Two coarse-thread screws |
Either way the cure is the same: new coarse-thread screws into fresh wood, the old head killed, the spot filled with setting compound. Don’t bother pulling a nail unless it’s loose enough to grab with pliers without tearing the paper. Yanking it usually makes a hole bigger than the bump you started with.
Texture Match Before Paint
If the wall is smooth, a flat sanded patch disappears under primer. Skip this section.
If the wall has texture (orange peel, knockdown), a smooth patch shows. Spot-prime the dry patch, then hit it with a matching aerosol texture from the hardware store. Spray a test card from 18 inches first. A fresh can spatters heavier than what’s on your wall, so adjust distance until it matches. For knockdown, wipe the high points flat with a wide knife about 60 seconds after spraying. Let the texture dry 4 hours, prime over it again, then topcoat.
Popcorn ceilings don’t spot-blend well. Patch flat, prime, and repaint the whole ceiling rather than chasing a match.
Common Mistakes
- Hammering the nail back and painting over it. That’s the exact fix that already failed. It pops again next summer, now under your fresh coat.
- Filling without adding a screw. Covers the bump for a few months, then the fastener moves and your new patch cracks.
- Using premix mud on the fill. It shrinks overnight and sinks. Setting compound for fastener fills, every time.
- Feathering too narrow. A 3-inch feather reads as a halo under sidelight. Go 6 to 8 inches on the second pass.
- Skipping the spot-prime. Bare compound flashes dull and every patch shows through the color. One coat of PVA fixes it.
- Spot-painting the patch instead of the whole wall. Touch-up rarely blends. Roll the wall corner to corner.
When to Call a Pro
- Pops follow a line on a wall that’s also bowed, sloped, or cracking diagonally. The framing is moving more than seasonal, and a cosmetic fix won’t hold.
- A brown ring, soft drywall, or a musty smell at the pop. Water above the fastener. Find the leak before any paint touches the wall.
- Pre-1978 home with paint chipping around the pops. Lead-test the chips before you scrape or sand. Test kits run about $15. Positive result means RRP-equivalent practices or a certified contractor.
- A whole-ceiling pop epidemic, dozens of fasteners in one room. Re-screwing the entire ceiling on a 12-inch grid is faster than chasing pops one at a time, and a drywall finisher charges a couple hundred.
What’ll Bite You in Two Years
Roll paint over a pop without driving a new screw and the same bump is back next August, this time poking through your new color with a wider crack ring. By the third season the paper face tears and your dime-size bump is a quarter-size hole. The fastener has to grab fresh wood, or you’re just repainting the problem. Add the screws the first time, while the wall is bare and the work is cheap. For the broader prep that makes any repaint hold, walk through the drywall painting guide before you mask off the room, and read what primer actually does so you don’t skip the one coat that hides every patch.