How to Fix Holes in Plaster
Fix holes in plaster the right way: match the repair to the size, bind the edges, fill in layers, and seal so the patch doesn't crack or flash through paint.

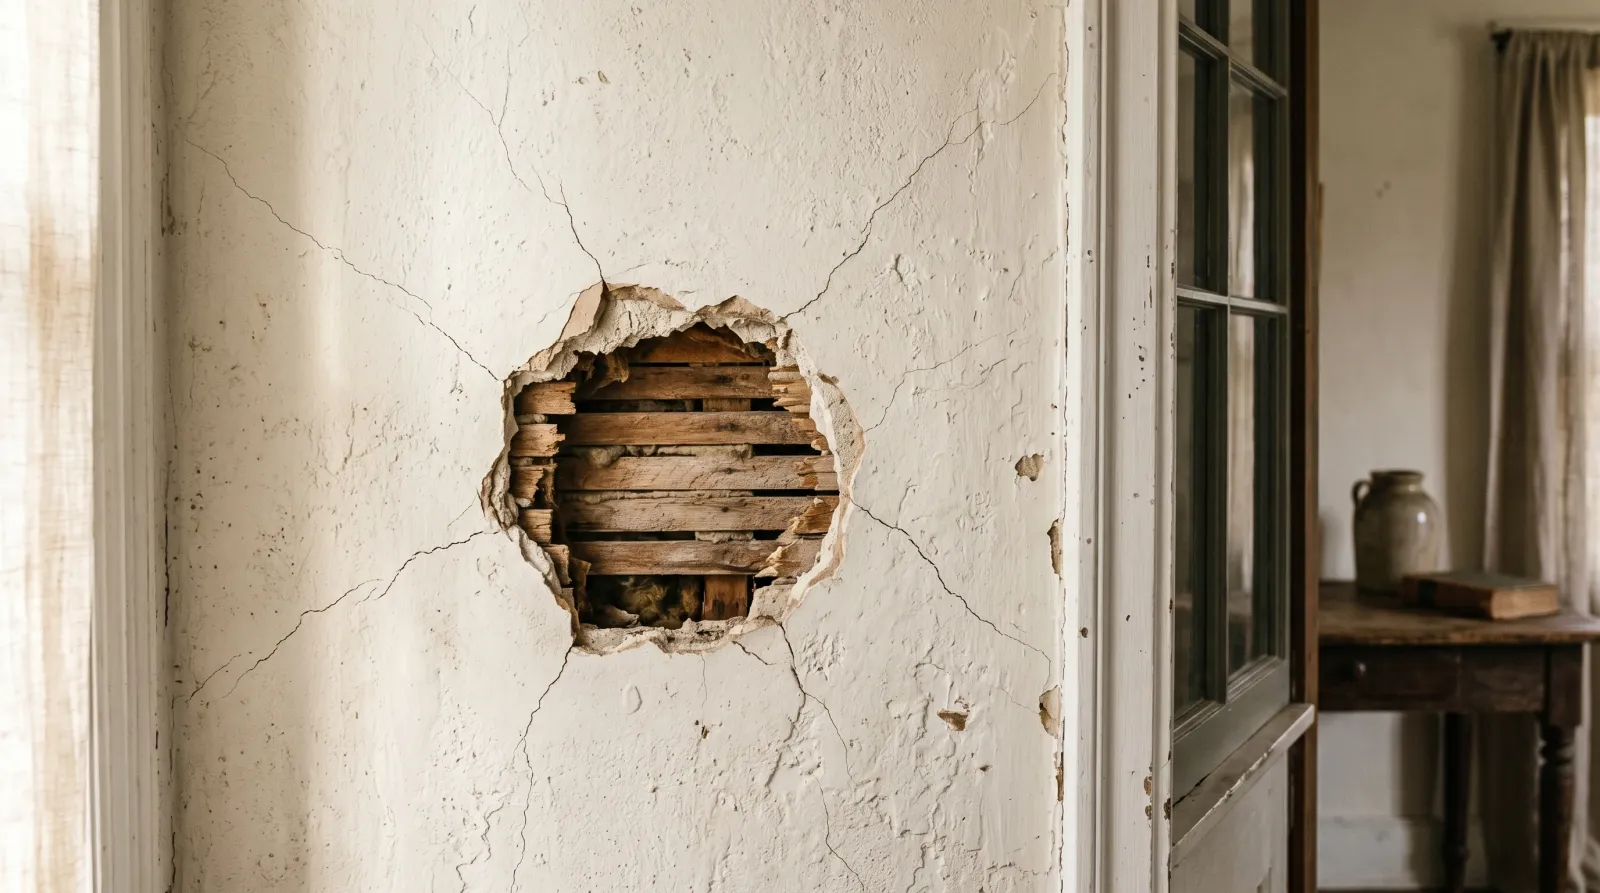
A hole in plaster is a different animal than a hole in drywall. The wall is harder, older, and held to wood lath by little fingers of plaster that snap when they feel like it. Fill it wrong and the patch cracks, sinks, or flashes through your paint.
TL;DR
- Match the fill to the damage. Spackle for nail holes, setting compound or patching plaster for anything you can see lath through.
- Bind the dry edges first with water mist or a PVA bonding agent, or the patch lets go at the seam.
- Fill in layers, not one glob. Hard setting compound for structure, lightweight compound for the finish skim.
- Re-anchor a loose field with plaster washers before you fill, or the crack comes right back.
- Prime every patch and recoat the whole wall. Bare plaster flashes; spot-painting leaves a halo.
Does This Match What You’re Seeing?
Match the repair to the damage. Look at the hole before you open a bag of anything.
- Nail holes, screw holes, small dings: cosmetic. Lightweight spackle and a sanding sponge.
- A gouge or chunk missing, plaster still solid around it: fill in layers with patching plaster or setting compound. No lath exposed.
- Fist-sized hole, brown wood lath showing through: structural fill. You’re rebuilding the plaster off the lath, or dropping in a drywall plug.
- Cracks radiating from the hole: the field is moving. Bridge with mesh tape before you fill, or the crack telegraphs back through.
- Plaster bulging, soft, or hollow-sounding around the hole: the keys are broken and the section has pulled off the lath. The hole is the least of it.
- Brown or yellow staining at the edges: water got in. Find the leak first, then fix the hole, then block the stain with shellac primer.
If it sounds hollow when you tap near the hole, the plaster is detached from the lath. That’s not a fill job. That’s a re-anchor job, covered below.
How Serious Is This?
A few nail holes are a 20-minute job. A clean gouge with solid edges is a same-weekend fix. Three things push it higher:
- Exposed lath over a wide area: you’re rebuilding the plaster, not patching it. Plan two or three days for the layers to cure.
- Loose, bulging field: the section has to be re-secured to the lath or cut out. Skip that and your patch rides on a moving wall.
- Pre-1978 home with painted plaster: the paint is probably lead. Test before you sand or chip anything. EPA RRP rules apply.
Why This Is Happening (root Cause)
Plaster on lath is troweled over thin wood strips with gaps between them. Wet plaster squeezes through the gaps and slumps behind the lath. Those slumped fingers are the keys, and they’re the only thing holding the wall up once it cures.
The keys are the weak point. A door slammed for fifty years, a house settling, a joist flexing, water from a leak softening the plaster: any of it snaps keys off the lath. Once enough go, the field sags, cracks, and a chunk lets go. That’s your hole.
So the visible hole is usually the end of a longer story. Sometimes it’s simple: a doorknob punched through, one clean wound, easy fix. Other times the hole is where a whole detached section finally surrendered, and the plaster around it is still loose. Fill that and you’ve patched a symptom while the cause keeps working.
Press the heel of your hand around the hole and push. Sound plaster doesn’t move. If the field flexes or you hear a gritty crunch, keys are broken back there and you need to re-anchor first. For why old plaster behaves differently from drywall, see the guide to painting plaster.
The Fix
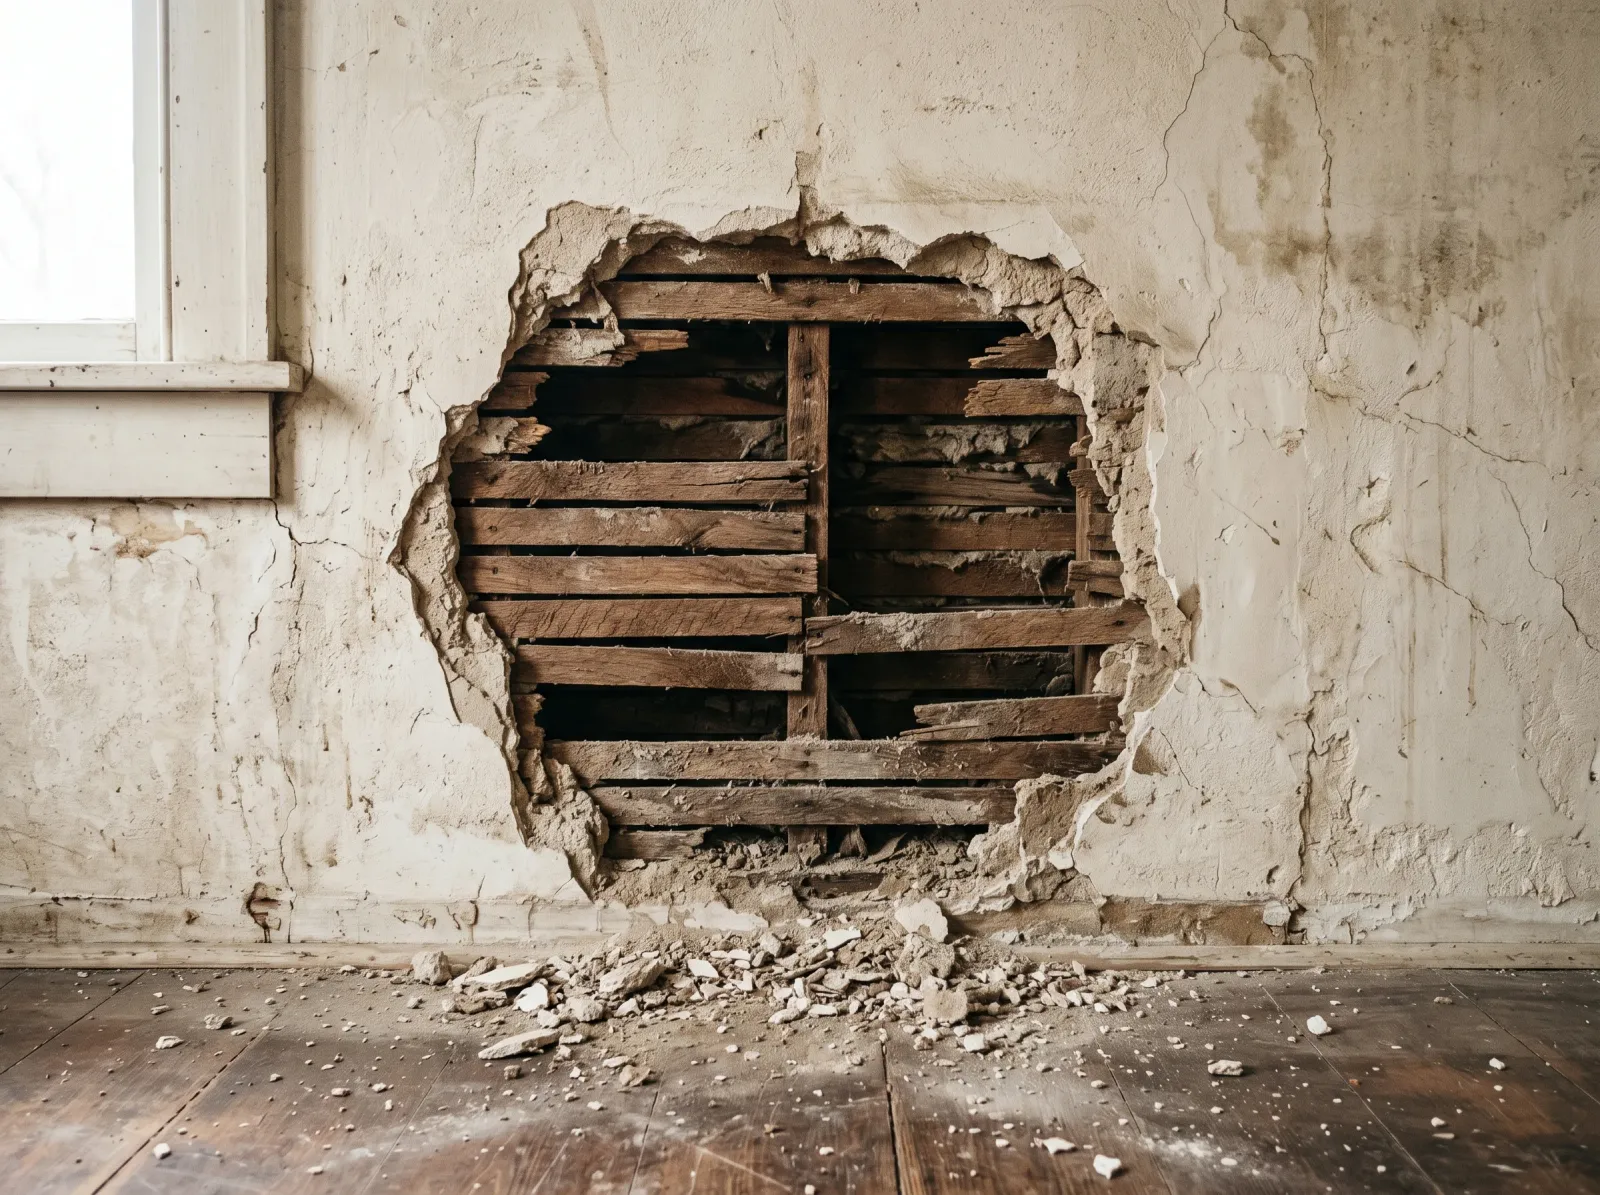 Brown lath showing through a hole means you’re rebuilding plaster off the wood, not just filling a dent.
Step 1. Clean Out the Hole and Re-Anchor If It’s Loose
Pull off anything crumbling with a putty knife. Whatever wants to come away will come away now or later, so do it now. Vacuum the cavity.
If the field around the hole moves, set plaster washers (thin perforated metal discs) every few inches and drive a 1-1/4-inch drywall screw through each one into the lath. The washers pull the loose plaster back tight to the wood. Tighten until the disc sits just below the surface.
Don’t fill anything until the wall stops moving under your hand.
Step 2. Bind the Edges
Old plaster edges are dry and dusty, and fresh patch material won’t bond to dust. Mist the broken edges with water, or brush on diluted PVA bonding agent like Plaster-Weld and let it get tacky (20 to 30 minutes) before you fill. This one step is the difference between a patch that holds and one that pops loose at the seam in a year.
For cracks running off the hole, press self-adhesive fiberglass mesh tape over each one so the next coat doesn’t crack along the same line.
Step 3. Fill in Layers With the Hard Stuff
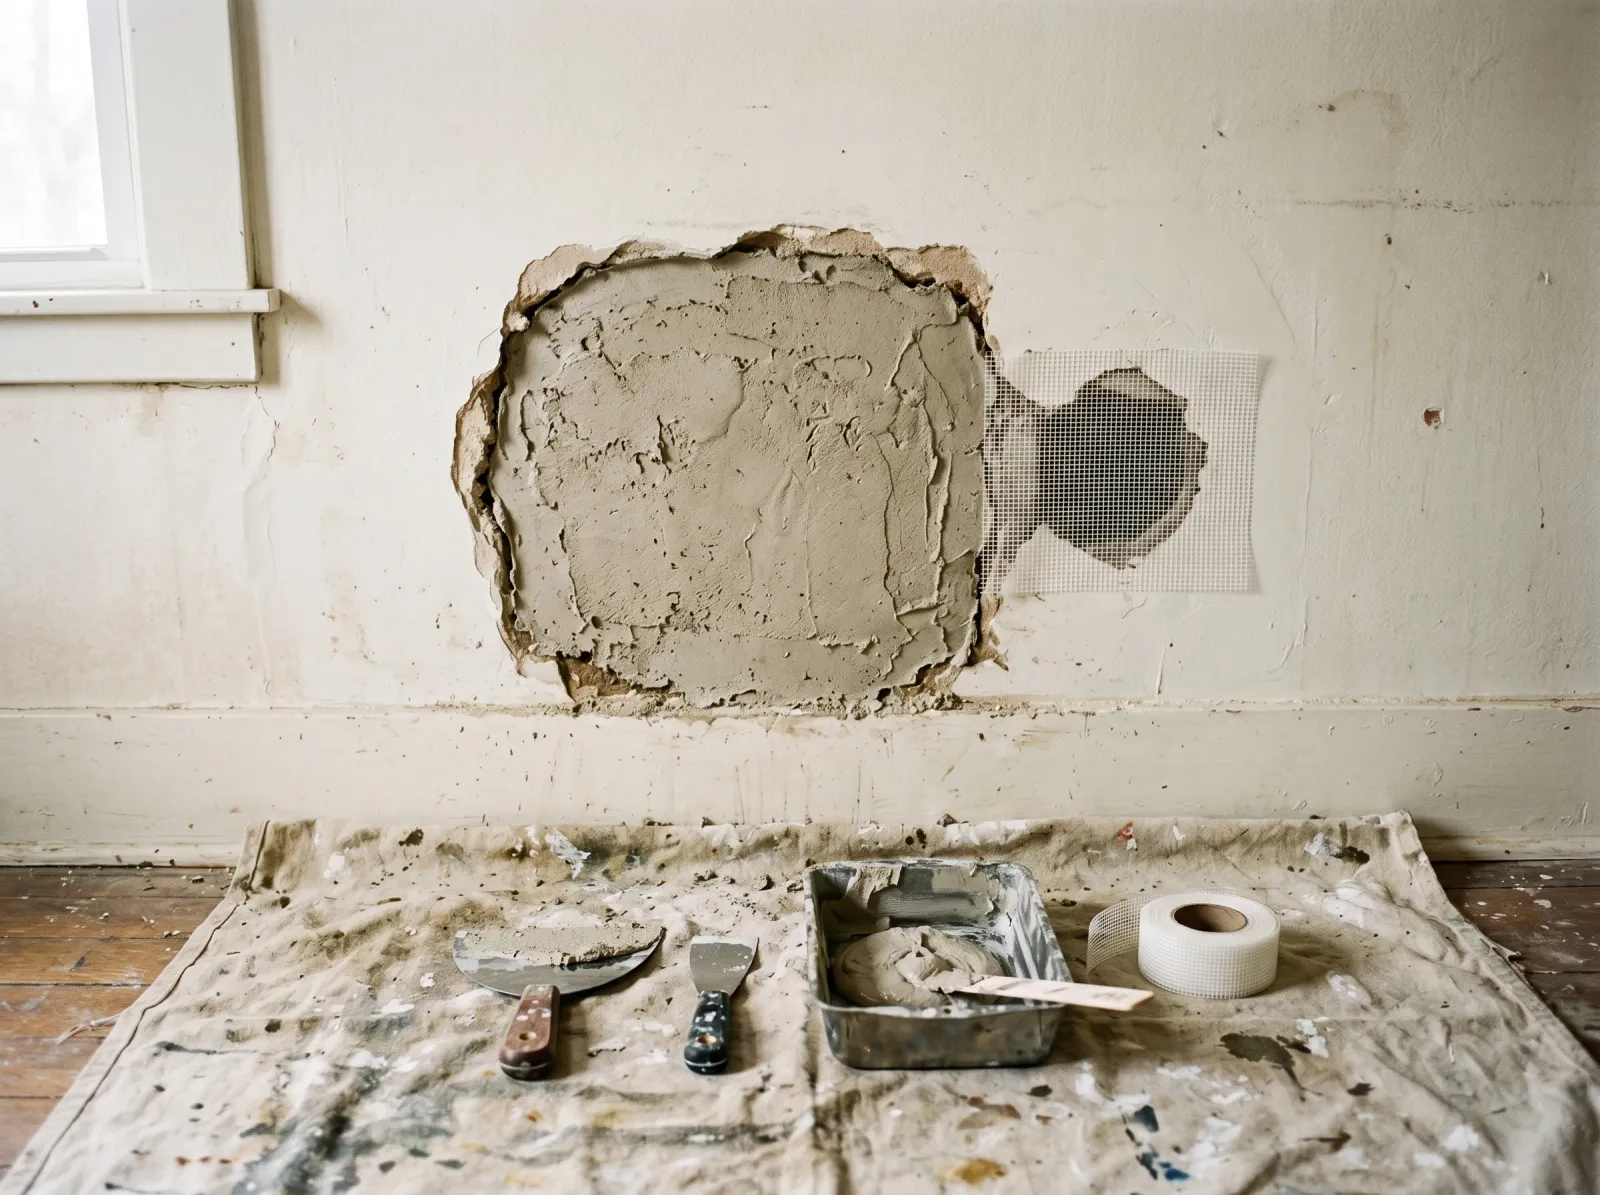 Base coat sits below the surface on purpose. Build it up in passes; one thick glob cracks and shrinks.
For a hole exposing lath, use a setting-type compound (the bag kind you mix, like Durabond or Easy Sand 45) or patching plaster. These cure hard and barely shrink. Don’t reach for premixed joint compound or spackle here; they shrink and sink.
Push the first coat in hard so it squeezes through the lath gaps and forms new keys. Fill to about two-thirds depth and let it set; Easy Sand 45 gives you 30 to 45 minutes before it kicks. Build a second coat nearly flush, leaving a hair below the surface for the finish skim.
For a big hole, screw a drywall plug into the cavity (backer strip behind the lath, drywall screwed to it), then plaster the seams with mesh and setting compound. Faster than rebuilding thick plaster off bare lath, and it holds. The drywall hole fix walks through the backer-and-plug method.
Step 4. Skim and Finish
Once the structural fill is hard, skim flush with lightweight or topping compound. This is where the soft, easy-sanding material earns its place. Two thin skim coats beat one thick one. Feather the edge a few inches past the patch so the transition disappears.
Most old plaster is troweled smooth. If yours has a sand float or knockdown, work the texture into the last skim with a sponge before it sets.
Step 5. Sand Flush
Let the final skim dry fully (overnight for thick areas). Sand with 120 grit, then 150, on a sanding sponge. Light pressure. Run your fingertip across the patch with a work light raking sideways; your finger and the shadow find ridges your eyes miss. Knock down anything you feel. Wipe with a damp microfiber.
Don’t sand into the surrounding paint any more than you have to. For what grit does what, see the sandpaper guide.
Step 6. Prime, Then Paint
 Primed and flush. A bare patch drinks topcoat unevenly and flashes as a dull spot, so seal it first.
Fresh patch material is thirsty and porous. Spot-prime every patch with a drywall PVA primer so it doesn’t suck the binder out of your topcoat and flash as a dull patch. Where there were water stains, use a shellac-based stain blocker like Zinsser BIN instead; PVA won’t stop a stain bleeding through. One primer coat, then two coats of wall paint over the whole wall corner to corner. Spot-painting just the patch leaves a halo you’ll see under side light. If you’re unsure which primer does what, the primer explainer sorts it out.
Safety
N95 while sanding compound; the dust is fine and gets everywhere. P100 respirator, wet methods, and HEPA cleanup if the home is pre-1978 and the paint tests positive for lead. Never mix bleach with vinegar, ammonia, or another cleaner if you wash a stained area first. It makes toxic gas. Eye protection for ceiling work; compound and dust fall straight down.
Common Mistakes
- Filling a lath hole with spackle. No structure. It cracks at the rim and sinks into the cavity. Spackle is for nail holes, not for holes you can see lath through.
- One thick coat instead of layers. Thick fills shrink, crack, and stay soft in the middle for days. Build it up.
- Skipping the bonding agent. Dry old plaster won’t grip fresh material. The patch lets go at the seam within a year.
- Ignoring a loose field. Fill a hole in a wall that’s still moving and the crack comes right back.
- No primer on the patch. The repair flashes through the finish as a dull spot under raking light.
- Spot-painting the patch only. Leaves a visible halo. Recoat the whole wall, edge to edge.
Prevention
Plaster fails from movement and moisture, not from age alone. Address those and the holes stop coming back.
- Fix the water source. A roof leak, a failing gutter, or bathroom condensation softens plaster and breaks keys. The hole is downstream of the leak.
- Re-secure loose fields early. Plaster washers cost a few dollars now. A collapsed ceiling costs a weekend and a dumpster.
- Add a doorstop. Half the doorknob-sized holes I patch in old houses are from a knob hitting the same spot for decades.
- Watch active cracks. A crack that opens and closes with the seasons is structural. Tape and fill buys time, but the movement won’t stop until the cause does. See how to fix wall cracks to tell a dead crack from a live one.
When to Call a Pro
- A ceiling that sags, sounds hollow over a wide area, or shows a long bulge. Plaster ceilings can let go all at once and they’re heavy.
- Detached plaster over more than a few square feet. Re-anchoring a big field is a different skill than patching a hole.
- Cracks that keep reopening after a proper mesh-and-setting-compound repair. Something structural is moving.
- Water staining that won’t stop bleeding through after a shellac primer. You haven’t found the active leak.
- Pre-1978 home where you’d be chipping or sanding a large area. Lead test first; if positive and the area is big, hire a certified RRP contractor.
What’ll Bite You in Two Years
You patched the hole and never asked why it was there. If the keys around it are still breaking, the new patch sits on a wall that’s still letting go, and the crack opens right around your repair. Press the whole field, re-anchor anything that moves, and fix the leak that softened it. Patch the cause, not just the hole, or you’ll be mixing another bag of compound in two years for the same wall.