How to Repair Drywall Corner Bead
Repair corner bead the right way: spot dented, rusted, or popped beads, cut out the bad section, refasten or replace, mud in three coats, then prime and paint.

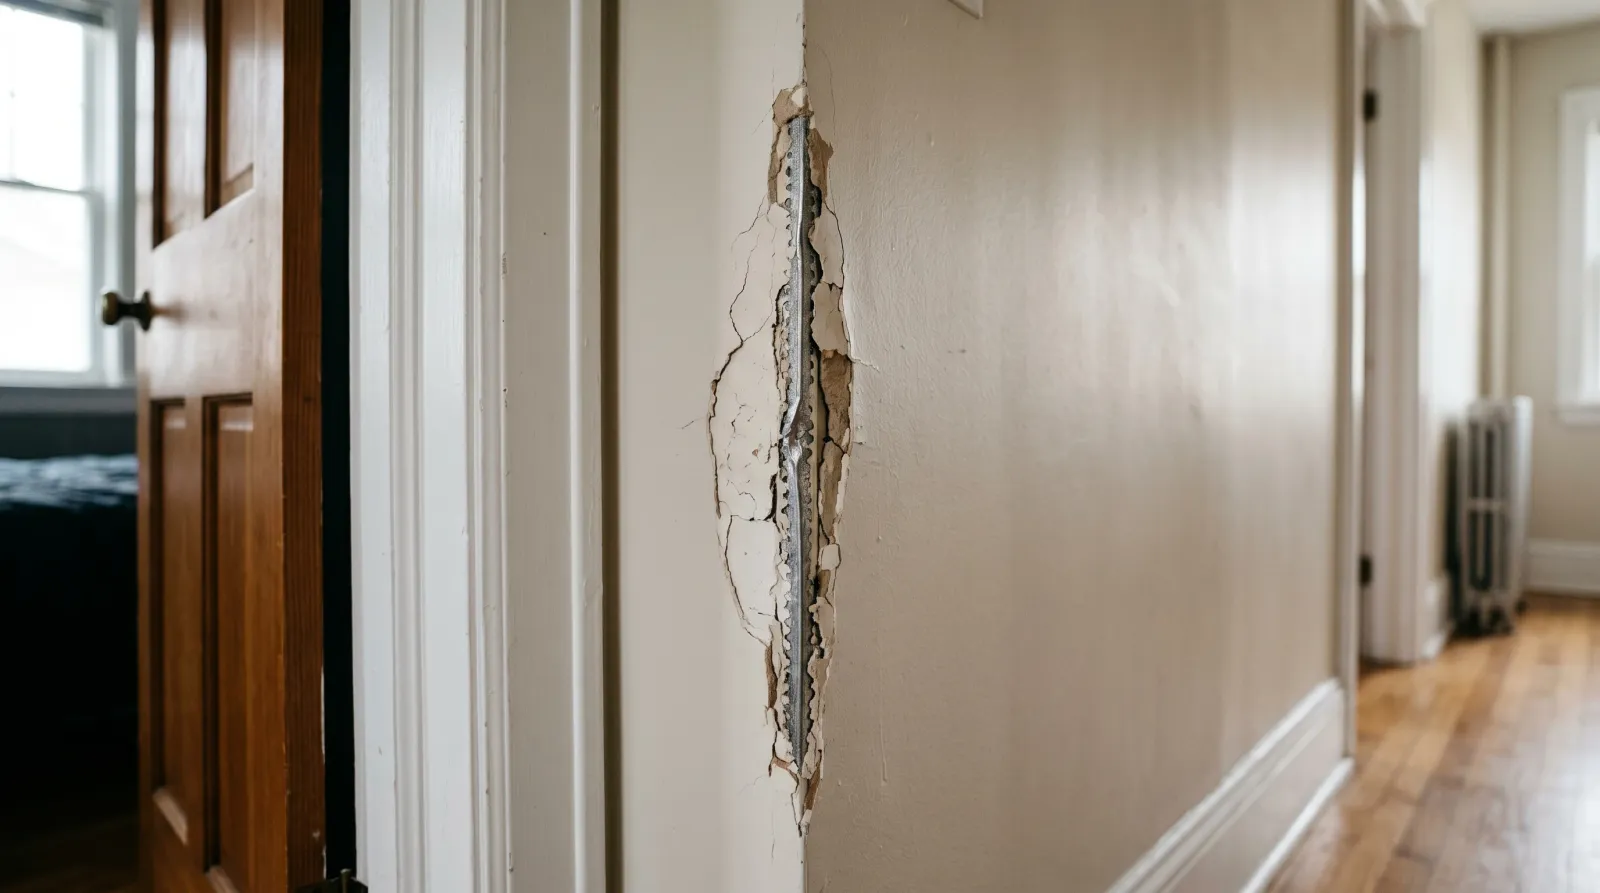
A damaged corner bead isn’t a paint problem. It’s a metal-or-vinyl strip under the paint that took a hit, popped loose, or rusted, and the compound over it cracked to show it. Fix the bead first. Skim mud over a loose corner and you’ll be sanding the same crack open next spring.
TL;DR
- The bead is the strip that forms the outside corner. The crack you see is the compound over it failing.
- Shallow ding, solid bead underneath: skim, sand, prime, paint. Half a day.
- Dented, popped, or rusting bead: cut out the bad section, fasten in a new piece, then three coats of mud.
- Use vinyl bead for most patches. No rust, cuts with a knife, bonds with adhesive.
- Three thin coats of compound beat one thick one. Each dries about 24 hours.
- Always prime fresh compound before paint or you get a dull halo over the patch.
Does This Match What You’re Seeing?
Look at the corner straight on, then run your finger down it. The pattern tells you how deep the repair goes.
- Hairline crack running down the corner, no dent: the bead popped loose from the framing. Refasten, then mud. The metal is fine.
- Dent or crease with the corner pushed in: something hit it. The bead is bent and won’t take a straight edge again. Cut that section out.
- Rust-colored bleed or brown staining through the paint: metal bead behind it is rusting, usually near a tub, a slab floor, or an exterior return. Cut out the rusted run, replace with vinyl.
- Compound flaking off in chips, bead showing silver: the mud lost its bond. Press the metal. If it’s tight, it’s a skim job. If it moves, the bead is loose.
- Whole corner sounds hollow when you tap it: the bead was nailed into air, not framing. It has to come off and go back on tight.
If you press the corner and the metal moves, no amount of compound fixes it. That’s the test that decides the whole job.
How Serious Is This?
Low severity, almost always. A damaged outside corner is cosmetic. The wall behind it is doing its job, and you can live with a cracked corner for years without anything structural going wrong.
Two things bump it up. Rust staining means moisture is reaching the metal, so find the water before you patch. And a corner that cracks again within months of a proper repair means the framing is moving or the bead never got fastened tight. Chasing that with mud is a losing game.
Everything else is a half-day fix with a taping knife and a sanding sponge.
Why This Is Happening (root Cause)
Outside corners take more abuse than any other spot on a wall. Vacuums, furniture, kids, carts down a hallway. The bead armors the corner, and when it fails it’s almost always one of three reasons.
It came loose. Metal bead is nailed or screwed to the framing every 8 to 10 inches. Miss the stud, drive the fastener into the gap behind the drywall, and the bead has nothing to hold it. Framing swells and shrinks with the seasons, the loose bead flexes, and the rigid compound over it can’t follow. So it cracks. This is the most common cause I see on houses five to fifteen years old.
It got hit. A direct impact creases metal bead into a permanent dent. You can fill over a shallow ding, but compound packed into a bent corner cracks back out along the crease. That section has to come out.
It rusted. Older galvanized bead corrodes wherever it stays damp: bathrooms, laundry rooms, corners near a slab, exterior window returns. Rust expands, pushes the compound off, and bleeds an orange stain through your paint. Paint won’t stop active rust. The metal comes out.
The reason picks your fix. Loose bead gets refastened. Dented or rusted bead gets replaced. Guess wrong and the repair fails.
The Fix
Pick your path by what the corner did. A solid bead with a surface ding is Step 4 onward. A loose, dented, or rusted bead starts at Step 1.
Step 1. Cut Out the Damaged Section
Score the compound both sides of the corner with a utility knife, top and bottom of the bad run, a few inches past the damage into sound material. Cut through metal bead with tin snips or an oscillating multi-tool. Pry the loose section off with a stiff putty knife and pull any old fasteners.
Leave the surrounding sound bead in place. You’re replacing a section, not the whole corner. Clear the loose compound back to a clean, tight edge so the new piece sits flat.
Step 2. Cut and Fit the New Bead
Measure the gap and cut a new piece of bead to length, about 1/8-inch short so it drops in without binding. Vinyl cuts clean with a utility knife and a straightedge. Metal needs tin snips.
For most interior patches, use vinyl. It won’t rust, it’s lighter, and you can bond it with spray adhesive instead of fasteners. Dry-fit it first. The new piece has to sit at the same projection as the old bead on either side, or the finished corner will have a wave you’ll see down the hall.
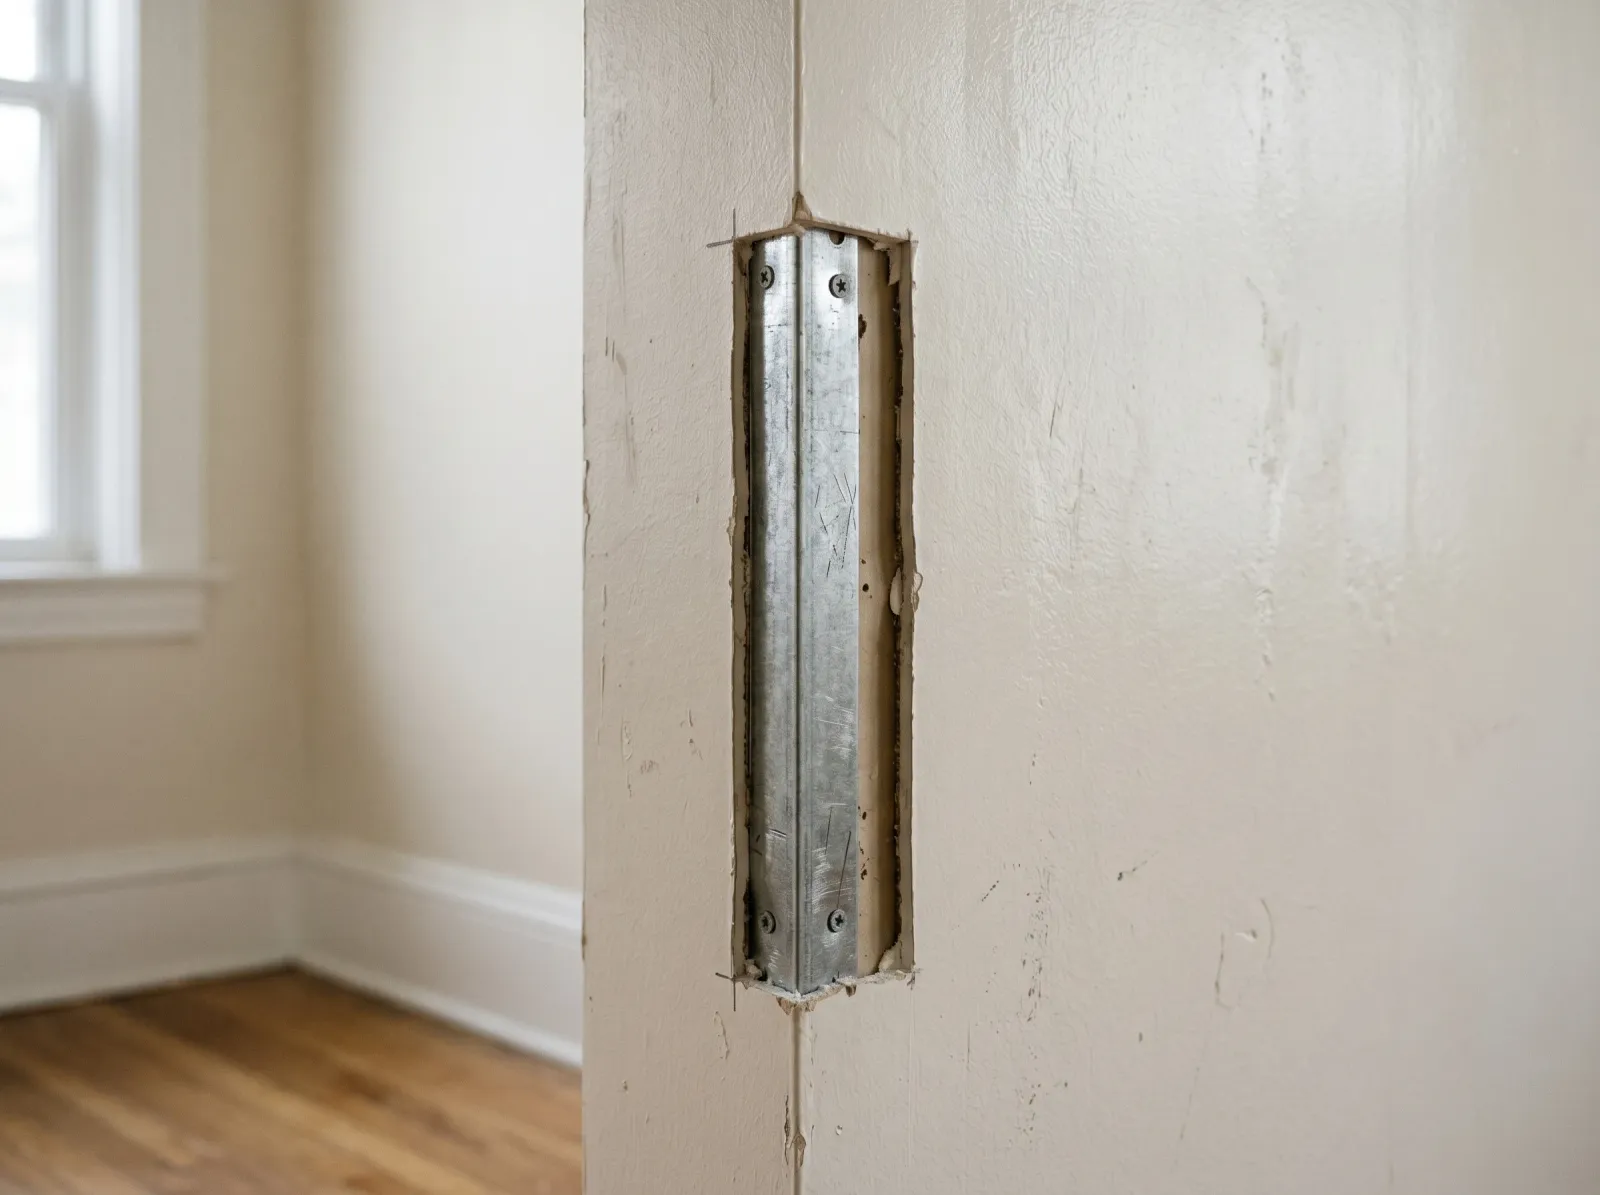 The damaged run cut away and a fresh strip of bead dropped in at the same projection as the sound bead on either side.
Step 3. Fasten It Tight
This is the step that decides whether the repair lasts.
- Vinyl bead: spray the back with corner-bead adhesive (a 3M or Titebond aerosol), press it into the corner, then staple every 8 to 10 inches with a hand stapler to hold it while the adhesive grabs. Wipe the squeeze-out flat.
- Metal bead: drive 1-1/4-inch drywall screws or ring-shank nails every 8 to 10 inches, alternating sides, into the framing behind the drywall. Set each fastener just below the surface. If a fastener spins or feels soft, you missed the stud. Move it.
Run your finger down the new bead. It should not move at all. If it flexes, add fasteners until it’s dead solid.
Step 4. First Coat of Compound
Load a 6-inch taping knife with all-purpose joint compound. Pull it down each side of the bead in one pass, riding the knife on the bead nose and the wall so the compound feathers about 4 inches onto the wall. Fill the screw heads and any gaps.
Don’t bury the corner in one coat. A thick coat shrinks, cracks, and takes forever to dry. Thin is the whole game. Let it dry about 24 hours at 70 degrees. It’s dry when the compound goes uniformly light, not darker in the thick spots.
Step 5. Second and Third Coats
Knock off any ridges with a light scuff of 120 grit. Second coat with a 10-inch knife, feathering 6 to 8 inches onto the wall each side. Third coat wider still with a 12-inch knife if the corner needs it.
Three thin coats give you a flat corner with no hump. Most repairs need all three; a tiny ding sometimes takes two. Each coat dries about 24 hours, so this is a two-to-three-day job spread across evenings, not one afternoon.
Step 6. Sand Flush
Once the final coat is dry, sand with 150 grit on a sanding sponge, then 220 to finish. Light pressure. You want the corner flat and the feathered edges blended in with no ridge your fingertip can catch.
Wear a dust mask. Drywall dust is fine and it gets everywhere. Wipe the corner with a damp microfiber and let it dry before primer. For grit choice, see the drywall sandpaper guide.
Step 7. Prime and Paint
Fresh compound is thirsty. It pulls paint in faster than the wall around it, and skipping primer leaves a dull flat halo over the patch that shows the second raking light hits it.
Prime the repair with a PVA drywall primer. If you cut out a rusted bead, hit the area with a stain-blocking shellac primer like Zinsser BIN first, then PVA, so no rust ghost bleeds back. Let it dry, then two topcoats of wall paint. Two coats. Always two coats. The full workflow is in the drywall painting guide.
 Three coats sanded flush, feathered into the wall, and sealed with drywall primer. From here it takes paint like the rest of the wall.
Safety
N95 dust mask for all sanding. Eye protection when you’re cutting metal bead. Cross-ventilate while priming with shellac products. BIN is alcohol-based and the fumes are strong in a closed room.
Vinyl vs Metal Corner Bead
| Vinyl bead | Metal bead | |
|---|---|---|
| Rusts | No | Yes, near moisture |
| Fastening | Adhesive plus staples | Screws or nails into framing |
| Impact resistance | Good, flexes back | Strong, but dents permanently |
| Cutting | Utility knife | Tin snips or multi-tool |
| Best for | Most interior patches | Garages, high-traffic commercial corners |
For a homeowner patching one corner, vinyl is the easier and more forgiving choice. Reach for metal only where the corner gets hit hard and often.
Common Mistakes
- Mudding over a loose bead. The corner moves, the rigid compound can’t, and the crack reopens. Fasten the bead solid first.
- One thick coat instead of three thin ones. Thick compound shrinks, cracks, and pillows out. Three thin coats lie flat.
- Sanding before the mud is dry. Damp compound gums the paper and gouges. Wait for it to go uniformly light.
- Painting straight over fresh compound. The patch flashes a dull halo. Prime first, every time.
- Fastening into drywall instead of framing. A nail in the gap behind the board holds nothing, and the corner pops loose again.
Prevention
- Fasten new bead into framing every 8 to 10 inches. Tight bead doesn’t move, and a corner that doesn’t move doesn’t crack.
- Use vinyl or paper-faced bead in damp rooms. Bathrooms, laundry rooms, and basement corners stay rust-free.
- Add a clear corner guard in high-traffic spots. A garage doorway or tight hallway takes constant hits. A guard absorbs them so the bead doesn’t.
- Fix the moisture before you patch a rusted corner. A leaking window return or wet slab will rust the new bead too if the water’s still coming.
- Check repeat-cracking corners for framing movement. A paper-faced bead bonds across the whole corner and rides seasonal movement better than a fastened metal one. Same root cause as a nail pop.
When to Call a Pro
- Long runs of cracked or rusted bead across a whole room, not one corner. That’s a re-bead job, not a patch.
- Rust staining that keeps coming back after the repair. There’s an active leak behind the wall. See how to fix water stains and find the source first.
- Cracks that reopen on the same corner three times. The framing is moving, and that’s a structural diagnosis, not a mudding one.
- Pre-1978 home where you’d be sanding old painted compound. Lead test before any sandpaper touches it.
- Curved or archway beads, which use flexible bead and a technique most homeowners haven’t run before.
What’ll Bite You in Two Years
If you mud over a loose bead instead of fastening it tight, the corner cracks again the first time the framing moves with a season change. You won’t notice the day it happens. You’ll notice the morning sun hits the hallway sideways and the crack is back, in the same spot, under your fresh paint. Fasten the bead dead-solid before any compound goes on. That’s the whole repair. The mud is just the cosmetics.