Best Window Glazing and Putty Tools
Six window glazing tools tested on eleven old wood sashes. Top pick: the Hyde Black and Silver 2-in-1 Glazing Tool, plus the point driver, stripper, and putty that earn a spot in the kit.

Disclosure: Some links below are affiliate links. We earn a commission if you buy through them, at no extra cost to you.
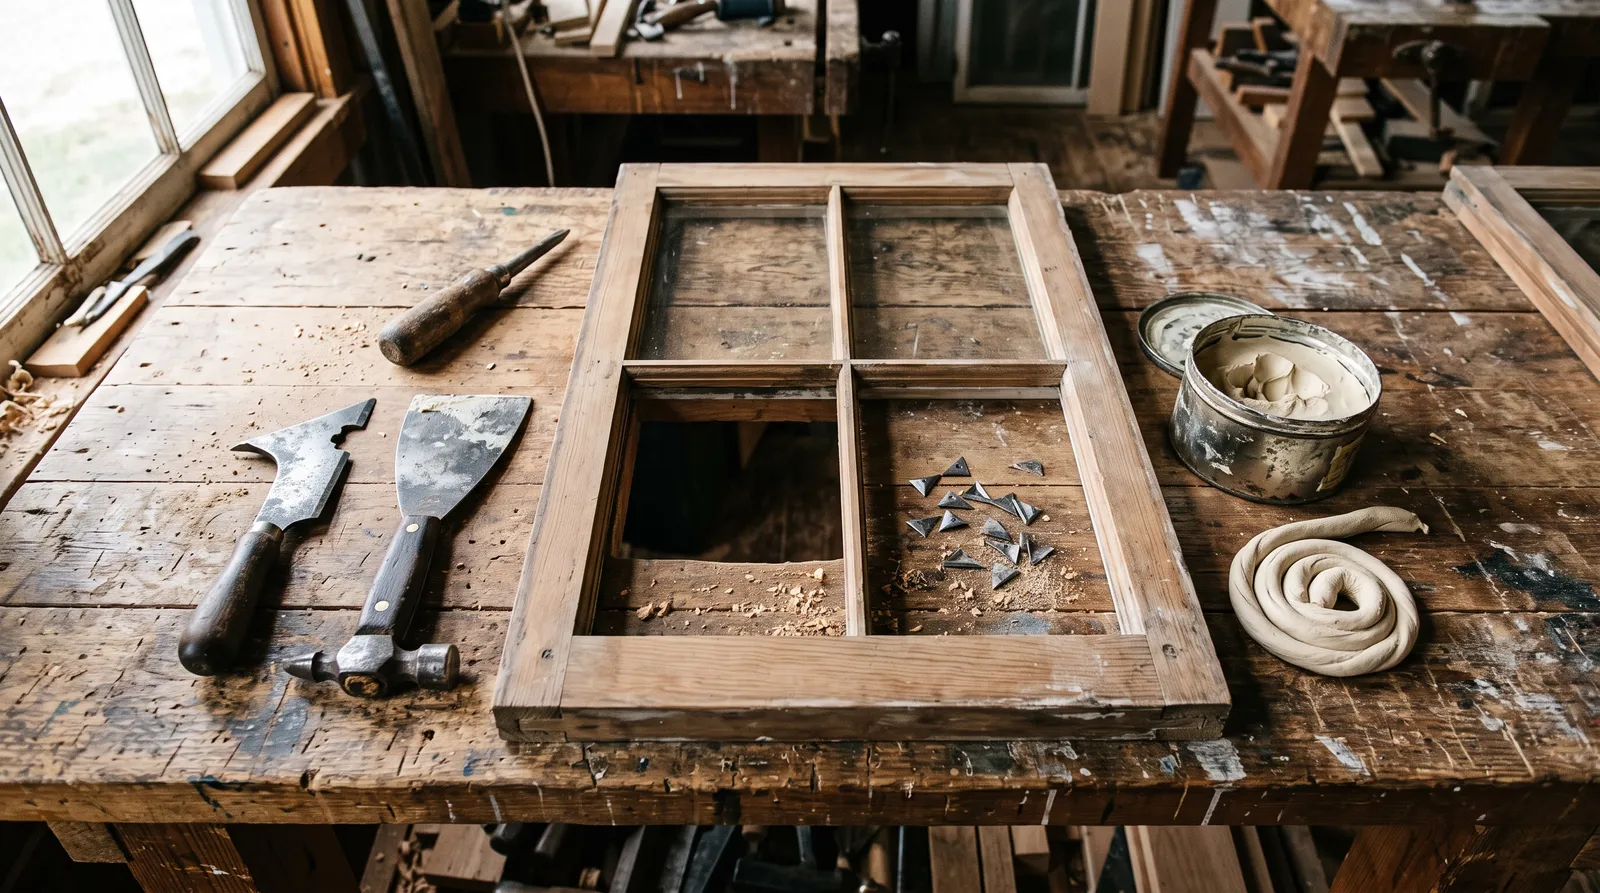
Top pick: the Hyde Black and Silver 2-in-1 Glazing Tool. Under 10 dollars, one notched end that hooks dead putty out of the rabbet corner and one angled edge that pulls a straight 45-degree bevel in a single stroke. It wins on the thing that actually decides whether a re-glazed window looks restored or looks patched, which is the bevel line. It falls short on hard old putty, where no hand tool beats heat, and it rusts if you set it down dirty. If you need to strip eleven sashes instead of one, the Speedheater Cobra is the tool that changes the job. For the putty itself, Sarco Dual Glaze on anything pre-war and DAP 33 when you need paint on it inside a week.
Glazing is a cheap-tool trade with an expensive failure mode.
Break one wavy 1926 pane and you have spent more than the entire kit.
Why This Job Punishes the Wrong Tool
Three things happen in the rabbet, and each one wants a different edge.
Removal. Putty that went in during the Coolidge administration is not putty anymore. It is a dry mineral crust bonded to wood on one side and glass on the other. A flexible knife bends away from it. A chisel bites, then finds a hard spot, and the blow goes into the pane. Our fastest hand-removal run on a stripped sash took nineteen minutes with the notched end of the Hyde tool, and that was after the infrared had already softened it. Cold, the same sash was still half full of crust at the forty-minute mark.
Bedding and points. Glass sits on a thin bead of fresh putty, gets pressed down until the bead squeezes out evenly, then gets held by glazier points every 8 to 10 inches. This is where panes crack. Not from the hammer, usually, but from a point set at an angle that levers the glass, or from a knife tip that slips off a point and skates across the pane.
The bevel. The finish putty, tooled to about 45 degrees, running dead straight, and held low enough that it does not show above the muntin when you look out from inside. That last part is what separates a professional-looking sash from a homeowner one, and it is entirely a function of the tool’s edge angle and your steadiness.
A good glazing tool solves the first and third. It does nothing for the second, which is why the kit needs more than one piece.
What We Looked For
We bought six tools at retail and ran them over eleven double-hung sashes from a 1926 four-square in Cleveland, plus two 1950s steel casements. Six criteria, weighted roughly in this order.
Forming edge first. A fixed 45-degree edge does the geometry for you; a flat knife makes you hold the angle by hand for a 28-inch run, and any wobble reads as a wave from the sidewalk.
Blade stiffness second. Stiff for chiseling and bedding. There is no part of this job that wants a flexible blade, which surprises people who own eight flexible putty knives and no stiff one.
Then point setting, removal strategy, putty chemistry, and rust behavior. Carbon steel cuts better and stains overnight. Stainless survives neglect and goes dull sooner. On a job where linseed oil sits on your blade for hours, that is a real trade-off, and it is why every carbon tool in this test wants a wipe and a drop of oil before you put it down for the night.
Side by Side
| Tool / Product | Type | What it does | Best for | Price tier |
|---|---|---|---|---|
| Hyde Black and Silver 2-in-1 Glazing Tool | Hand tool | Hooks old putty, forms the 45-degree bevel | The whole glazing job, one tool | $ |
| Hyde 1-1/2 in Stiff Scraper w/ Hammerhead | Hand tool | Chisels the rabbet, taps glazier points | Rabbet cleanup and point setting | $ |
| Fletcher-Terry Glazier Points and Driver | Point driver | Drives points flush, one-handed | Whole-house jobs, softwood sash | $$$ |
| Speedheater Cobra | Infrared stripper | Softens putty and lead paint below vapor temp | Ten or more sashes, pre-1978 houses | $$$$ |
| Sarco Dual Glaze / Type-M | Linseed putty | Beds and forms; ages with old wood | Restoration and exterior sash | $$ |
| DAP 33 Glazing | Knife-grade compound | Beds and forms; paints in about a week | Fast repairs, one or two panes | $ |
1. Hyde Black and Silver 2-in-1 Glazing Tool, Top Pick
This is a nine-dollar piece of carbon steel in a hardwood handle, and it is the single most useful thing in the kit.
The forming edge is the reason. Load the rabbet with putty, press it in with your thumb, then pull the angled edge along the muntin with the flat of the blade riding the glass. The tool holds the angle. You supply the pressure and a steady pull, and what comes off the back of the blade is a bevel with a straight top line and a clean break at the glass. Nine of our eleven sashes needed no second pass. The two that did were both places where I had underloaded the rabbet, which is an operator problem, not a tool problem.
The notched removal end earns its half of the name on spot repairs. One cracked pane, one sash still hanging in the frame, no interest in setting up a stripping station. Warm the old putty with a heat gun, hook the notch into the rabbet corner, and pull. The crust comes out in lengths instead of chips. On a whole-window strip it is slow, and I would not want to do a house this way, but that is not what a nine-dollar tool is for.
Two real weaknesses. Carbon steel and linseed putty is a rust recipe if you walk away without wiping the blade; mine had orange freckles after the second day because I forgot. And the bevel angle is fixed. On a deep-rabbet sash or the steel casements, where the geometry is different, you want a knife you can steer rather than an edge that steers you. For those two casements I ended up back on the flat stiff knife, holding the angle by eye.
| Spec | Value |
|---|---|
| Blade | Carbon steel, notched removal end plus angled forming edge |
| Handle | Hardwood, Black and Silver line |
| Best for | Bedding, tooling the bevel, spot putty removal |
| Weakness | Fixed bevel angle; rusts if stored dirty |
| Approx. price | $9 |
Buy it if: you are re-glazing anything with a standard wood rabbet and you want the bevel to look like someone who has done it before. Skip it if: you only own steel casements, or you already pull a clean 45 with a flat knife and do not need the training wheels.
2. Hyde Carbon Steel Stiff Scraper With Hammerhead, Best for the Rabbet
Different job, different blade. The 1-1/2 inch stiff scraper does the two things the glazing tool cannot: it chisels, and it hits.
The stiffness is the point. Once heat has softened old putty, you want a blade that goes where you push it and does not flex up out of the corner. This one cleared a rabbet to bare wood faster than any flexible knife we tried, and the 1-1/2 inch width is right for a standard muntin. Wider skips over the corner. Narrower turns a straight run into eight short ones.
The steel cap on the handle butt is the quiet feature. Set a glazier point against the glass, tip the tool over, tap the point home with the cap. No separate hammer, no swapping tools mid-pane, no reaching for a mallet with one hand still holding a loose piece of glass. Across twenty-four points on pine sash we set every one flush without a crack. On old-growth fir it took three taps instead of one and two points went in crooked.
Do not try to tool a bevel with it until you have done a few sashes. Stiff plus flat means every hand tremor lands in the putty line.
Verdict: the second tool in a two-tool kit, and about six dollars. Buy it with the glazing tool, not instead of it.
3. Fletcher-Terry Glazier Points and Driver, Best for Setting Points
A dedicated point driver is a luxury on one window and close to mandatory on thirty.
What it buys you is one-handedness. The magazine feeds the points, the driver pushes one flush into the rabbet with hand pressure instead of a blow, and your other hand never leaves the glass. That matters more than it sounds. Most cracked panes in a re-glaze happen during point setting, when a point levers instead of driving or a knife tip skates. Take the impact out and take a hand off the tool, and the failure mode mostly goes away. Points also land at a consistent depth, which keeps the finish bevel from riding up over a proud point and bulging.
It does not love hard wood. Old-growth heart pine and the oak sash out of the same house both fought it, and on those I went back to hand points and the hammer cap. And the price is real. This tool costs more than the rest of the glazing kit put together, so the math only works when you are counting sashes in double digits.
Buy it if: you are doing a whole house, a rental portfolio, or you glaze for a living.
4. Speedheater Cobra, Best for Stripping a Whole Sash
Here is where the money is, and where the job stops being miserable.
Old putty comes out easily when it is warm and comes out in fragments when it is cold. Infrared heats the putty through rather than blasting the surface, so 20 to 40 seconds on a section of rabbet takes it from ceramic back to something a knife sinks into. On the 1926 sashes, a full strip that had taken forty-plus minutes cold ran about twelve minutes warm, and the crust lifted in ropes instead of crumbs.
The second reason is lead. Every one of those sashes was painted before 1978, and infrared works below the temperature at which lead paint starts to vaporize. A heat gun at full tilt does not. If you are stripping old windows in an old house, that difference is the entire argument, and it is why restoration shops standardized on infrared rather than open heat. The tool also softens the sash paint on the same pass, so stripping and re-glazing collapse into one operation instead of two weekends. For the cheaper heat option and its limits, see the heat gun round-up.
The cost is about 500 dollars. It is still hot enough to crack old glass if you park it, so keep it moving. And after an hour of overhead work on top sashes your shoulder will tell you about the weight.
| Spec | Value |
|---|---|
| Type | Handheld infrared, roughly a 2 by 5 inch working strip |
| Dwell time | 20-40 seconds on old linseed putty |
| Lead safety | Operates below lead vaporization temperature |
| Best for | Pre-1978 sash, ten or more windows |
| Approx. price | $500-$540 |
Skip it if: you have one broken pane and a heat gun in the garage. Rent or borrow before you buy.
5. Sarco Dual Glaze and Type-M, Best Putty for Old Sash
Putty is the consumable that outlives every tool on this page, so it is worth getting right.
Sarco is linseed-oil compound, the same chemistry that is already sitting in a pre-war sash. It rolls into a rope in your palm without crumbling, which is the practical test for hand-applied putty, and it beds and tools without dragging. Two versions matter. Multi-Glaze Type-M skins overnight and is what shops use when sashes have to go back in the frame this week. Dual Glaze is the exterior on-site version, staying workable while you tool it and taking two to three weeks to skin hard enough for paint.
That slowness is the honest con. An unpainted bevel is an unfinished bevel, and a month of waiting is a month of exposure. Plan a re-glaze for spring or early fall so the paint window lands in mild weather. Sarco also comes from restoration suppliers rather than the shelf at your local store, so order ahead.
One rule with it: never bed linseed putty on bare old wood. The wood pulls the oil straight out, the bevel goes chalky, and it releases at the corners inside a few years. Oil the rabbet first.
Buy it if: the sash is older than you are and you want the repair to last thirty years rather than five.
6. DAP 33 Glazing, Best Budget Compound
The compound you buy at 4 p.m. on a Saturday because a ball went through a pane.
DAP 33 is knife-grade out of the can, tools acceptably, and skins in about five to seven days in mild weather instead of a month. For one or two panes on a garage sash or a basement window, that speed is worth more than longevity. It is also on the shelf at every home center for less than a restoration putty costs to ship.
It gives up service life to get there. On a south-facing elevation, expect to be back sooner than you would with a linseed compound. The can skins over once opened, so a half-used quart tends to harden before your next window. And below 50 degrees it drags under the knife and tears the bevel instead of cutting it.
Verdict: the right can for a fast repair, the wrong can for a restoration.
Tools We Bought and Set Aside
- Cordless multi-tool with a scraper blade. Fast on putty, and it chattered against the glass. One cracked pane on the second sash ended that experiment.
- Steam wallpaper stripper aimed at the rabbet. It works, it is cheap, and it puts a lot of water into old wood that then has to dry for a week before you can oil it. Fine if you are in no hurry.
- Stainless glazing knives. Nicer to own, worse to use. They dull faster on abrasive old putty and the edge rolls where carbon holds.
- Acrylic latex window glazing in a tube. Paints the next day, which is the whole appeal. It also stays rubbery, will not hold a crisp tooled bevel, and reads as caulk from six feet away.
Putty Care, Curing, and Paint
Putty fails at the corners first, and it fails for reasons you control before the putty ever comes out of the tub.
Oil the rabbet. Thinned boiled linseed oil, about half and half with mineral spirits, brushed into the stripped wood and left to soak. Bed the glass while the wood is still slightly tacky. An oil-based primer does the same job. Acrylic primer does not seal thirsty end grain nearly as well, which is covered in the primer explainer.
Knead cold putty. Compound out of a cold garage tears instead of cutting. Work a fist-sized wad in your hands for a minute until it warms and goes plastic. If it is still crumbling, it is too old.
Wait for the skin, then paint. Fingertip test. If the surface takes a print, it is not ready. When you do paint, lap the paint about 1/16 inch onto the glass. That lap is the water seal at the putty-to-glass joint, and skipping it is why a bevel that looked perfect in June is failing by the following spring. Any good exterior trim enamel works; see the best exterior paint round-up for what holds up.
Wipe your steel. Carbon blades plus linseed oil equals rust by morning. Wipe with a rag, add a drop of oil, hang the tool.
Realistic life on these: the Hyde tools last decades if you dry them. Points are a consumable. The infrared head is rated in thousands of hours. Putty in an opened can is measured in weeks.
Where Glazing Jobs Go Wrong
- Chiseling cold putty. The most expensive mistake on this list, because it costs a pane. Heat first, always.
- Bedding on bare wood. The bevel looks perfect and lets go in three years. Oil the rabbet.
- Setting points with a knife tip. The tip slips, it skates across the glass, and you get a scratch or a crack. Use a hammer-capped handle or a driver.
- Too few points. Every 8 to 10 inches, and at minimum two per side. Points hold the glass. The putty is a seal, not a fastener.
- A bevel that shows from inside. Keep the putty line below the muntin edge as seen from indoors. It is a sight-line check, and it takes two seconds from the other side of the sash.
- Caulk instead of putty. Silicone in a rabbet cannot be tooled, cannot be painted, and has to be cut out by whoever fixes it next. Glazing compound goes in the rabbet.
- Painting too soon. Paint on unskinned putty wrinkles and traps uncured oil. Fingertip test, every time.
- Ignoring the rest of the sash. If the putty failed, the paint is usually going too. Deal with both at once; the peeling exterior paint fix and the exterior wood prep guide cover the sash itself.
The Kit I Would Actually Buy
One or two panes: Hyde 2-in-1 Glazing Tool ($9), Hyde 1-1/2 inch stiff scraper with hammerhead ($6), a card of glazier points ($4), a quart of DAP 33 ($10). About $29, plus whatever heat gun you already own.
A whole old house: the same two Hyde tools, a Fletcher-Terry driver and points (roughly $70 with refills), a pail of Sarco Dual Glaze, and the Speedheater Cobra if you have more than ten sashes. Around $650 for the full kit, which sounds absurd until you price eleven replacement sashes.
Buy the nine-dollar tool first either way. It is the one that decides how the window looks.
Ask a Question